This article includes an archive of Release Notes from the 2024 calendar year.
Release Notes 8.372 (November 18, 2024)
- Tip! If you need assistance configuring these settings in Exatouch, reach out to our tech support team.
Exatouch has added the capability for merchants to assign departments to their items and categories. This gives them a higher level of insight into the profitability of their business, such as seeing revenue versus non-revenue sales or the success of seasonal items.
Once Exatouch support activates departments in the system, all items or categories must have a department assigned to them to sell them in the Register. Users can assign departments three separate ways:
- Per item
- By category
- In bulk
Users can create a new department in the Custom Vars tab in Settings > Preferences.
Tap Add Line, and then fill in the description and ID. Make sure to select a default department, and then save your changes.
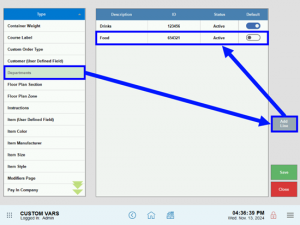
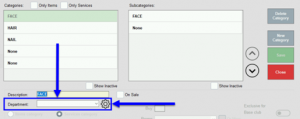
- Tip! Users can also update the custom department variables by tapping the gear icon next to any Department dropdown.

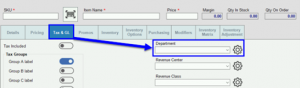
Users can update the department of individual items through the Tax & GL tab in Items > Item Details.
Users can update the department of existing categories by tapping the Department dropdown in Items > Categories.
Merchants can assign departments in bulk through the Modify All List Items button in Items > Item List.
For more information on how to include departments in the Modify All List Items functionality, see Modify Items in Bulk.
Merchants are now able to define departments within the Inventory Import spreadsheet for more accurate tracking.
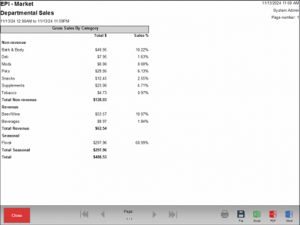
When merchants run transactions that include items and/or categories assigned to departments, the analytics for those reports can be found in Sales Report > Departmental Sales Report.
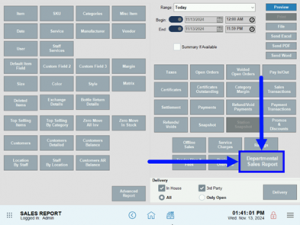
These analytics include information for each department and category within the department.
Release Notes 8.371.1 (October 4, 2024)
Exatouch now has the capability to support the stable time setting for scales. This includes a pre-set delay to ensure a stable weight is reached prior to adding a sold by weight item to an order. If merchants notice any issues with their system’s scale or need the delay adjusted, they should contact Exatouch support for further assistance.
If necessary, merchants can now override the use of non-exclusive discounts in conjunction with exclusive discounts. This means that merchants can now combine the benefits of club discounts and regular discounts for applicable customers.
Release Notes 8.371 (September 13, 2024)
Price Look Up (PLU) codes are used to identify produce and other related items in a quick, efficient way during checkout. PLU codes are 4 or 5-digit numbers that appear on a small sticker applied to the individual item. These are often used in place of an item’s Stock Keeping Unit (SKU), which is a unique number with either 8 or 12 digits corresponding to the item’s barcode.
Release 3.871 introduces the proper restrictions so users can only complete a price override if the applicable permissions were enabled in their Security Profile settings, or if they have a System Admin PIN.
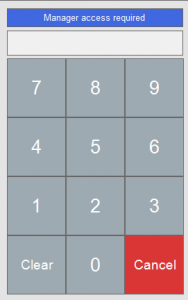
If a user does not have the Register, Override Price toggle enabled in their Security Profile, then the system will display a keypad to enter the admin PIN to override an item’s price.
If a valid PIN is entered, then the user will be able to edit the price of that single line item. If the wrong PIN is entered, then an error message will appear.
Users will need to repeat the PIN-entering process for each item they want to override the price of.
Release 8.371 now includes a new way to enable touch on a Customer Facing Display (CFD). A new toggle found in Settings can be used to either enable or disable touch features, without the need to plug or unplug cables. This toggle is machine-specific, so changing it on one device won’t change settings on any other devices a merchant might have.
Reserved settings can only be accessed with a System Admin PIN, so if you need to enable touch for your system’s CFD, contact Exatouch support.
- See: Admin PIN Requests
Release Notes 8.370 (August 12, 2024)
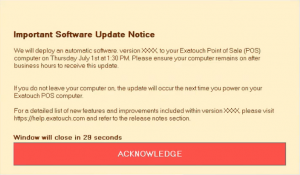
Exatouch will now automatically push through system updates. This will ensure that all of our merchants are running the best and most current operating system. Now, when new updates are available, users will receive communications through their device from the Exatouch team.
Home Page Notifications
Release 8.370 includes a text overlay or area on the Home page, at the bottom center beneath the Reports and Register icon. This area will display any messages sent to the merchants’ systems and will appear when merchants are active and online. See Merchant Notifications and Messages for more information.
To accept this change, users should tap the Update Notice icon, and then tap Acknowledge. Once acknowledged, the update will run on the system overnight so as to not interrupt business-processes.
Task Tray Updates
Exatouch has made a couple changes to the task tray in Release 8.370. These include a new, in-depth window when prompted, and the addition of notifications! Exatouch can now send merchants notifications with personalized messages and reminders when the Notifications button is tapped. This button, which has replaced the battery indicator seen in previous versions, will appear like this when a new message has arrived:
![]()
- See: Merchant Messaging
Exatouch now has the capability to process on the Tsys network on Dejavoo terminals and the PAX A35. Working with a larger variety of processing networks means we work with a larger variety of merchants.
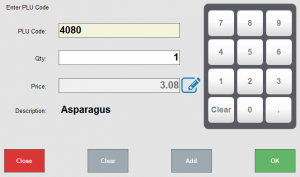
In this release, price lookup codes (or PLUs) are now supported by Exatouch!
Merchants can now scan or insert PLUs by adding them to the Inventory tab in Item Details. In this tab, merchants can create custom buttons for each PLU that can appear in the Register and Order Details tabs. When tapped, the button will load the PLU window for merchants to either manually enter the code or scan it in.
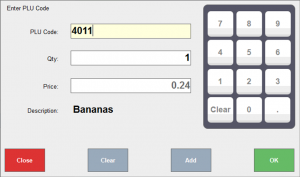
When the item’s label can’t be scanned or the PLU is unknown, merchants can use the custom PLU Code button.
- See: PLU Codes
In Release 8.370, Exatouch has made changes to many of its labels to improve customer and merchant experiences. These changes make text clearer than ever before and have been applied to print previews for supporting systems, as well!
Types of labels that are included in this change are:
- Laser label
- Shelf label
- Dual Price shelf label
- Split label
- Clothing tag label
Release Notes 8.369 (June 10, 2024)
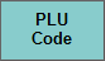
A new field in Account Settings updates labeling for the Dual Price and Admin Fee settings. Now the Dual Price and Admin Fee settings both have custom fields. These enhancements provide increased control and clarity over how pricing labels appear on the Customer Facing Display (CFD).
Contact Technical Support at 800-966-5520 for assistance in configuring these fields.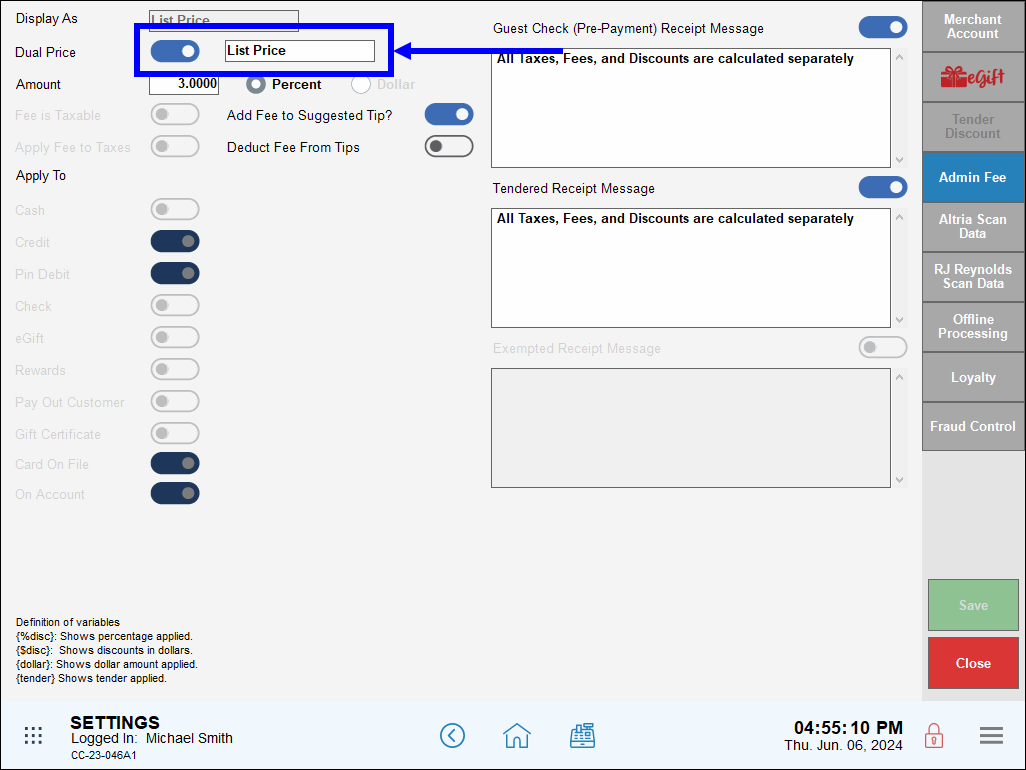
- See: Enable Dual Pricing.
Merchants can add a custom button to the register that removes Admin Fees from an order. This will ensure compliance with the special pricing program. Perform the following to add an Undo Admin Fee button to the register:
- From Home, navigate to Settings > Register Preferences.
- Tap the Custom Buttons tab.
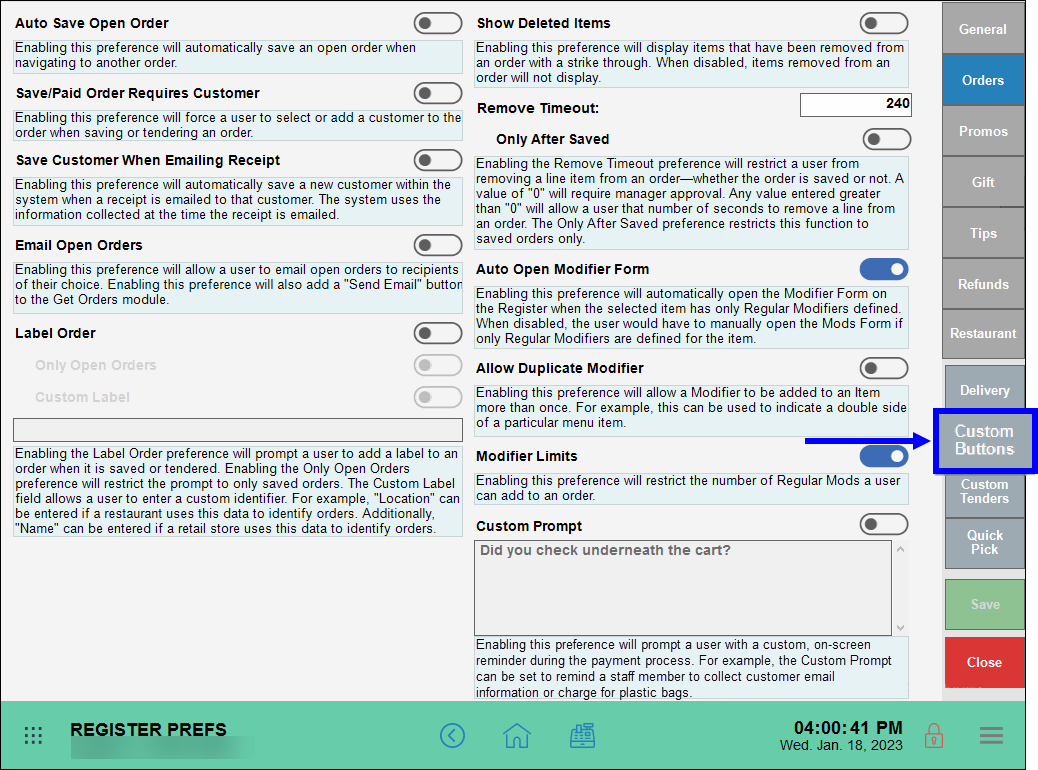
- Select Buttons.

- Select an available button from the custom buttons grid. Available buttons have no label. If no buttons are available, a button can be made available by clearing it. To remove a function, item, service or promo from a button, see Custom Buttons: Remove a Function from the Register.
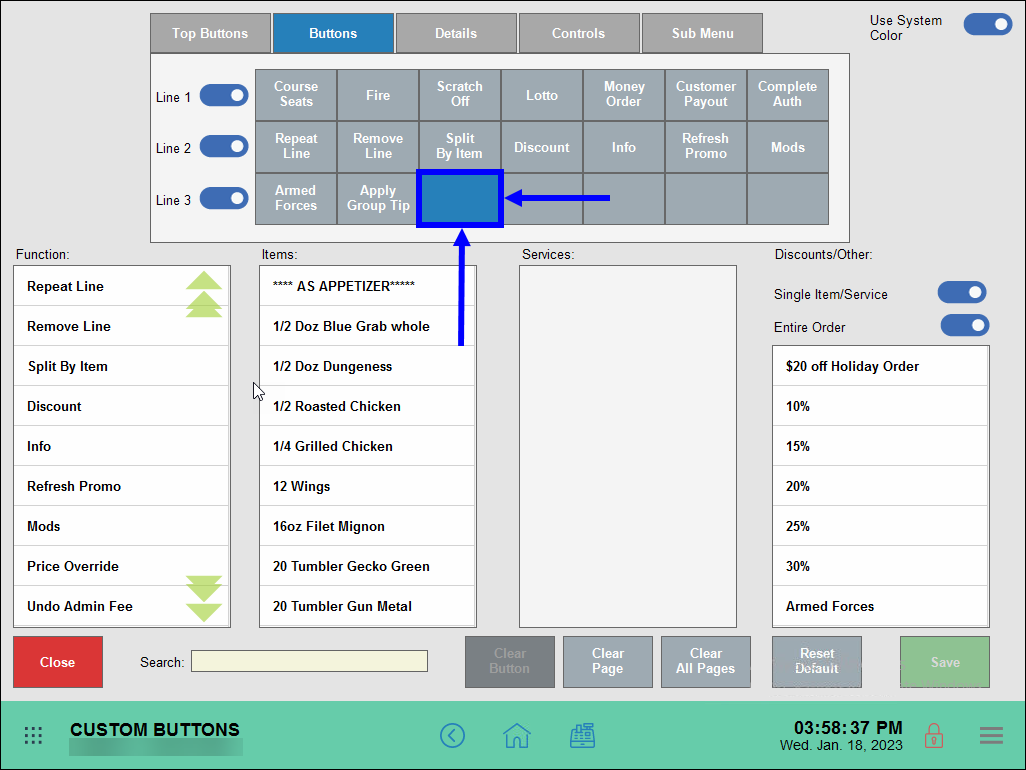
- From the Function section, select Undo Admin Fee to add the button to the grid.
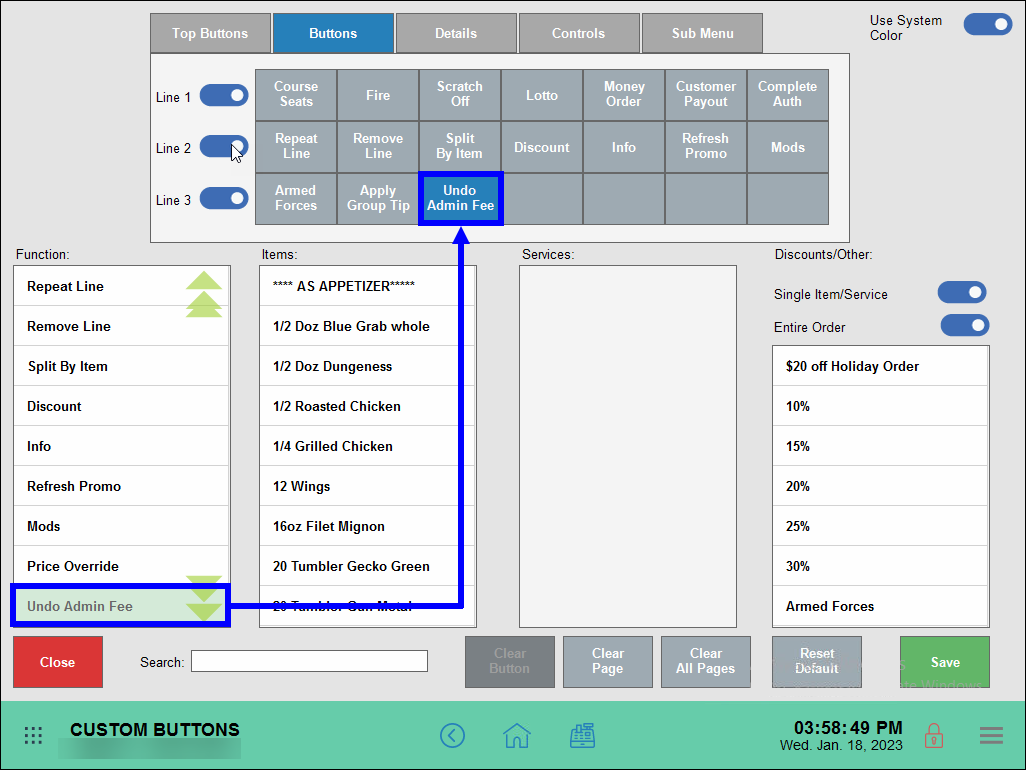
- Tap Save.
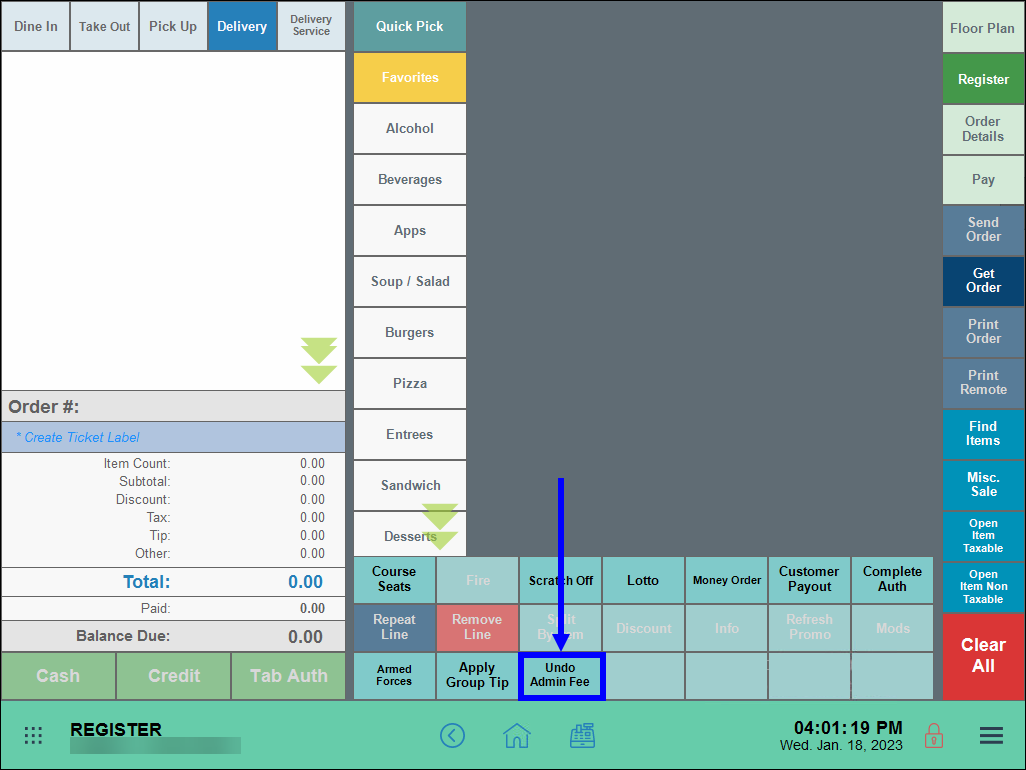
- Navigate to the register to confirm the location of the Undo Admin Fee button.
Merchants now have the ability to use their Google app password to send emails via Exatouch. This benefits merchants by enabling them to use their corporate or personal email accounts to send mass emails and other messages. Entering an app-specific password also simplifies the connection between Exatouch and a merchant’s email server.
To use this feature, merchants create a Google app specific password, and then enter that password on the Email tab under Settings Preferences.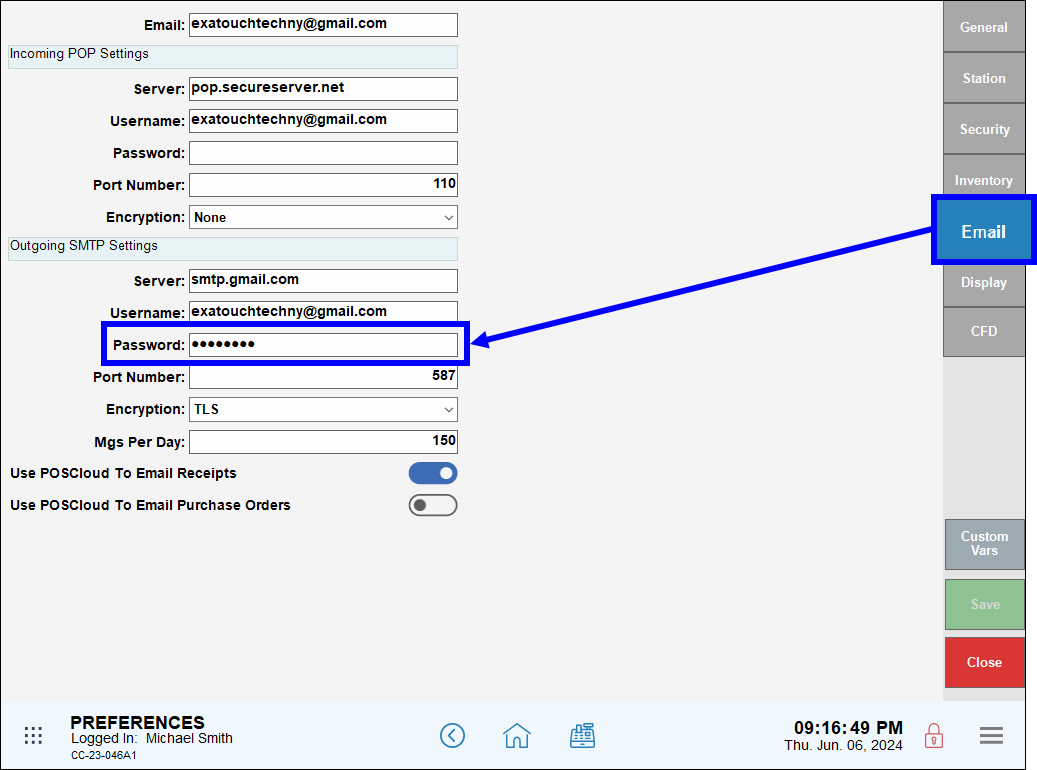
- See: Enable Email Settings.
Merchants can now send customers receipts via SMS text message from the Register app. When the Receipt Prompt setting is enabled in Printer Settings, the Text Message button displays as a selectable option on the receipt prompt pop-up screen.
This feature benefits merchants by providing a fast, reliable, and environmentally friendly method of providing receipts. Customers don’t have to worry about losing paper receipts, and SMS receipts help save merchants money by reducing paper costs.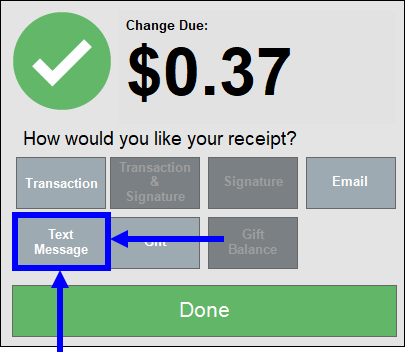
- See: Enable Receipt Prompts.
Release Notes 8.367 (April 10, 2024)
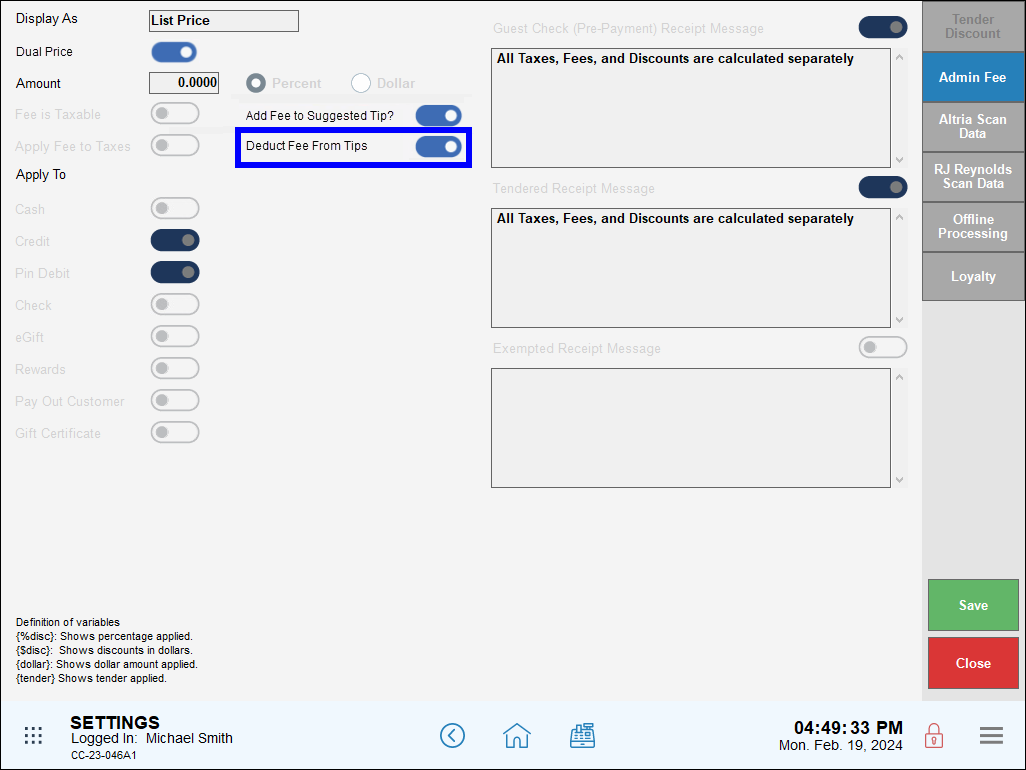
A new Add Fee to Suggested Tip setting has been added to the Admin Fee tab under Account Settings.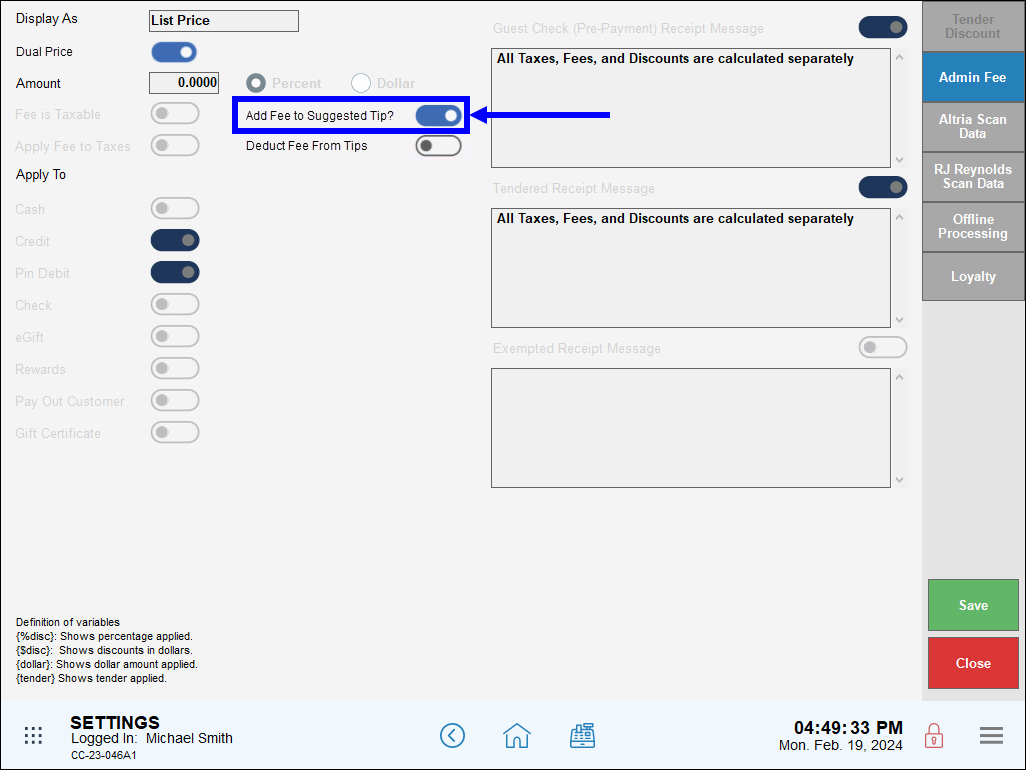
Enhancements in this release also add suggested tips amounts on the Customer Facing Display. This makes it easier for customers to quickly include a tip preassigned or custom tip to their check.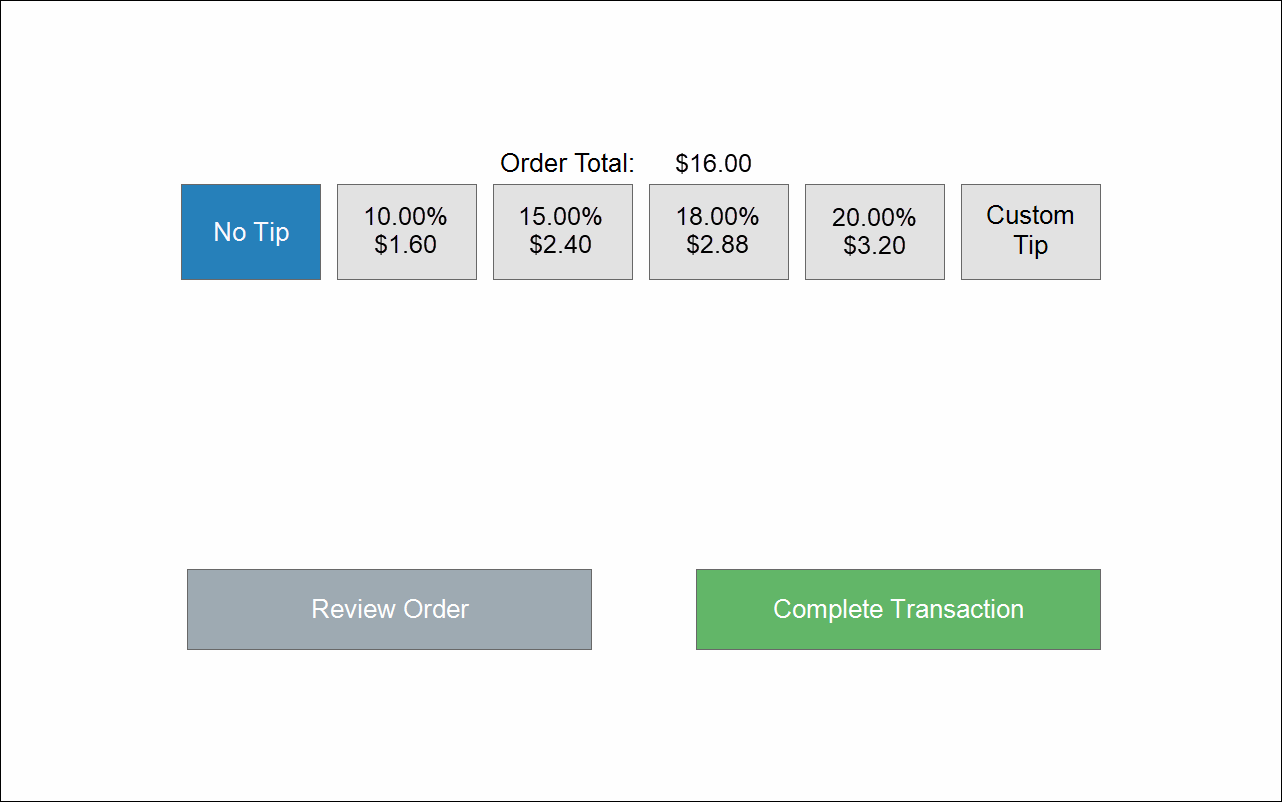
- See: Deduct Fee From Tips.
We’ve made it easier to manage tips by adding a Deduct Fee from Tips setting, which gives merchants the ability to deduct credit and debit fees from staff tips. This setting ensures that dual pricing fees do not impact employee tips.
- Note: To enable the Deduct Fee From Tips setting, contact Technical Support at 800-966-520 – Option 3.
- Warning: Exatouch versions 8.367 and earlier may not fully comply with recently implemented card brand requirements. Electronic Payments, Inc. strongly recommends you update to the latest version of Exatouch to meet these requirements.
- See: Deduct Fee From Tips and Enable Dual Pricing.
The Detailed Shift report includes details about any fee deductions, as well as appropriate amounts Owed to House and Owed to Staff.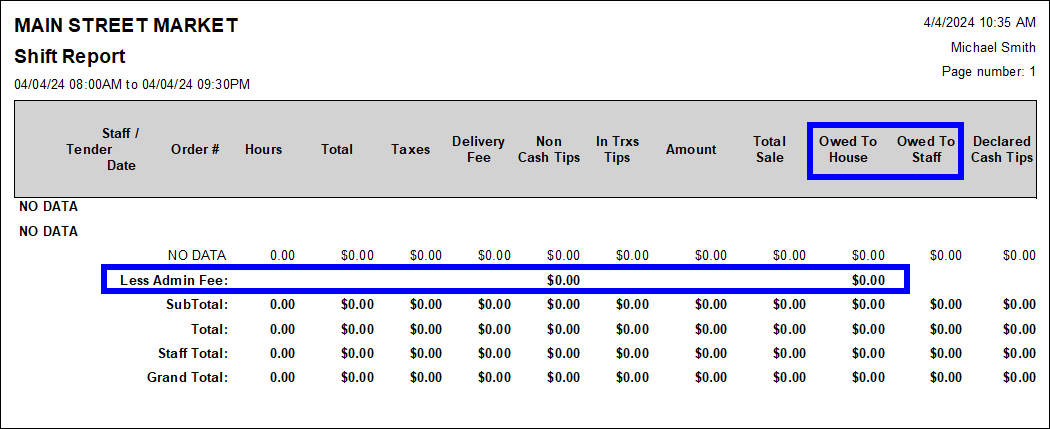
- Warning: Exatouch versions 8.367 and earlier may not fully comply with recently implemented card brand requirements. Electronic Payments, Inc. strongly recommends you update to the latest version of Exatouch to meet these requirements.
- See: Deduct Fee From Tips and Staff Report Summaries.
How can we improve this information for you?
Registered internal users can comment. Merchants, have a suggestion? Tell us more.