- Note: Changes in federal banking regulations may result in adjustments to the EBT, dual pricing, and tender discount features.
Save time and effort by quickly modifying groups of items in bulk. Change prices, categories, and more. Create a list of items using advanced search, then use Modify All List Items to make your changes.
Many Modify All List Items settings utilize sliders that operate according to a three-way toggle system. Tapping the slider the desired number of times toggles it between inactive, active (disabled), and active (enabled). By default, the sliders display as inactive. The following table describes the various slider settings.
| Slider Setting | Slider Image | Description |
|---|---|---|
| Inactive |  |
Default Setting. Indicates the slider is turned off. |
| Active (disabled) |  |
The slider is activated, but the setting is disabled. |
| Active (enabled) |  |
The slider activates and the setting is enabled. |
-
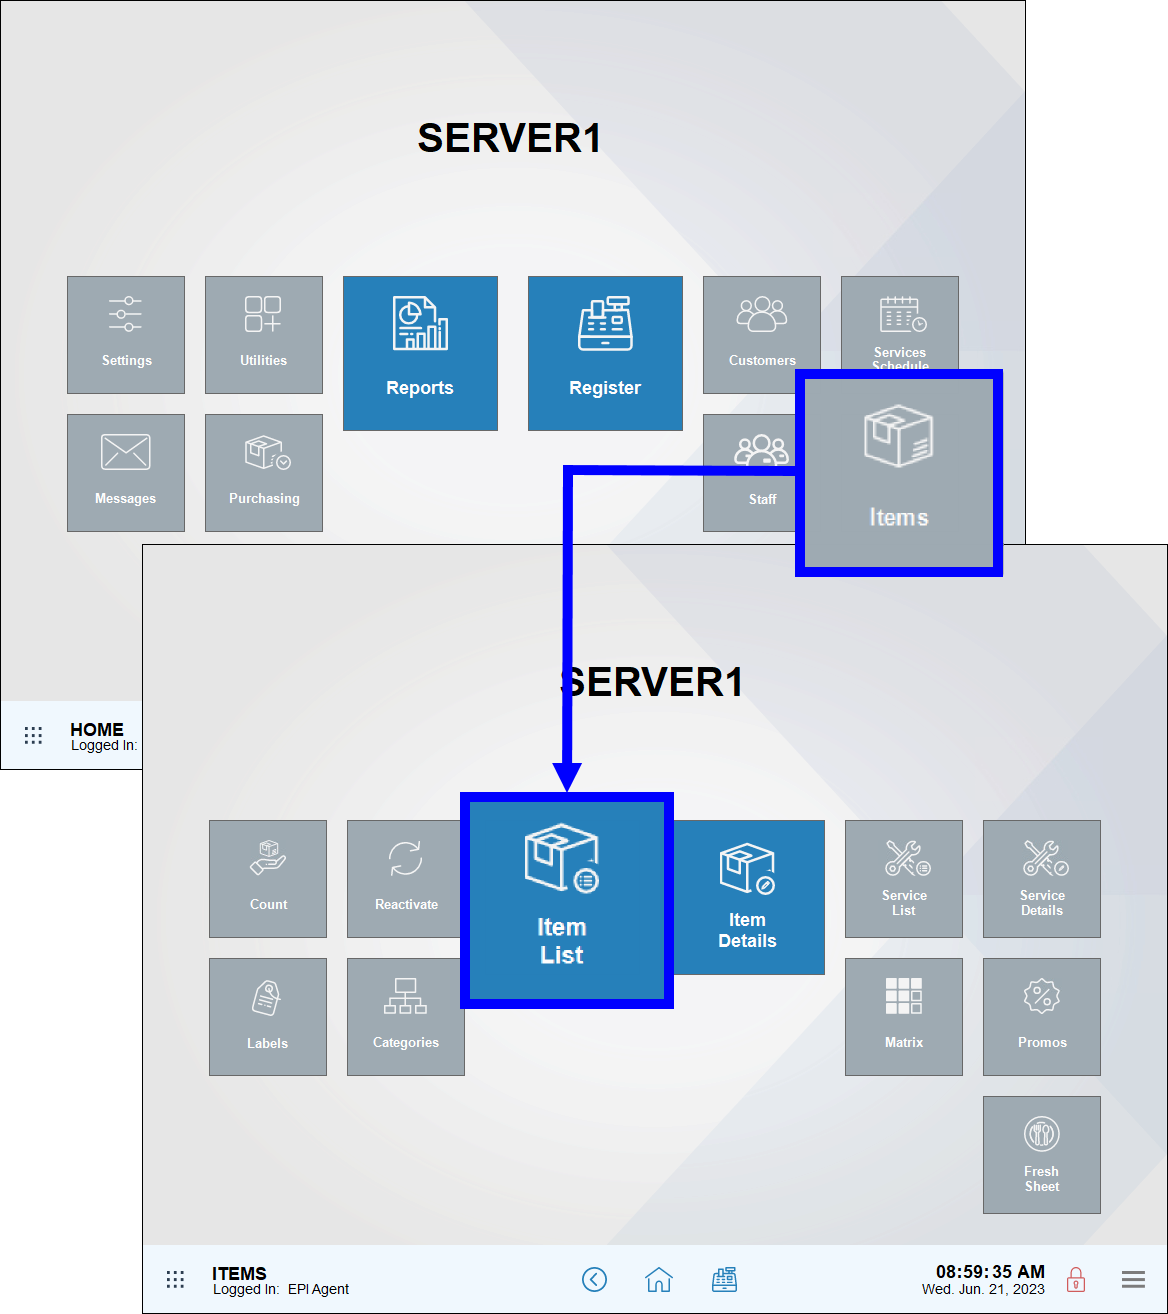
- From Home, navigate to Items > Item List.
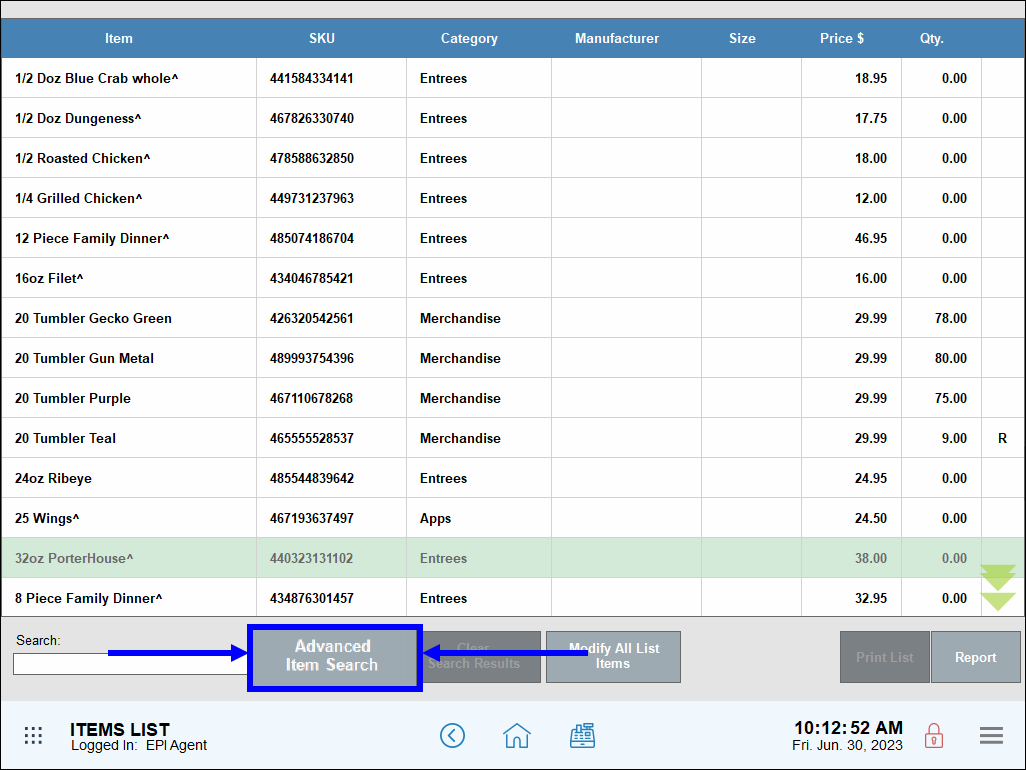
- On the Items List page, tap Advanced Item Search.
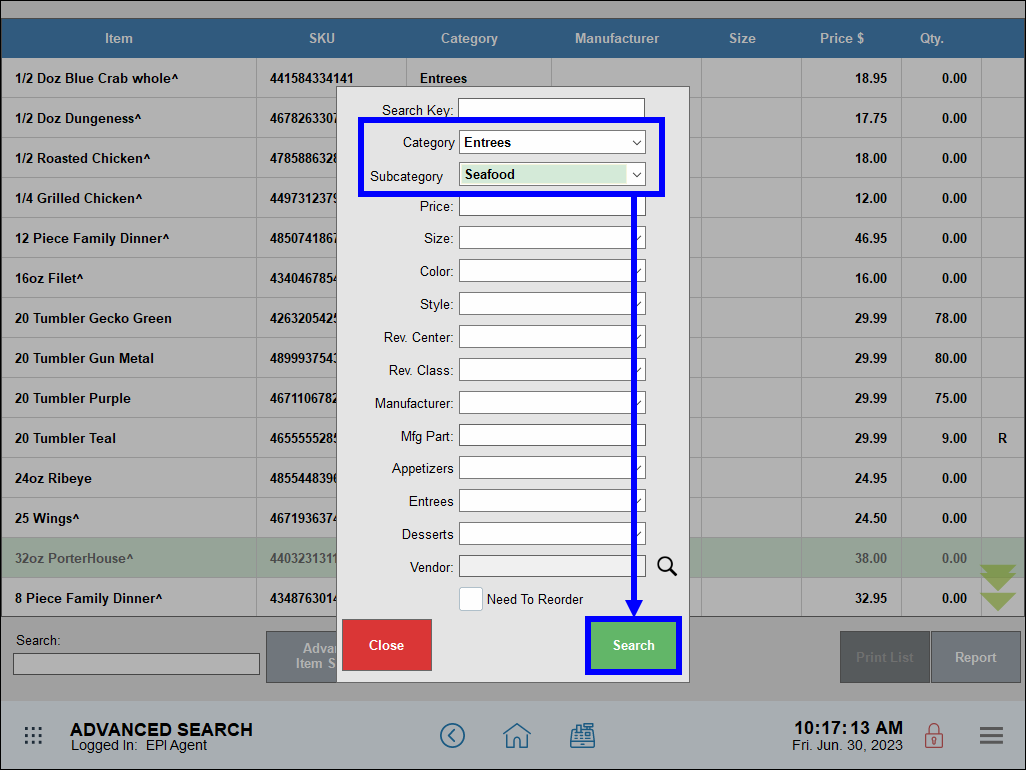
- Select the desired filters from the pop-up screen, then tap Search.
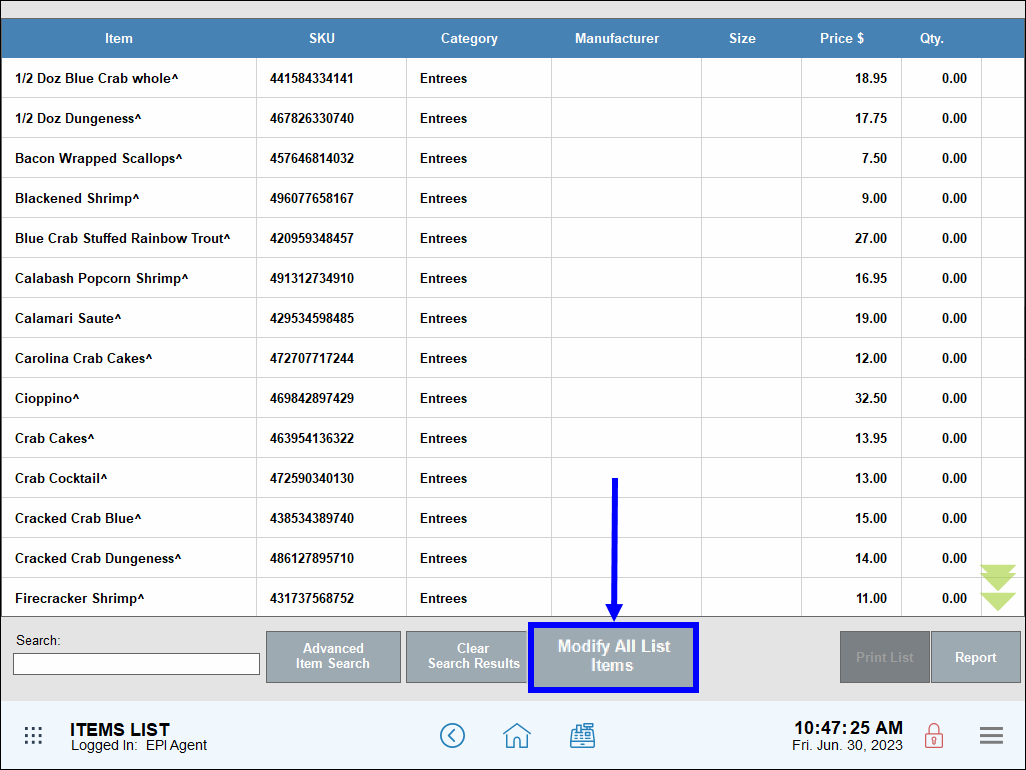
- Review search results, then tap Modify All List Items.
- Warning: Group items together using the Advanced Item Search button before using the Modify All List Items feature.
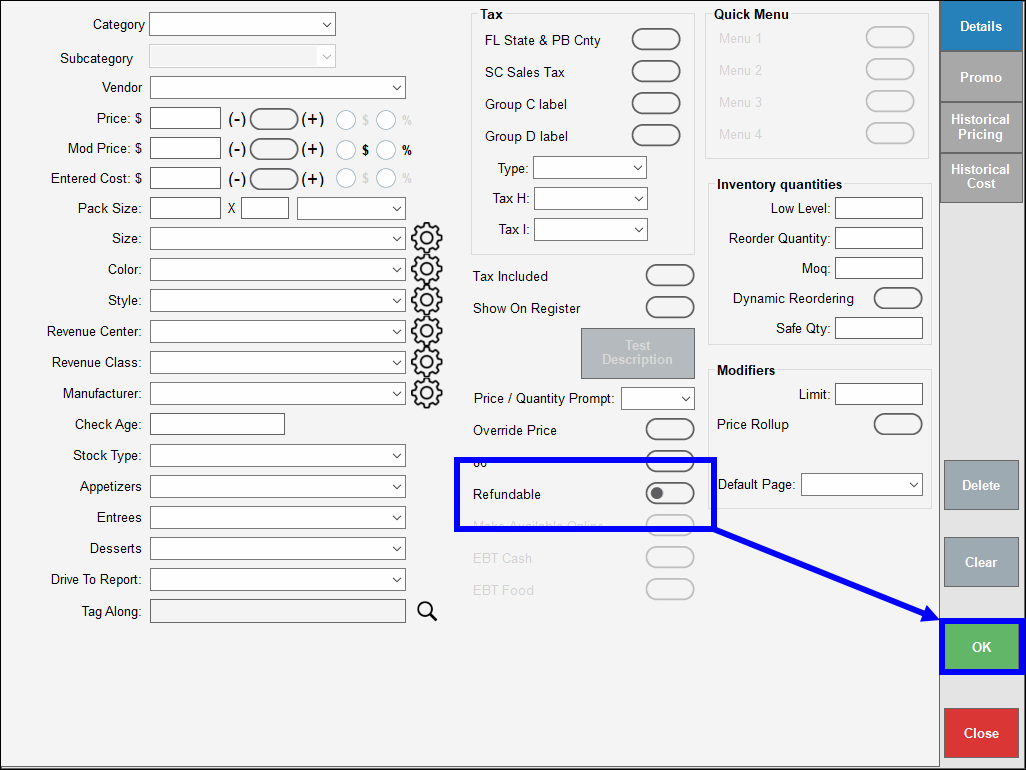
- In the work area that displays, enter any revisions as desired, then tap OK. In this example, the merchant configures Exatouch to make all seafood items non-refundable.
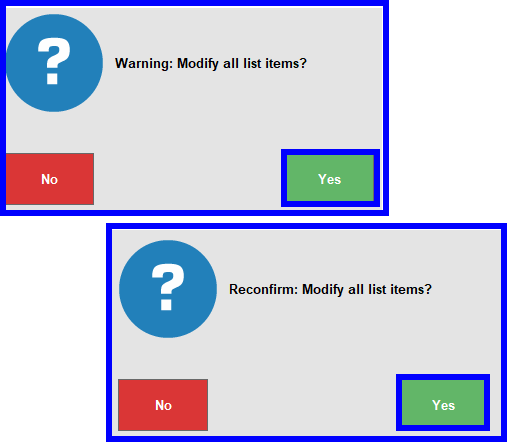
- Confirm and re-confirm any changes. Tap No to abort the function.
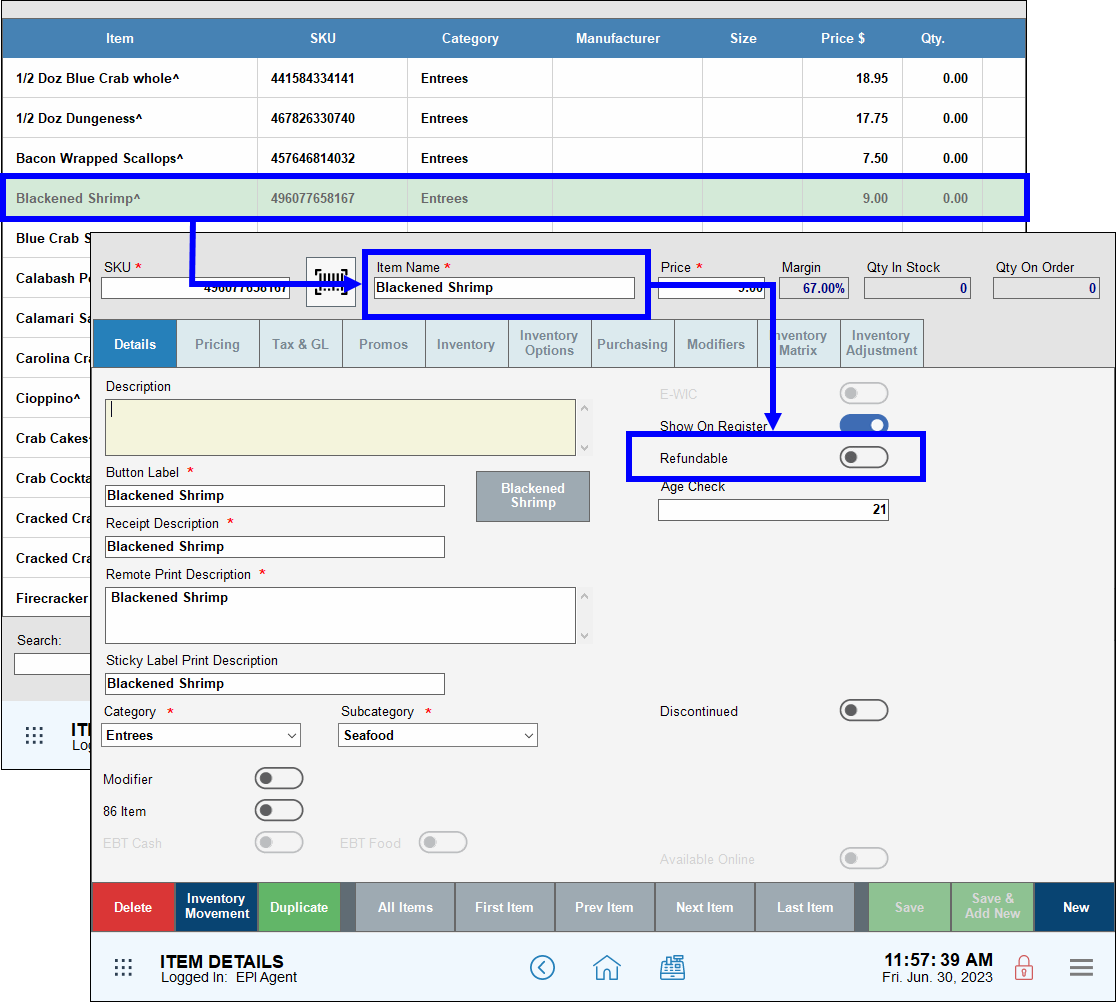
- Select any item in your temporary group of items to view your changes in the item’s record.
- From Home, navigate to Items > Item List.
- Note: Service Items can also be modified in bulk. For more information, see Modify Bulk Services
Apply price changes in bulk. Increase or decrease the price of a group of items by dollar amount or by percentage.
- Example: Raise prices by a percentage amount – A retailer offers cash discounts of 3.5% on in-house brand items and wants to adjust pricing to reflect cash prices.
- Begin by grouping all applicable in-house brands.
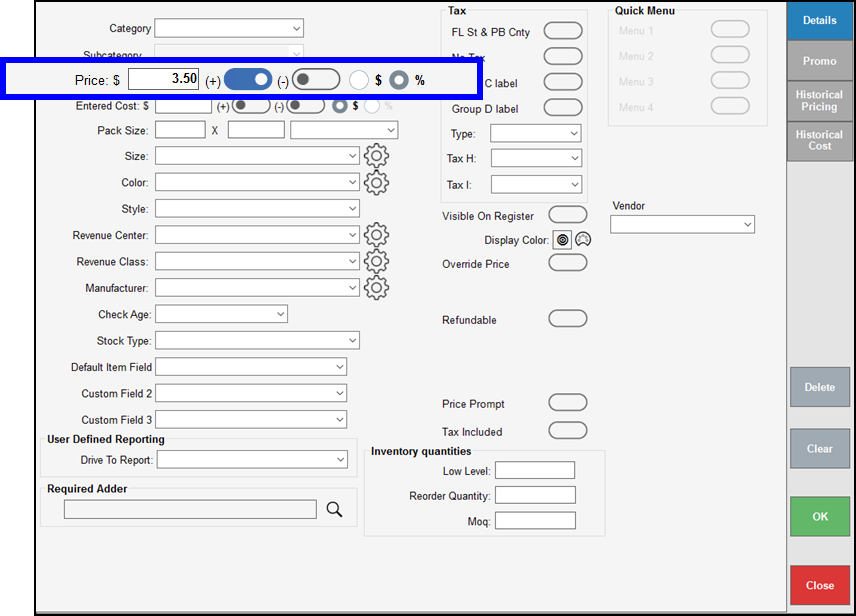
- In the Modify All List Items work area, enter 3.50 in the Price field.
- Tap the slider until it toggles toward the plus sign (+) setting.
- Select the percentage (%) bubble.
- Example: Lower prices by a dollar amount – A liquor store gets a large discount from their new provider of beer kegs and lowers its retail price by 5%. The store offers cash discounts and wants to adjust pricing to reflect cash prices.
- Begin by grouping affected items in the Keg category.
- In the Modify All List Items work area, enter 5.00 in the Price field.
- Tap the slider until it toggles toward the minus (-) setting.
- Select the dollar sign ($) bubble.
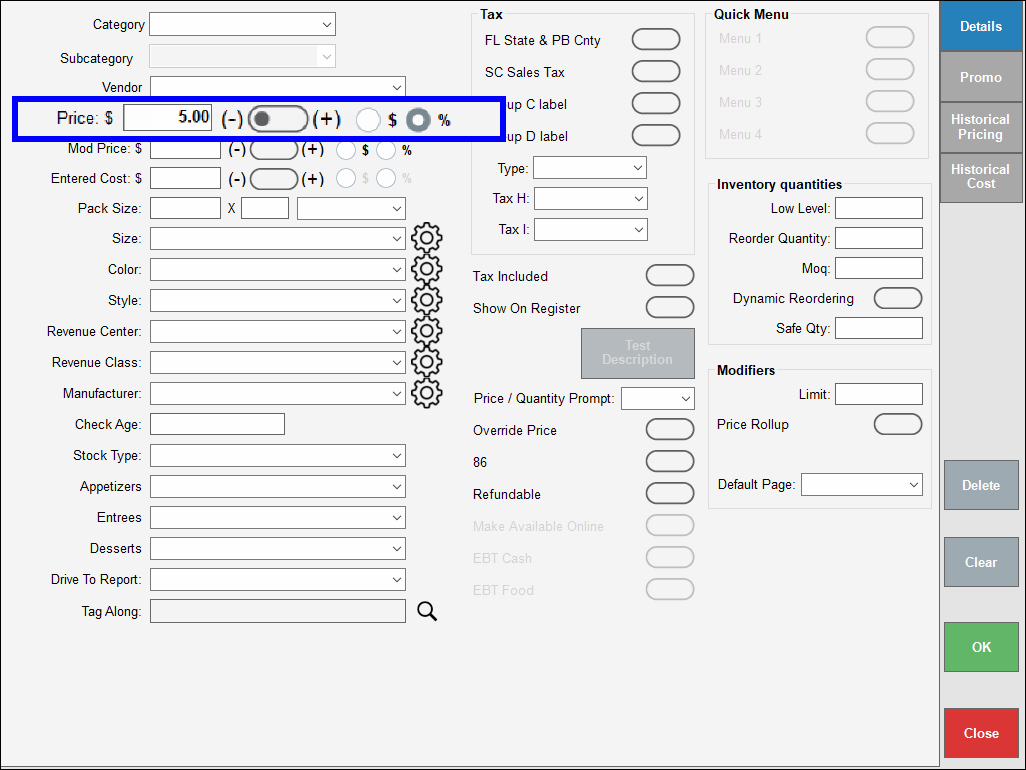
In Items > Item List, the Modify All List Items work area allows merchants to edit existing items in bulk. When a merchant taps the button, this Details window of the work area is displayed.
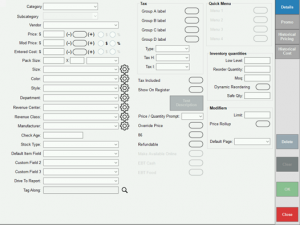
This window includes the following fields:
- Category – Select the category that the item(s) belong to.
- Subcategory – If a category is selected, then select the subcategory where the item(s) belong.
- Vendor – Select the Vendor that the item(s) come(s) from.
- Price: $ – Assign a price for the item(s).
- Mod Price: $ – Assign a price for the item(s) if it is modified.
- Entered Cost: $ – Assign the cost when purchasing from vendors.
- Pack Size – Assign the size and select the type of packaging or unit of measurement the item is sold in.
- Size – Select the size of the item(s).
- Color – Select the primary color of the item(s).
- Style – Select the style of the item(s).
- Department – Select the department that the item(s) belong(s) to.
- Revenue Center – Report revenue across the register in one center.
- Revenue Class – Report revenue across the register in one class.
- Manufacturer – The manufacture of the item.
- Check Age – Enter the youngest age the customer can be to purchase the item(s).
- Stock Type – Label the item(s) as Inventory or Non-Inventory.
- Default Item Field – Create custom item sales reports (name can be changed in Custom Vars).
- Custom Field 2 – Create custom item sales reports (name can be changed in Custom Vars).
- Custom Field 3 – Create custom item sales reports (name can be changed in Custom Vars).
- Drive To Report – Select Business Overview, Snapshot or Both to allow item sales to show on those reports.
- Tag Along – Select a second item to always be sold with the item the Tag Along is applied to.
- Tax – Enable the toggle for the applicable Group label, the Type, and optional settings for Tax H and I.
- Tax Included – Enable the toggle if the item(s) should have tax included in the price.
- Shown On Register – Enable the toggle to either hide or allow items to show in the Register.
- Price / Quantity Prompt – Select the appropriate prompt type from the dropdown: None, Both, Price, or Qty.
- Override Price – Enable the toggle if the item(s) can have its price overridden.
- 86 – Used to note that an item has sold out for the day. It will automatically be undone the following day.
- Refundable – Enable the toggle if the item(s) can be returned with a full refund.
- Quick Menu – Enable the appropriate toggle(s) to add an item to a Quick Menu (which can be activated in Custom Vars).
- Inventory quantities
- Low Level – Set the low-level threshold for inventory stock quantity.
- Reorder Quantity – Set the reorder default quantity for purchase ordering.
- Moq (minimum order quantity) – Set the minimum quantity that can be added to a purchase order.
- Dynamic Reordering – Enroll an item in the dynamic purchase ordering system.
- Safe Qty – Set the stock quantity that Dynamic Ordering will keep the item at.
- Modifiers
- Limit – Set a modifier limit that caps the number of mods selected when in the register.
- Price Rollup – Set the price of the mod to display in the main root item rather than on its own line in the register.
- Default Page – Select an option from the dropdown that should be displayed as default.
Edit Departments in Bulk
Once merchants activate departments in an Exatouch system, all items or categories must have a department assigned to them to sell them in the Register. Merchants can assign departments either per item, by category, or in bulk.
To assign items in bulk, do the following:
- From Home, tap Items and then Item List.
- Tap the Advanced Items Search and select the category to be updated.
- Tap the Modify All List Items
- Tap the Department dropdown and select the appropriate department from the list.
Example: Revenue, Non-revenue, or Seasonal. - In the window that displays, tap Yes.
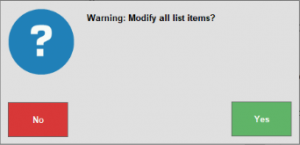
- Tap Save.
Edit Promotions in Bulk
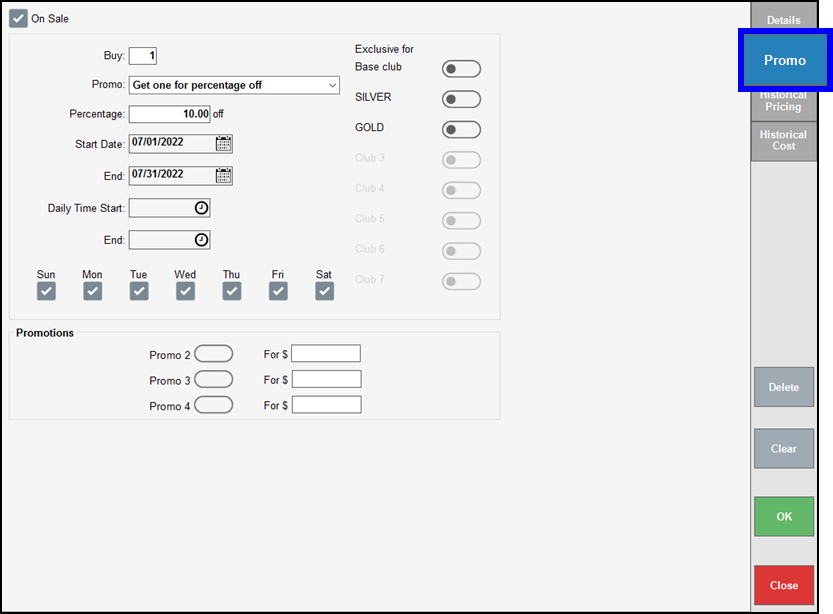
Merchants can also apply promotions quickly and easily to grouped items. After creating a group, navigate to the Modify All List Items work area and tap the Promo tab.
Set up and apply your promotion to your grouped items as you would for a single item.
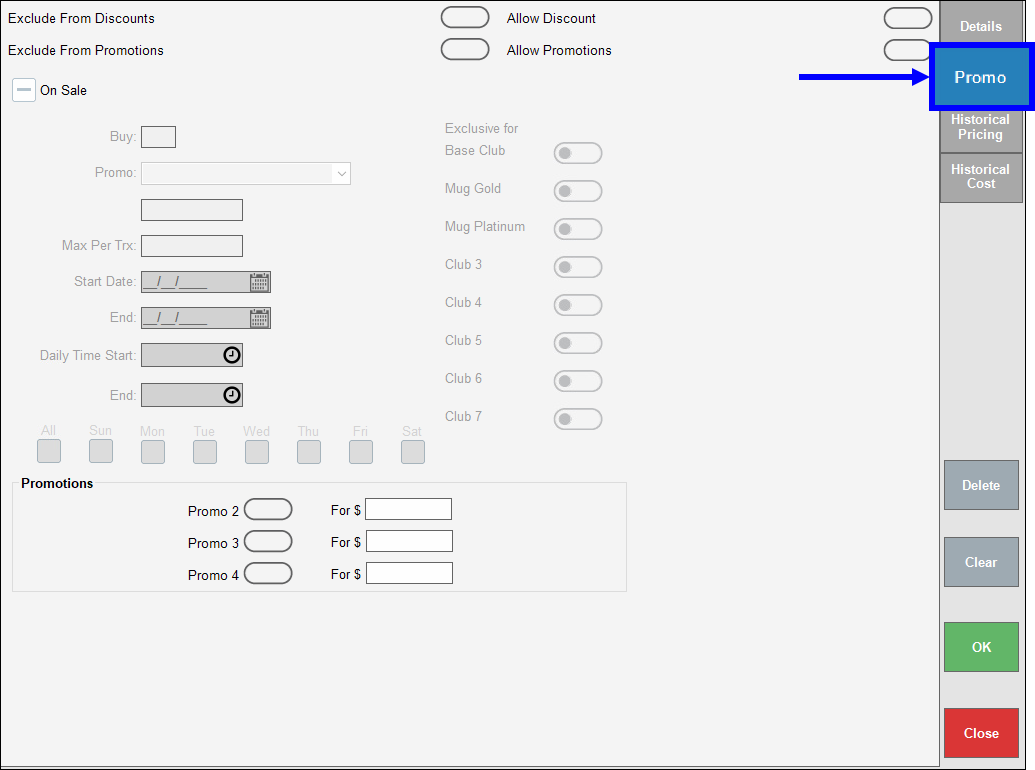
- Note: Depending on your Exatouch configuration, not all fields may be available.
Configure the following, as desired:
- Exclude From Discounts: Enable or disable to exclude an item group from discounts.
- Allow Discount: Enable or disable to define the item group’s discount status.
- Exclude From Promotions: Enable or disable to exclude an item group from promotions.
- Allow Promotions: Enable or disable to define the item group’s promotion status.
- On Sale: Select to enable discount and promotion settings.
- Buy: Enter the amount of items a customer must purchase to qualify for discounts/promotions.
- Promo: Select the desired promotion from the drop-down menu.
- Max Per Trx: Enter the maximum amount of the item a customer can buy per transaction (e.g., a merchant may limit quantities sold to prevent the item from selling out too quickly.)
- Start Date: Select the date the discount/promotion begins.
- End: Select the date the discount/promotion ends.
- Tip! Select specific dates for when the discount/promotion is applied by selecting the appropriate checkbox. For example, select Tue and Thu to offer the discount/promotion on Tuesdays and Thursdays only. Default: All.
- Daily Time Start: Select the time the discount begins.
- End: Select the time the discount/promotion ends.
- Exclusive For: Select the desired club membership level(s) to receive club discounts/promotions.
- Promotions: Select the desired promo layers and add a discount/promotion price for each item group.
- Promo 2: Select to enable and enter promo layer for Promo 2.
- Promo 3: Select to enable and enter promo layer for Promo 3.
- Promo 4: Select to enable and enter promo layer for Promo 4.
- Note: See Happy Hour Specials: Use Promo Layers for details on creating promo layers.
- Tip! You can also apply promotions quickly and easily to your grouped items. Create your group, then navigate to Modify All List Items > Promo tab.
Set up and apply your promotion to your grouped items as you would for a single item.
- Note: Historical pricing can be applied to group of items. For more information, see Historical Pricing.

How can we improve this information for you?
Registered internal users can comment. Merchants, have a suggestion? Tell us more.