DeliverMe’s online ordering website gives customers more ways to submit orders for pickup and delivery. The Exatouch POS integrates seamlessly with the DeliverMe online ordering platform, which offers more ways for customers to submit orders for pickup and delivery. Enhanced back end functionality gives merchants more menu options while making it even easier for customers to place orders.
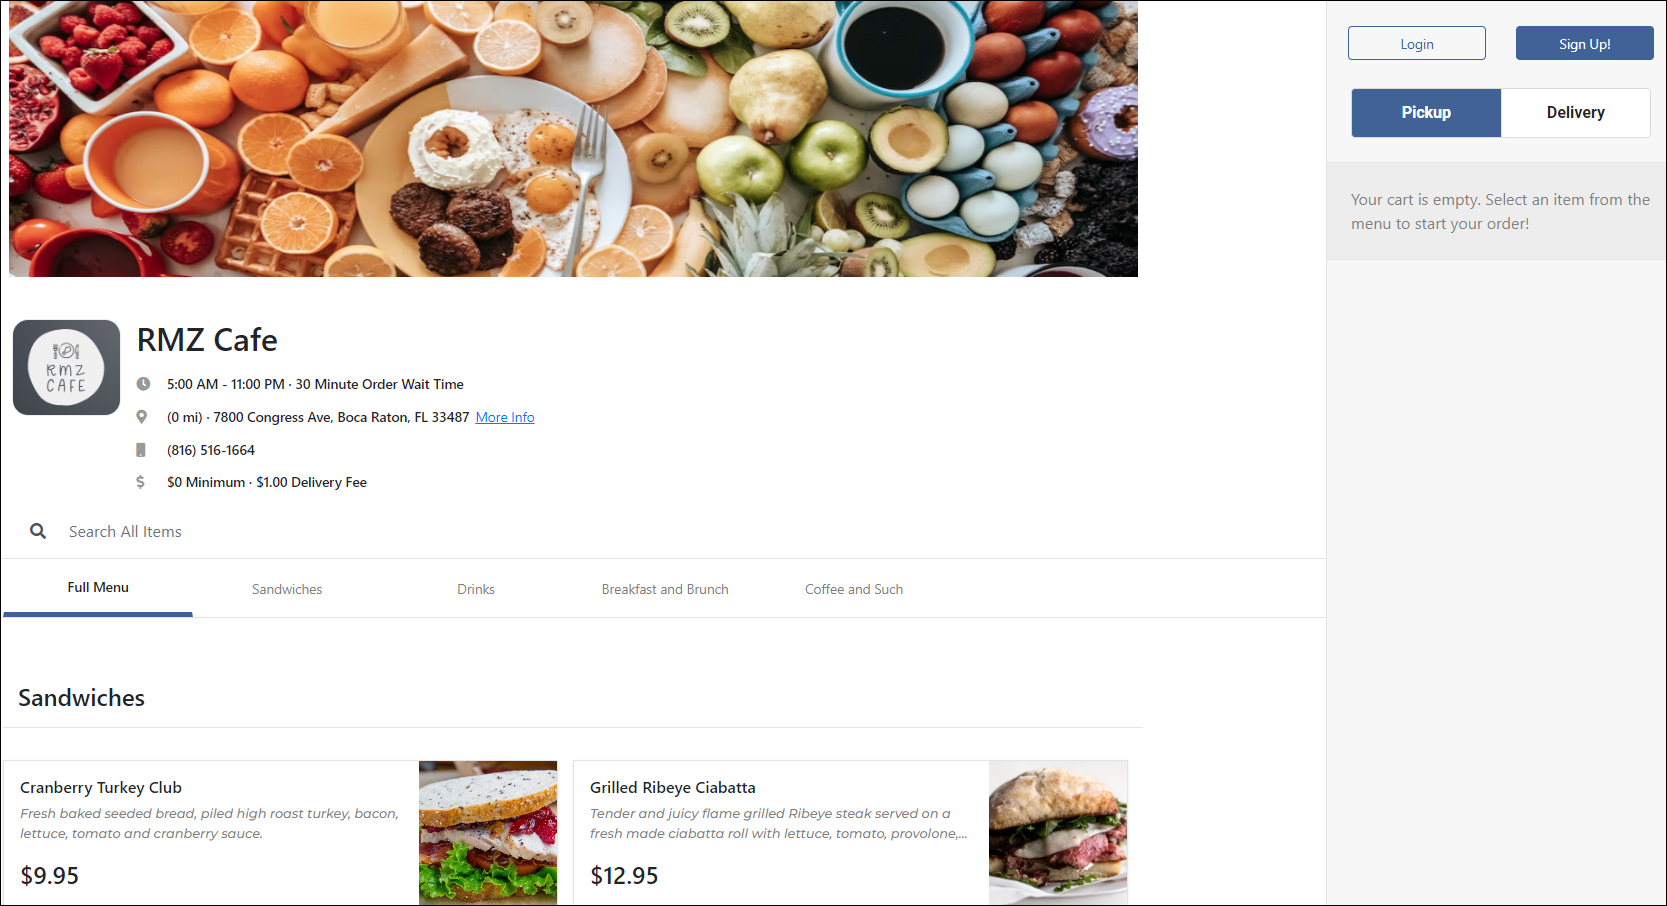
This document contains information about configuring and using the DeliverMe online ordering system. Uploading menu items into DeliverMe is easy. The DeliverMe interface lets Exatouch users port their menus and tax settings directly into DeliverMe by following these simple steps during initial setup.
- Getting Started
- Delivery Preferences
- Delivery Hours
- Pickup Hours
- Making Items Available in DeliverMe
- Syncing Exatouch and DeliverMe.
DeliverMe features a robust series of configuration options within the site itself, including the following high-level functions:
- Business Overview Report
- Reports
- Account Management
- Location Management
- Fee Management
- Menu Management
- Order Monitor
- Order History
- Add Items to an Order
- Schedule the Order
- Complete the Order
Exatouch users can port their tax and delivery settings directly into DeliverMe. This is a one-time process during the initial DeliverMe setup. Future DeliverMe changes are made within the DeliverMe website itself. Additionally, price and item changes made in DeliverMe do not translate back to Exatouch.
- From Home, navigate to Settings > Register Preferences.
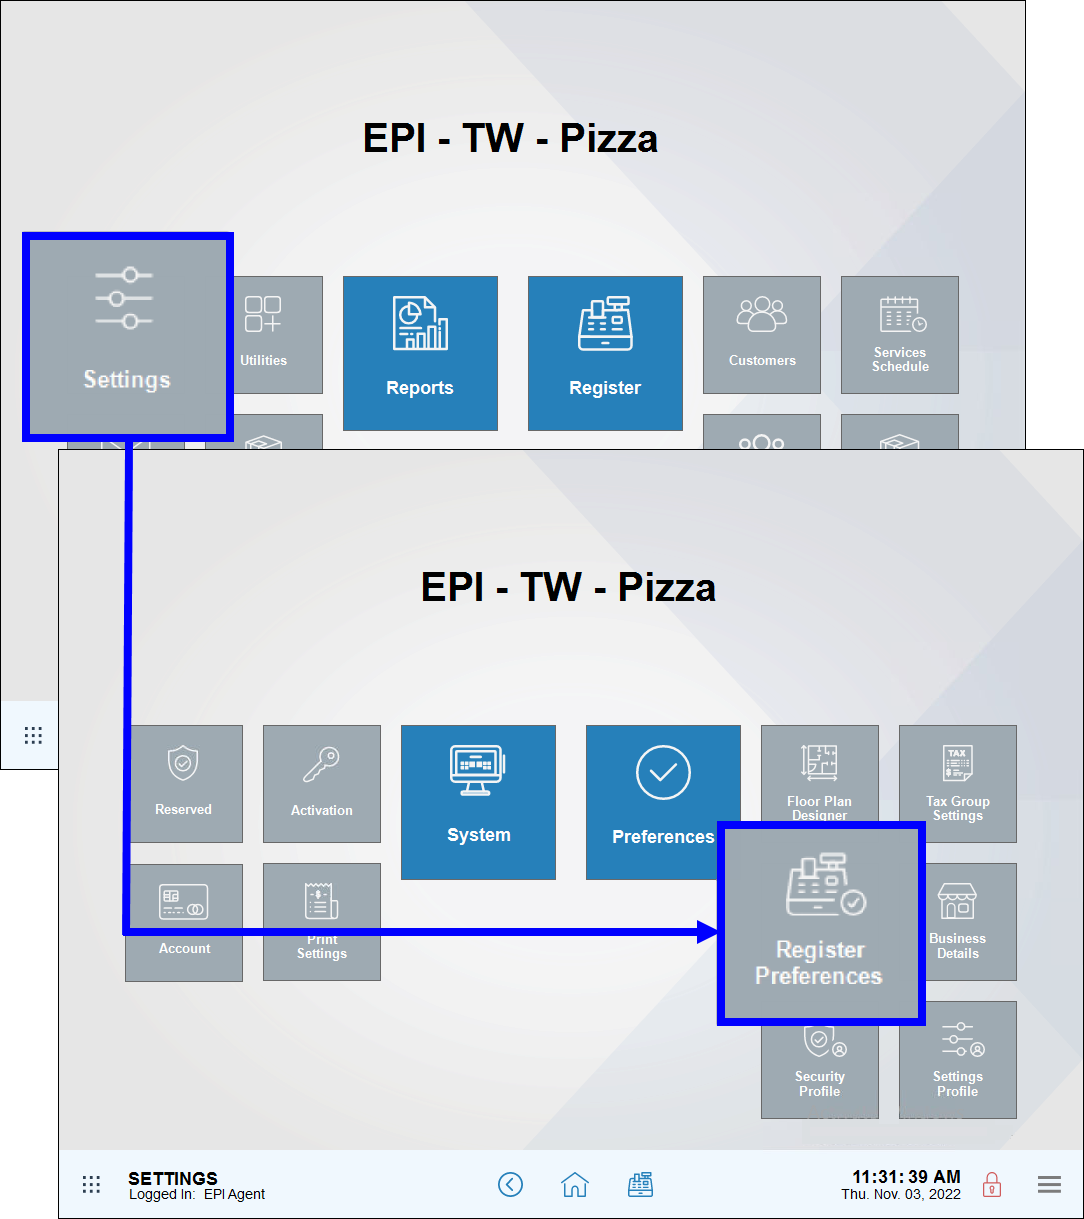
- Tap the Delivery tab.
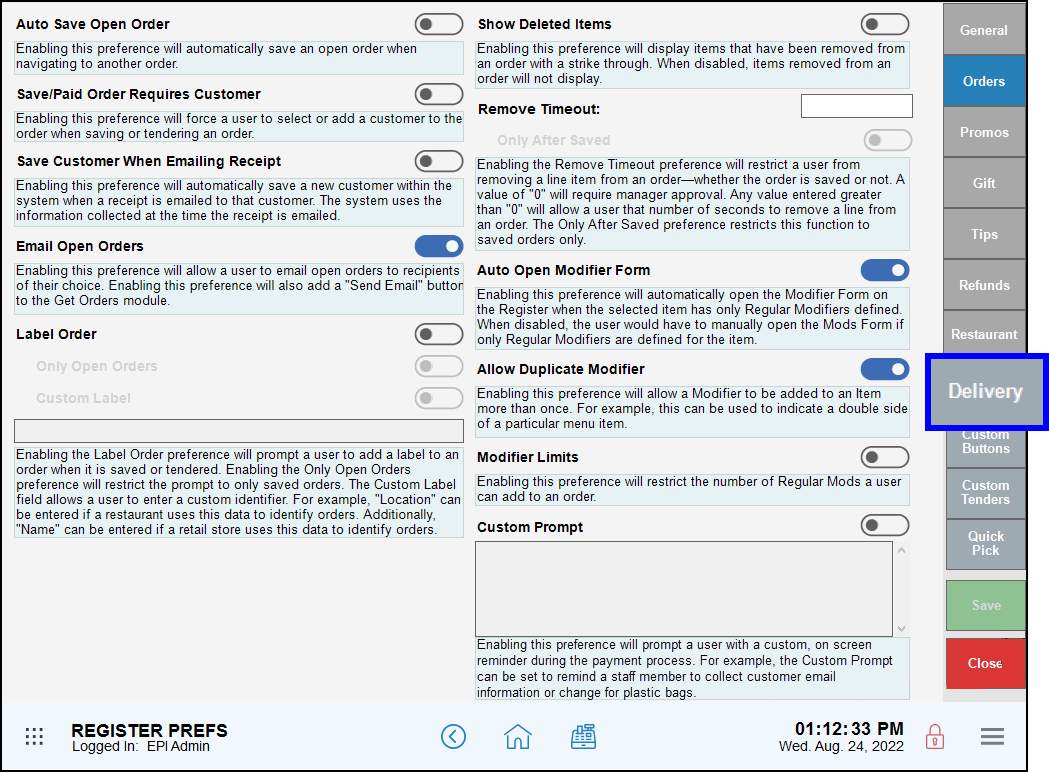
- The Delivery tab work area displays.
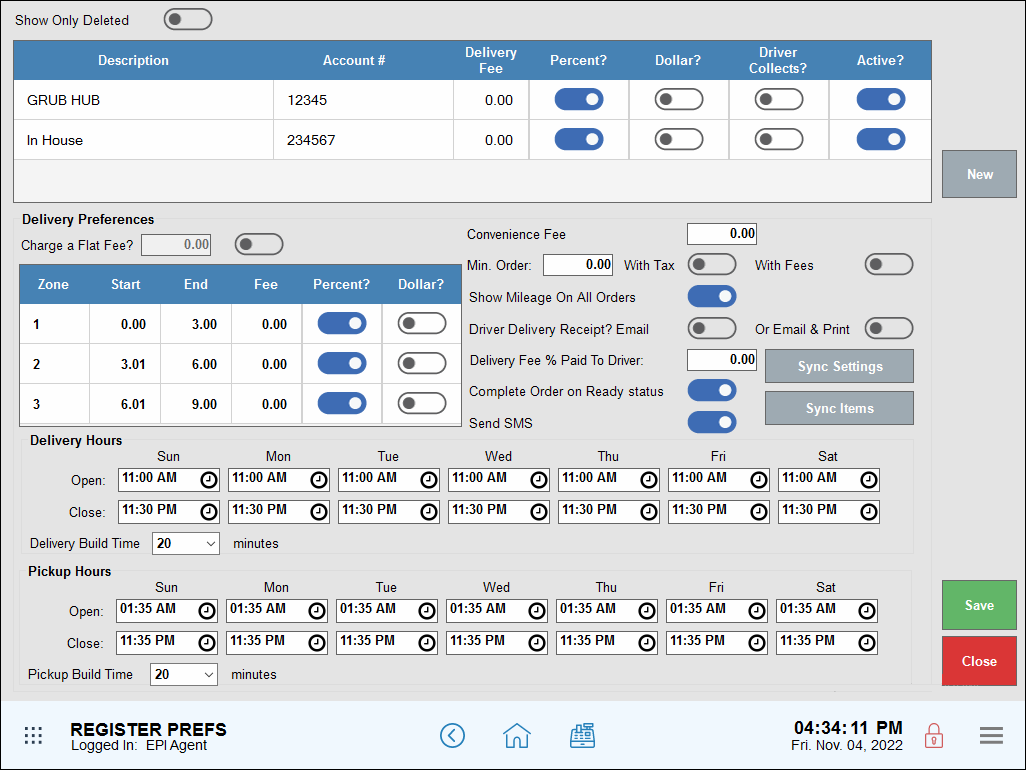
Most Exatouch settings for DeliverMe are configured in the Delivery Preferences section of the Delivery tab work area. From here, merchants can set fees, driver details, and other delivery information.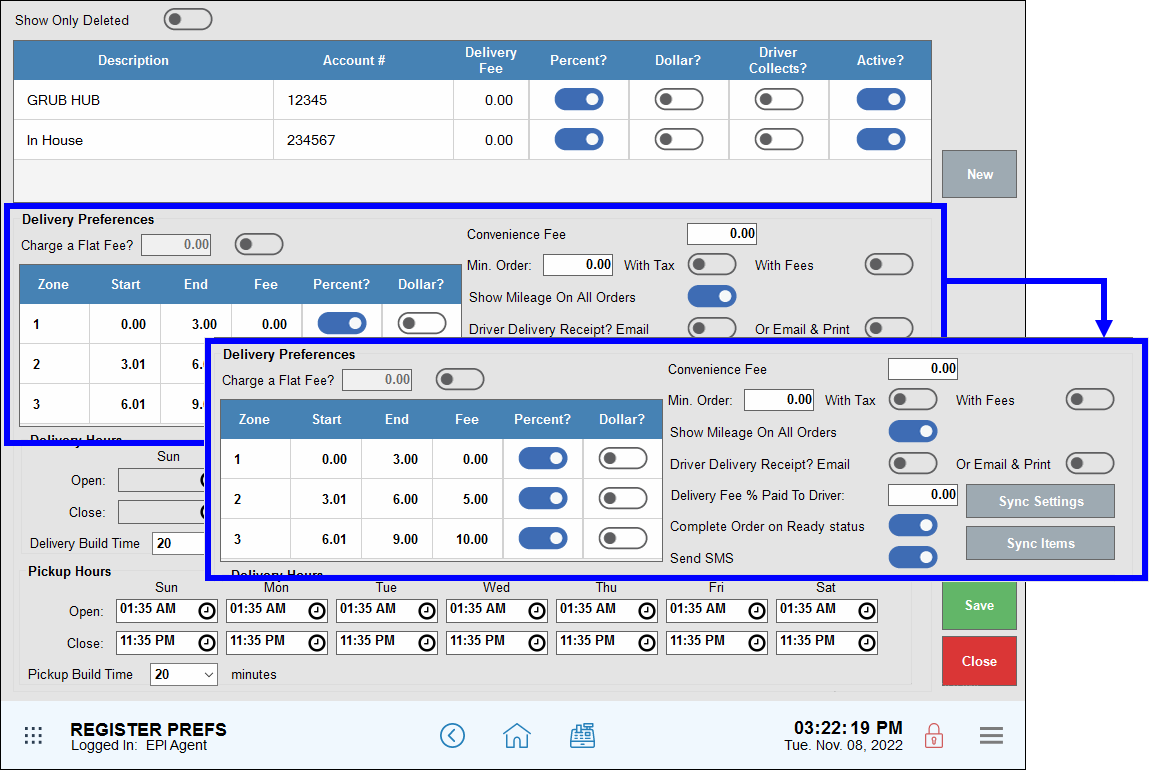
Setting Flat Fees
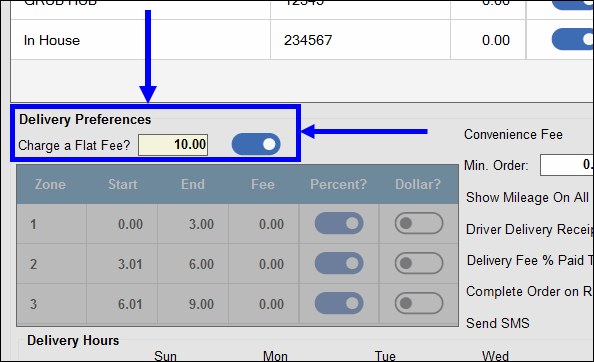
Merchants can quickly and easily set fees by configuring the Charge a Flat Fee? setting. Flat rate fees do not take delivery ranges into account.
- Enter a dollar amount in the Charge a Flat Fee? field. The Zone table becomes disabled.
- Tap Save.
- Note: To disable flat fees, click on the slider. The Charge a Flat Fee? setting reverts to “0.00” and the Zone table becomes enabled.
Setting Fees by Zone
Merchants can also create zones to provide greater flexibility in setting delivery fee options. Delivery zones calculate the distance between the business and the customer’s delivery address. This is particularly useful for merchants wishing to set a tiered fee structure based on delivery zones.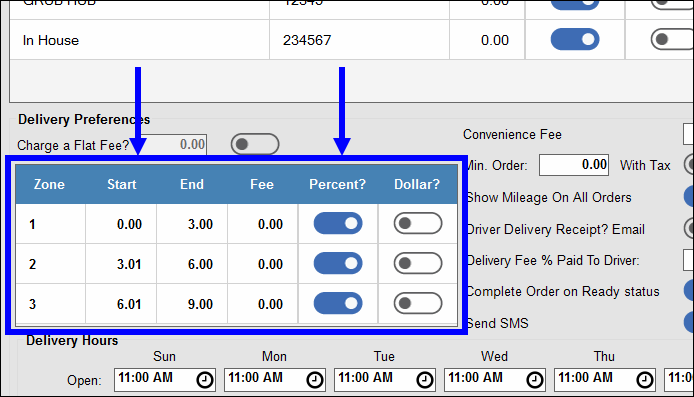
- Note: Before setting delivery zones, Business Details and Customer Details must first be configured in Exatouch.
- Select a row in the delivery zone table and configure the following:
- Zone: Enter the zone number.
- Start: Enter the zone’s starting distance in relation to the business address. Enter “0” when starting from the business.
- End: Enter the zone’s ending distance.
- Percent?: Toggle the slider to set the delivery zone fee as a percentage of the order total.
- Dollar?: the slider to set the delivery zone fee as a dollar amount.
- Configure additional rows, as desired.
- Note: When configuring the Start distance for Zones 2 and Zone 3, the start distance begins where the prior zone ended, not the original business address. For example, if Zone 1 starts at 0.00 and ends at 3.00, then Zone 2 starts at 3.01.
- Tap Save.
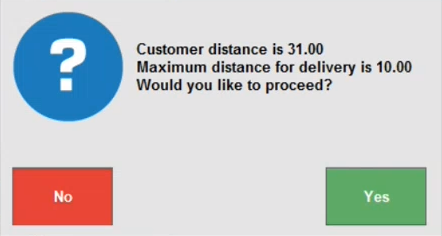
- Tip! Up to three delivery zones can be configured. Merchants can override preset delivery zone distances, if desired. When a customer’s address falls outside the delivery zone, Exatouch displays a prompt asking the employee whether or not to proceed. Tap Yes to proceed or No to cancel.
Additional Delivery Preferences
The Delivery tab includes additional Delivery Preferences that port to DeliverMe:
- Convenience Fee: Enter a dollar amount to add to delivery or pickup orders, as desired.
- Note: This fee only applies to DeliverMe. It does not apply to standard Exatouch orders.
- Min. Order: Enter the minimum amount a customer must spend for DeliverMe to process the order.
- With Tax: Toggle the slider to modify the Min. Order value to include taxes.
- With Fees: Toggle the slider to modify the Min. Order value to include fees.
- Show Mileage On All Orders: Toggle the slider to display on the receipt the number of miles the delivery person drove on a specific order.
- Driver Delivery Receipt?: The Email and Or Email & Print slider settings display as inactive by default. When both display as disabled, only print tickets generate for the delivery person.
- Email: Enable the slider to generate only an email ticket for the delivery person.
- Or Email & Print: Enable the slider to generate an email and print ticket for the delivery person.
- Delivery Fee % Paid To Driver: Enter the percentage of the delivery fee to pay the delivery person. For example, enter “50.00” to deposit one-half of all delivery fees into the delivery person’s bank account.
- Complete Order on Ready status: Enable to designate orders as complete after tapping the Ready button in Delivery Manager.
- Send SMS: Enable to send text message order updates to customers.
- Sync Settings and Sync Items: Push settings and items in bulk from Exatouch to DeliverMe during initial setup.
- Note: These buttons are only used during the initial DeliverMe setup. Future DeliverMe changes are made within the DeliverMe Dashboard Settings.
Exatouch uses a combination of the hours set for delivery and Delivery Build Time to determine available time slots for accepting delivery orders. Setting hours to allow enough time for order preparation is strongly recommended.
- Example: You set a Delivery Build Time of 25 minutes. You have staff on site to prep orders as early as 10:00 a.m. If you don’t deliver orders until after 2:00 p.m., set an Open time for delivery orders to 2:00 p.m. Orders that must be ready for delivery by 2:00 p.m. will fire at 1:35 p.m.

Perform the following to set Delivery Hours:
- Select the fields to set Open and Close times.

- Adjust the Clock Interface widget to set the desired time, and then tap the curved arrow icon within the widget to confirm the time.
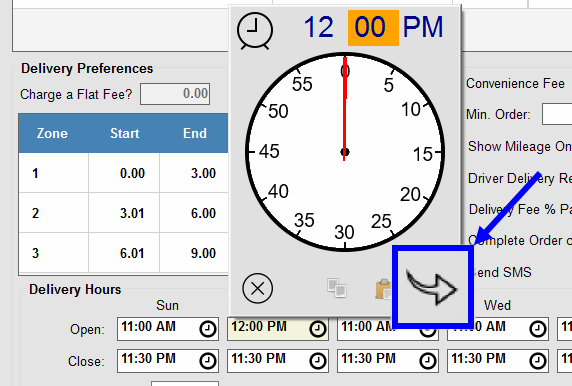
- Tap the circled “X” icon in the Clock Interface widget to remove delivery hours altogether for a specific day. For example, a merchant may not offer Sunday delivery due to being closed.

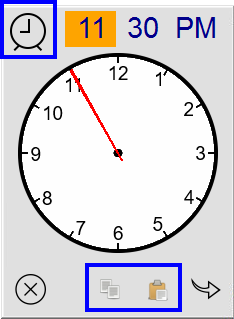
- Tip! Other icons in the Clock Interface widget allow merchants to enter times more quickly and efficiently. For example, tap the Clock icon to enter the current time. Tap the Document icon to copy and the Clipboard icon to paste a selected time into other fields.
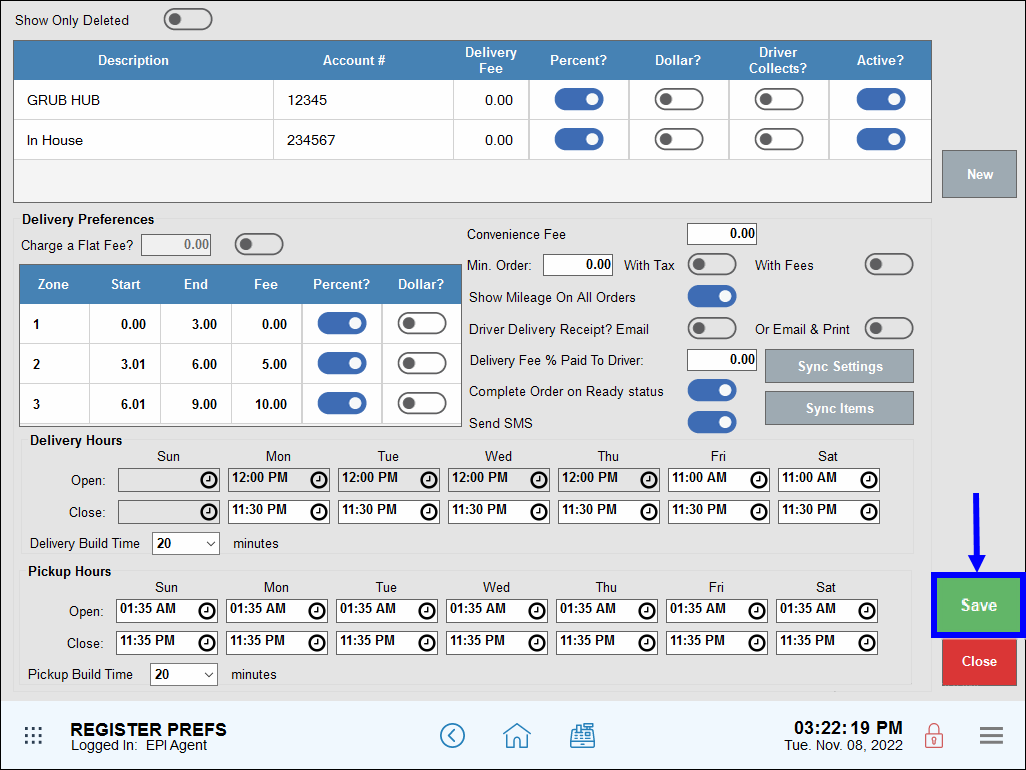
- Configure other fields, as desired. Field backgrounds change from white to gray, indicating unsaved changes.

- Tap Save.
Exatouch uses a combination of the hours you set for pickup and Pickup Build Time to determine the time slots available for accepting pickup orders. We strongly recommend these hours be set to allow enough time for order preparation.
- Example: You set a Pickup Build Time of 20 minutes. You have staff on site to prep orders as early as 10:00 a.m. If you don’t deliver orders until after 2:00 p.m., set an Open time for delivery orders to 2:00 p.m. Orders that must be ready for delivery by 2:00 p.m. will fire at 1:40 p.m.

Perform the following to set Pickup Hours:
- Select fields to set Open and Close times.
- Note: We recommend setting Close times before the actual closing to account for cooking times. For example, if a restaurant closes at 11:00 p.m., and it takes 30 minutes to prepare most orders, set the Close time for 10:30 p.m.
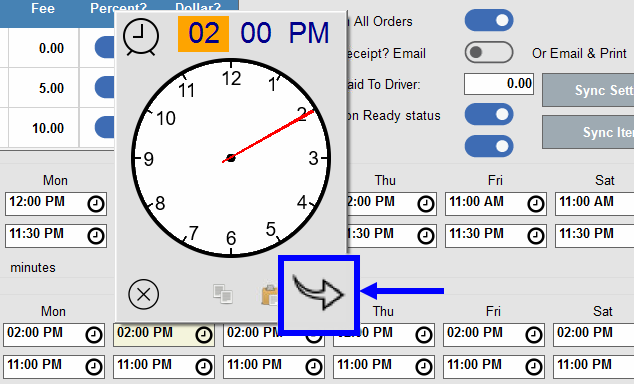
- Adjust the Clock Interface widget to set the desired time, and then tap the curved arrow icon within the widget to confirm the time.

- Configure other fields, as desired. Field backgrounds change from white to gray, indicating unsaved changes.
- Tap Save.
- Note: To ensure that prices, menu items, or other settings remain consistent in both Exatouch and DeliverMe, we recommend making the necessary configuration changes in Exatouch. Price and item changes made directly in DeliverMe do not translate back to Exatouch.
Merchants can quickly and easily make root items saved in Exatouch visible in DeliverMe by performing the following on the Item Details page. These procedures only apply to root items. Categories and modifiers do not require any additional steps. For more information, refer to the Create a Modifier article on the Online Knowledge Base.
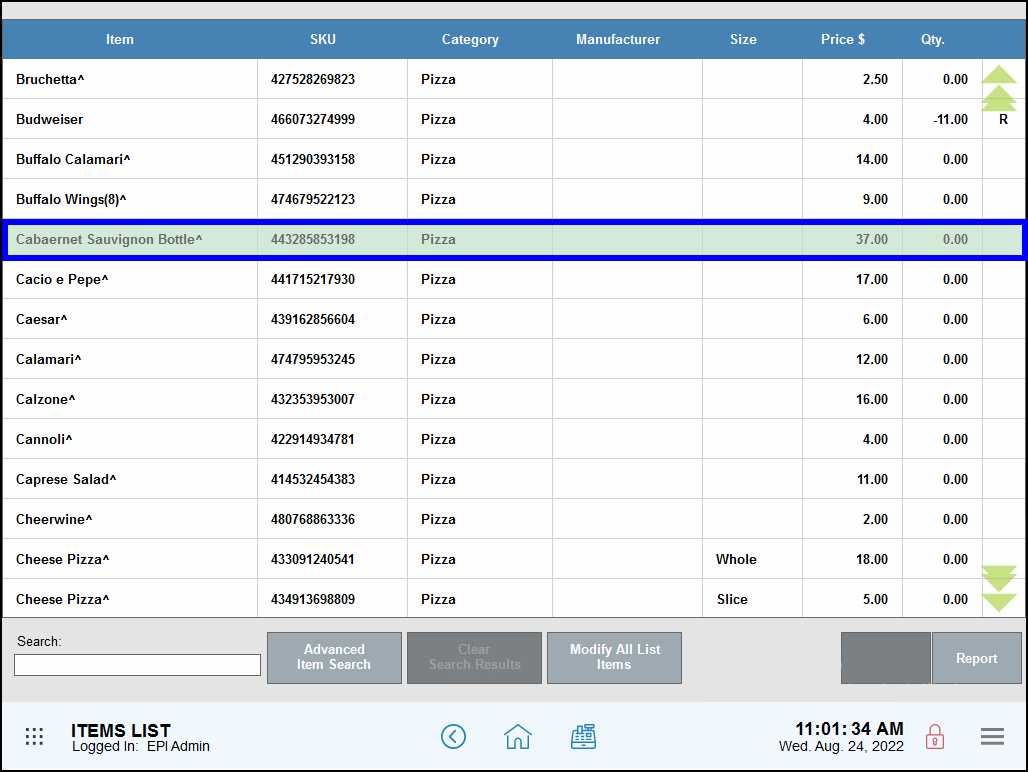
- From Home, navigate to Items > Item List.
- Select an item. The Item List screen displays and various fields under the Details tab populate.
- Toggle the Available Online slider so that it is active.
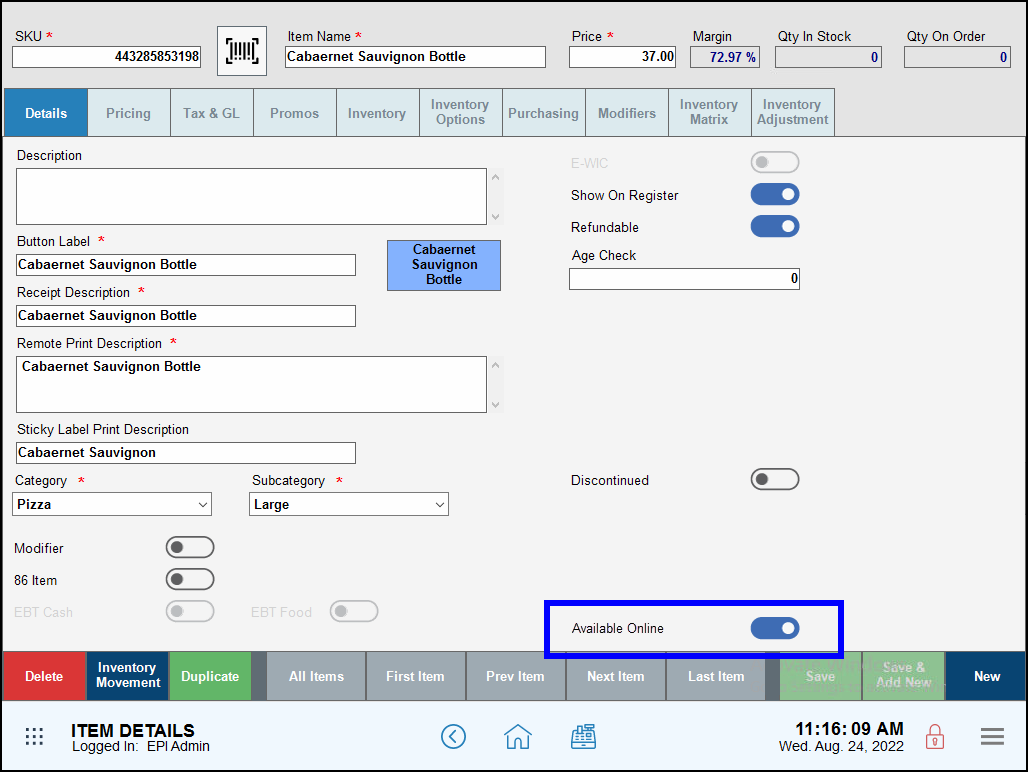
- Tap Save.
- Repeat as necessary for other root items.
- Note: Modifiers will port along with root items from Exatouch to DeliverMe
After making all desired items available online in Exatouch, merchants complete the process of porting items to DeliverMe by syncing all settings to the DeliverMe website. This is a one-time process that is only required on initial setup.
- From Home, navigate to Settings > Register Preferences.
- Tap Delivery.

- In the Delivery tab work area, tap Sync Settings to push settings in bulk from Exatouch to DeliverMe.
- Tap Sync Items to push items in bulk from Exatouch to DeliverMe.
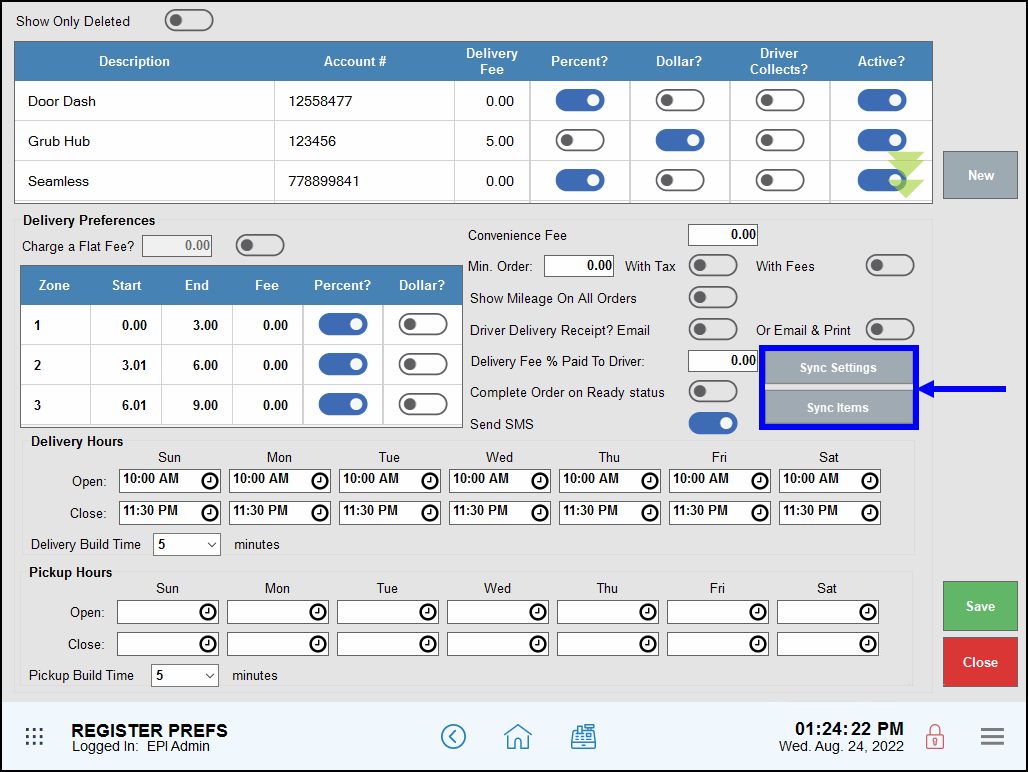
- Tap Save.

How can we improve this information for you?
Registered internal users can comment. Merchants, have a suggestion? Tell us more.