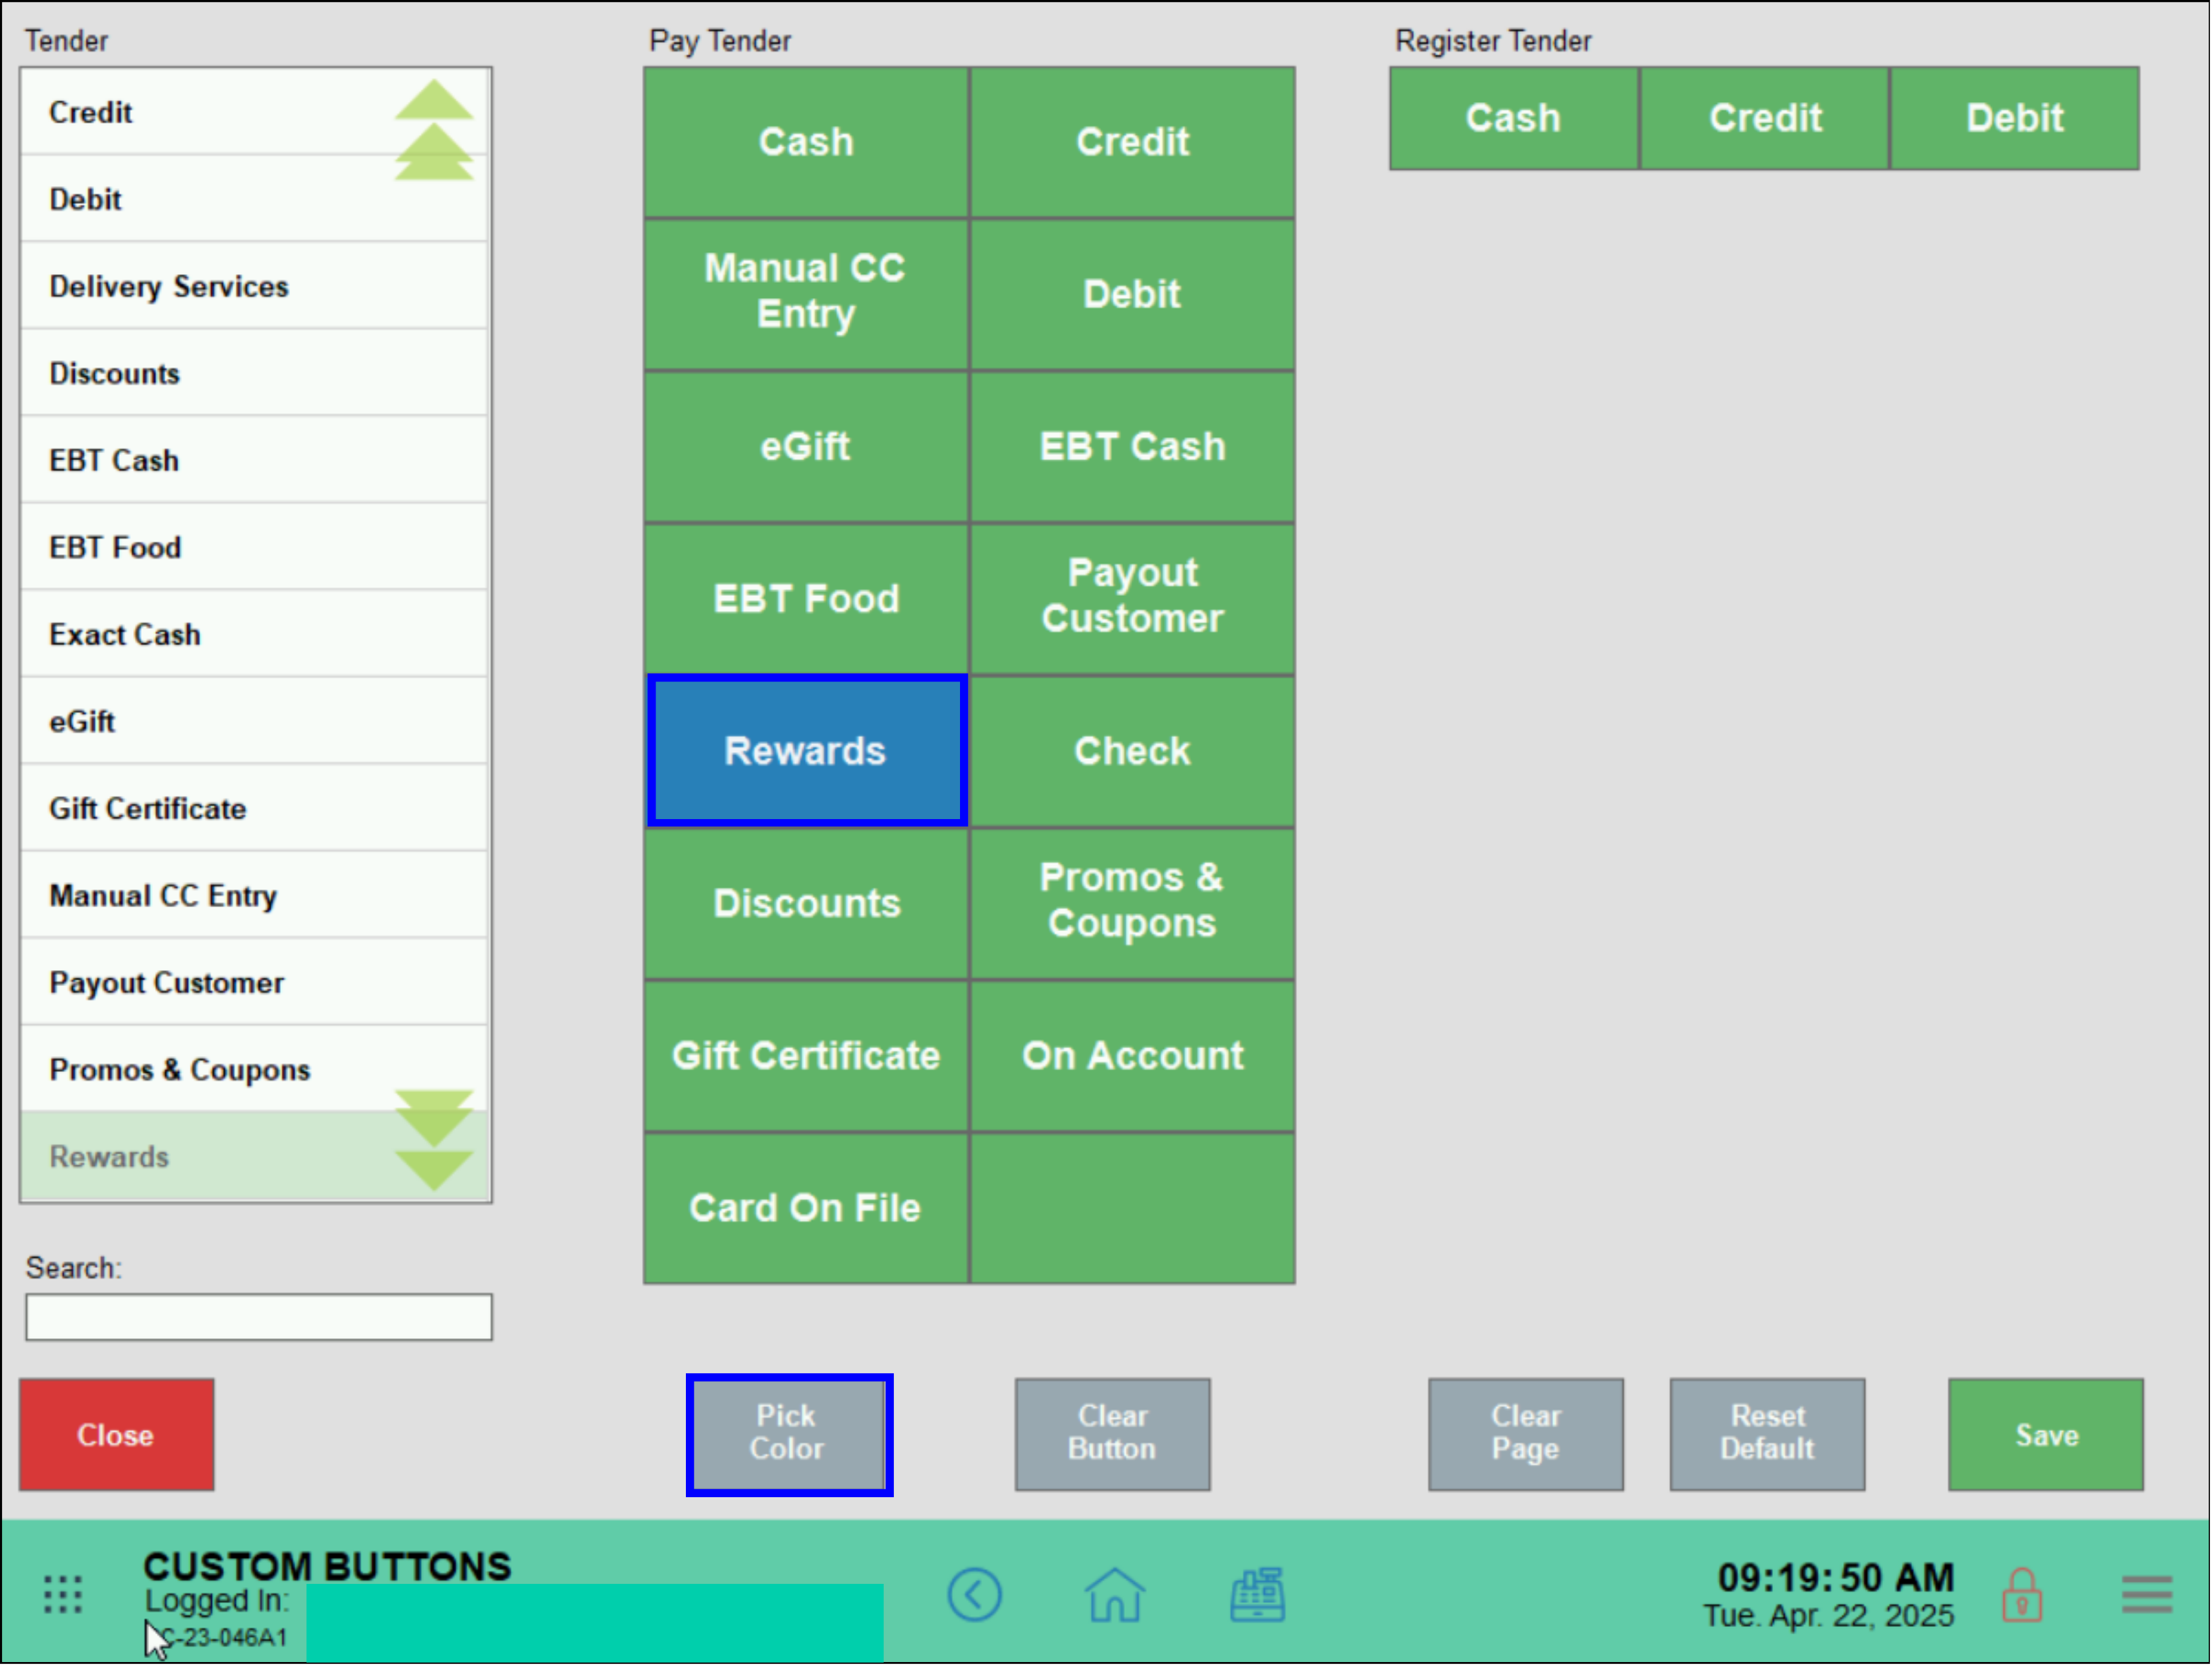
There are multiple ways customers may pay for an order or service. To accommodate their needs, Exatouch supports the customization of the Payment Tender and Register Tender buttons, which are located in the Register tab and Pay tab.
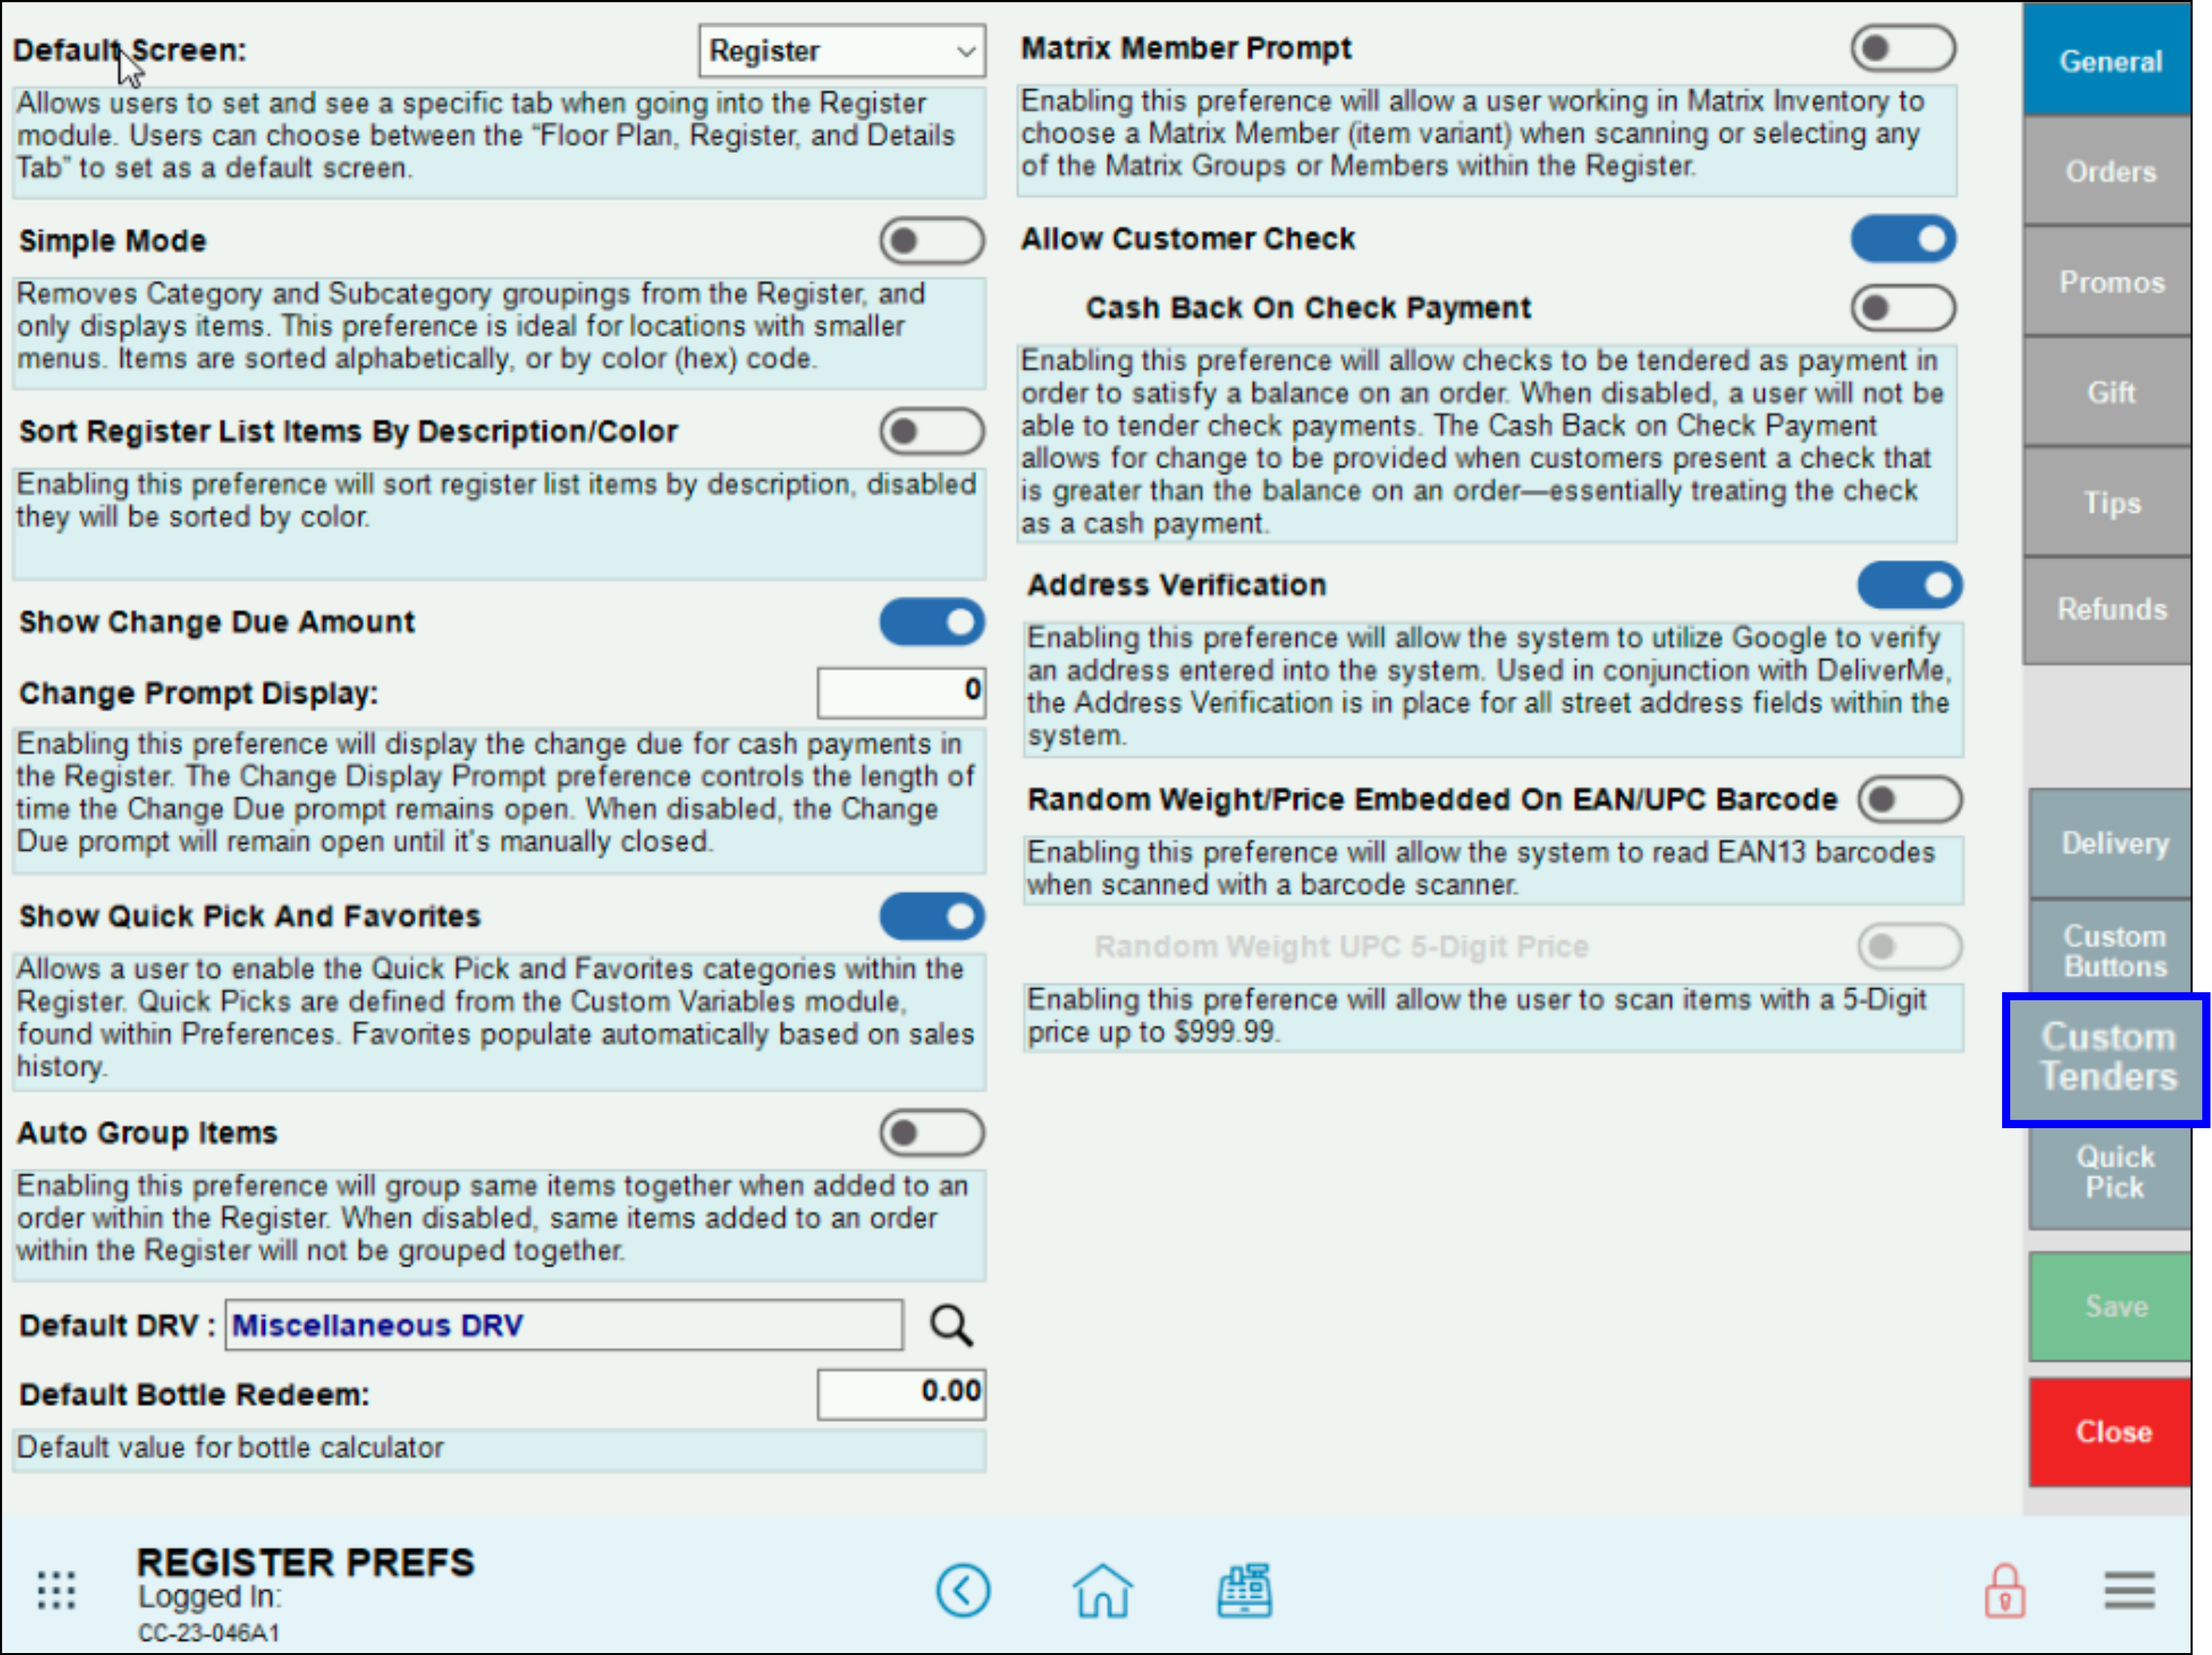
Navigation Notes: All of the functions detailed below are accessed via Home > Settings > Register Preferences and the Custom Tenders Tab (see below).

Use the tender button customization settings to:
- Create new payment tender buttons for tenders such as gift cards or store credit.
- Remove payment tenders that might not be used often at their location, such as checks.
- Rearrange the payment screen layout for quick access.
- Personalize payment button colors for easy identification.
- Note: Only an Admin or users with authorized access can make these changes to the Register tab and Pay tab. For more information on giving users authorized access, see Fine Tune User Access Using Security Profiles
Exatouch supports the following tender types:
- Cash
- Credit
- Debit (excluding restaurants)
- Manual credit entry (needs to be activated by Exatouch tech support)
- eGift solutions
- EBT cash
- EBT food (needs FNS number)
- Payout customers (e.g., lottery winners, performers)
- Loyalty rewards (redeemed in exchange for goods/services)
- Bank checks (note that Exatouch does not validate checks)
- Discounts (open)
- Promos and merchant/in-store coupons
- Gift certificates (merchant-based)
- On account
- Card on file
- Exact cash (not default)
- Delivery service (used to mark orders as paid and close out the order; note that this does not mark payment as received from the service.)
- Tab auth/Tab complete (restaurant only)
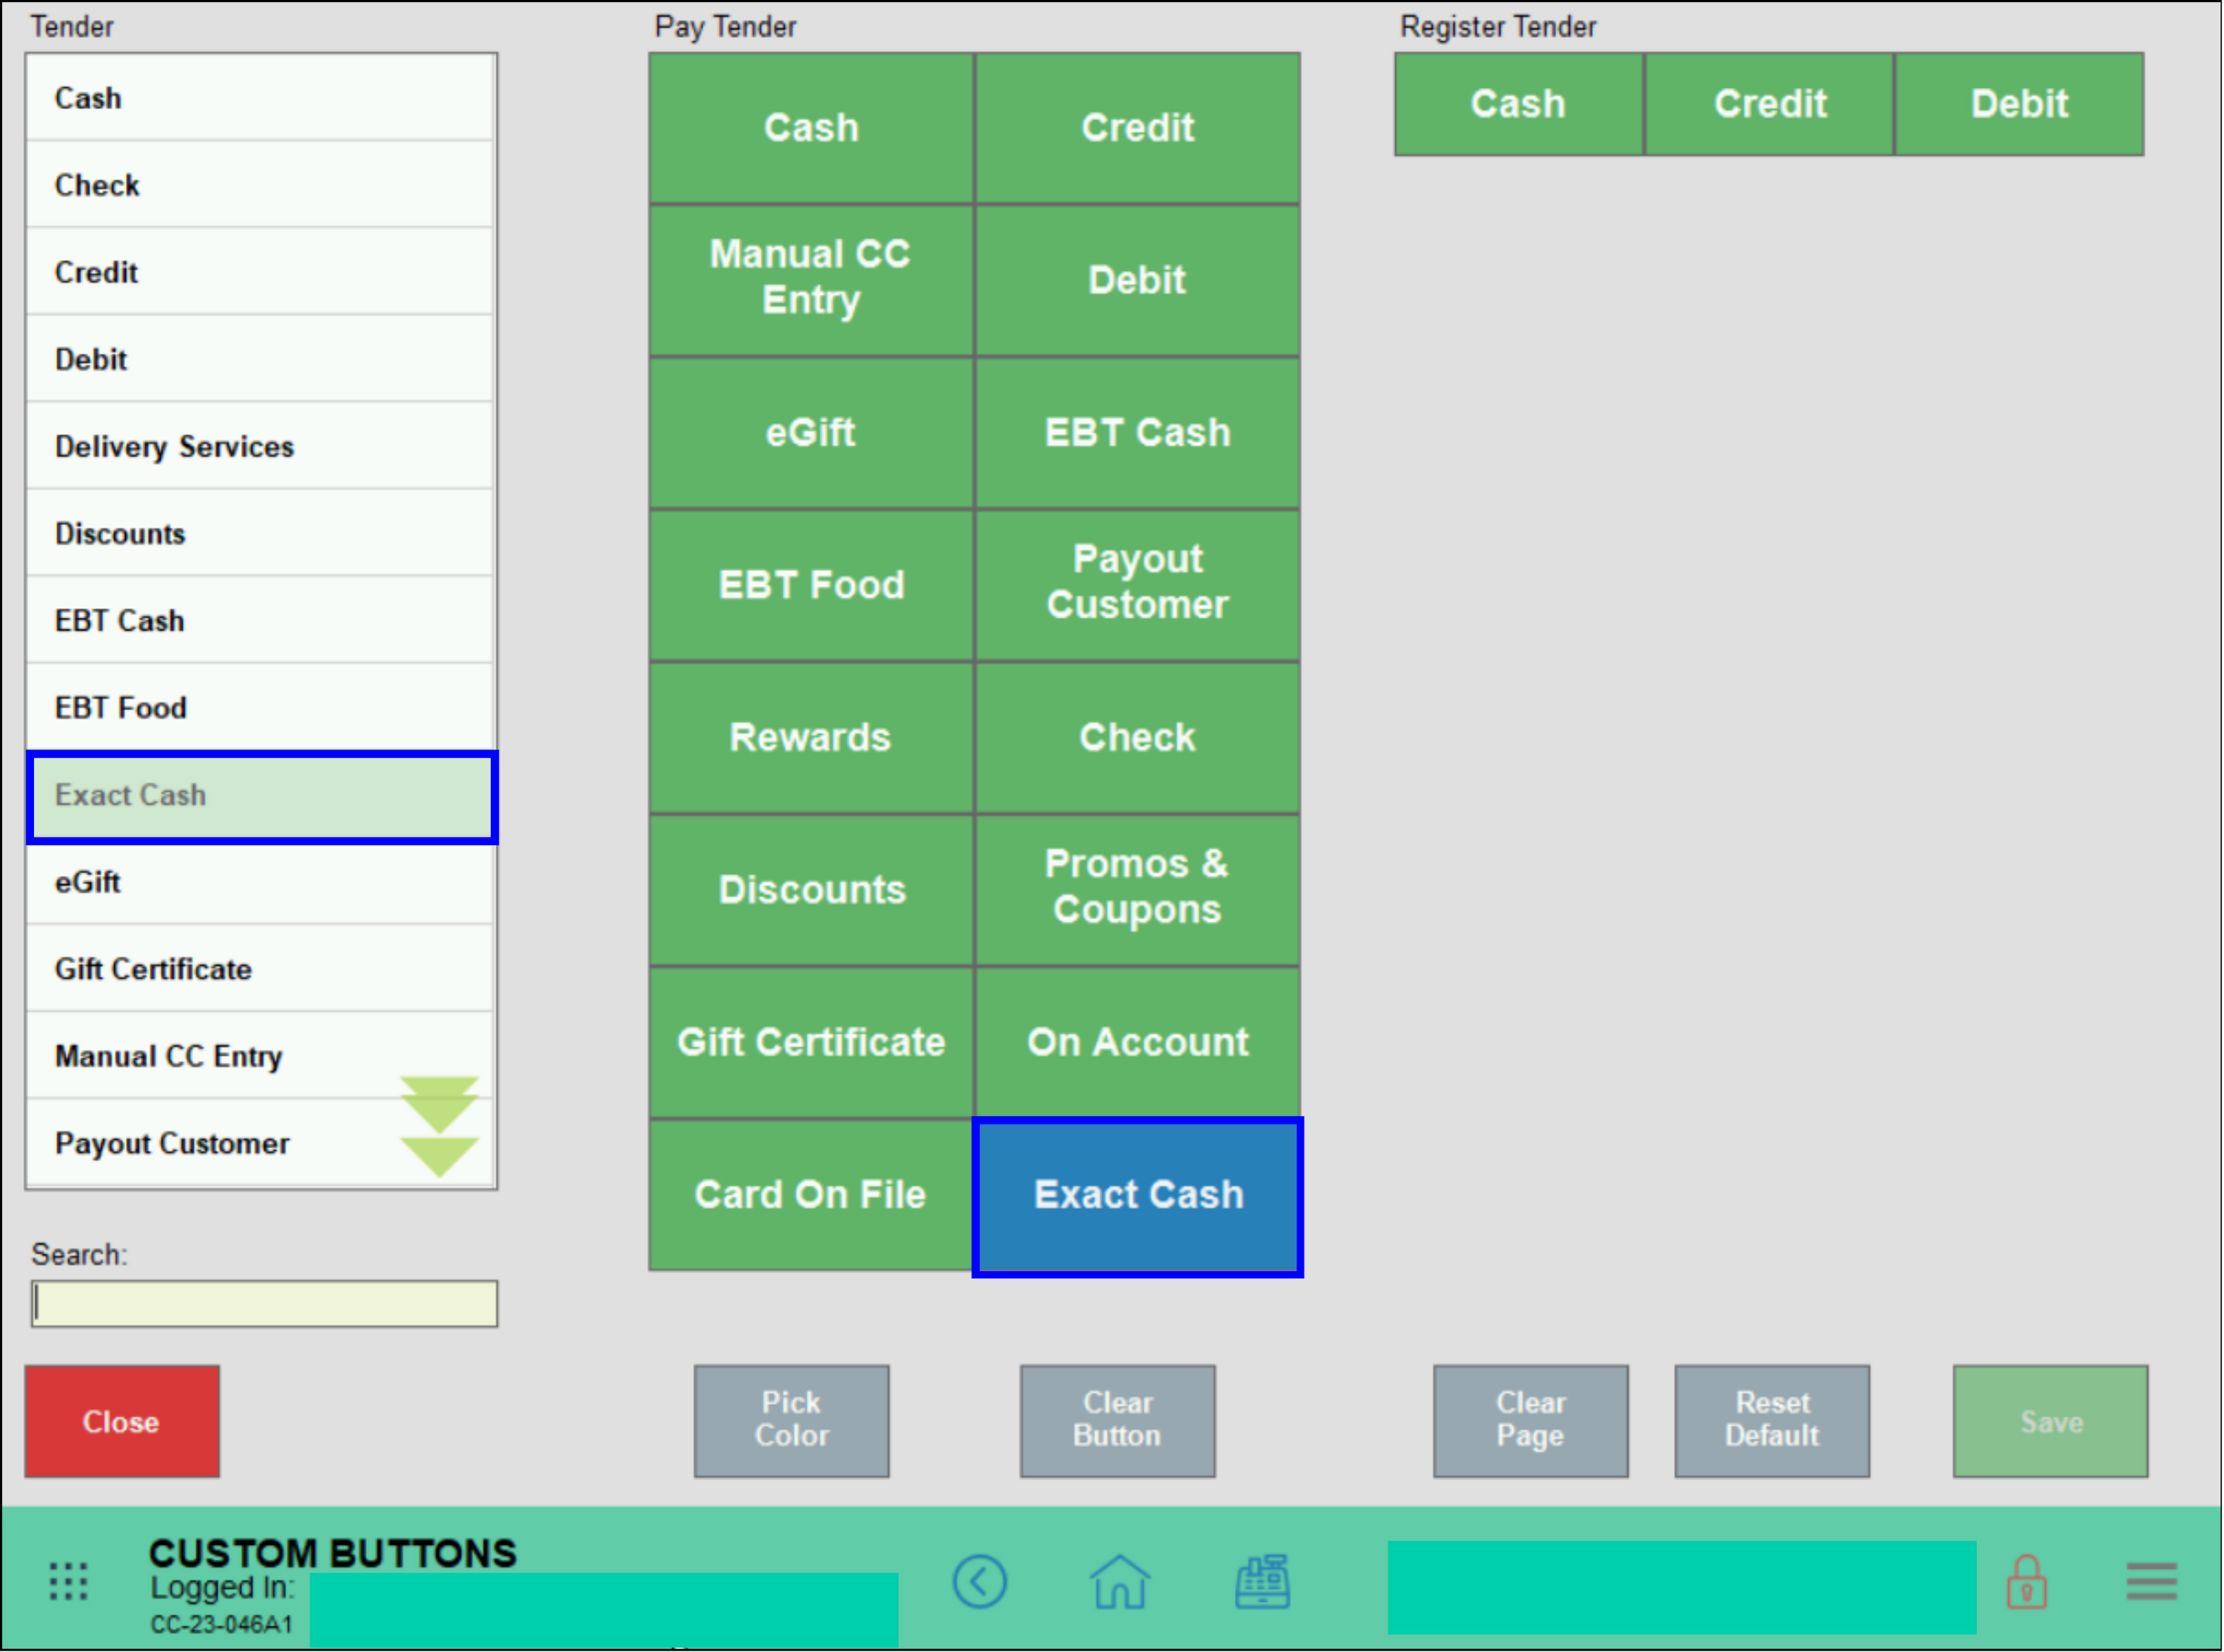
- From Home, tap Settings > Register Preferences.
- Select the Custom Tenders tab.
- Select an empty tile or an existing tile to overwrite.
- Select a tender from the Tender list. The tender automatically populates the selected tile.
- Note: If the selected tender in the Tender list is already in the Payment Tender work area, then a confirmation window will appear. Tap Yes to move the option to the newly selected tile and leave the old tile blank.
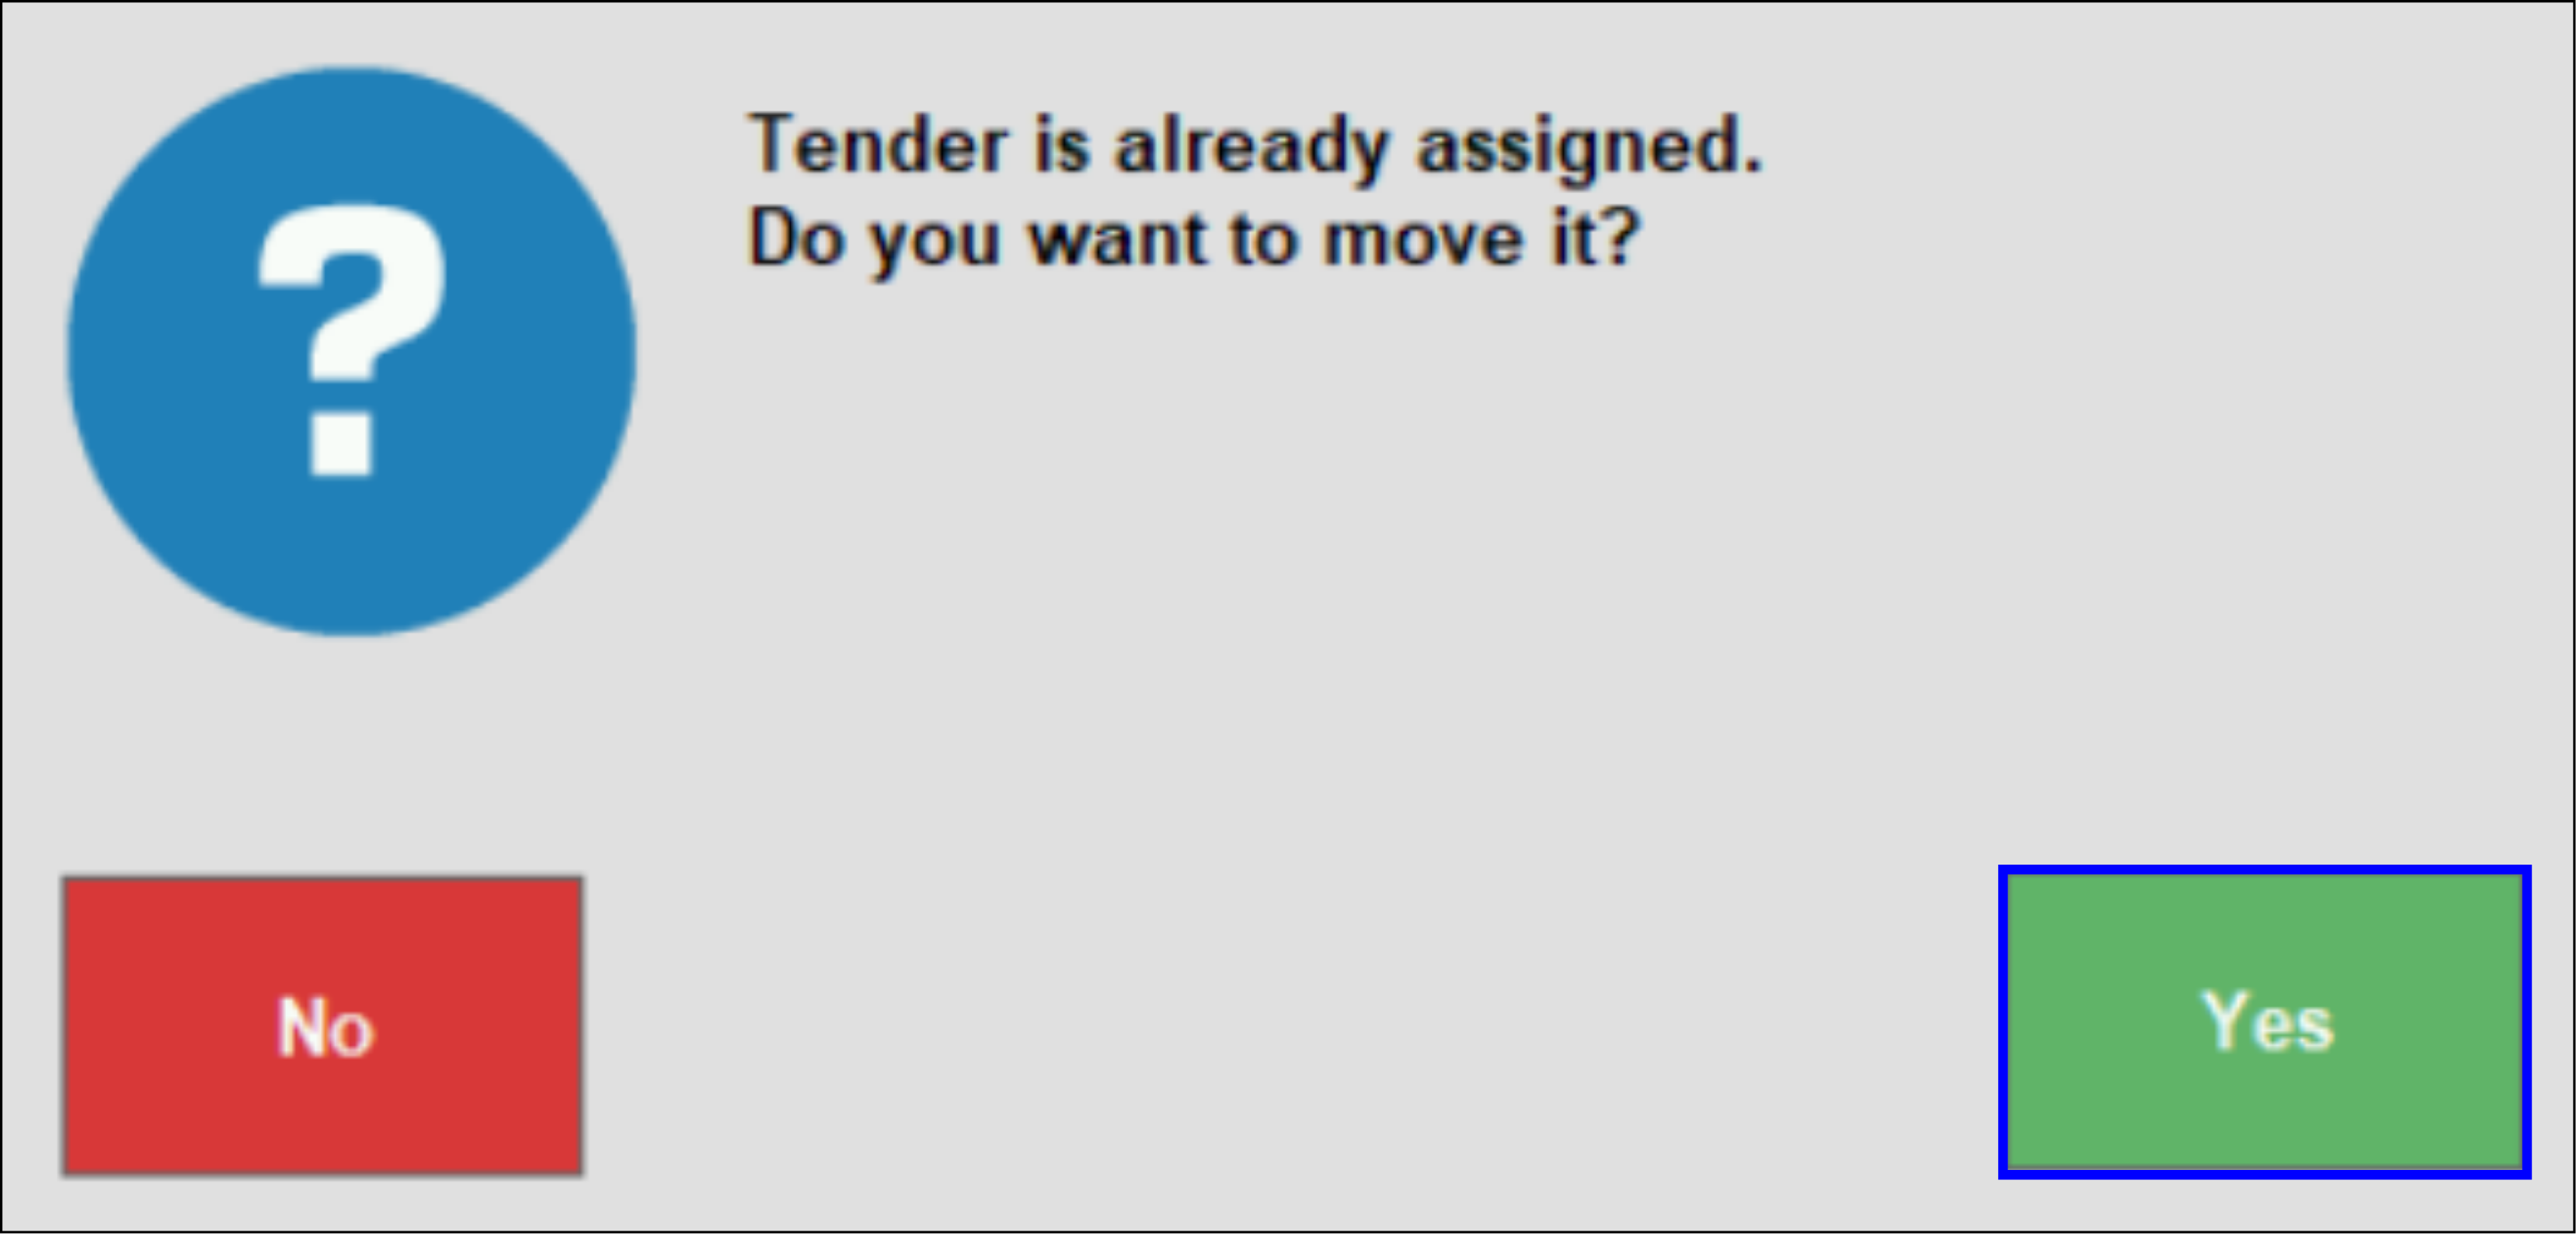
- Tap Save.
- Note: This procedure can also be used to rearrange Tender buttons.
![]()
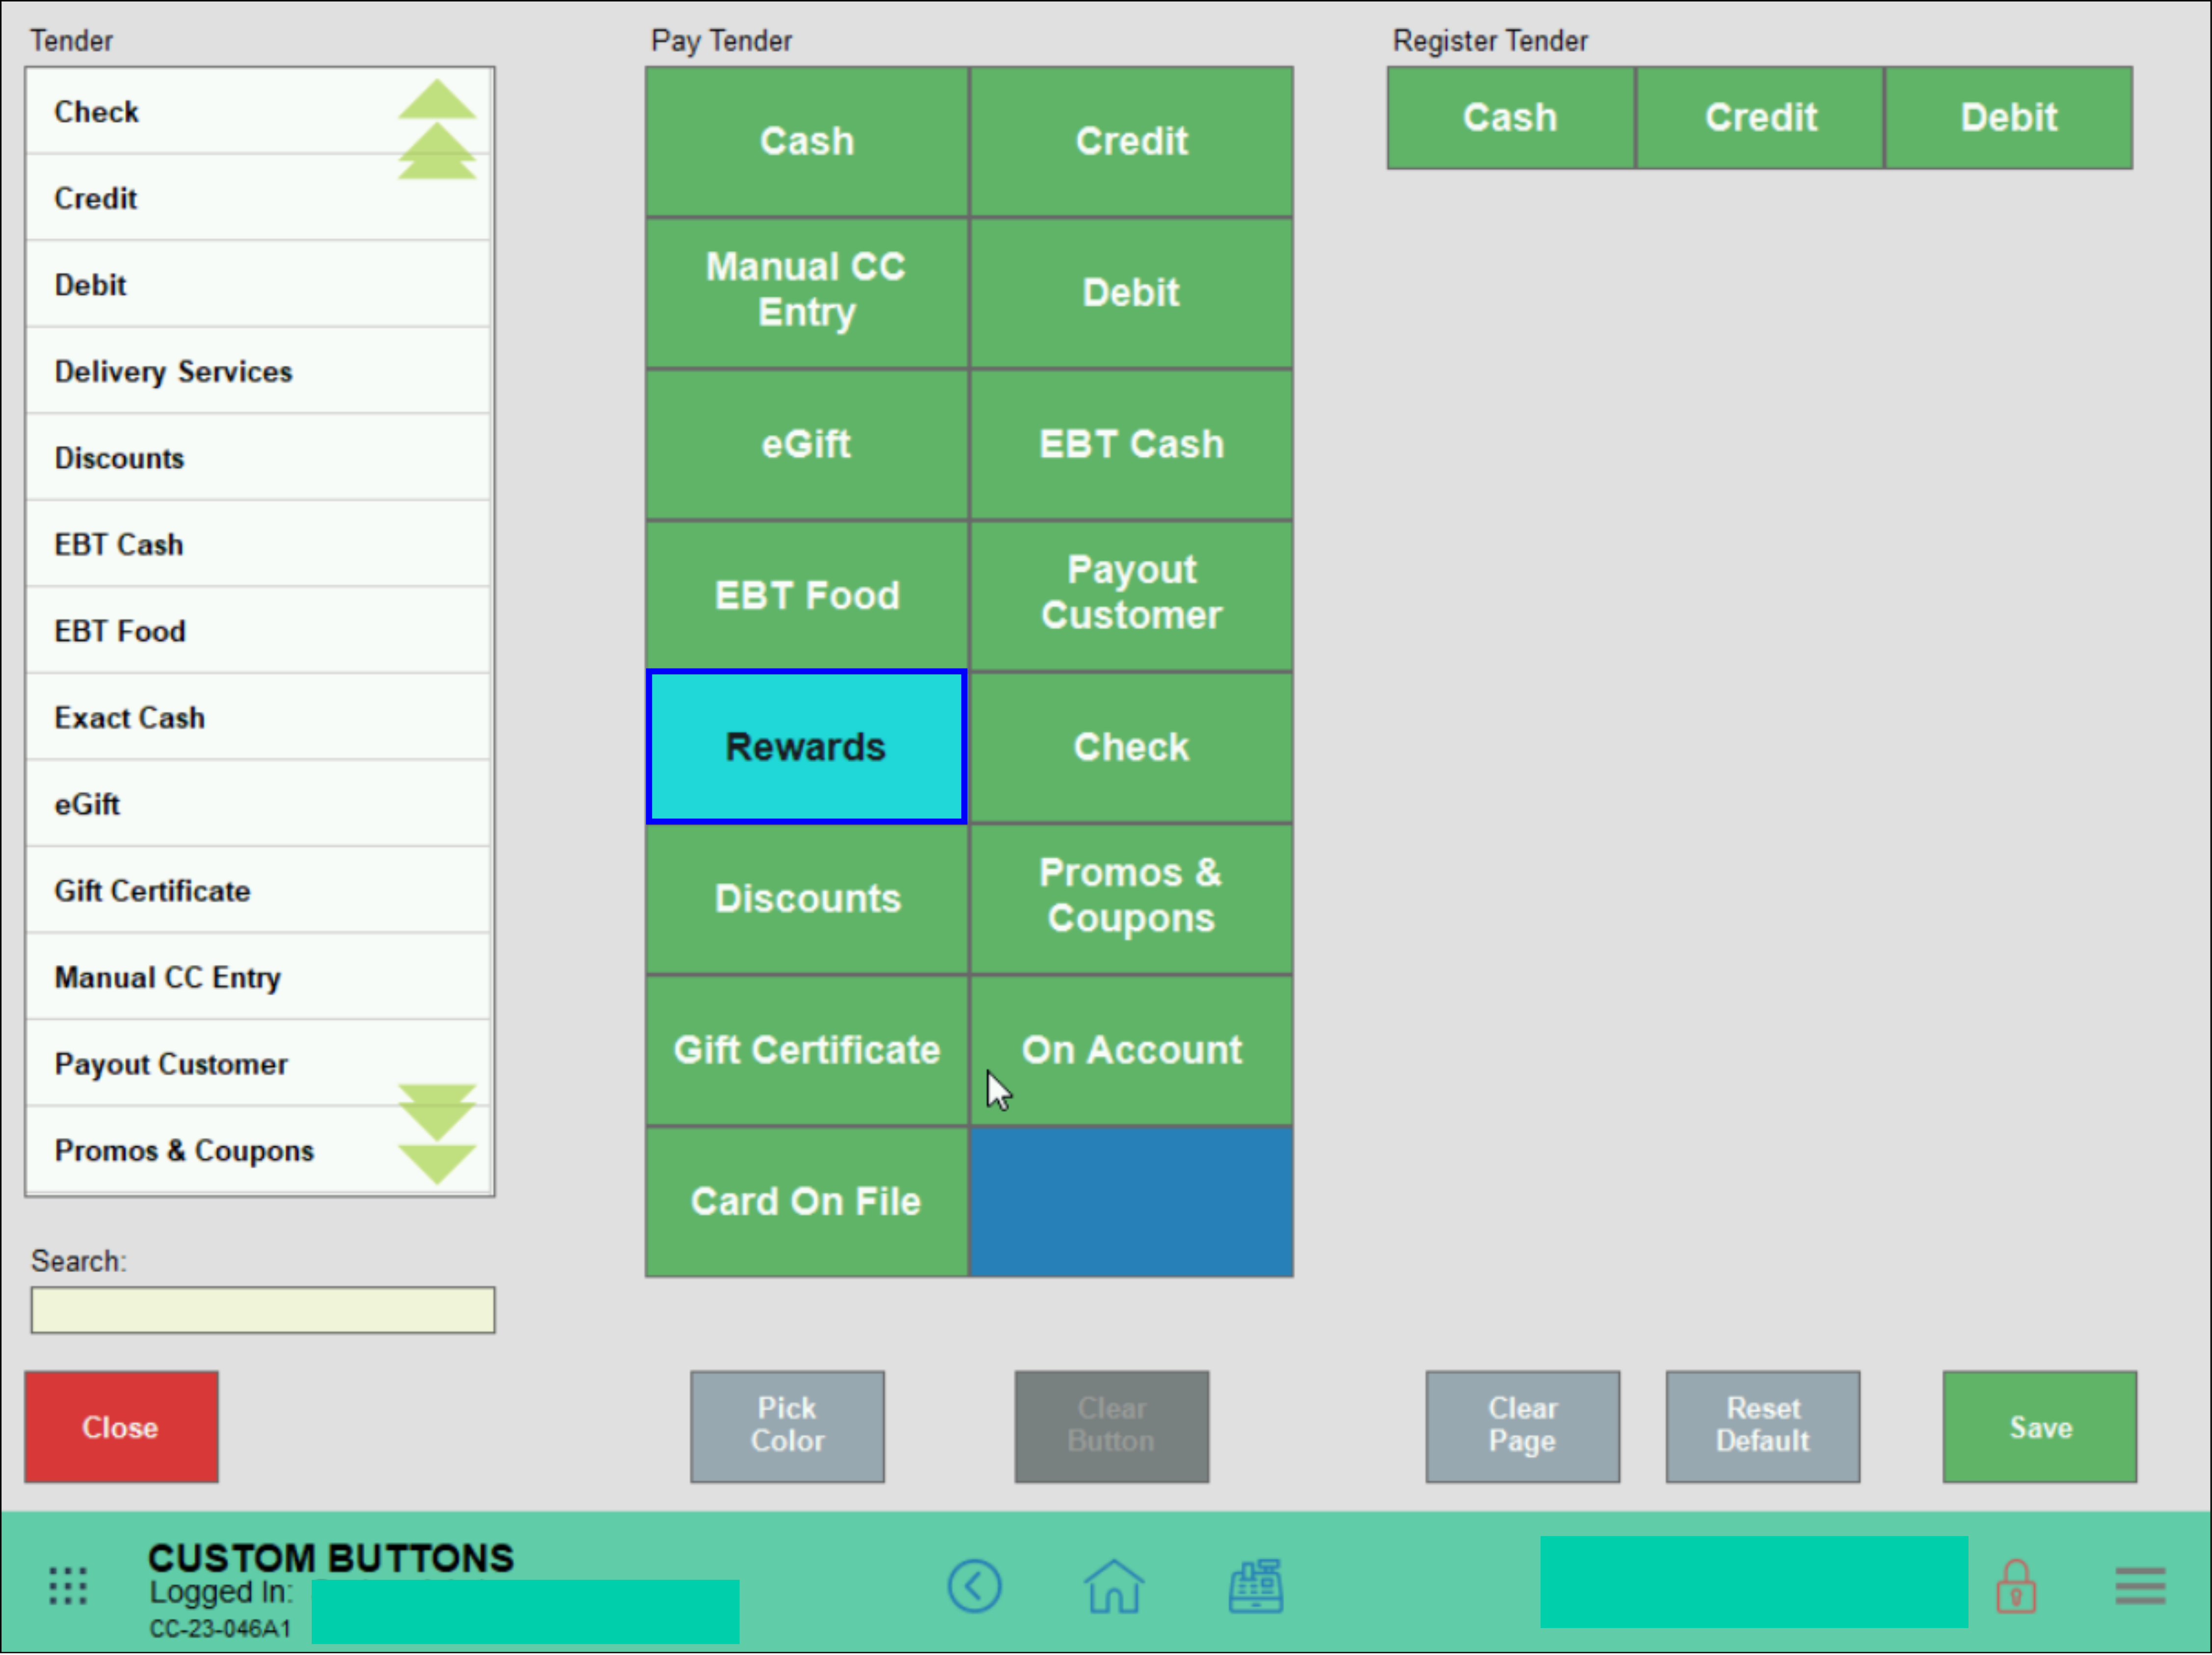
- From Home, tap Settings > Register Preferences.
- Select the Custom Tenders tab.
- Select the tender to be removed, then tap Clear Button.
- Tap Save.
![]()
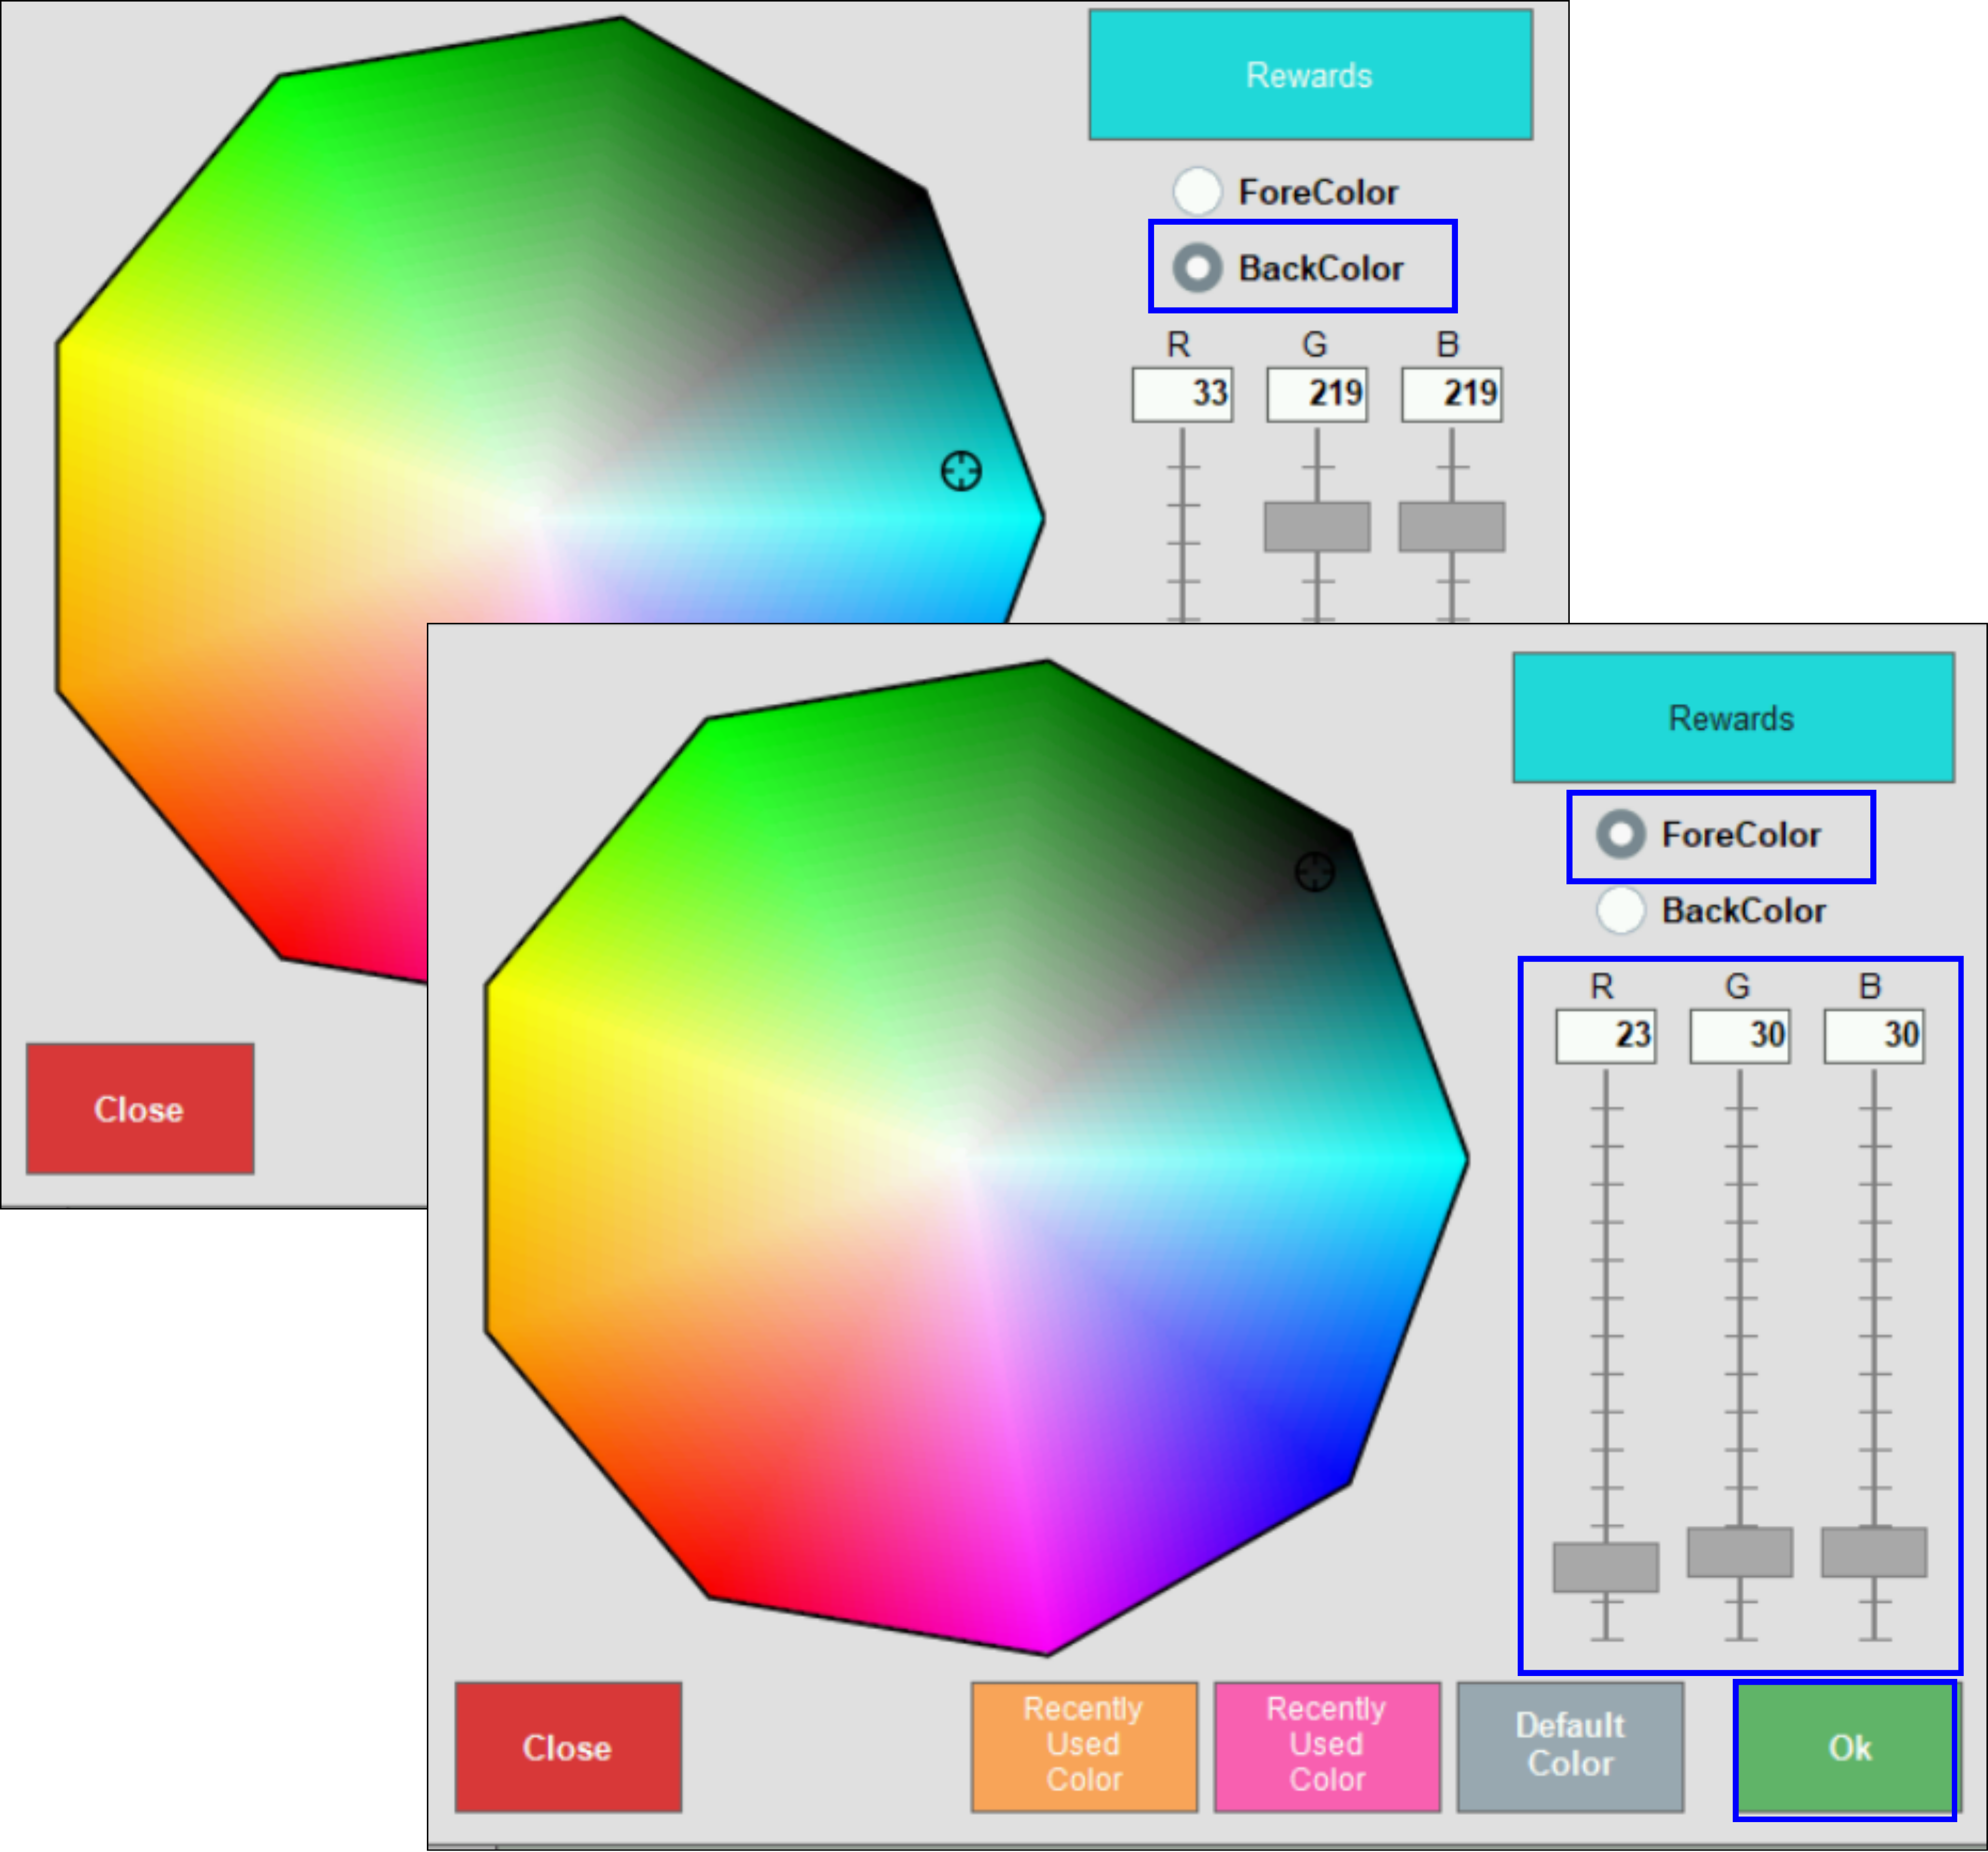
- From Home, tap Settings > Register Preferences.
- Select the Custom Tenders tab.
- Select the tile you want to change, then tap Pick Color.
- Choose the desired ForeColor and BackColor, then tap Ok.
- Tap Save.
How can we improve this information for you?
Registered internal users can comment. Merchants, have a suggestion? Tell us more.