Once a modifier is created and defined, the modifier (aka mod) can be added to an item.
MODs can be added to a category of items, to a single item, or to all items.
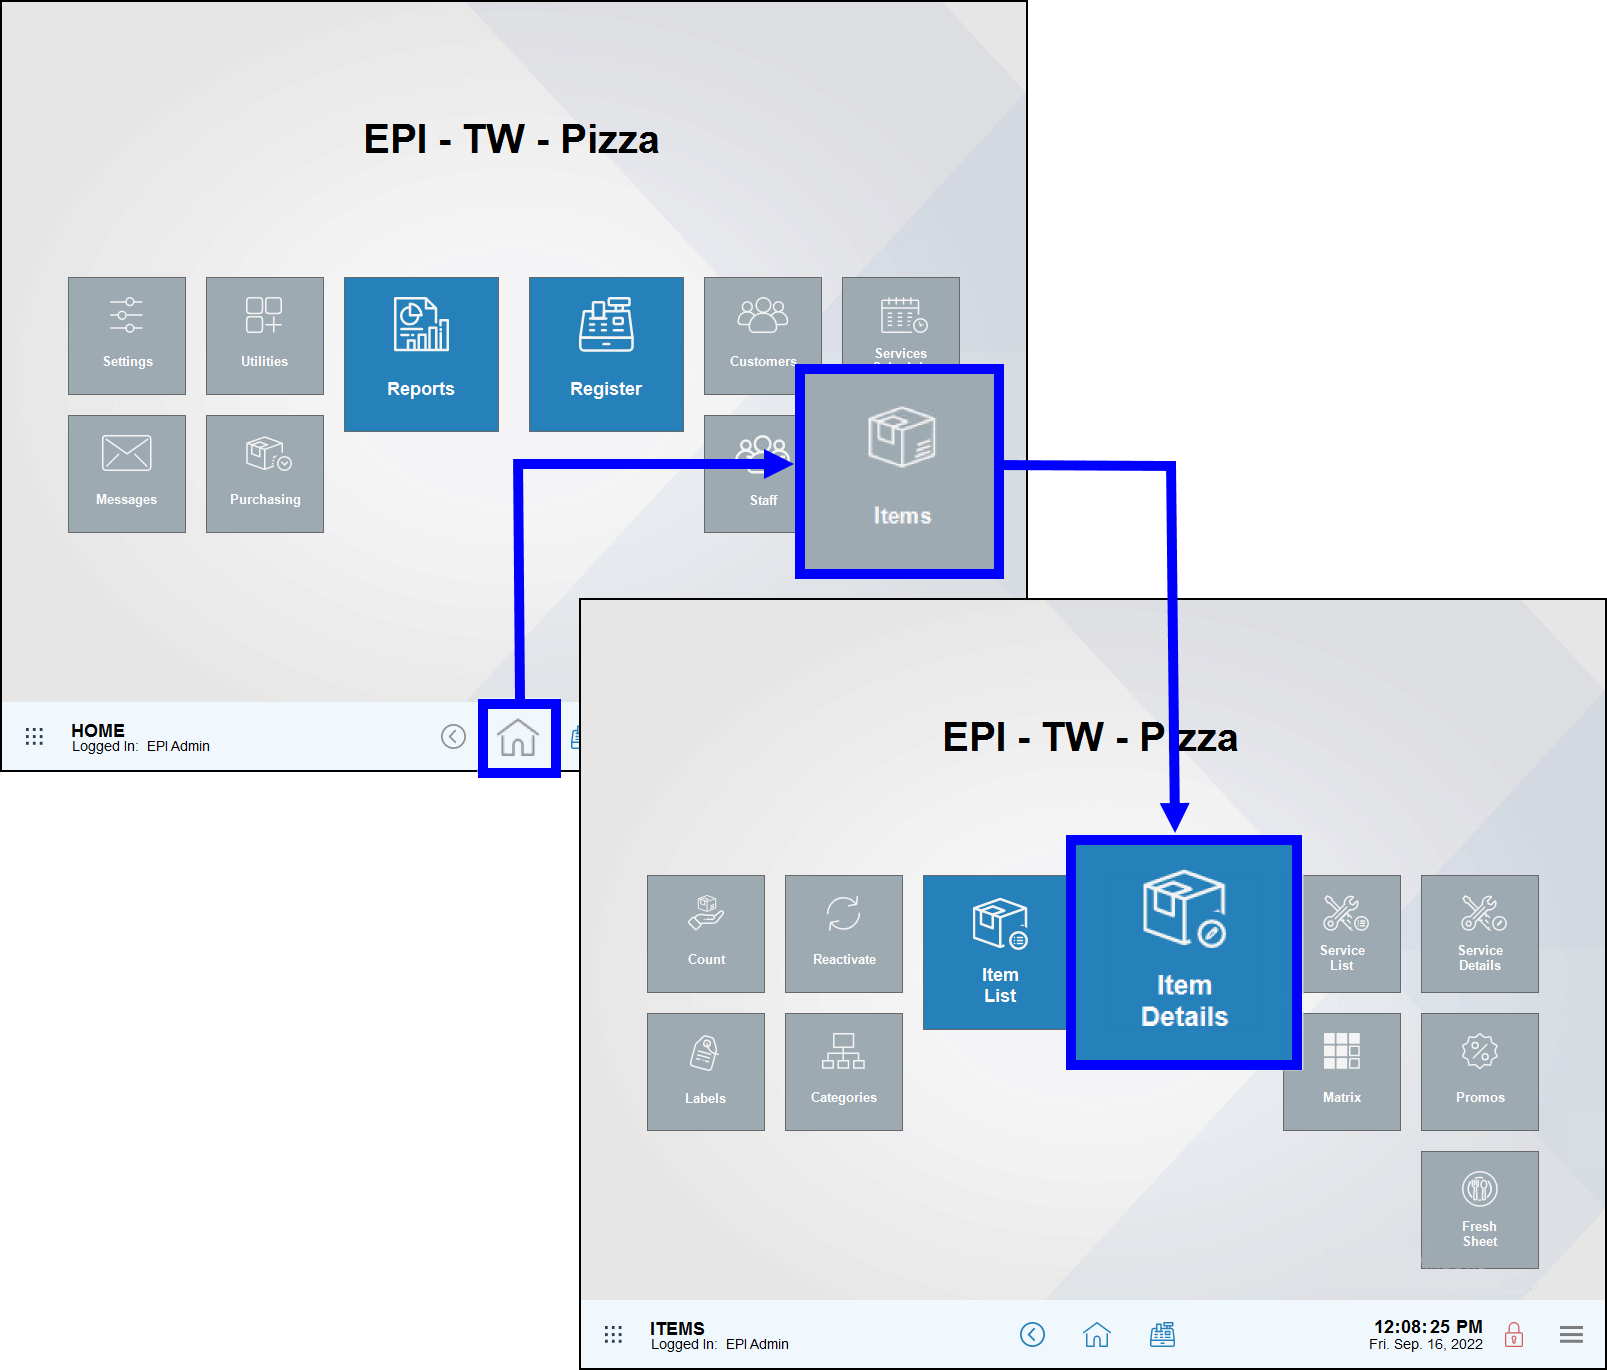
- From Home, navigate to Items > Item Details.
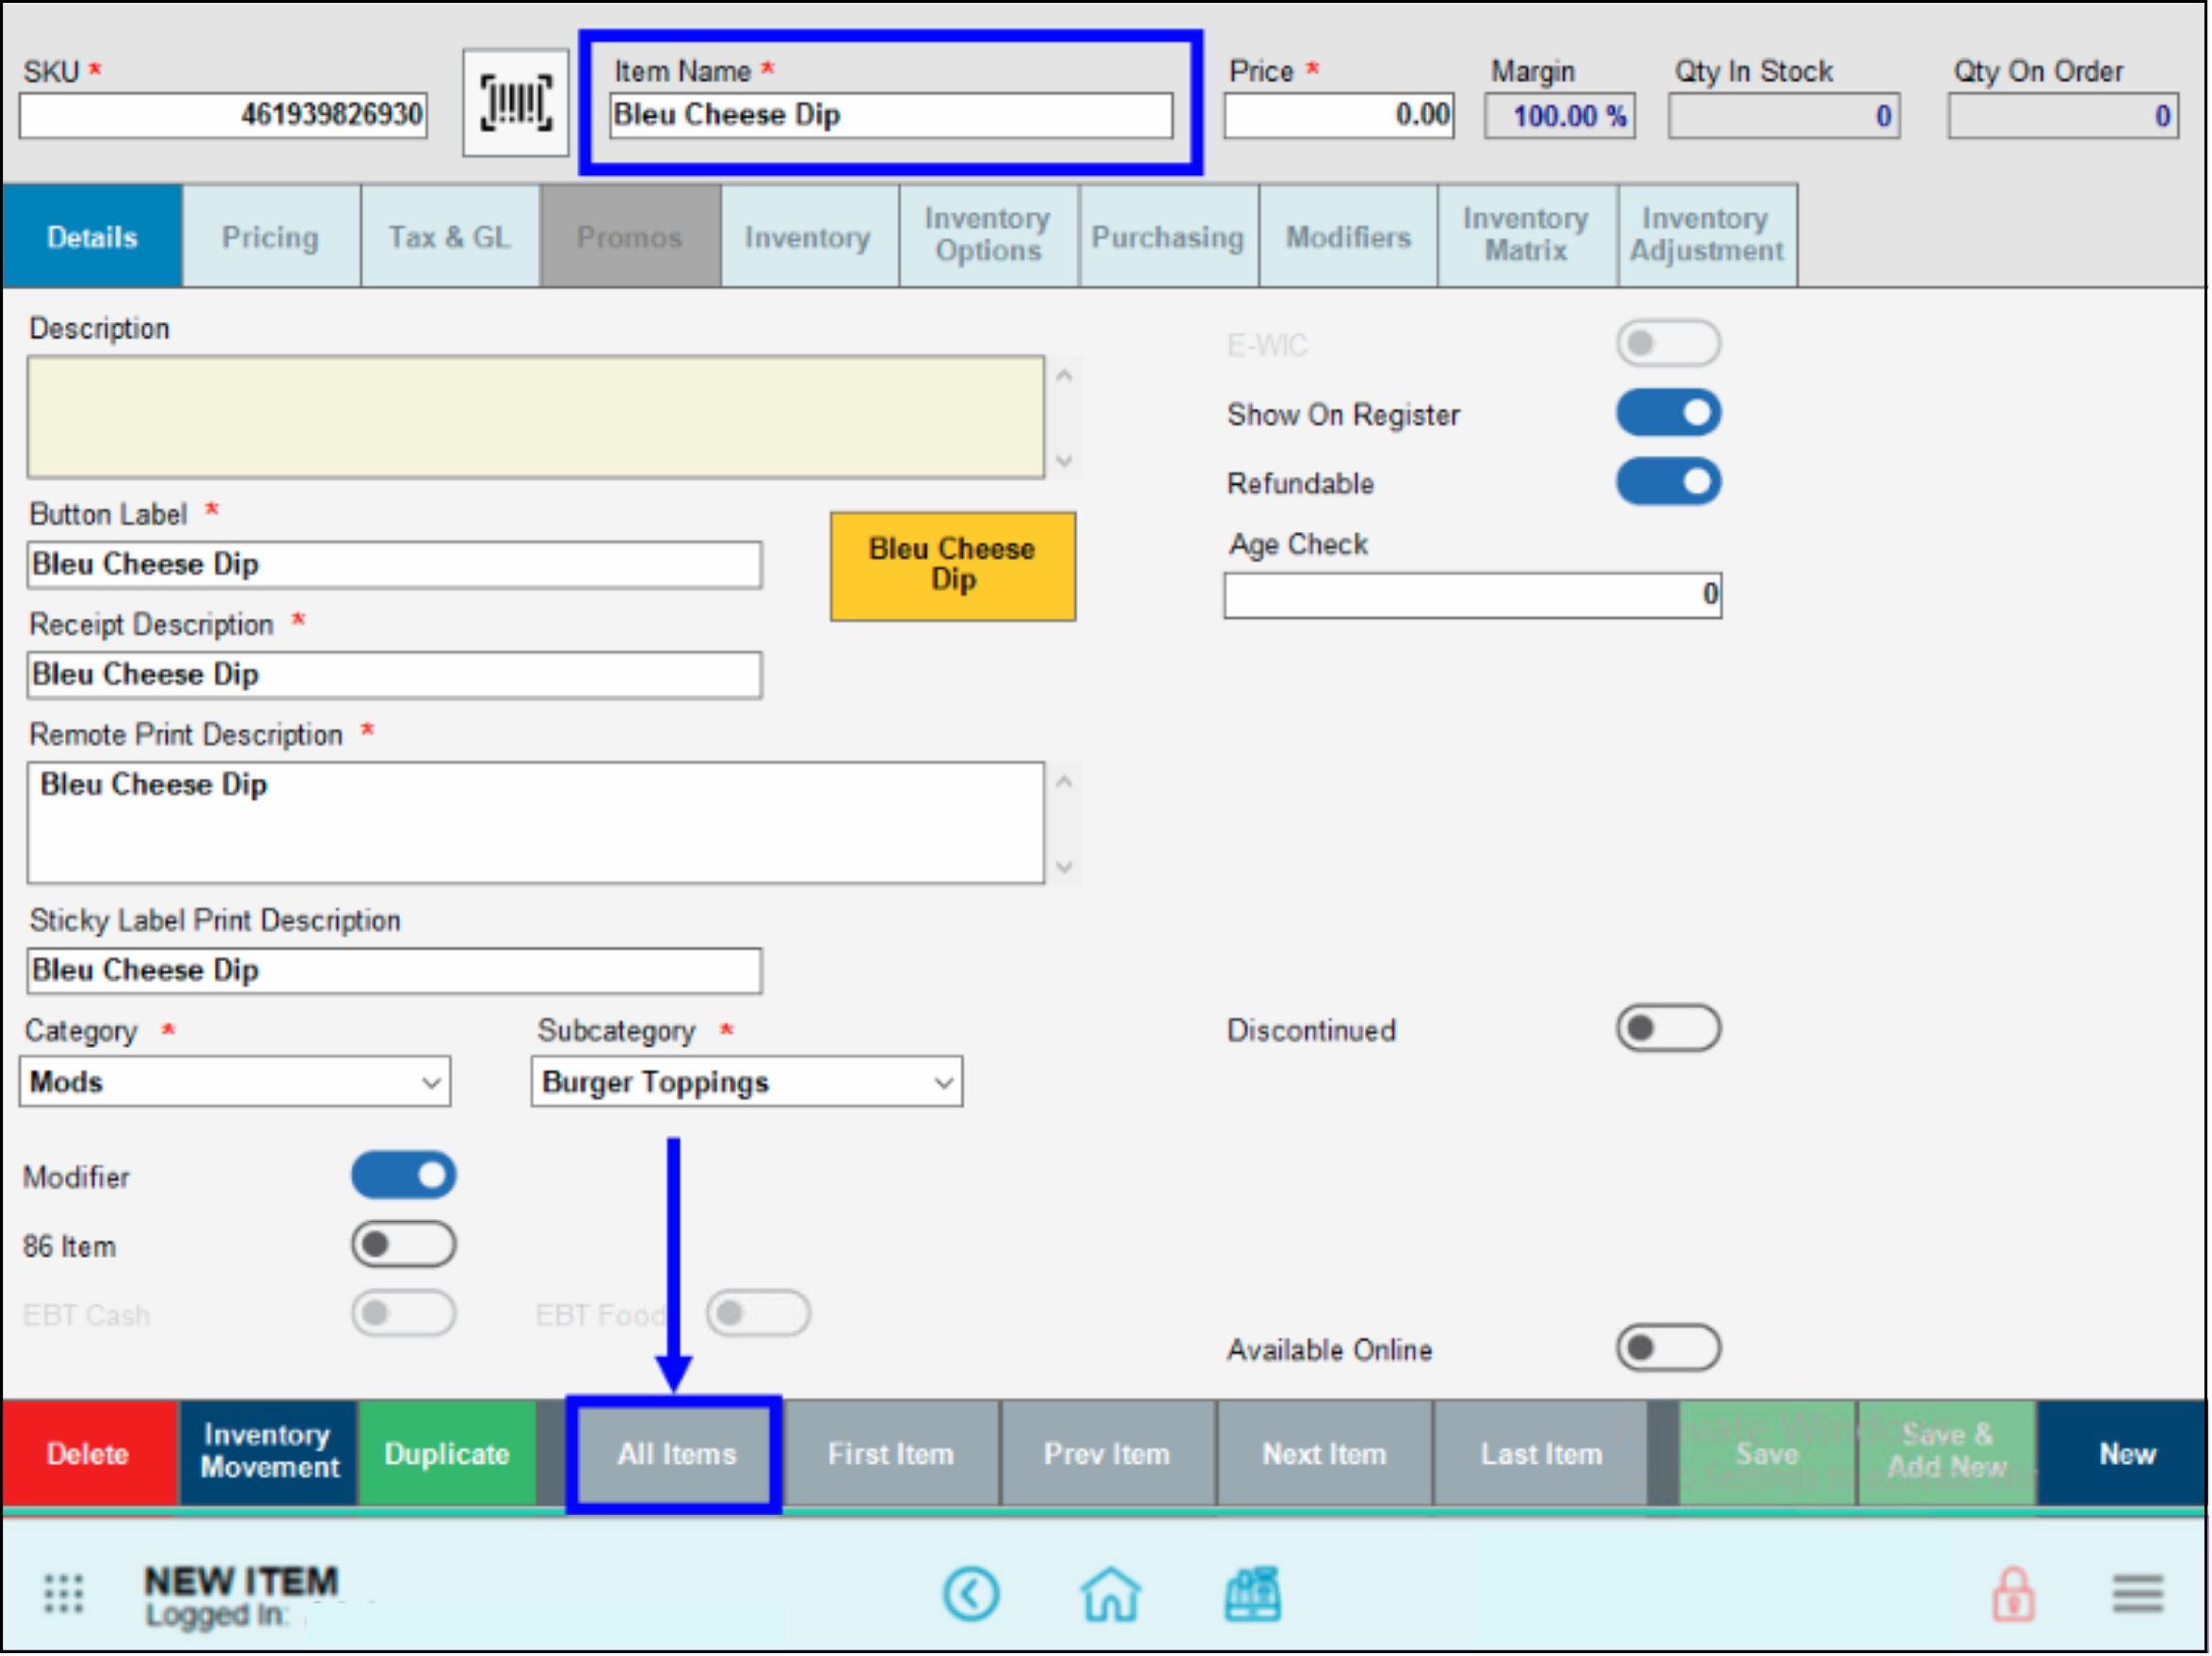
- Tap the Details tab.
- Verify that the correct record displays. If not, tap All Items to find another item. See: Find an Item
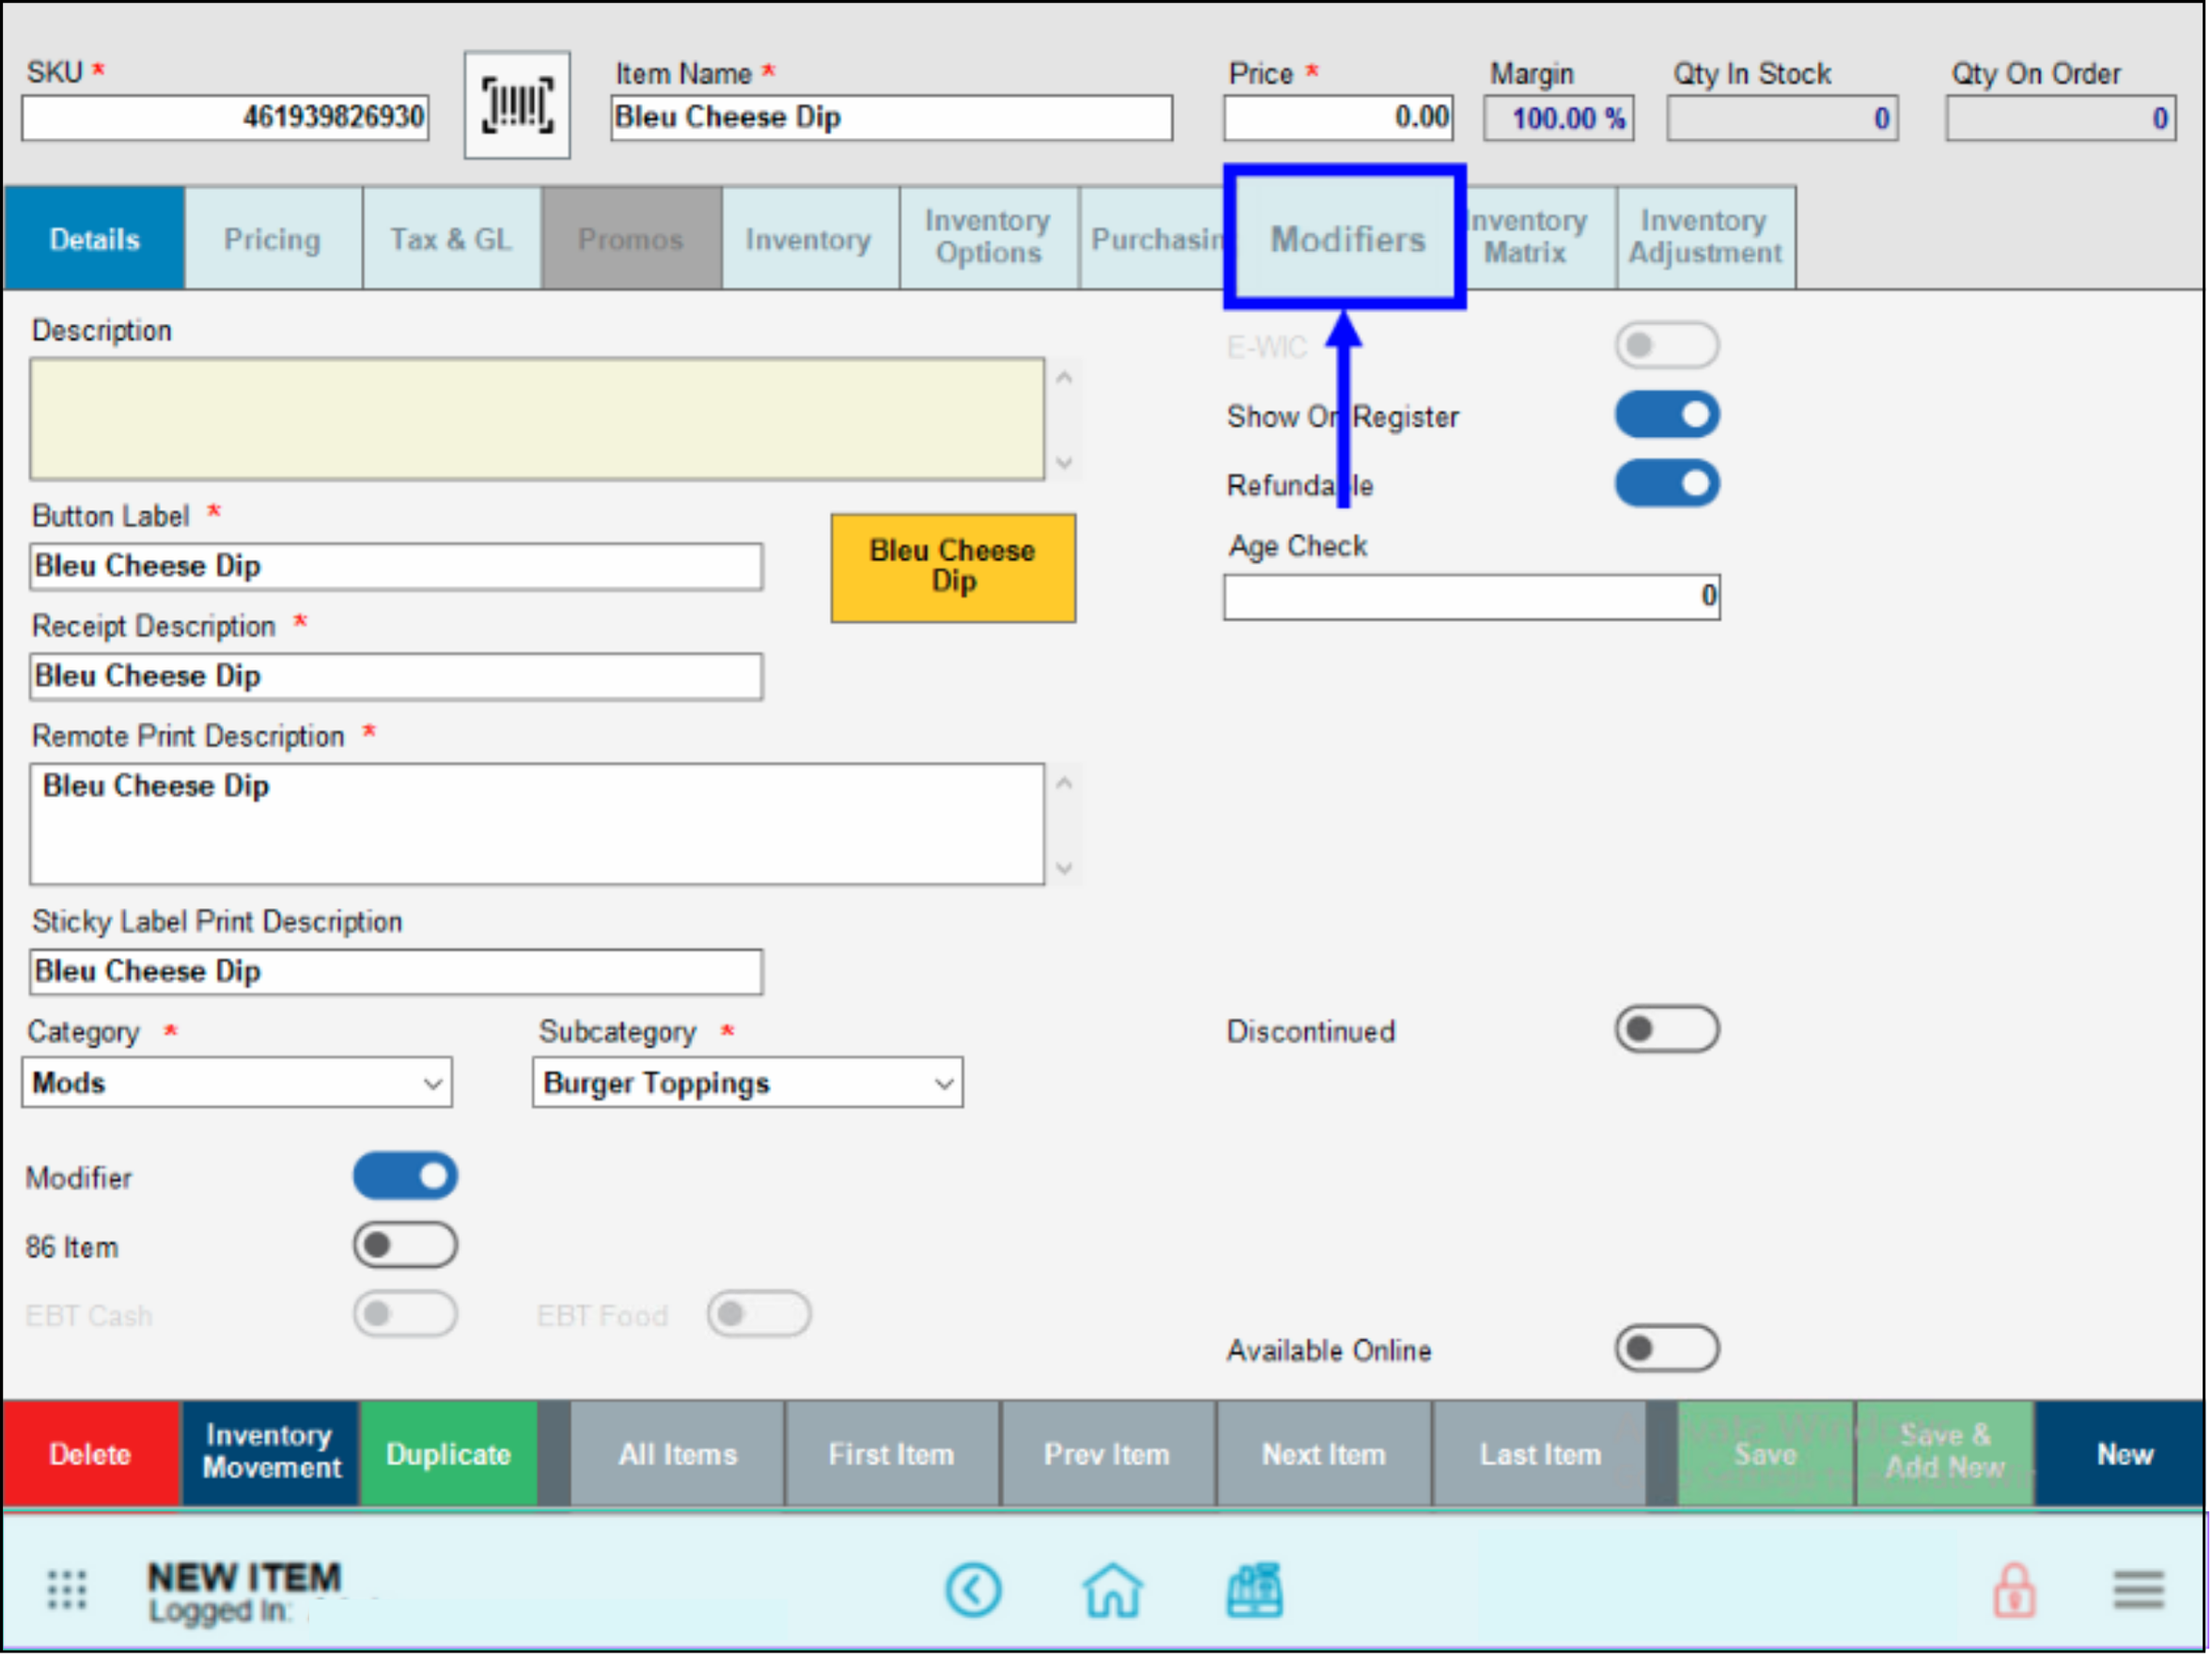
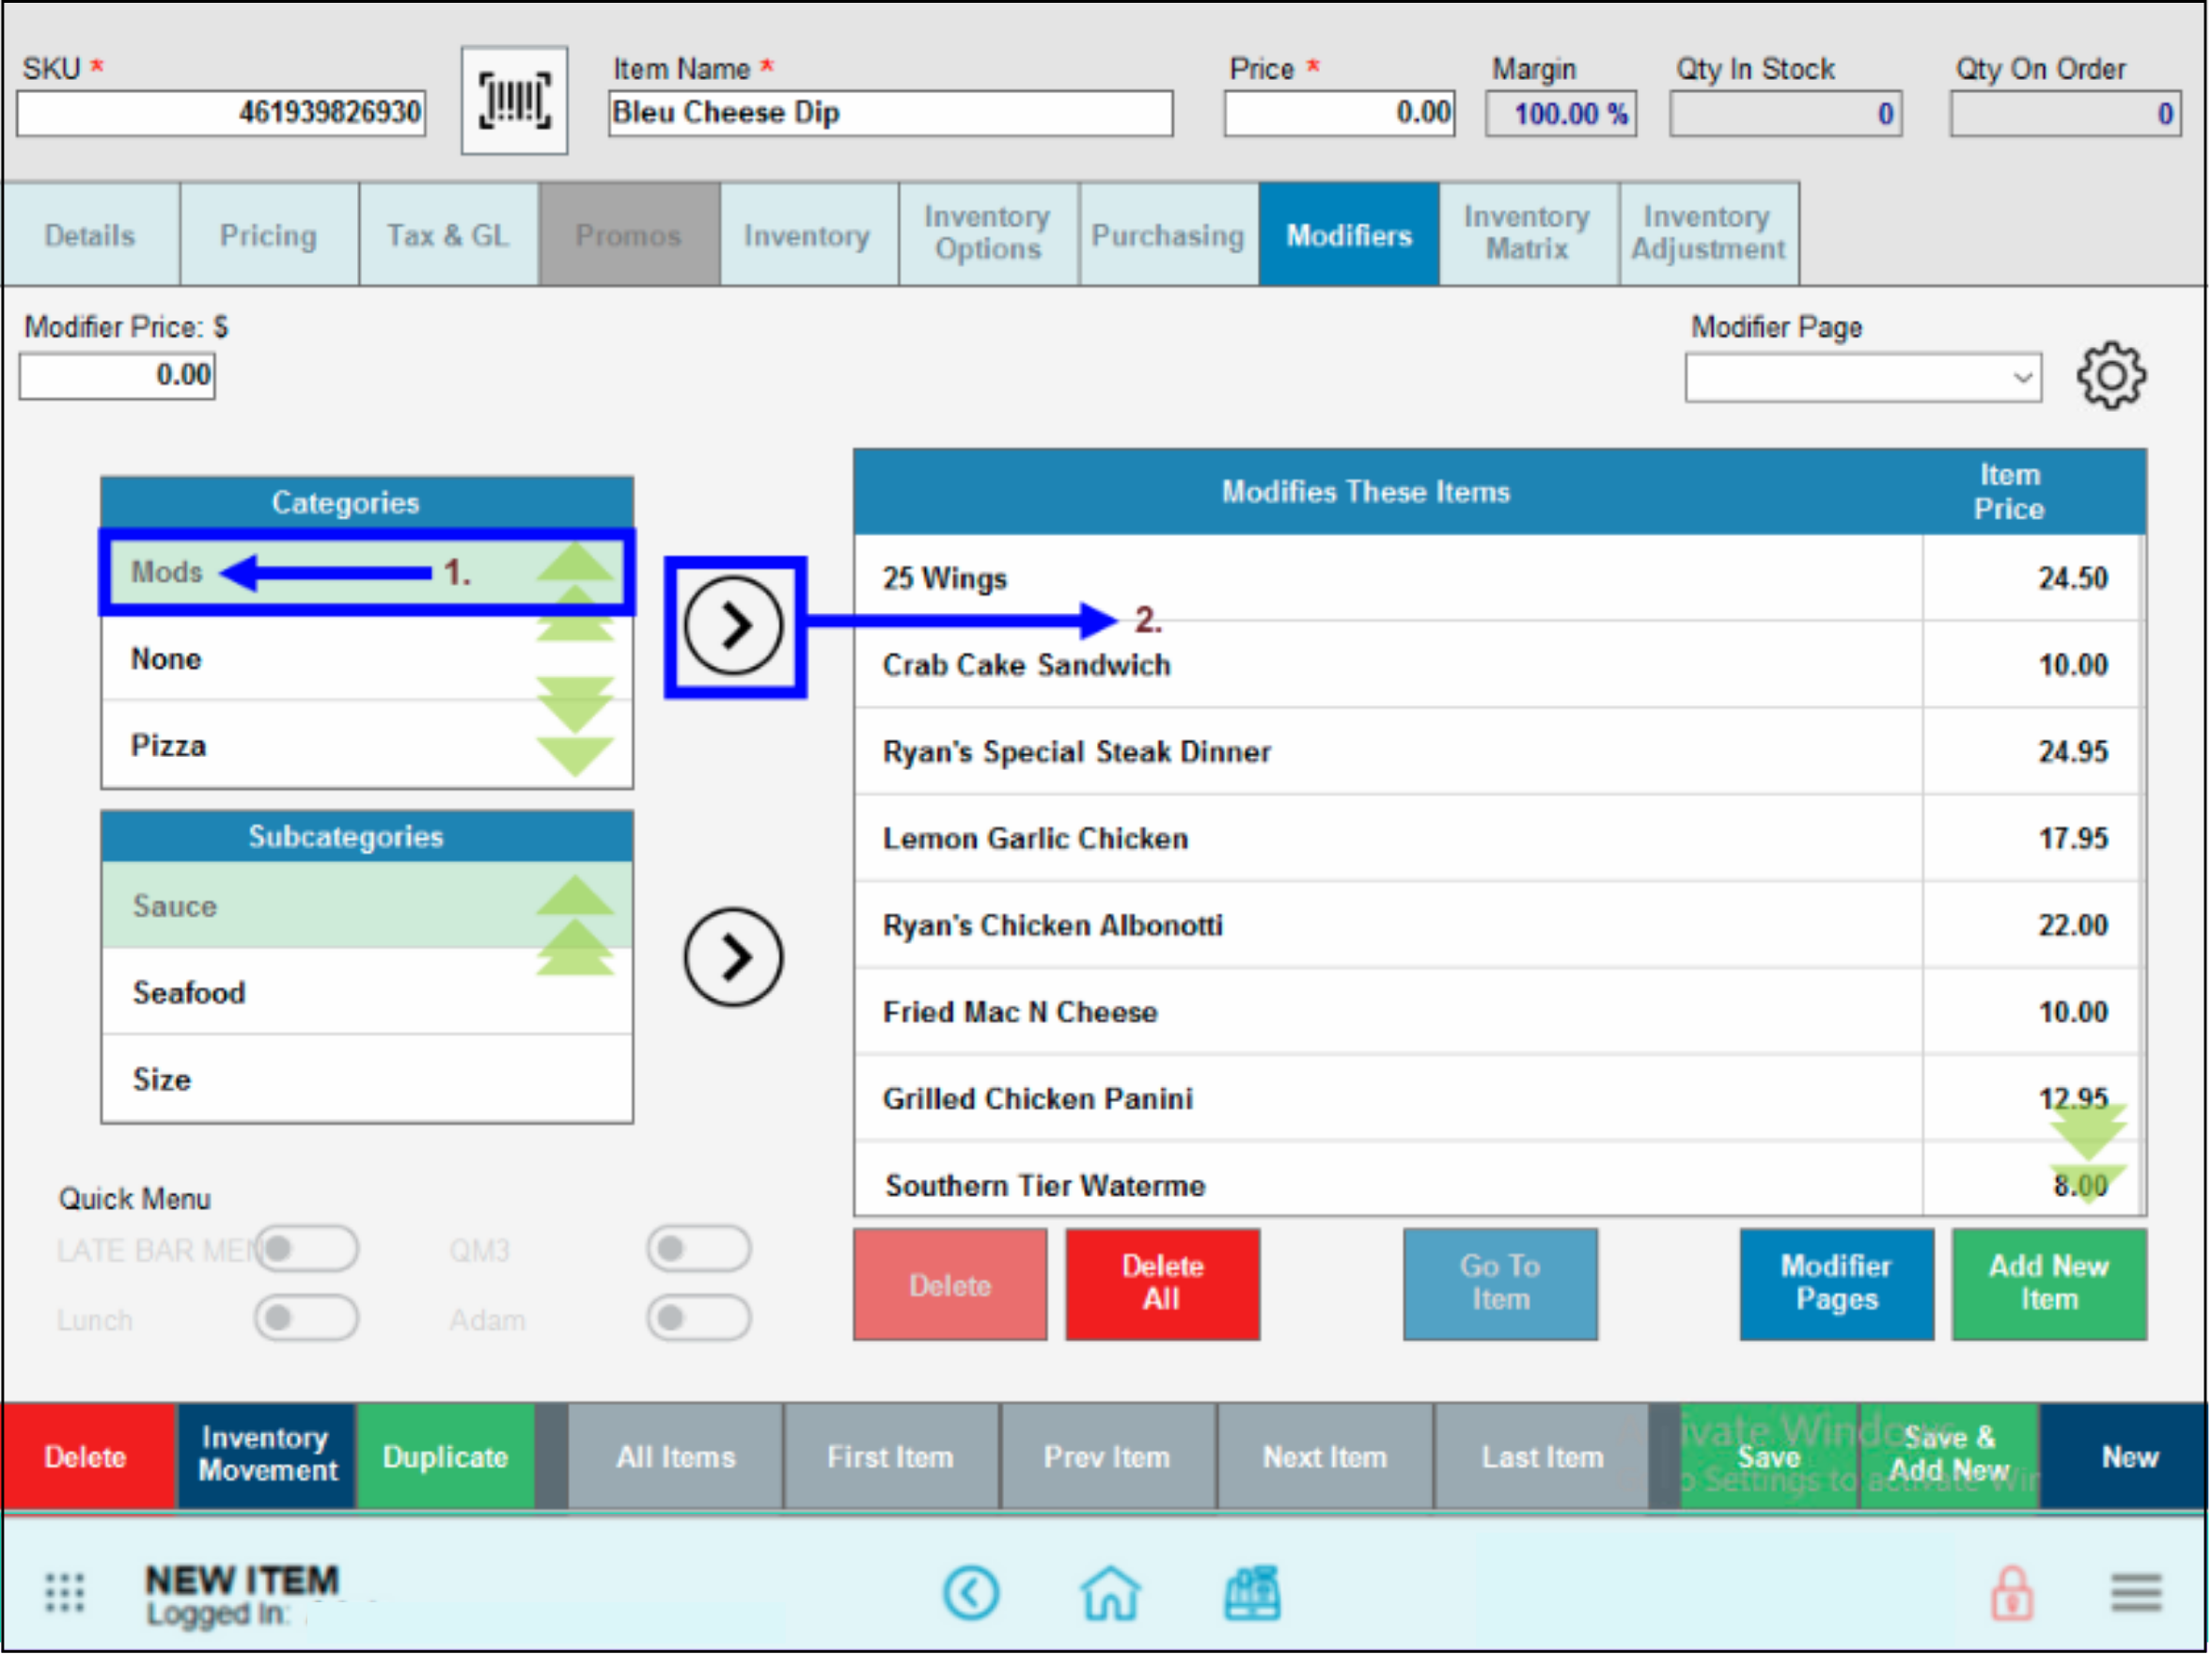
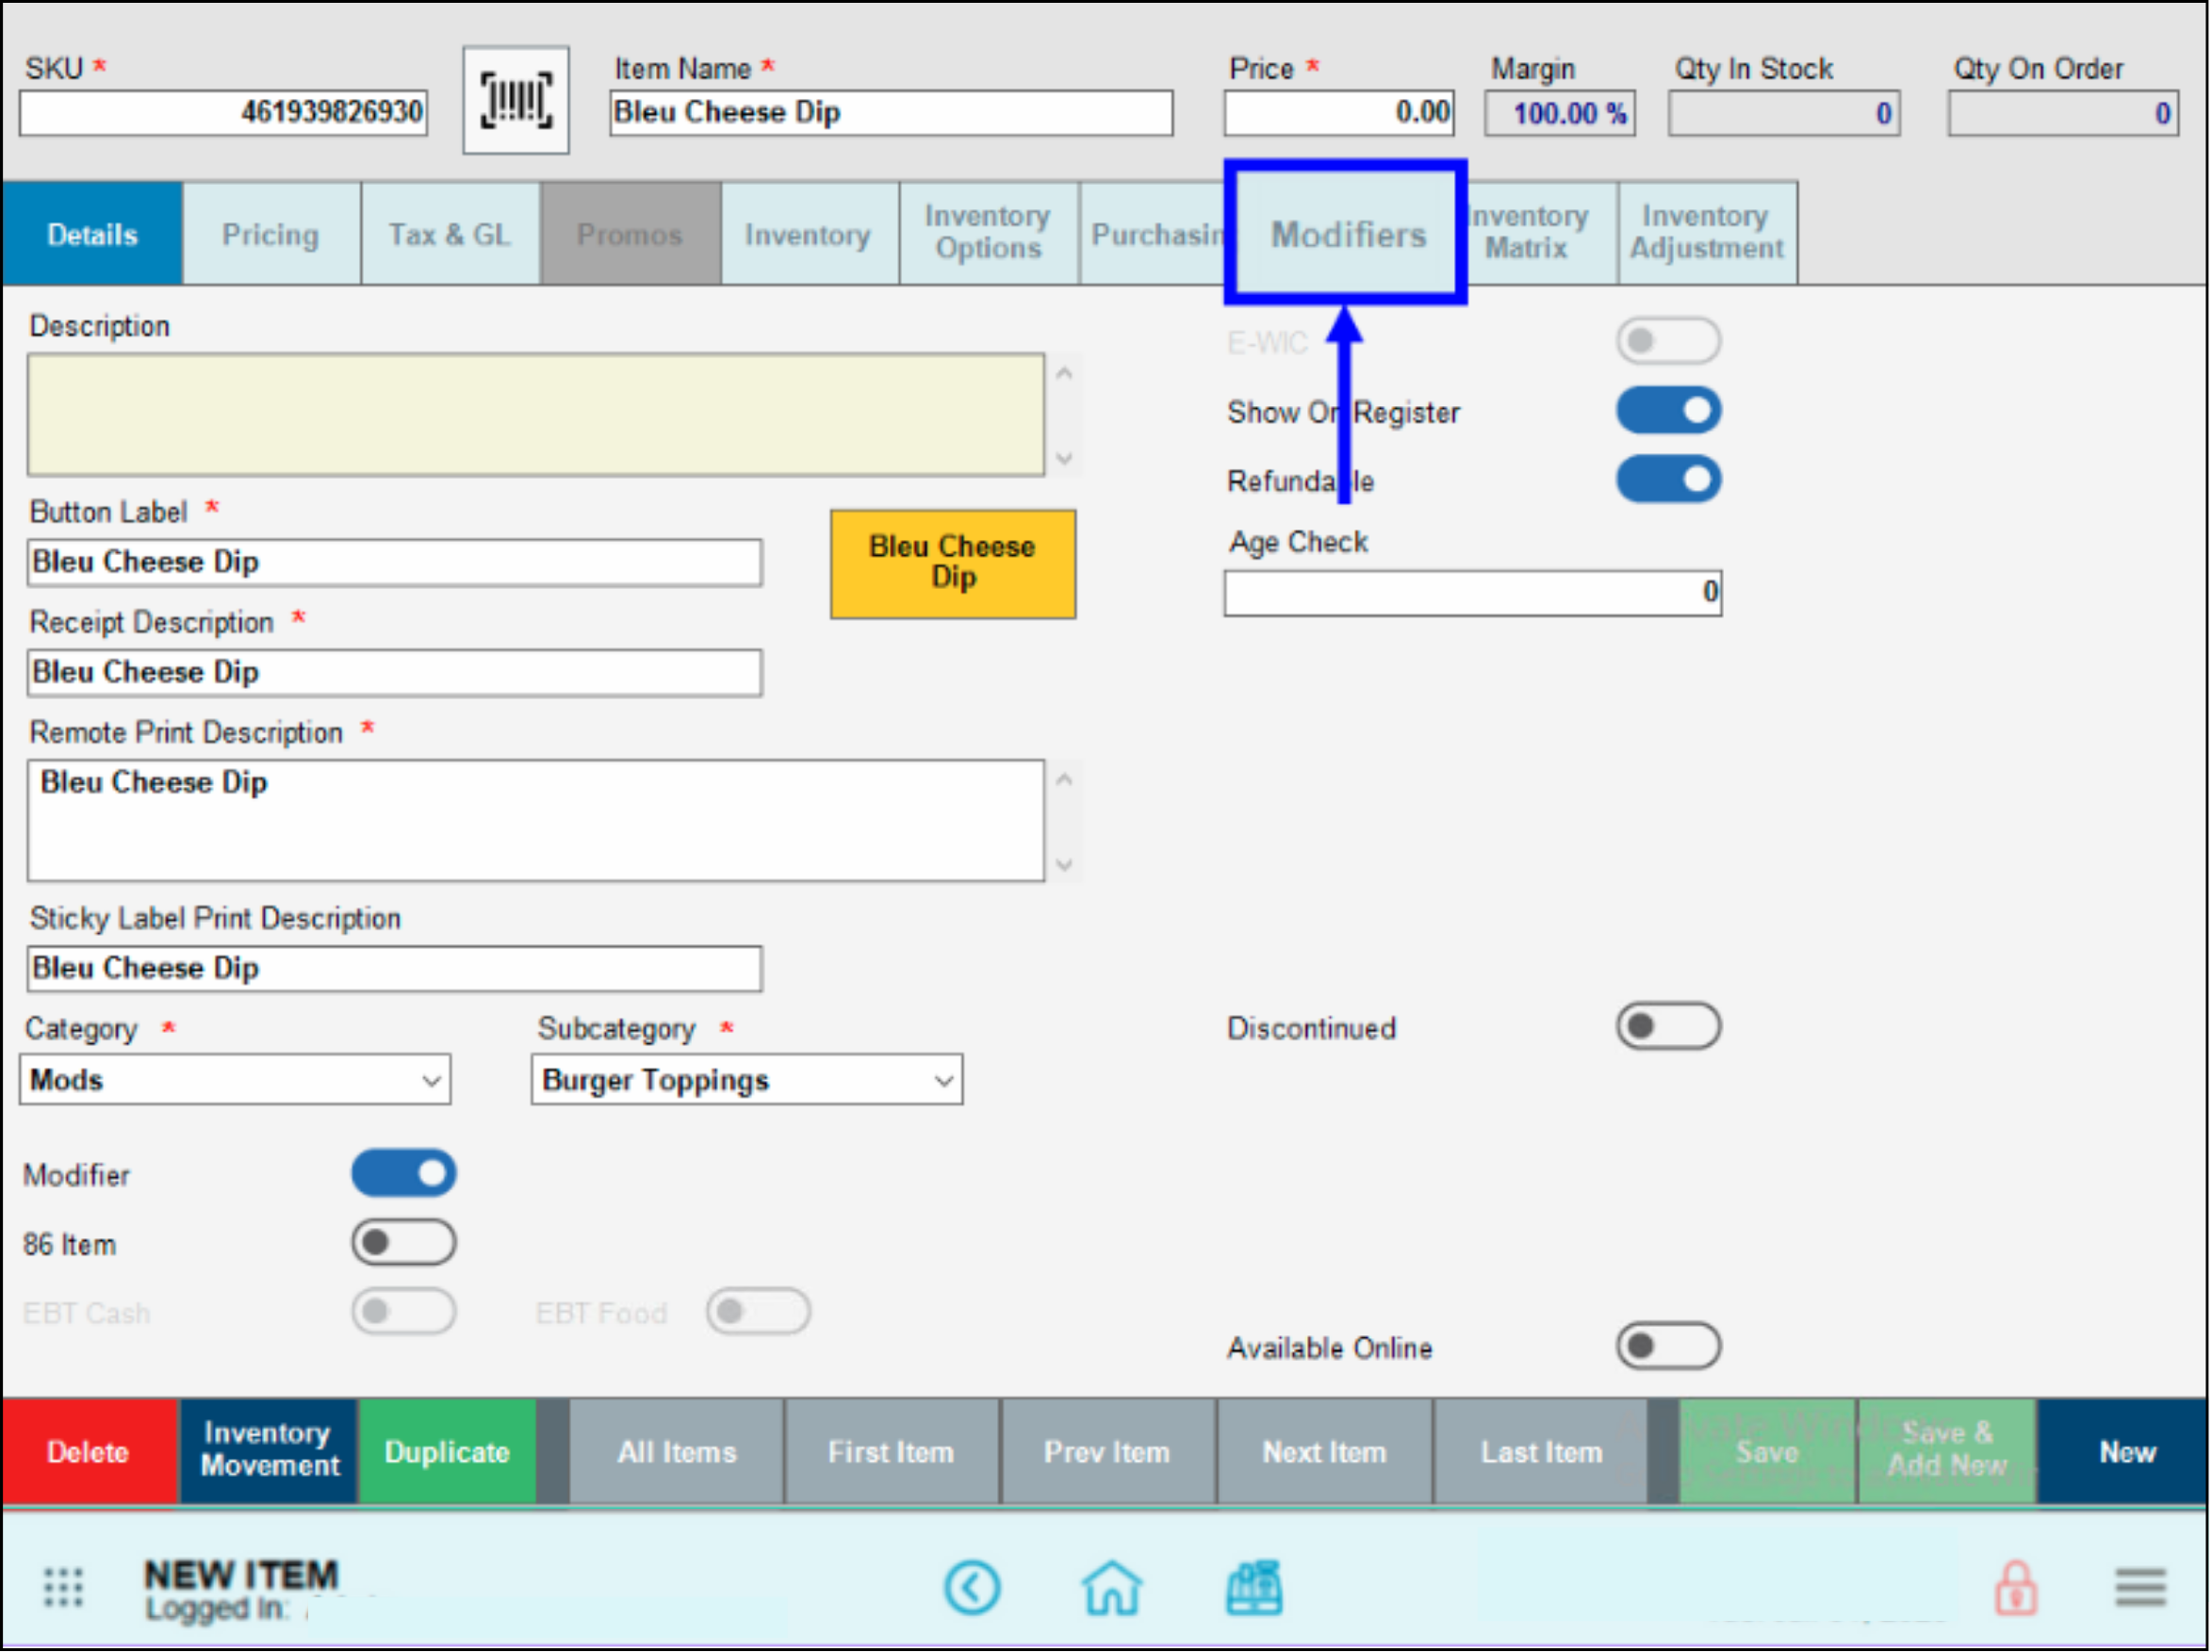
- Tap the Modifiers tab.
- Select a Category from the Categories list to add to the Modifies These Items section. Tap the Arrow to move your choice over to the list. For example, select Mods and move it to the Bleu Cheese Dip modifier list.
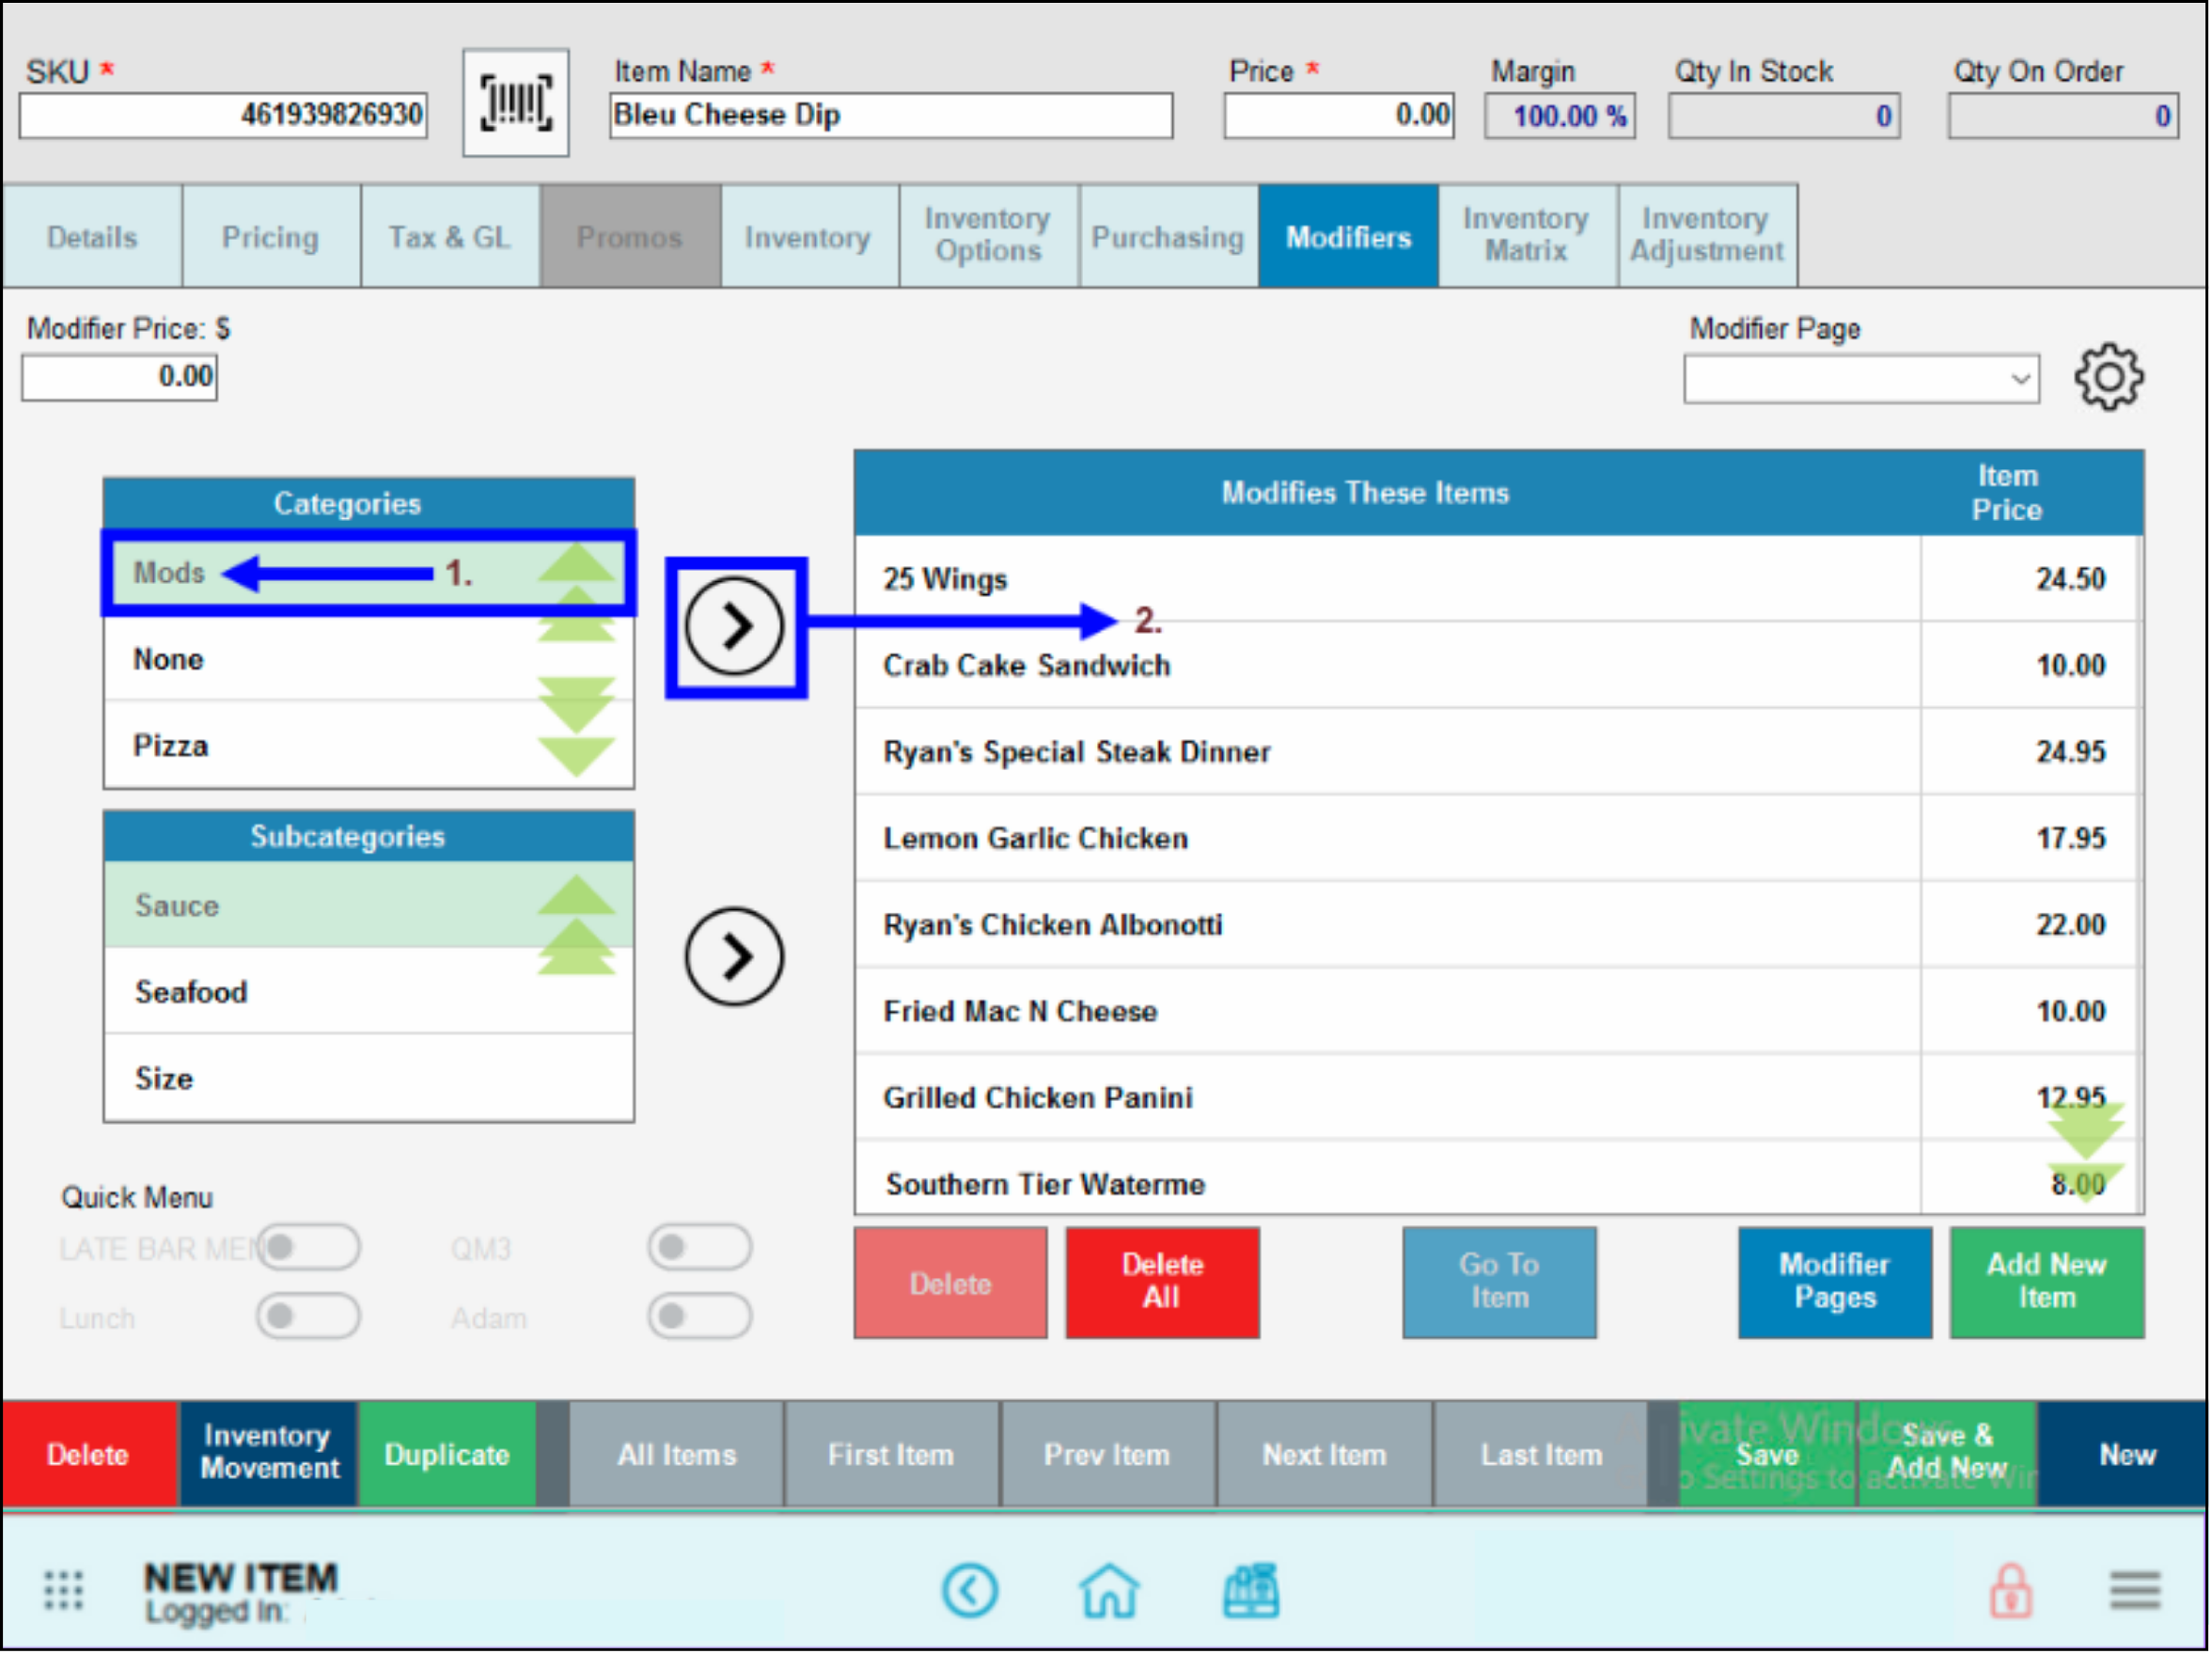
- Merchants can also add Subcategories to the Modifies These Items section. Select a subcategory, and tap the Arrow to move it into the list.
- Review the Modifies These Items list.
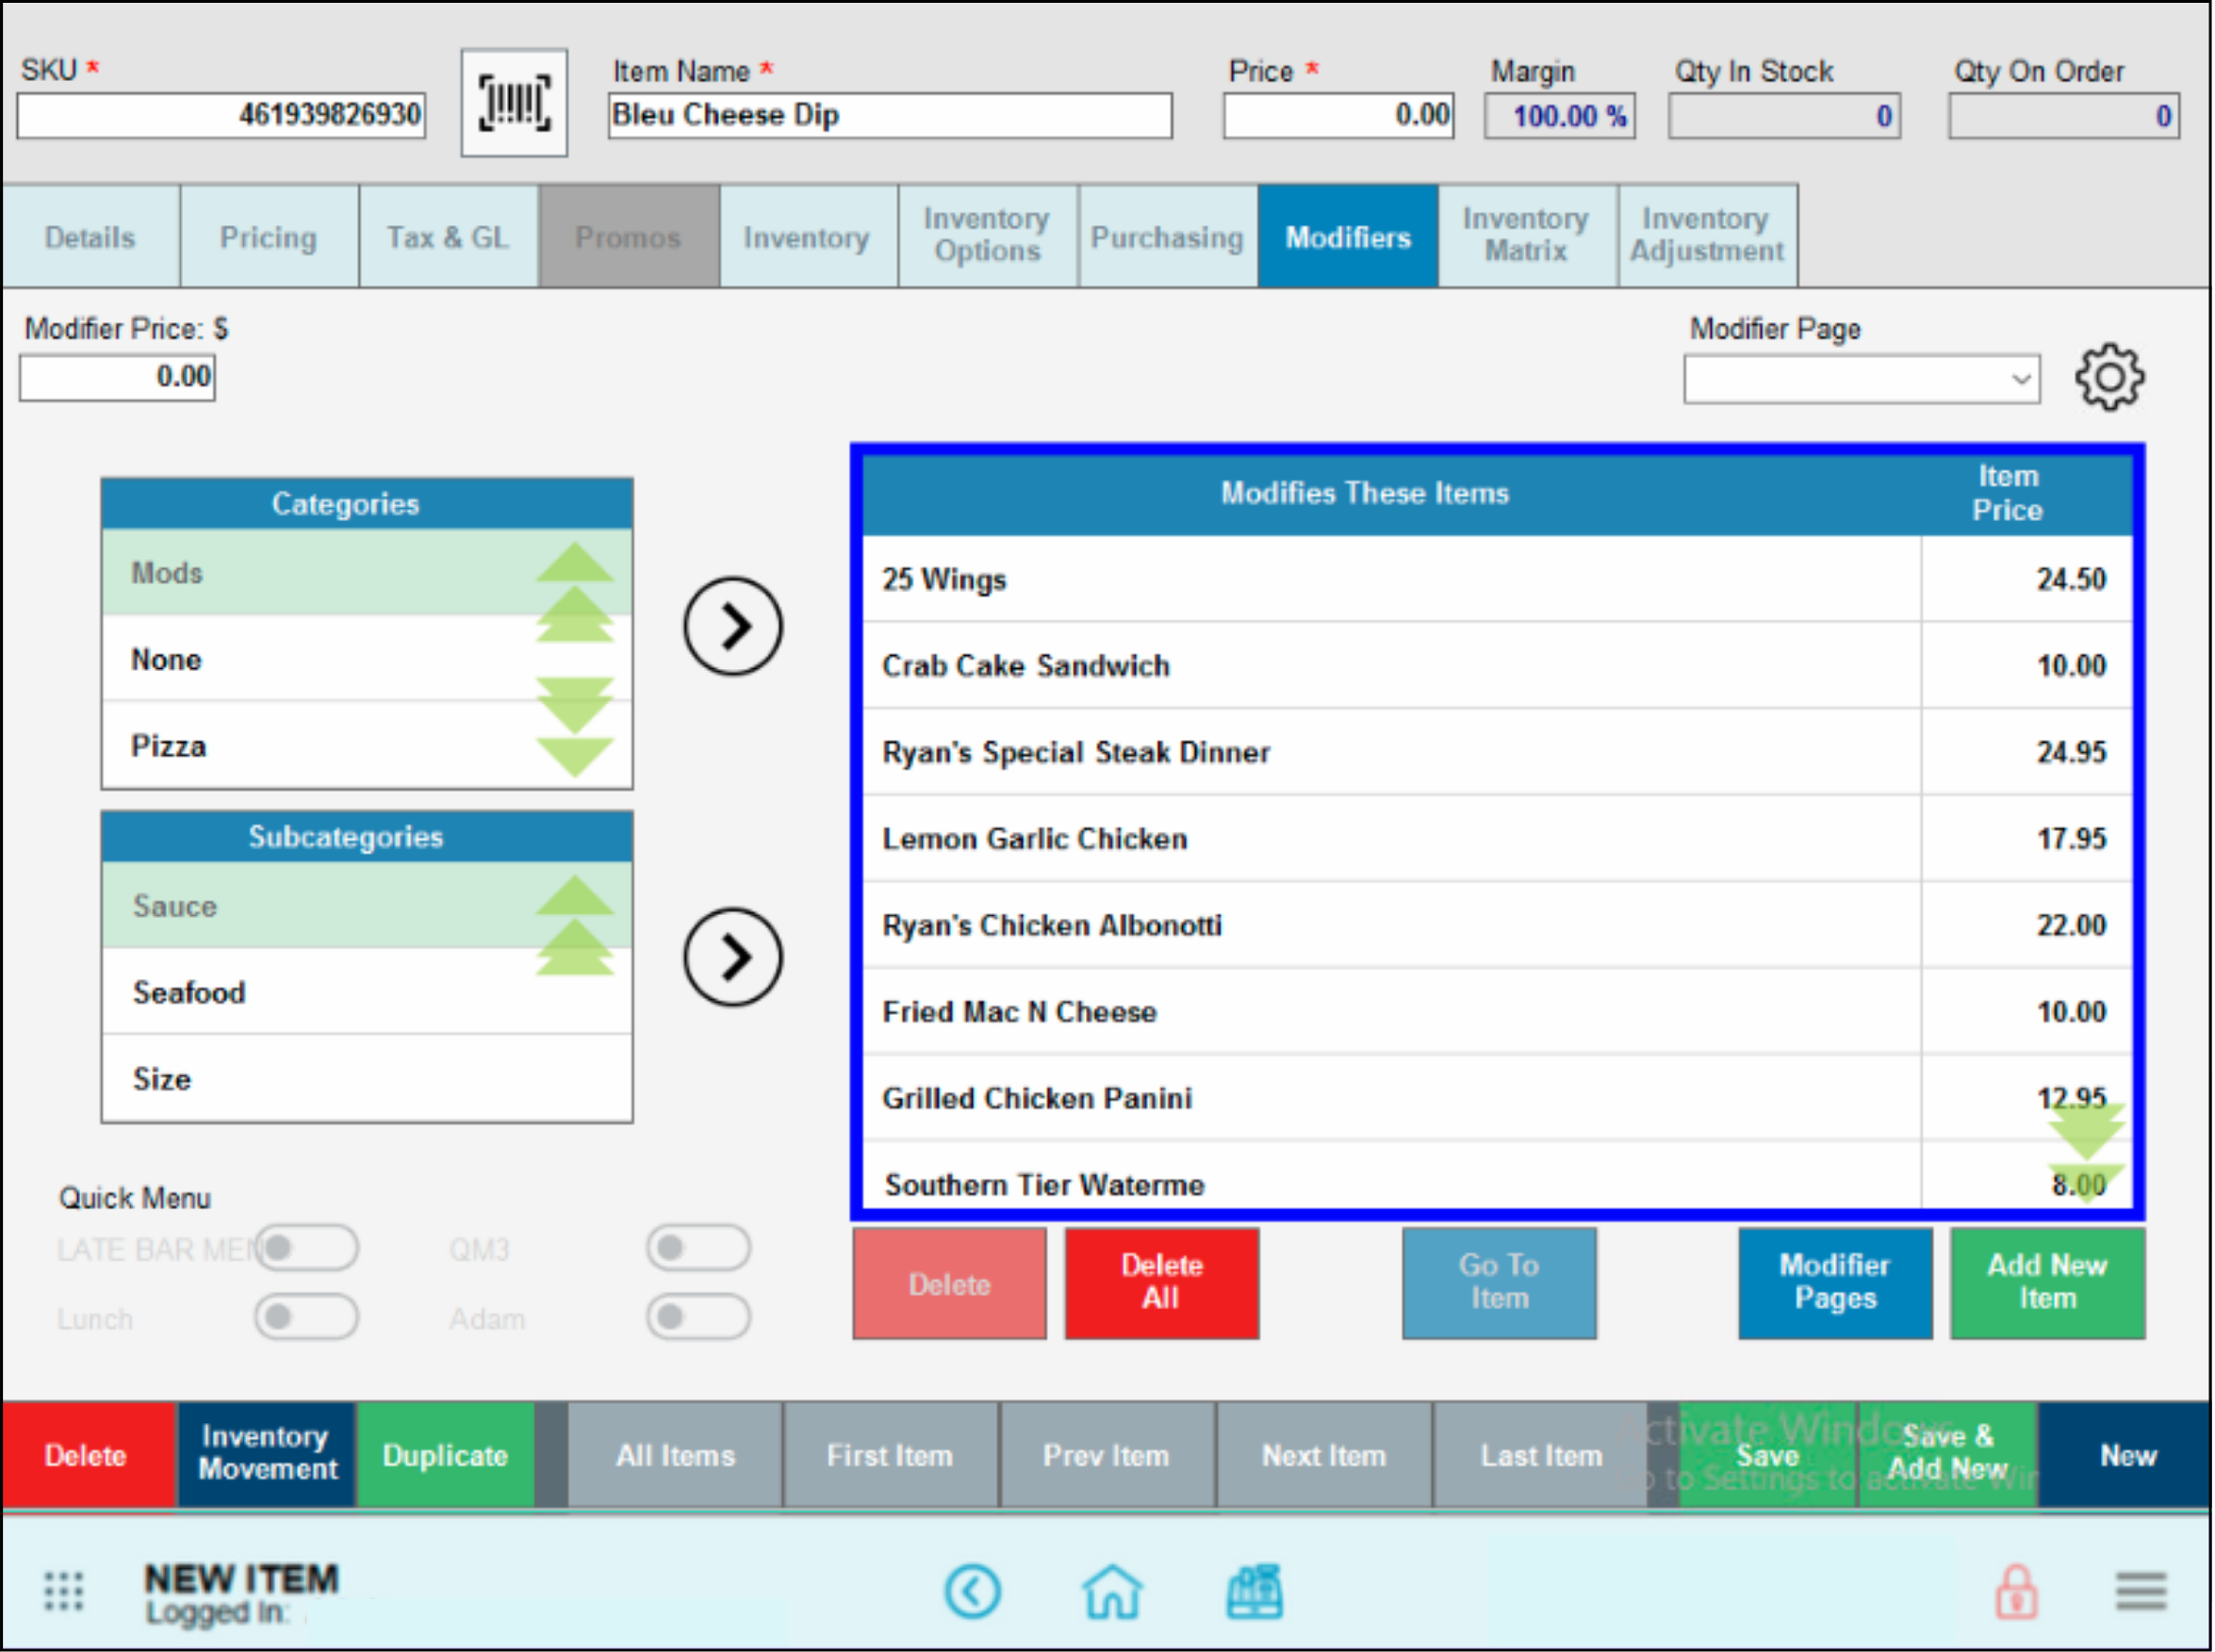
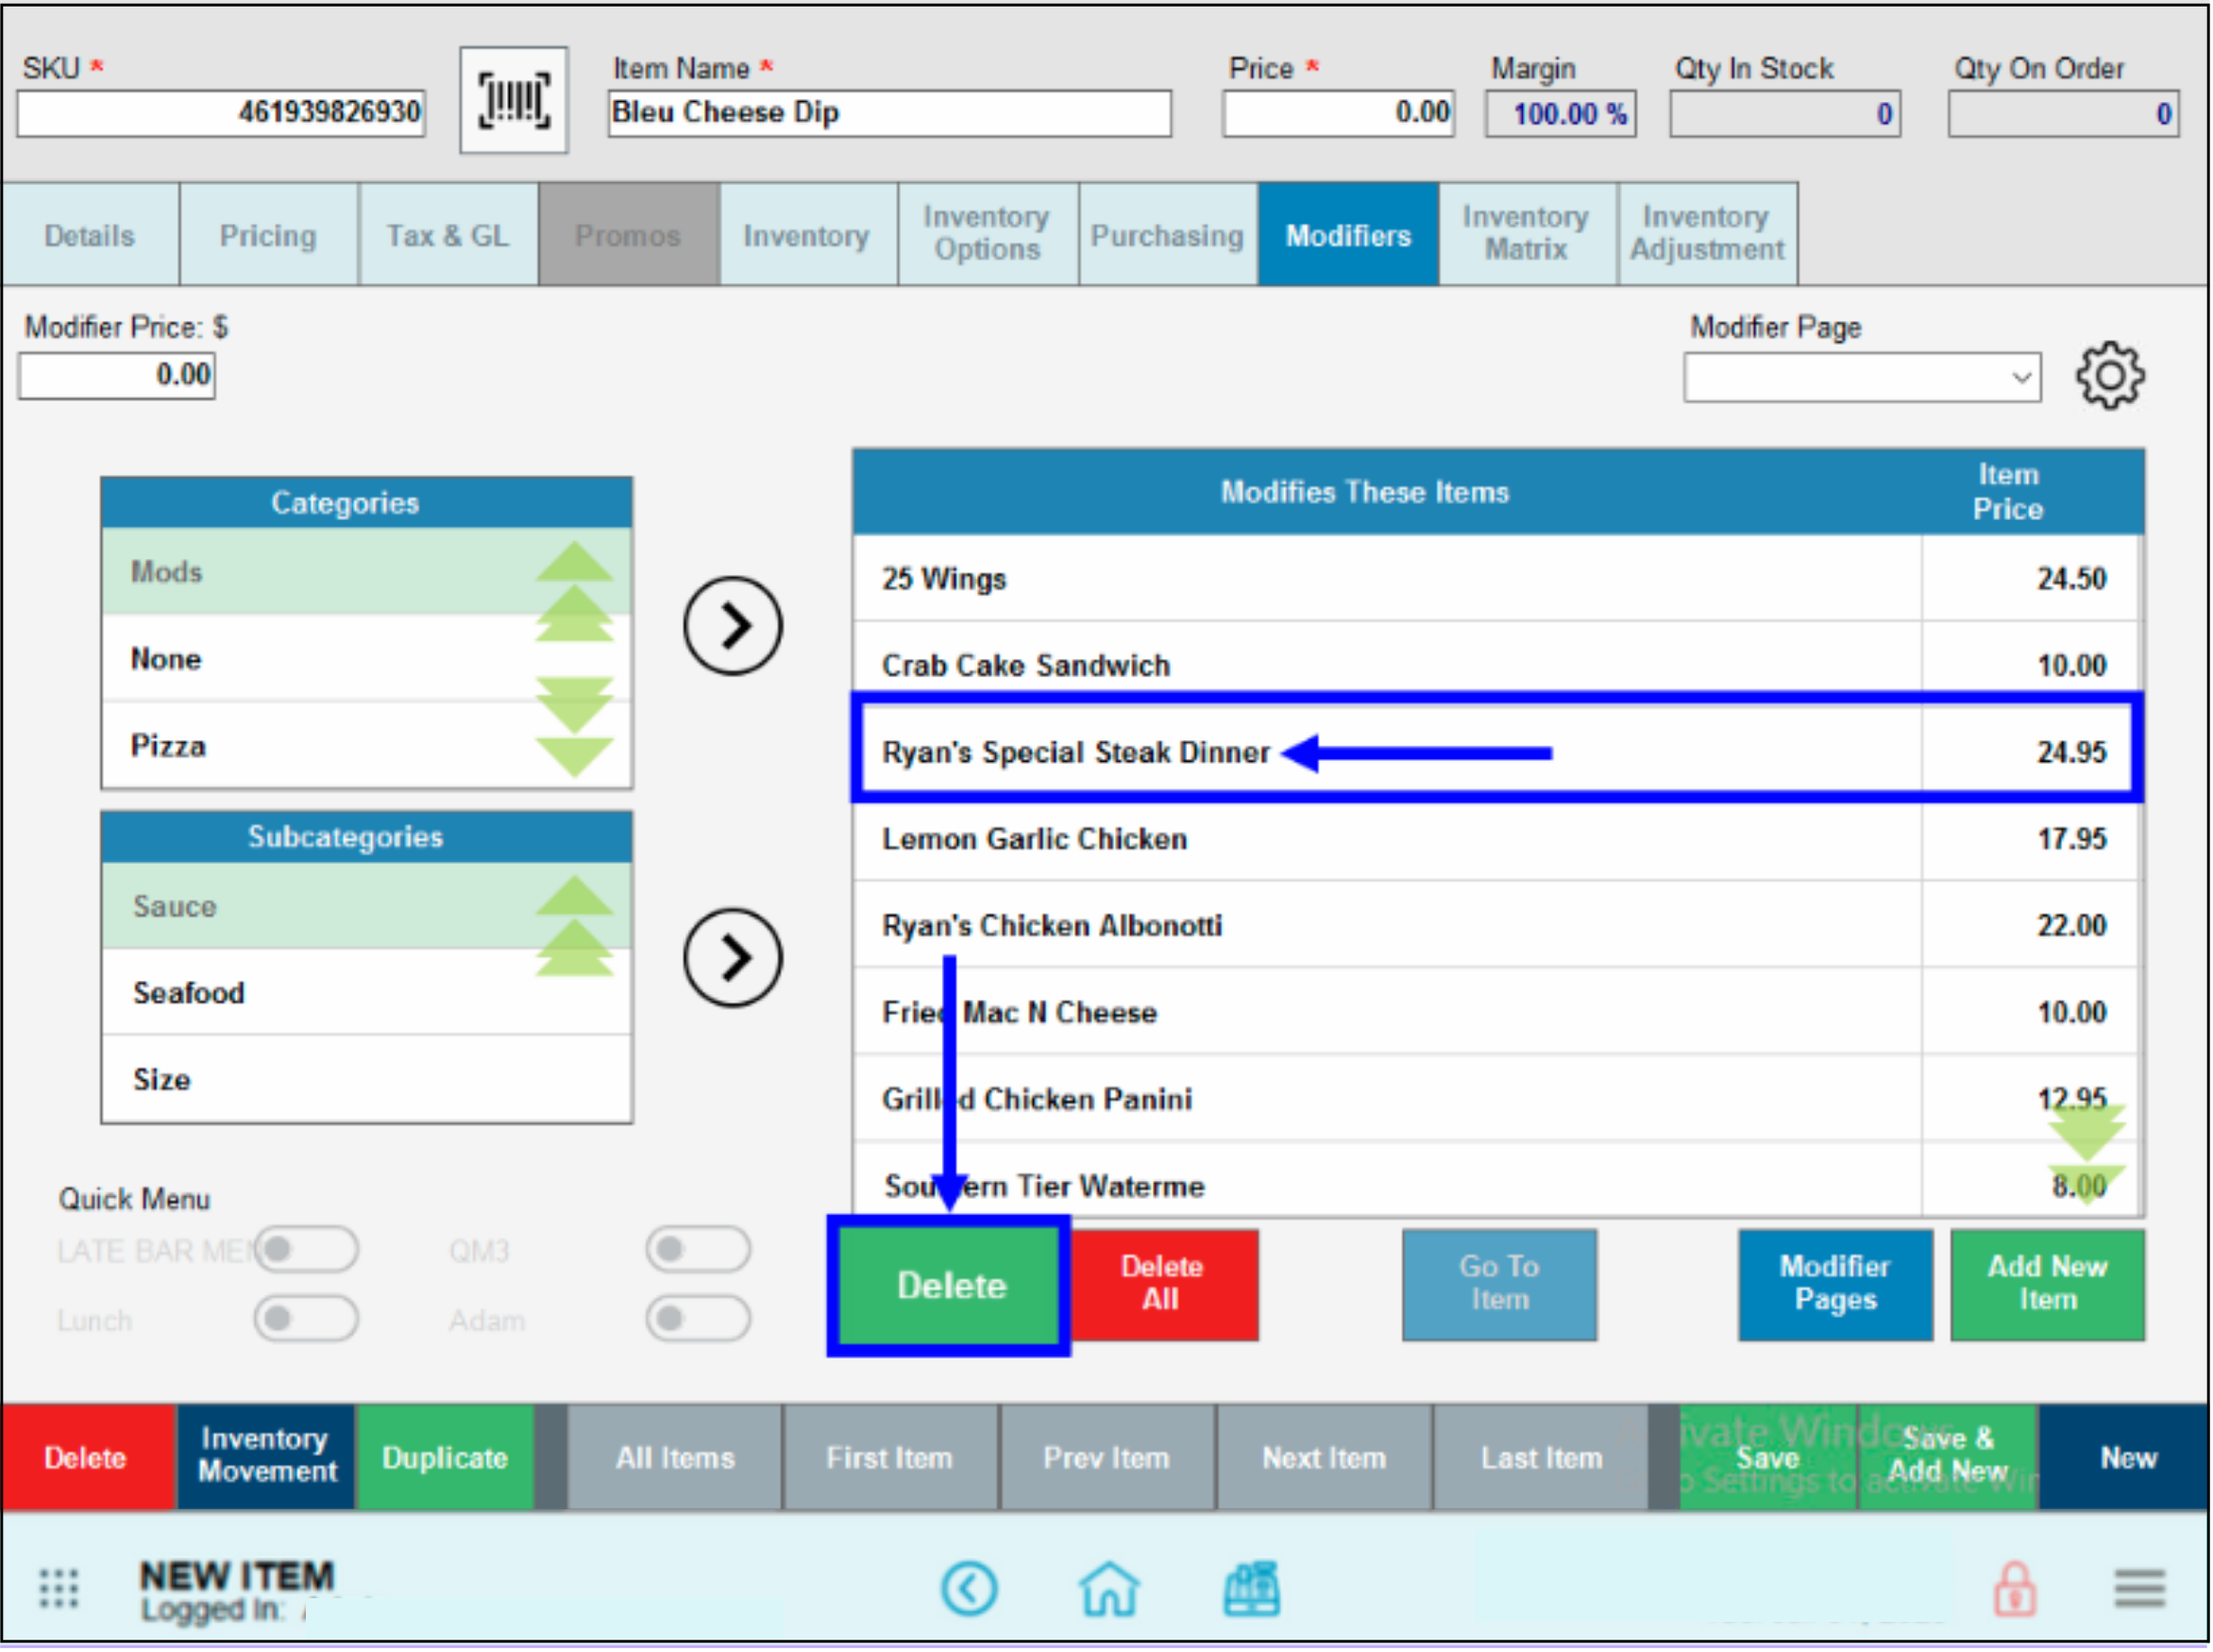
- Remove items from the Modifies These Items list by selecting an item and tapping Delete.
- Tap the Add button to add a one or several individual items to Modifies these items. See the instructions “Add Modifiers to Single Item” below.
- Tap Save.


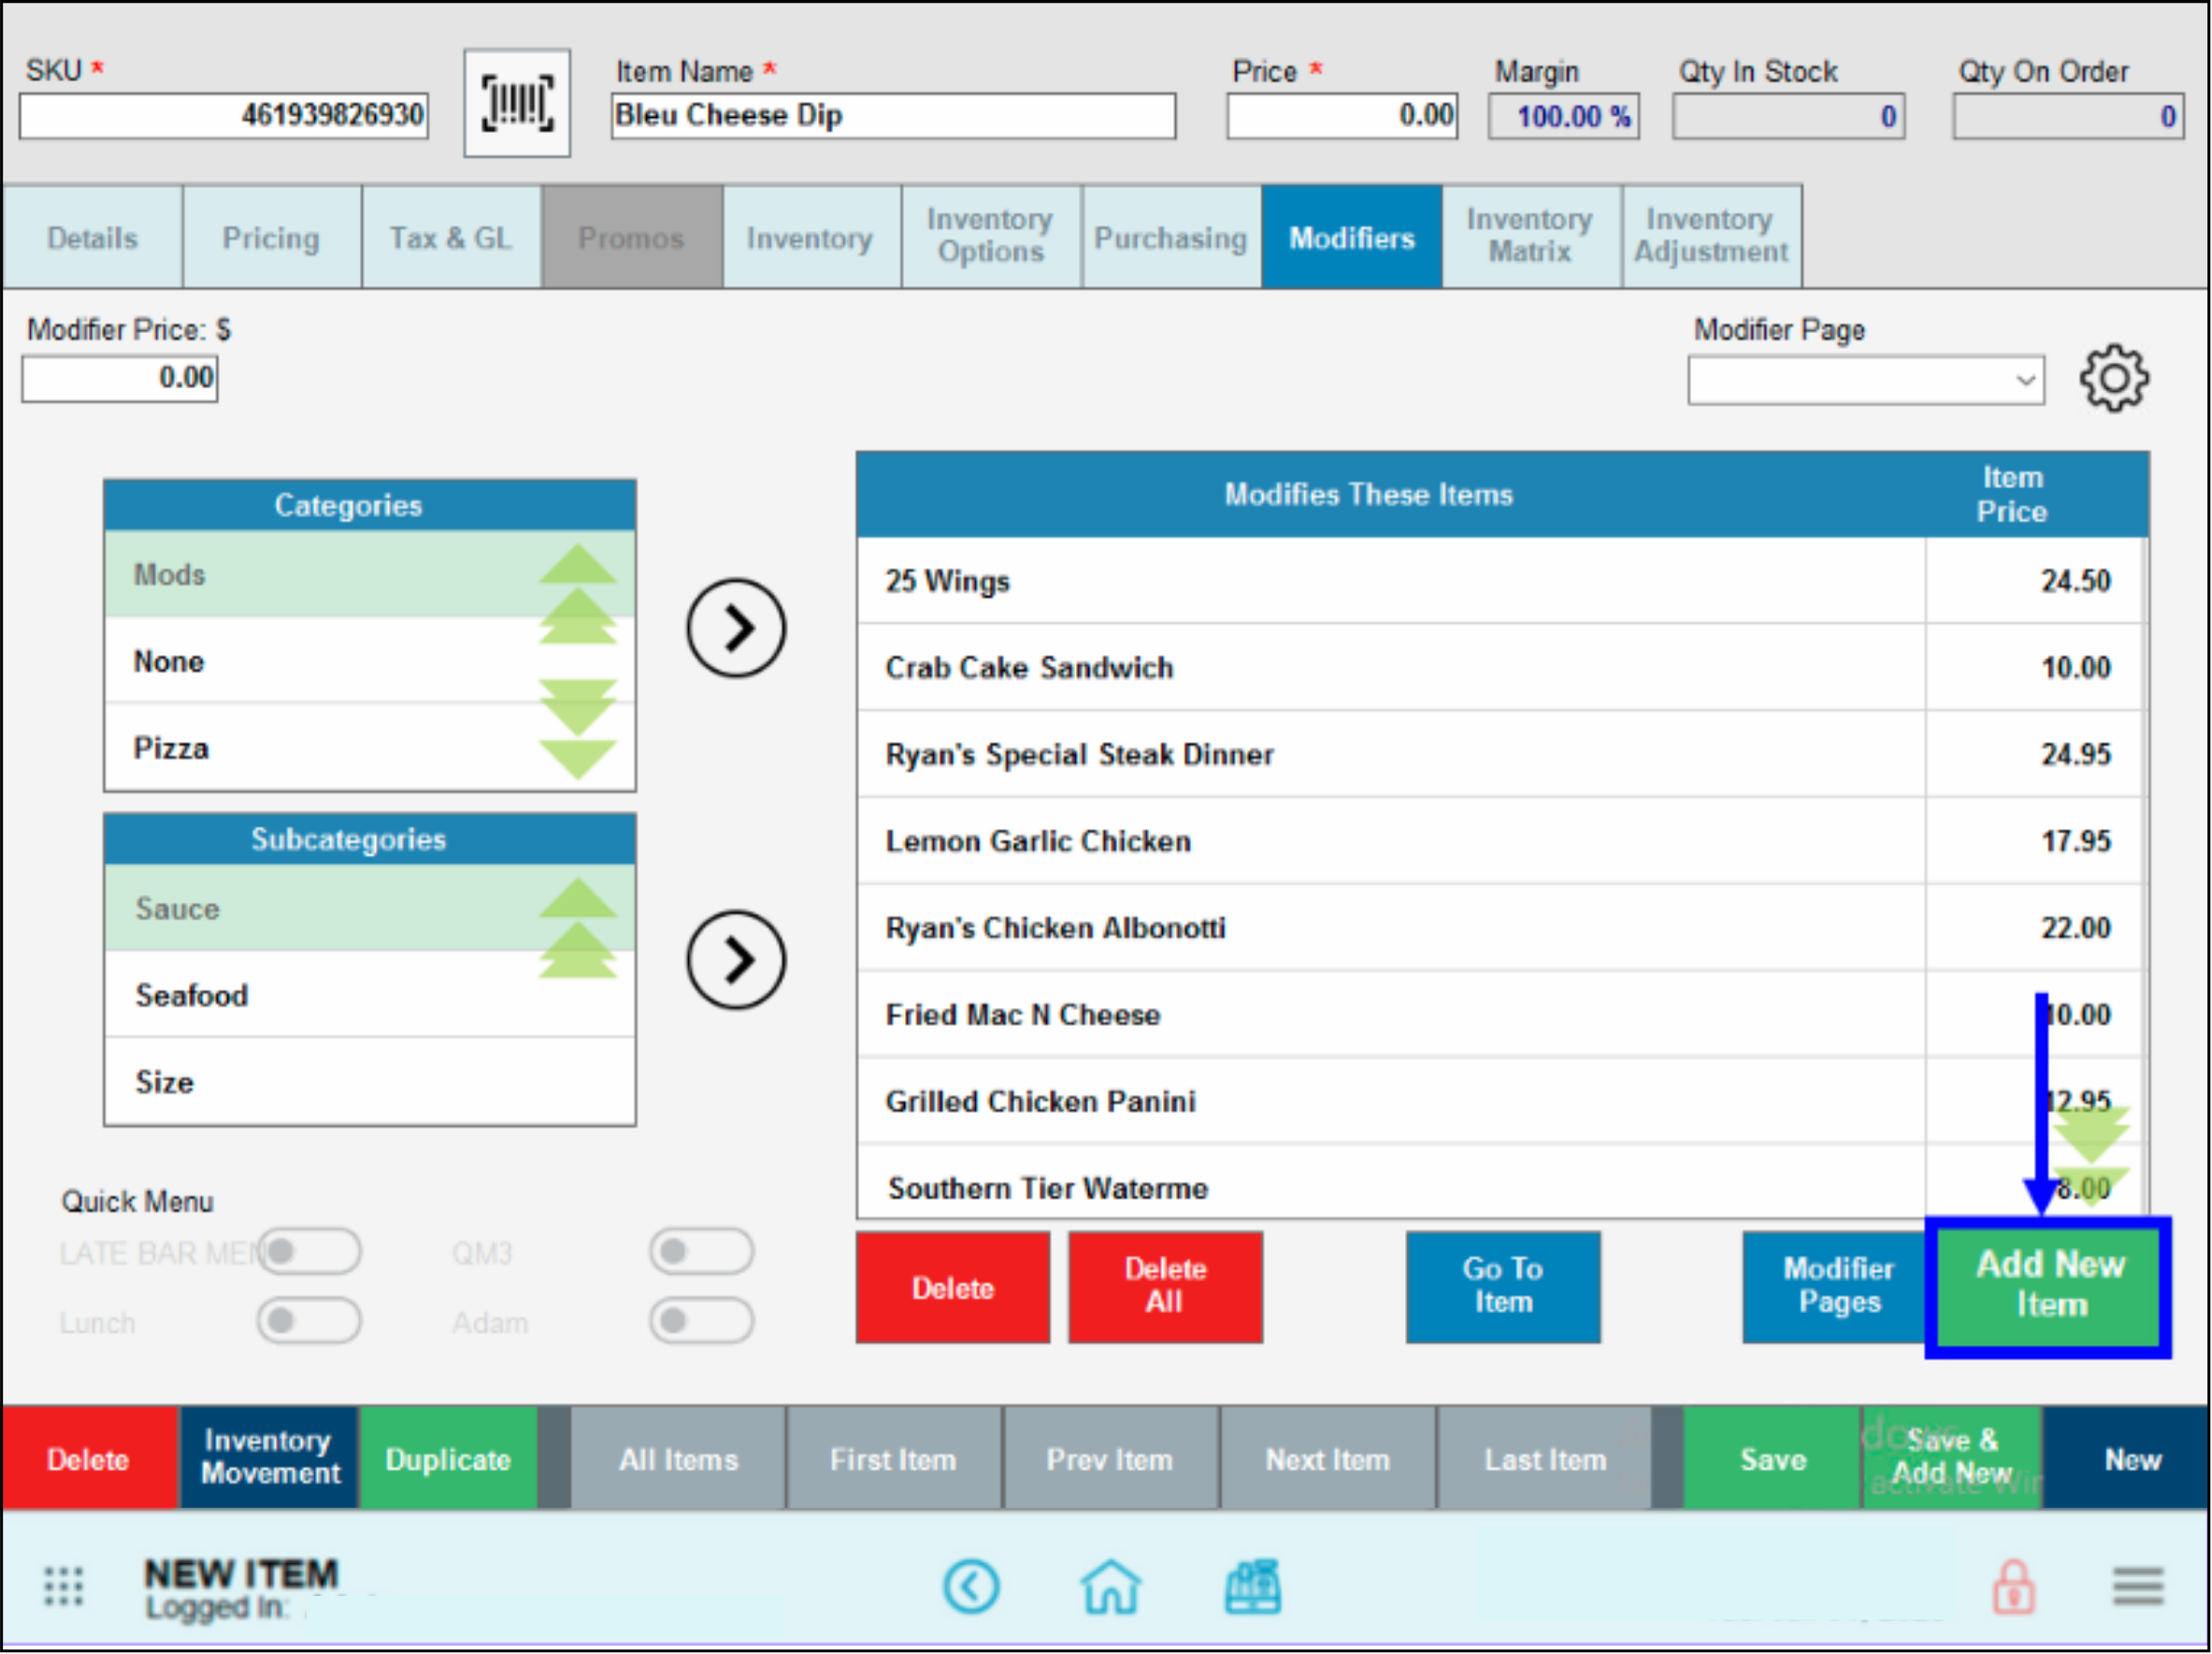
- From the Item Details page, tap the Modifiers tab. See: Find Modifier Details
- Tap Add New Item.
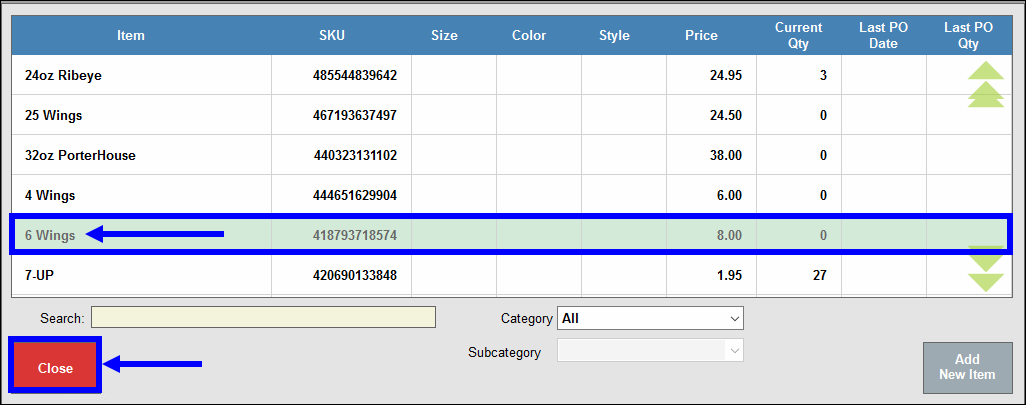
- Select one or more items from the list. Scroll or use search to narrow your choices, then tap Close.
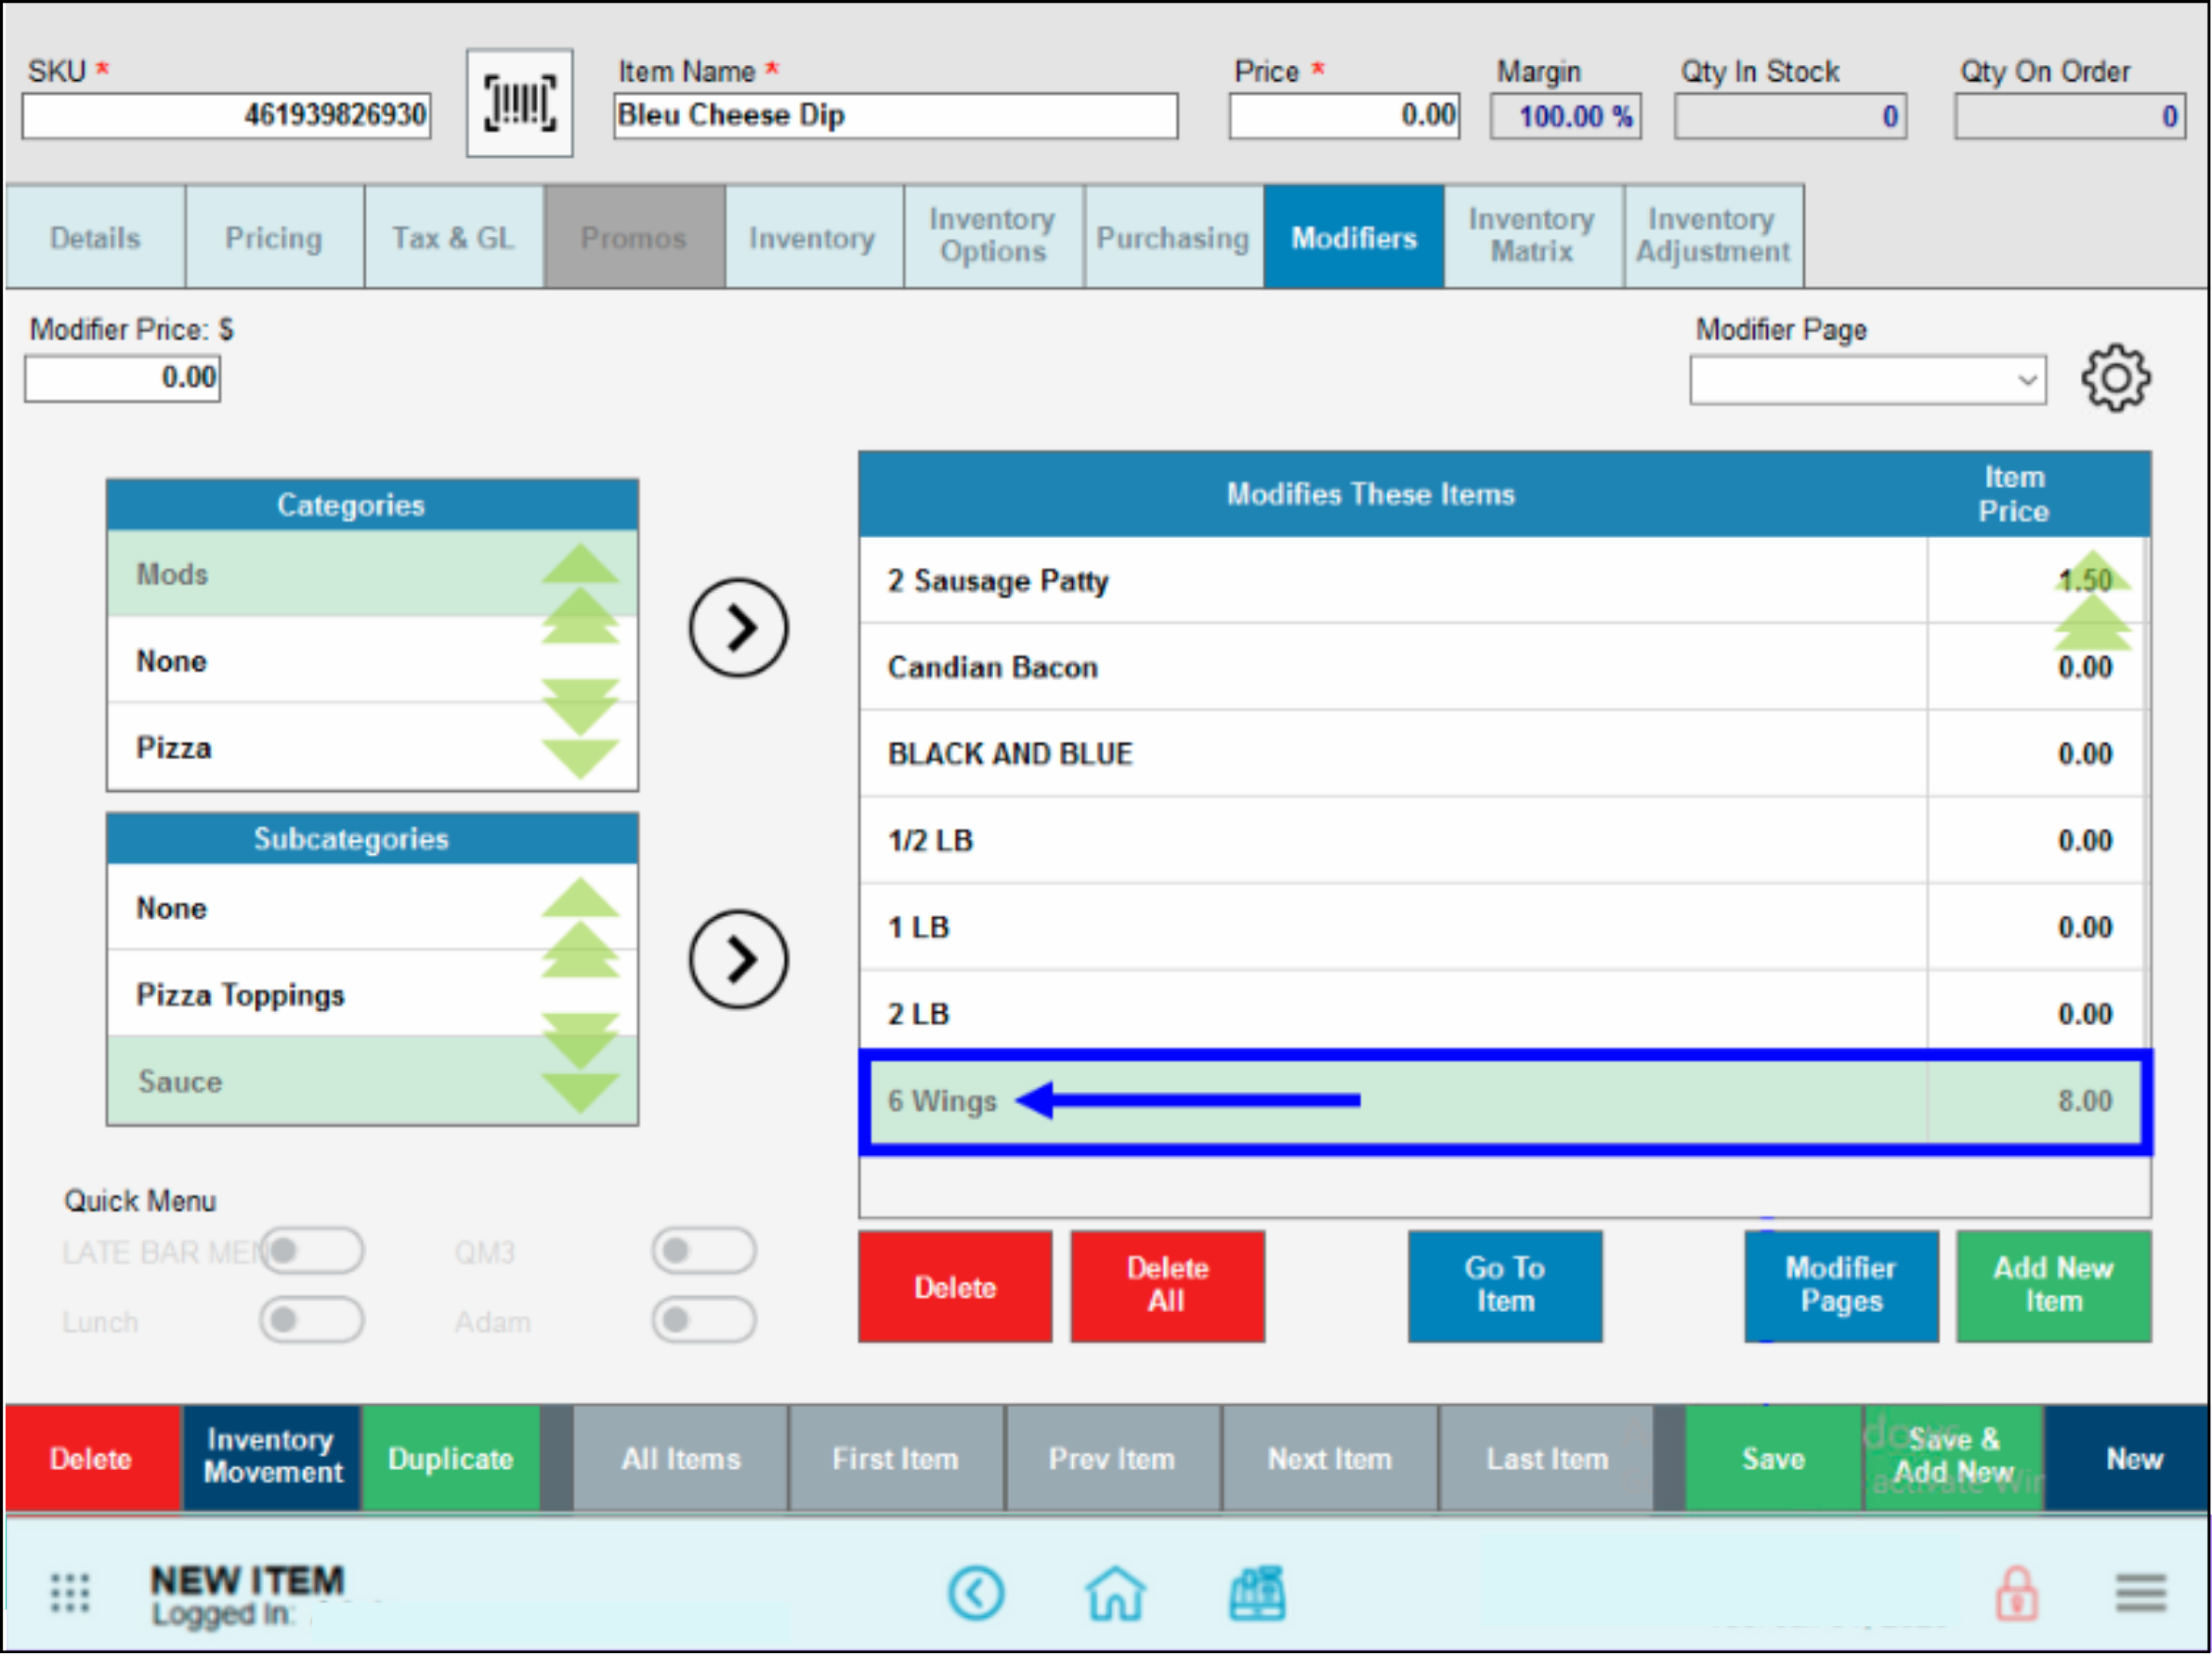
- View the added item(s).
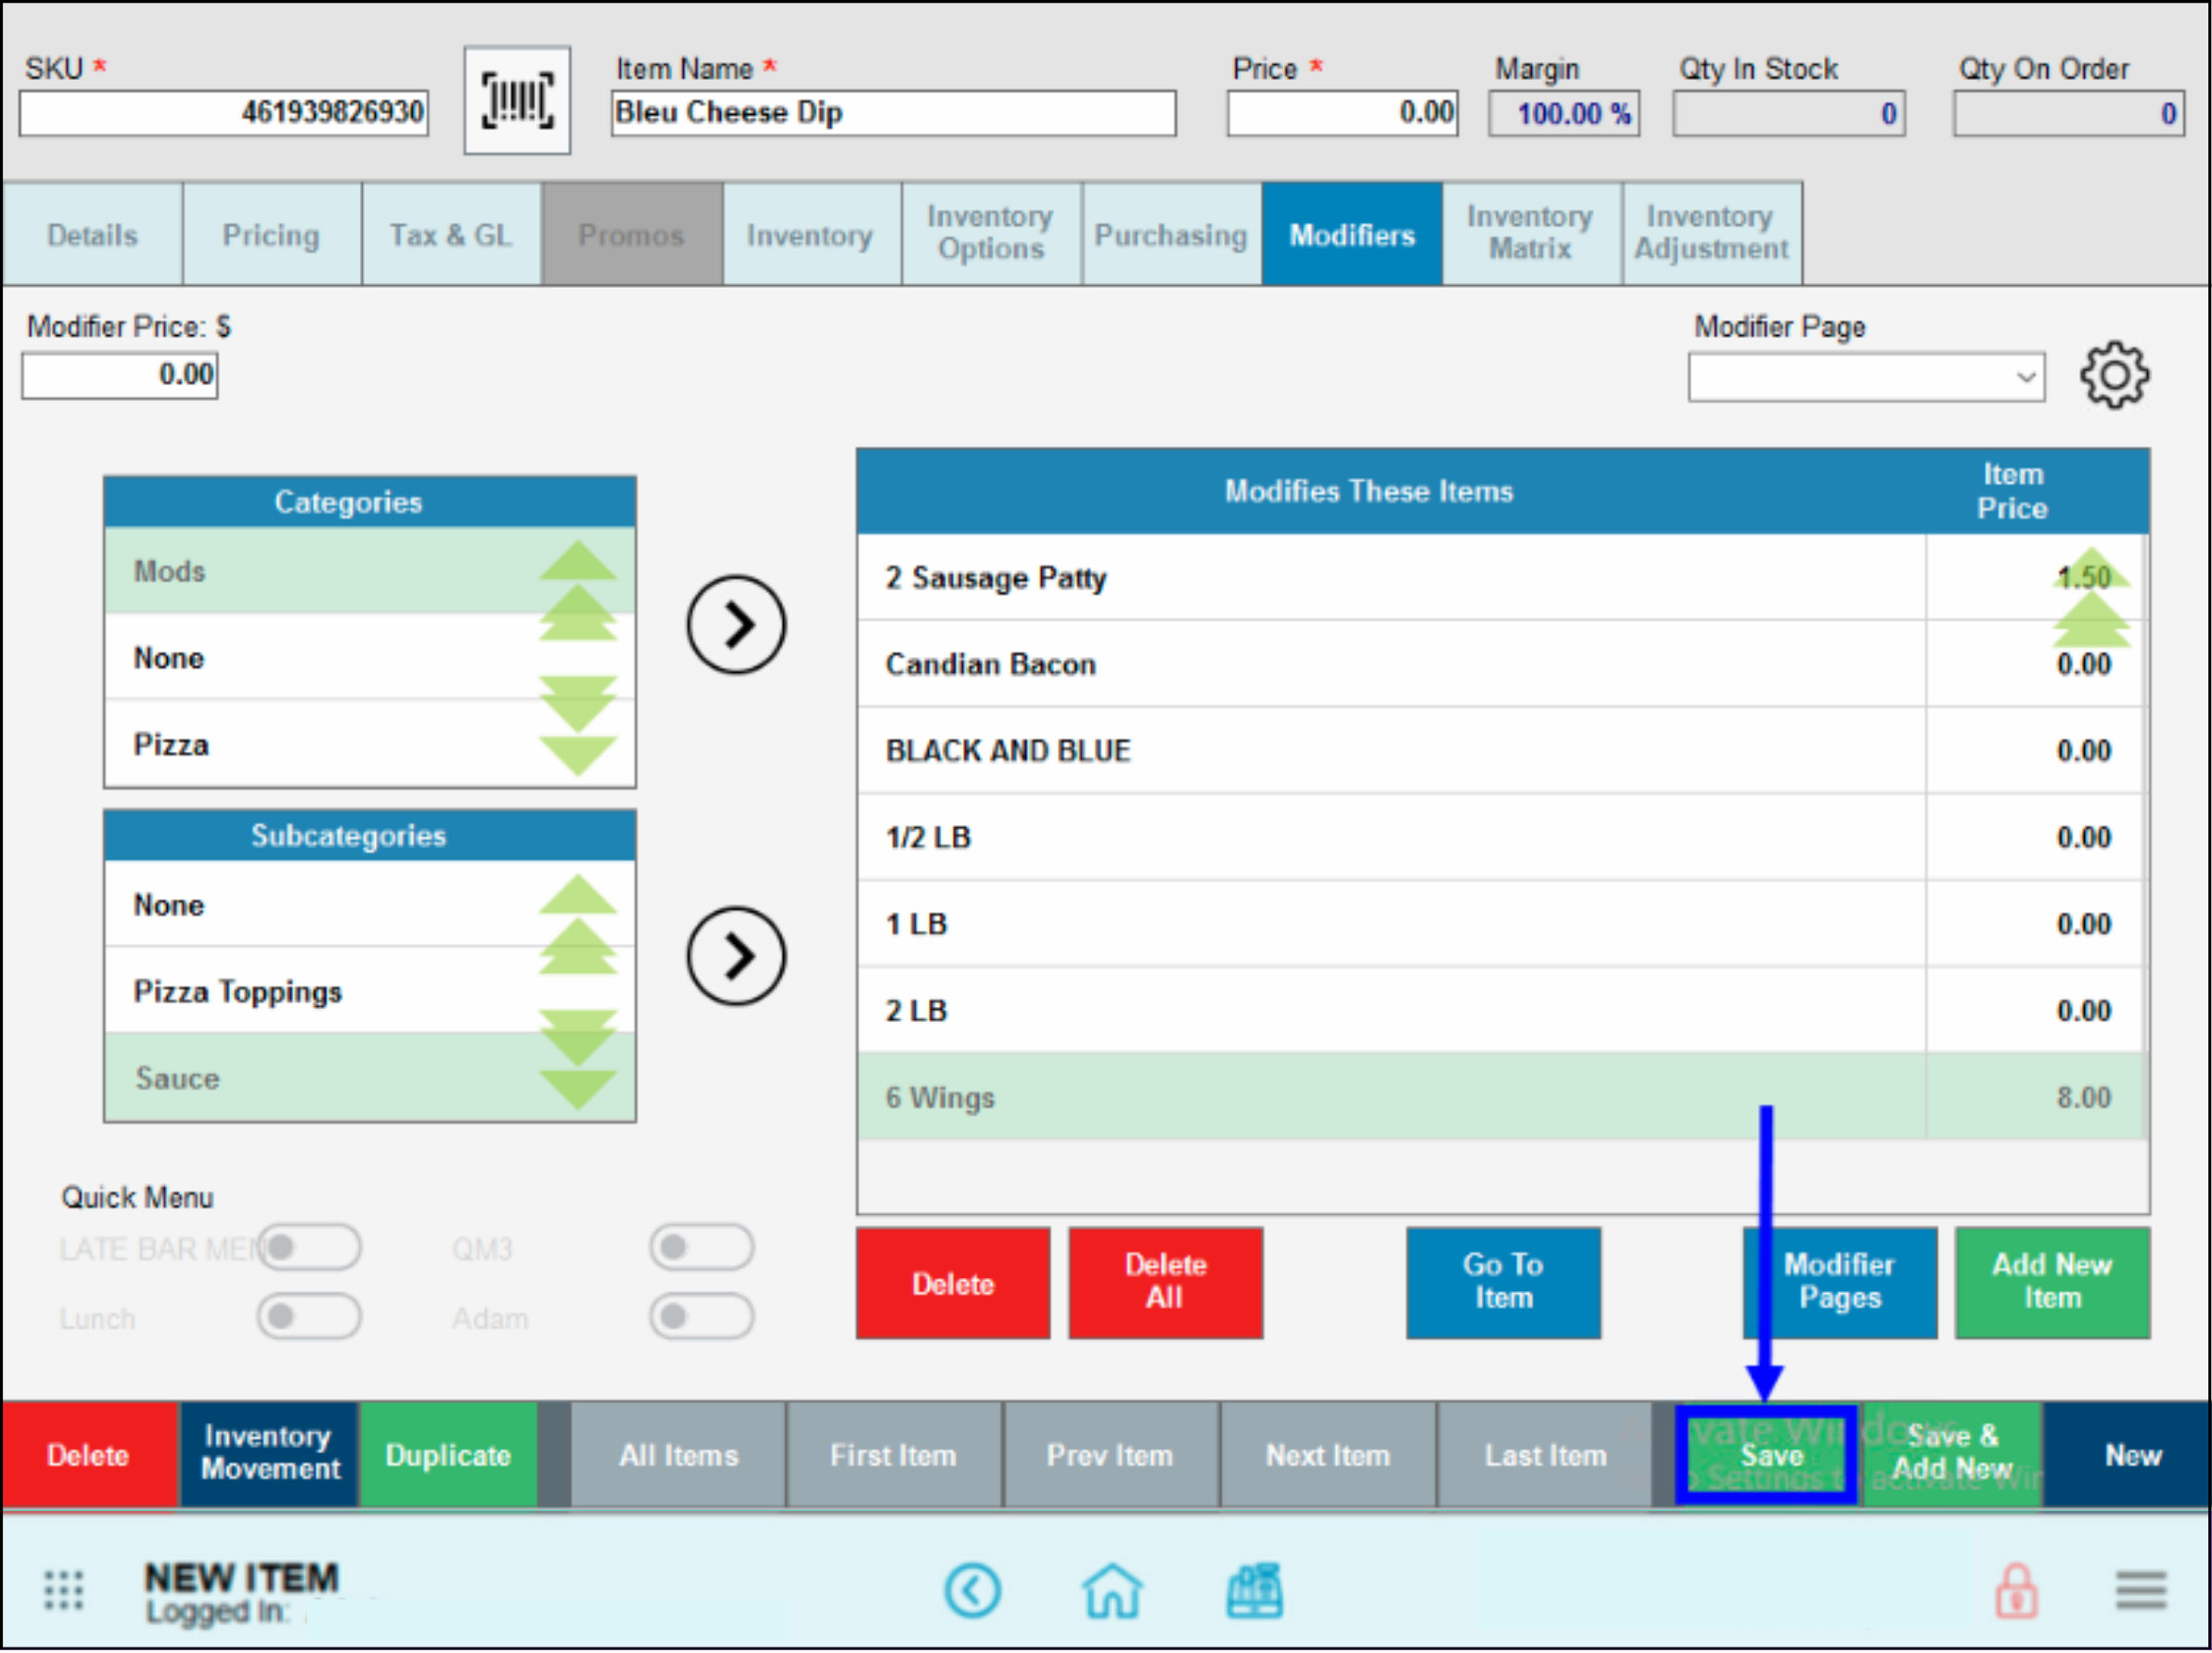
- Tap Save.
The MOD has now been added to an item. Now determine whether the modifier will appear as a required modifier or as an optional modifier.
- See:
- Difference between a required and an optional modifier
- If the mod will be required: Add Modifier to a Group.
- If the mod will be optional: View Modifiers at the Register.
How can we improve this information for you?
Registered internal users can comment. Merchants, have a suggestion? Tell us more.