Add a business logo to personalize the display of your Exatouch POS system. Logos can be placed almost anywhere, including on the Customer Facing Display (CFD) or customer receipts.

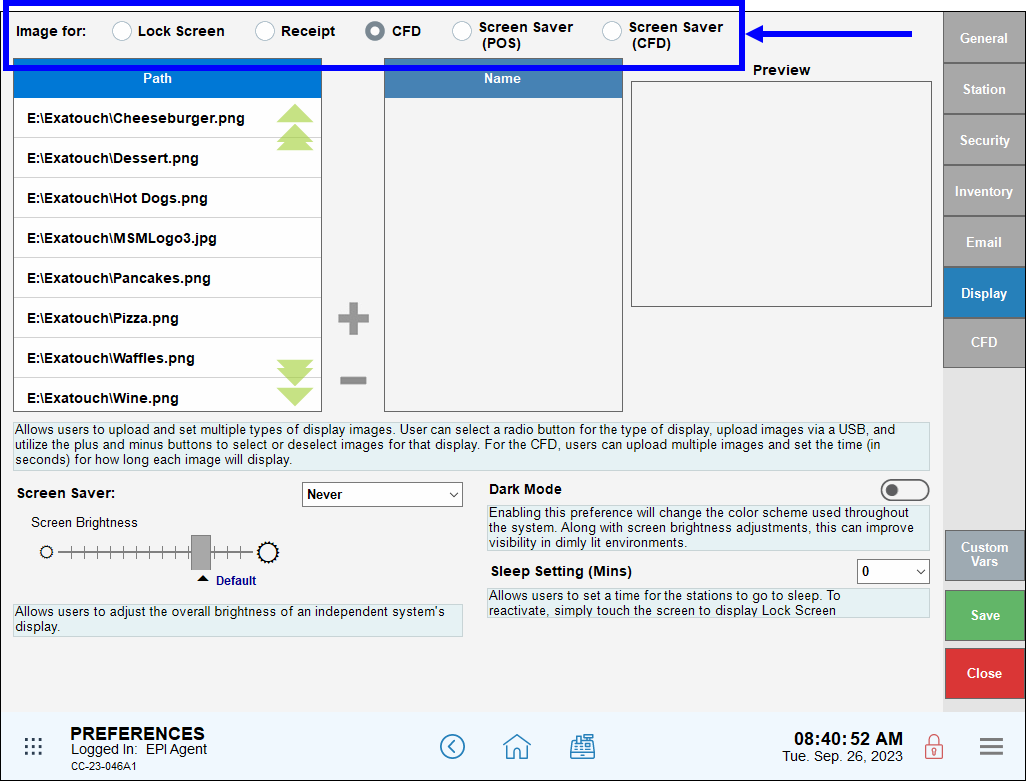
Most logos can be added under Settings > Preferences for the following locations and in the recommended file sizes:
- Note: When adding logos or images under the CFD setting, users must first crop the image so that it displays vertically before setting dimensions.
- Lock Screen: 1000 x 173 pixels
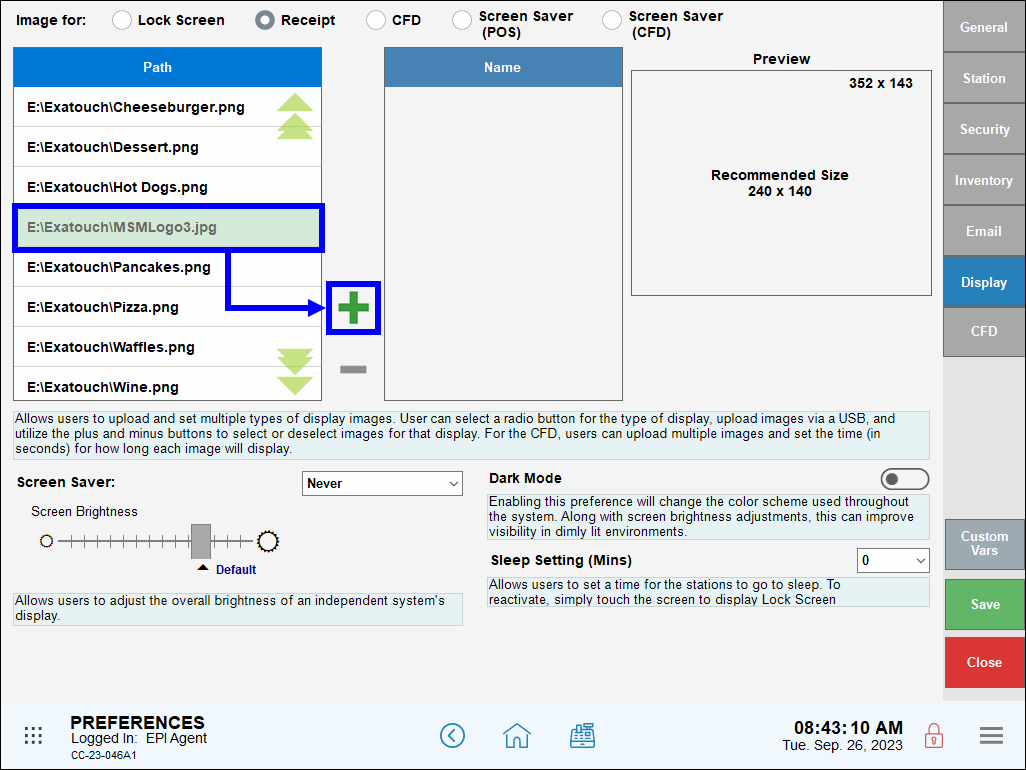
- Receipts: 240 x 140 pixels
- Customer Facing Display (CFD): 450 x 700 pixels
- Screen Saver (POS): 1024 x 768 pixels
- Screen Saver (CFD): 1280 x 800 pixels
Perform the following to add a business logo to the Lock Screen:
- Note: Logos should be formatted in advance and saved on a USB drive in .jpg format.
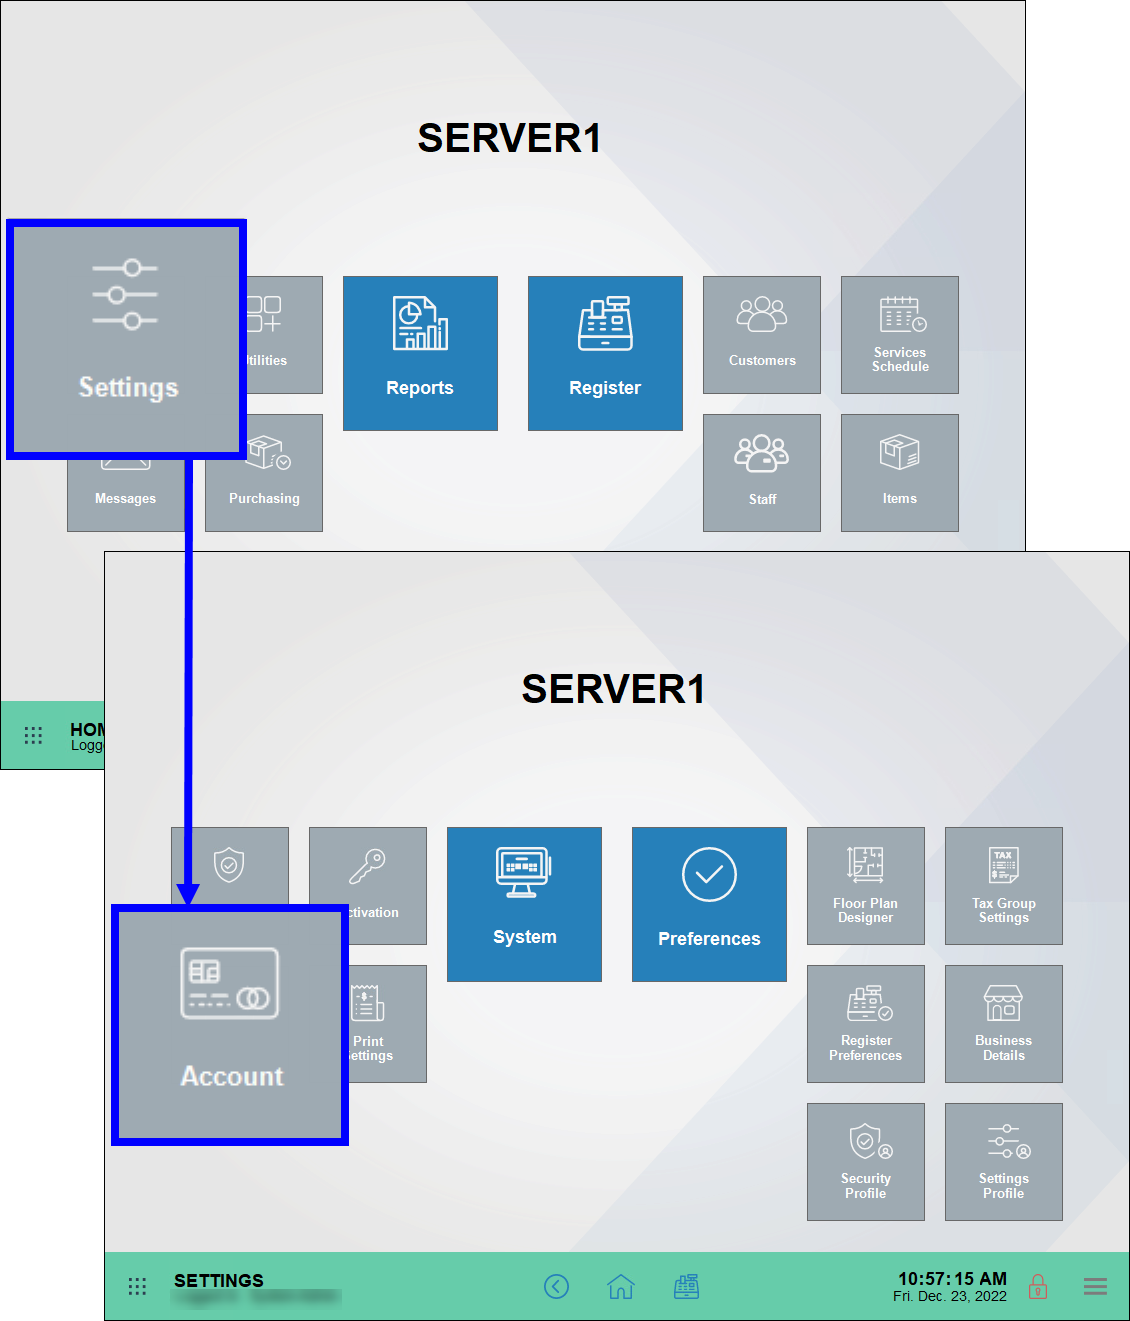
- From Home, navigate to Settings > Preferences.
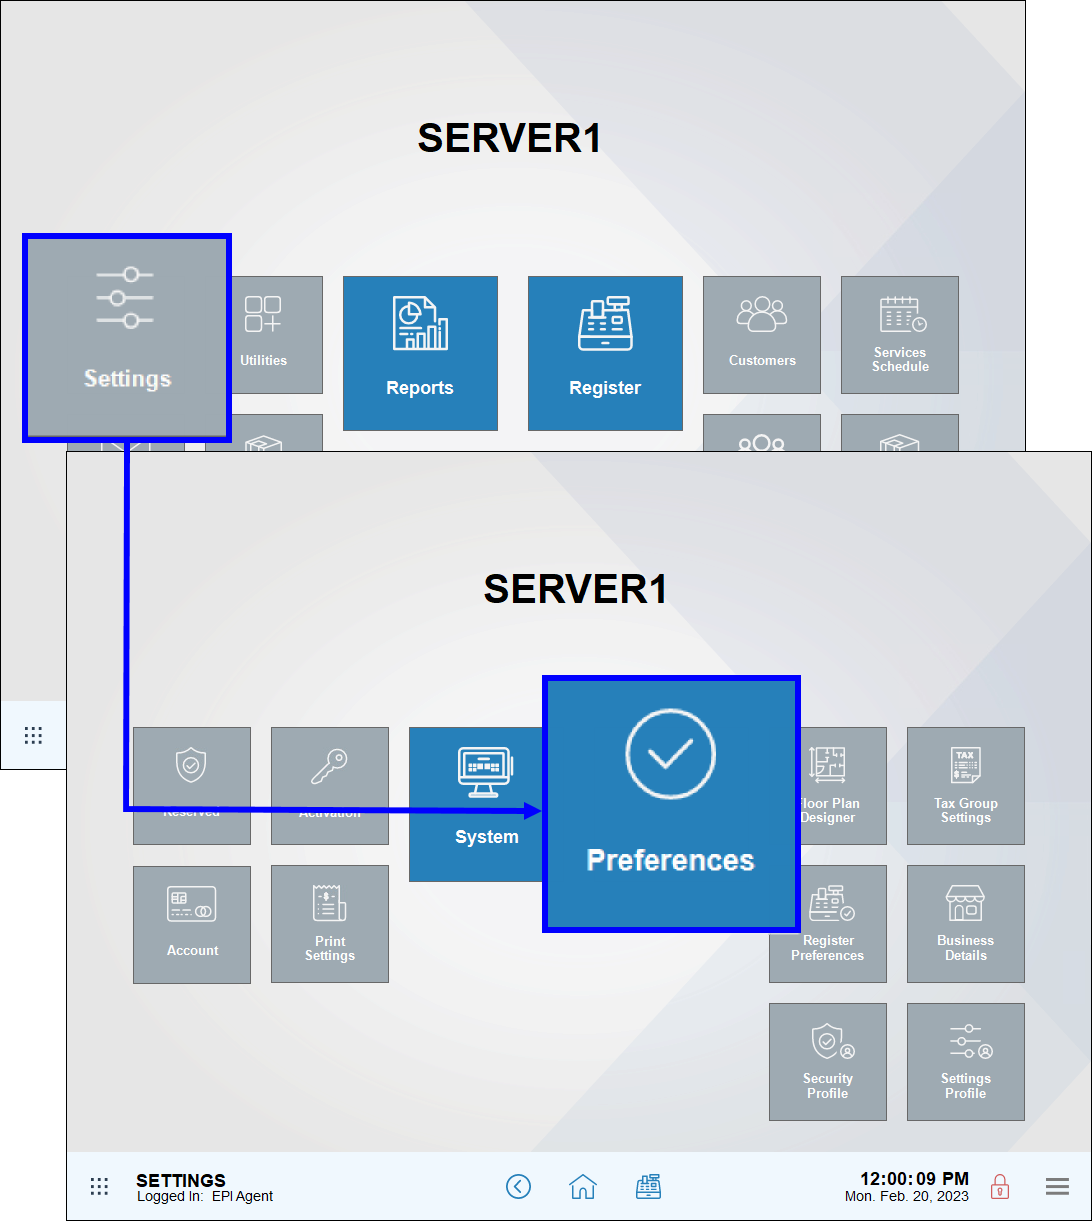
- Tap Display.
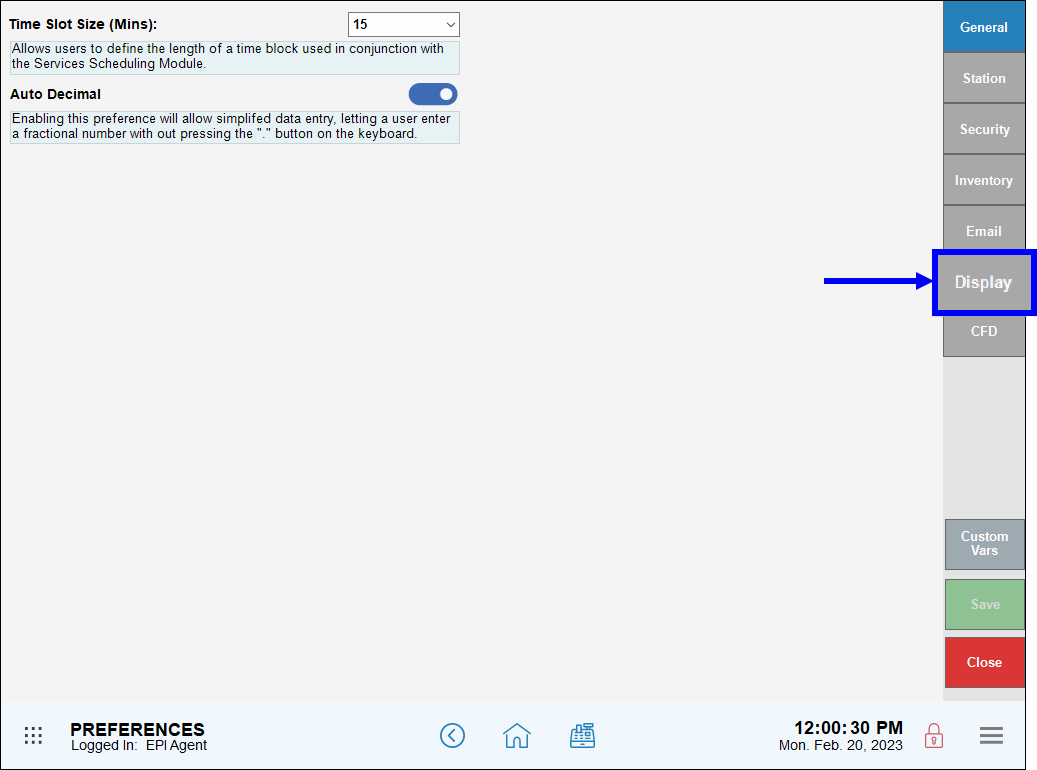
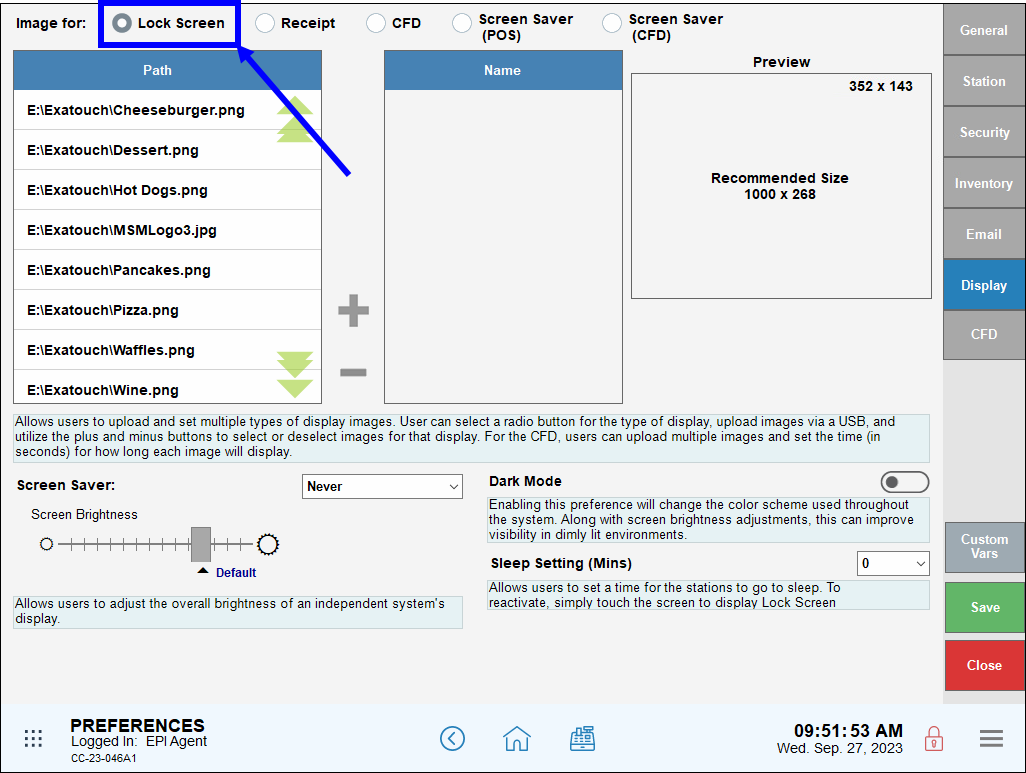
- Select Lock Screen.
- Note: Merchants can select any other location, such as Receipt or CFD, to place a logo there as well.
- In the Path section, select an available image and click the plus (+) sign.
- Note: Users can upload images from their PC or a USB device.
- A thumbnail of the image displays in the Preview window.
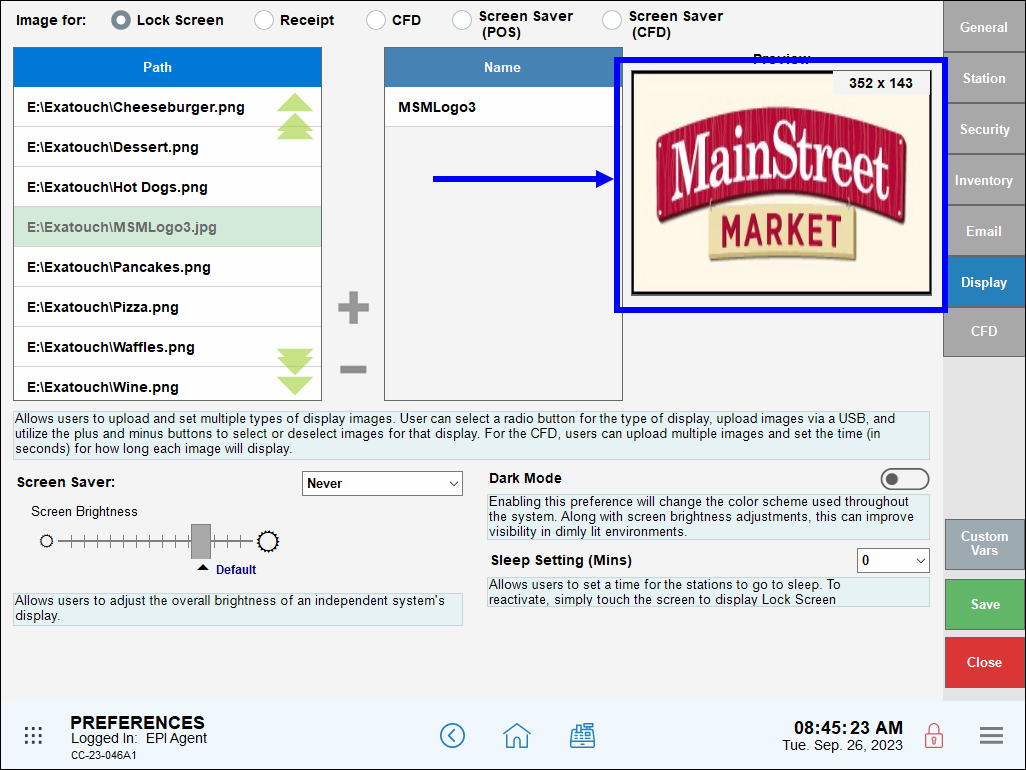
- Tap Save.
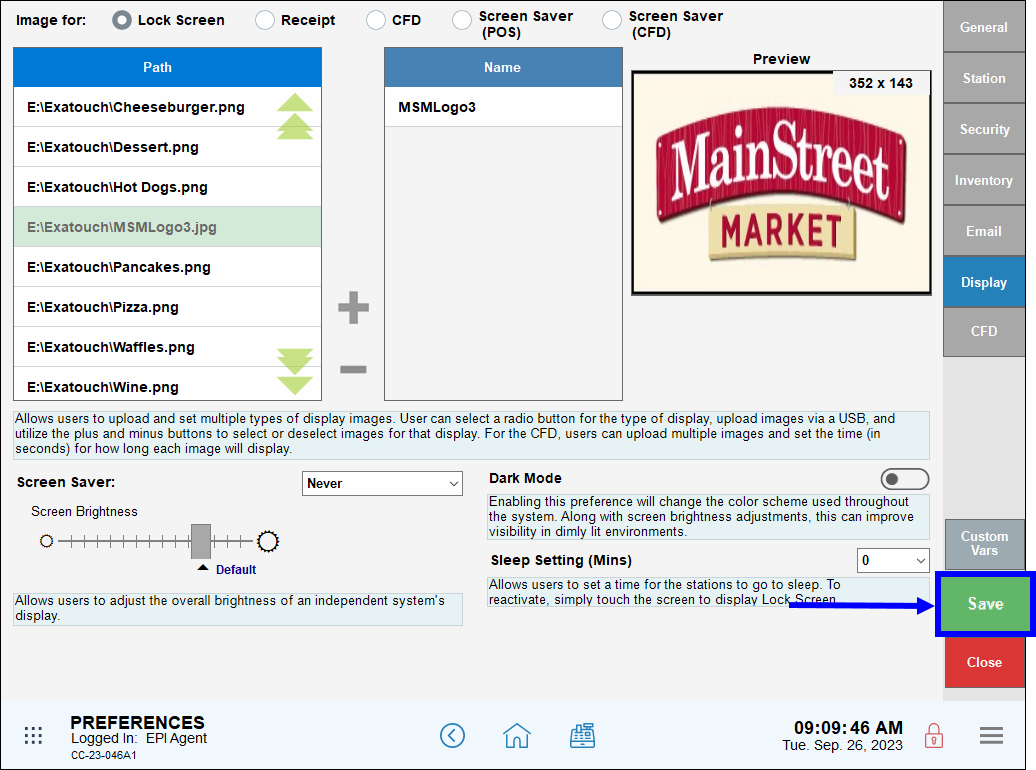
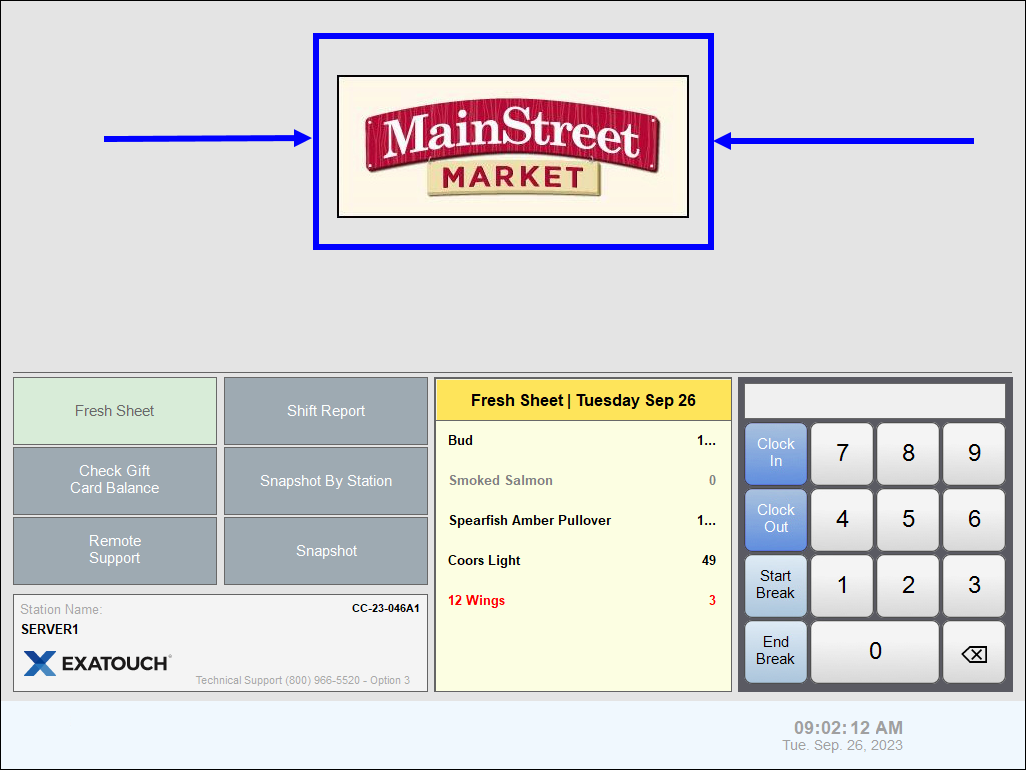
- Navigate to the Lock Screen and verify the logo displays correctly.
- Tip! Optimal logo size for the kiosk is 418 x 173 pixels and min 96 dpi
- Upload a logo in jpeg (.jpg) format onto an external USB drive.
- Insert the USB drive into one of Exatouch’s USB port, located on the underside of your Exatouch monitor.
- From Home, navigate to Settings > Account.
- Tap the Loyalty tab.
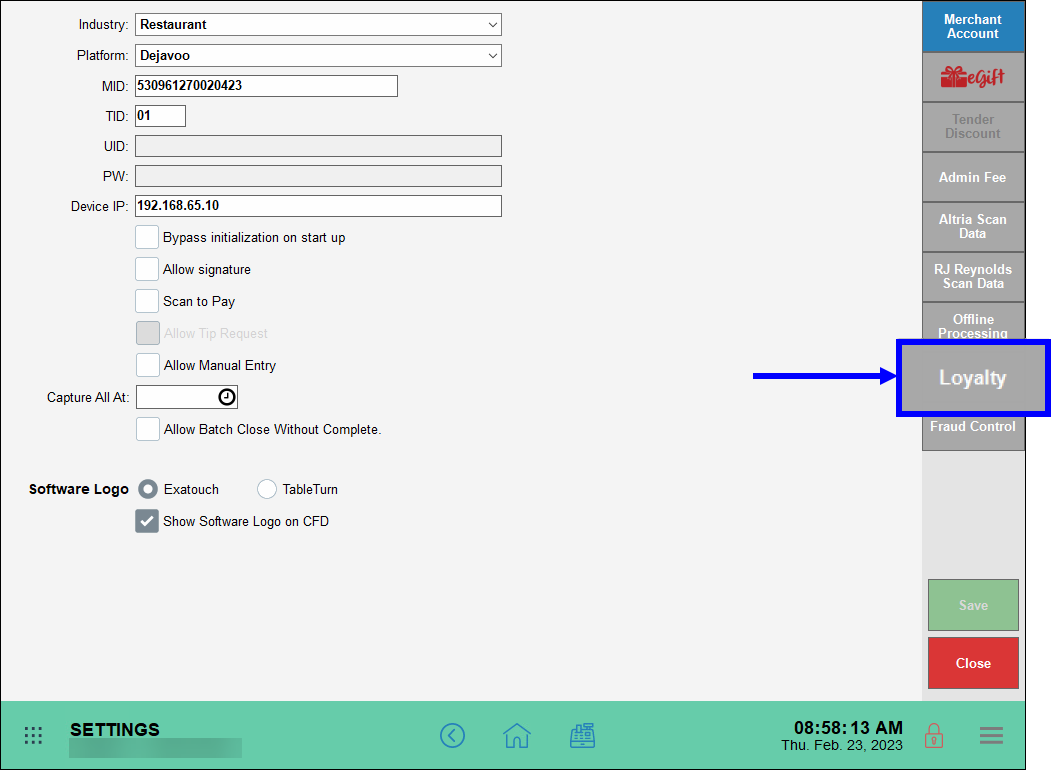
- Tap Kiosk Background.

- Select a .jpg file.
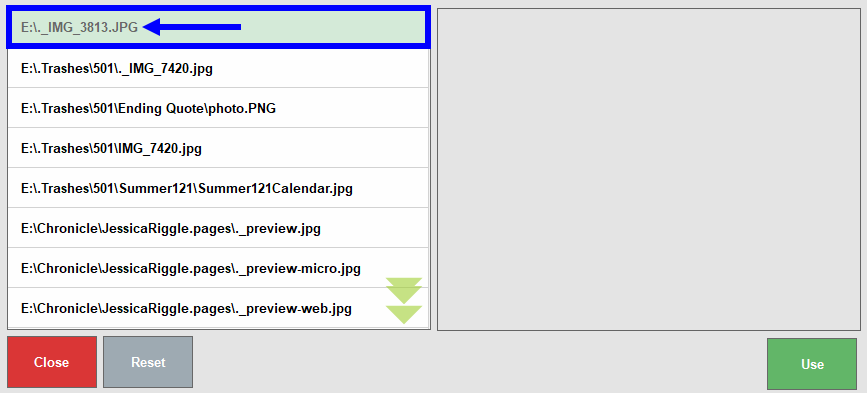
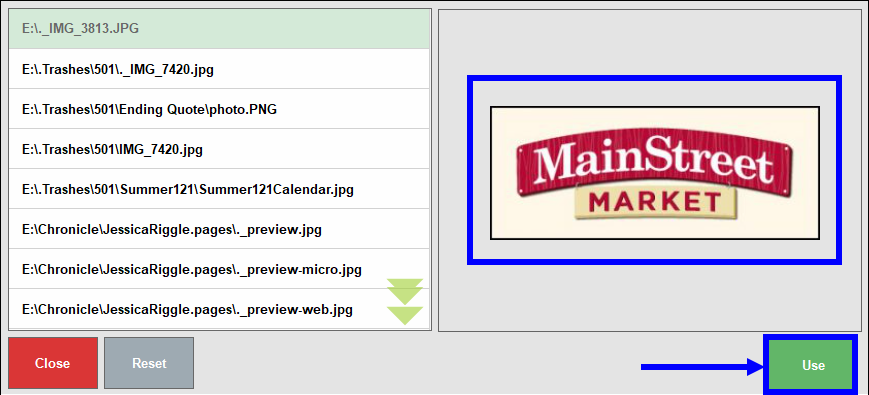
- Preview the image, and tap Use.
- Note: Clear the logo by tapping Reset.
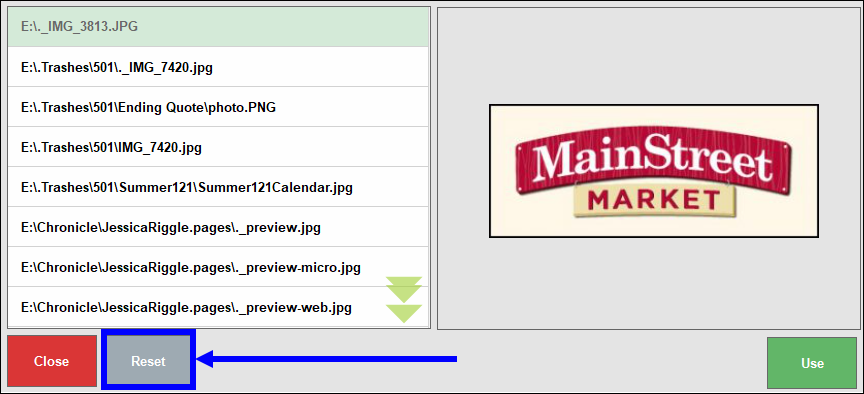
- Note: Clear the logo by tapping Reset.
- View the logo in the “Kiosk background” field, and tap Save.

- Tip! Optimal logo format for Floor Plan is 936 x 625 pixels and min 96dpi
- Upload a logo in jpeg (.jpg) format onto an external USB drive.
- Insert the USB drive into one of Exatouch’s USB ports, located on the underside of your Exatouch monitor.
- From Home, navigate to Settings > Floor Plan Designer.
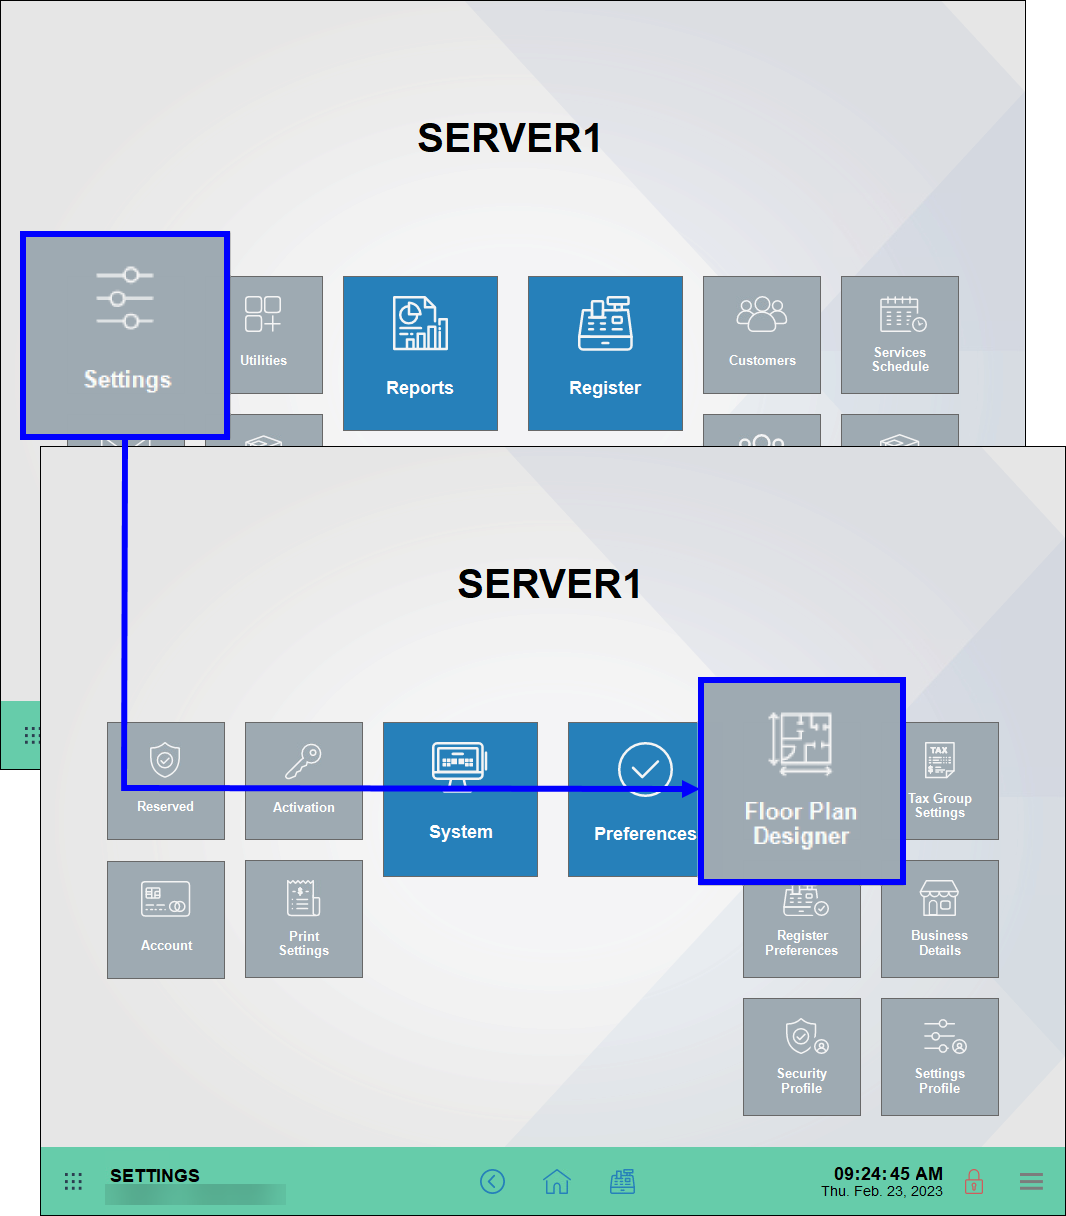
- Tap Change Bg (Change background).
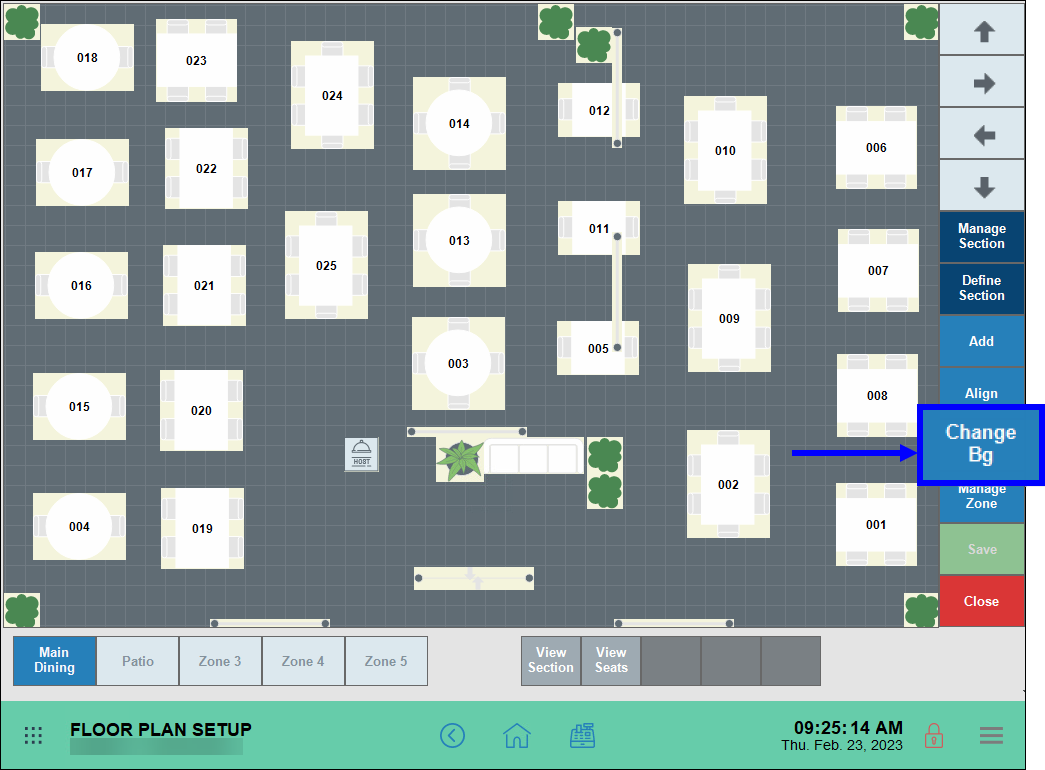
- Select a .jpg file.
- Preview the image, and tap Use.
- Note: Clear the logo by tapping Reset.
- Note: Clear the logo by tapping Reset.
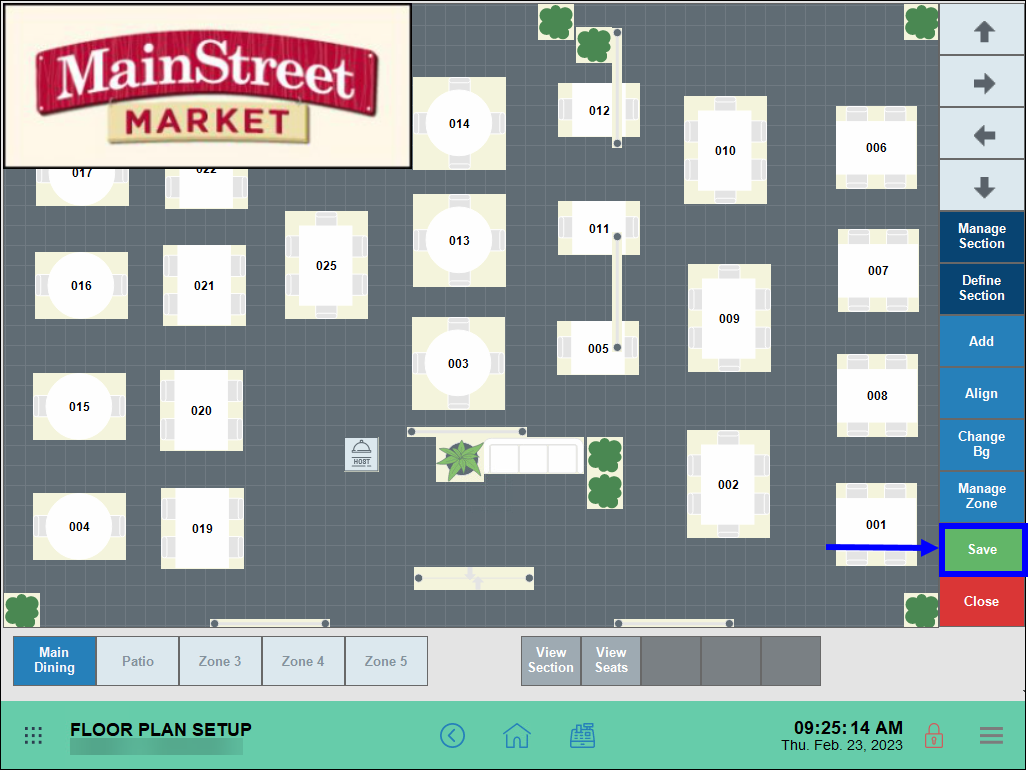
- View the logo on the Floor Plan screen, and tap Save.
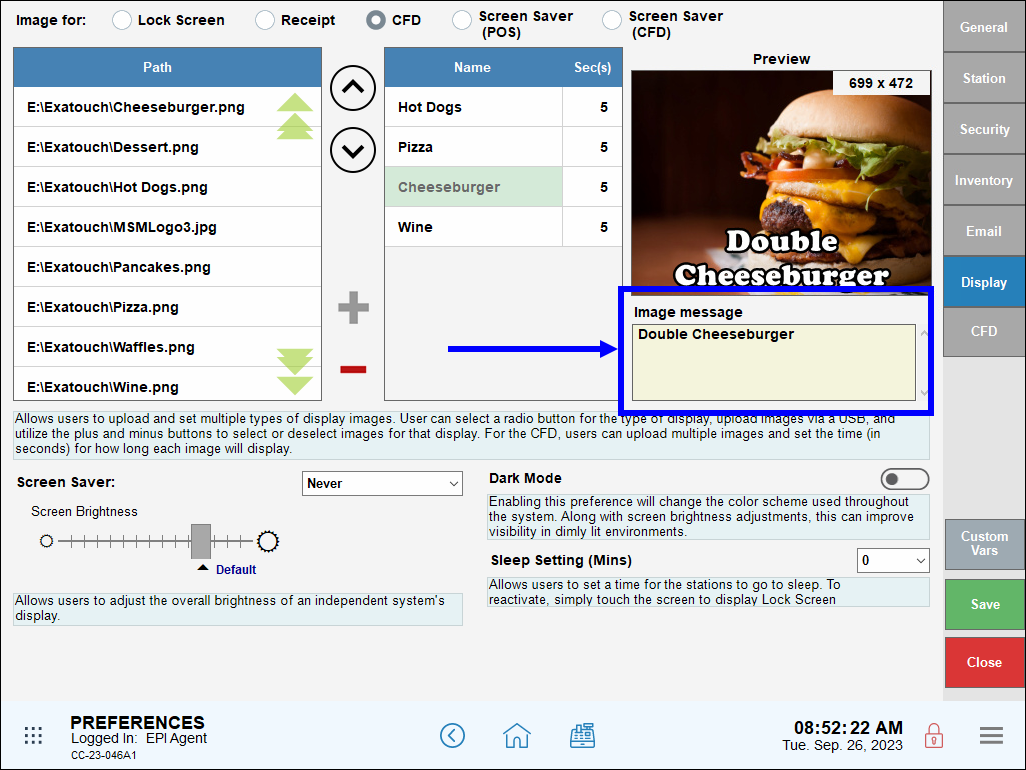
Merchants can use the same principles for adding logos to Exatouch to add images and even create slideshows to further showcase your menu. Slideshows can be added to the Customer Facing Display (CFD), or as screen savers to Exatouch or the CFD.
- From Home, navigate to Settings > Preferences and select the Display tab.
- Select either CFD, Screen Saver (POS), or Screen Saver (CFD).
- Add menu items as desired from a USB flash drive or PC. Selected items populate in the Name section of the Display tab.

- For each image, enter timeout values (in seconds) in the Sec(s) section.
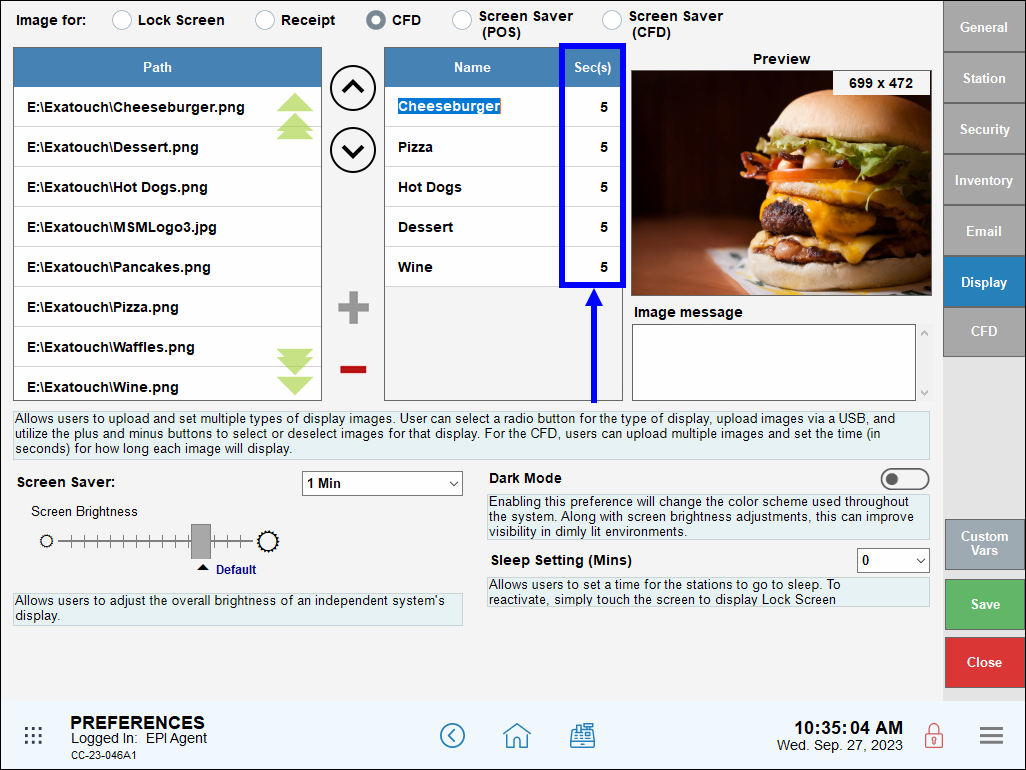
- Tap Save.
- View the slide show in the display format you selected in Step 2.
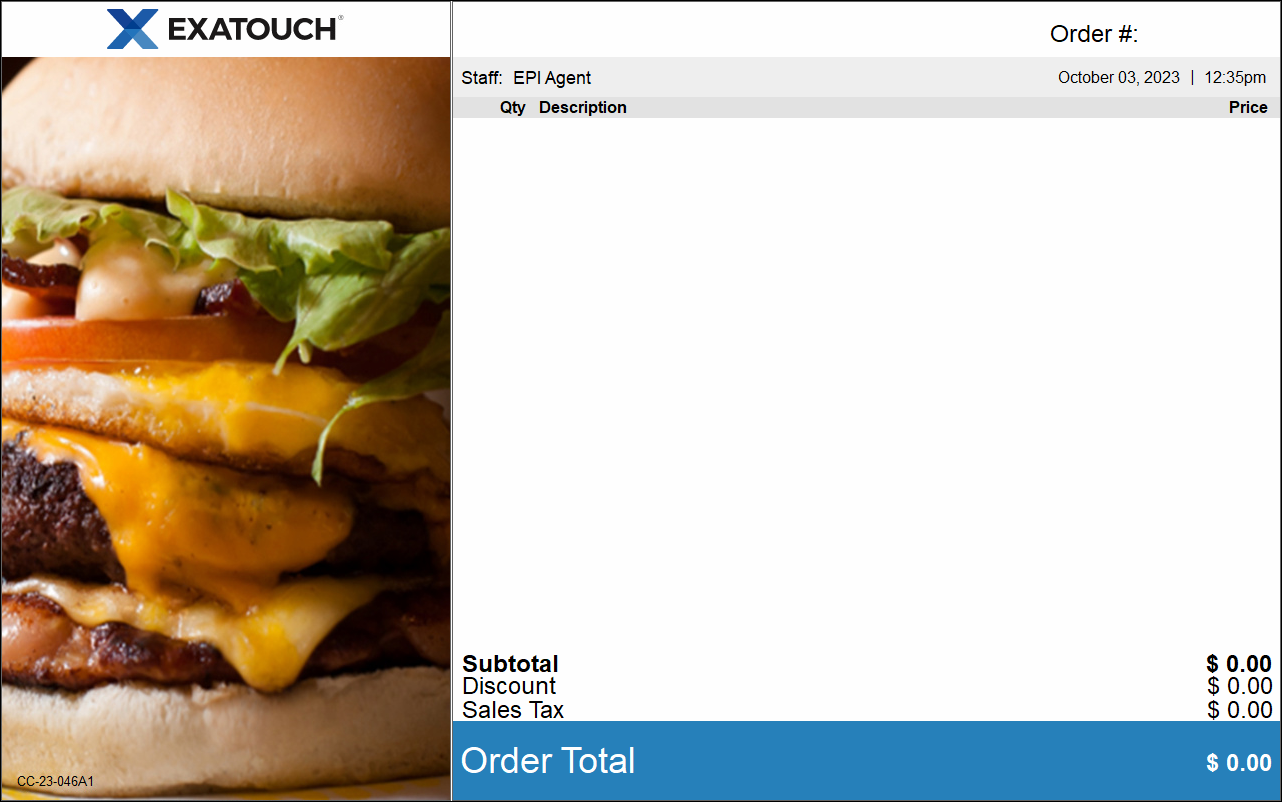
- Tip! Merchants can also add text to a logo or image. Select an image, then enter the desired text in the Image message field and tap Save.
How can we improve this information for you?
Registered internal users can comment. Merchants, have a suggestion? Tell us more.