This section contains information and procedures about system administrator level functions of the DeliverMe online ordering site. While many of these procedures are performed by your Electronic Payments Support team, merchants can also configure settings to meet the needs of their business.
DeliverMe’s online ordering website gives customers more ways to submit orders for pickup and delivery. Enhanced back-end functionality provides merchants with additional menu options while making it even easier for customers to place orders.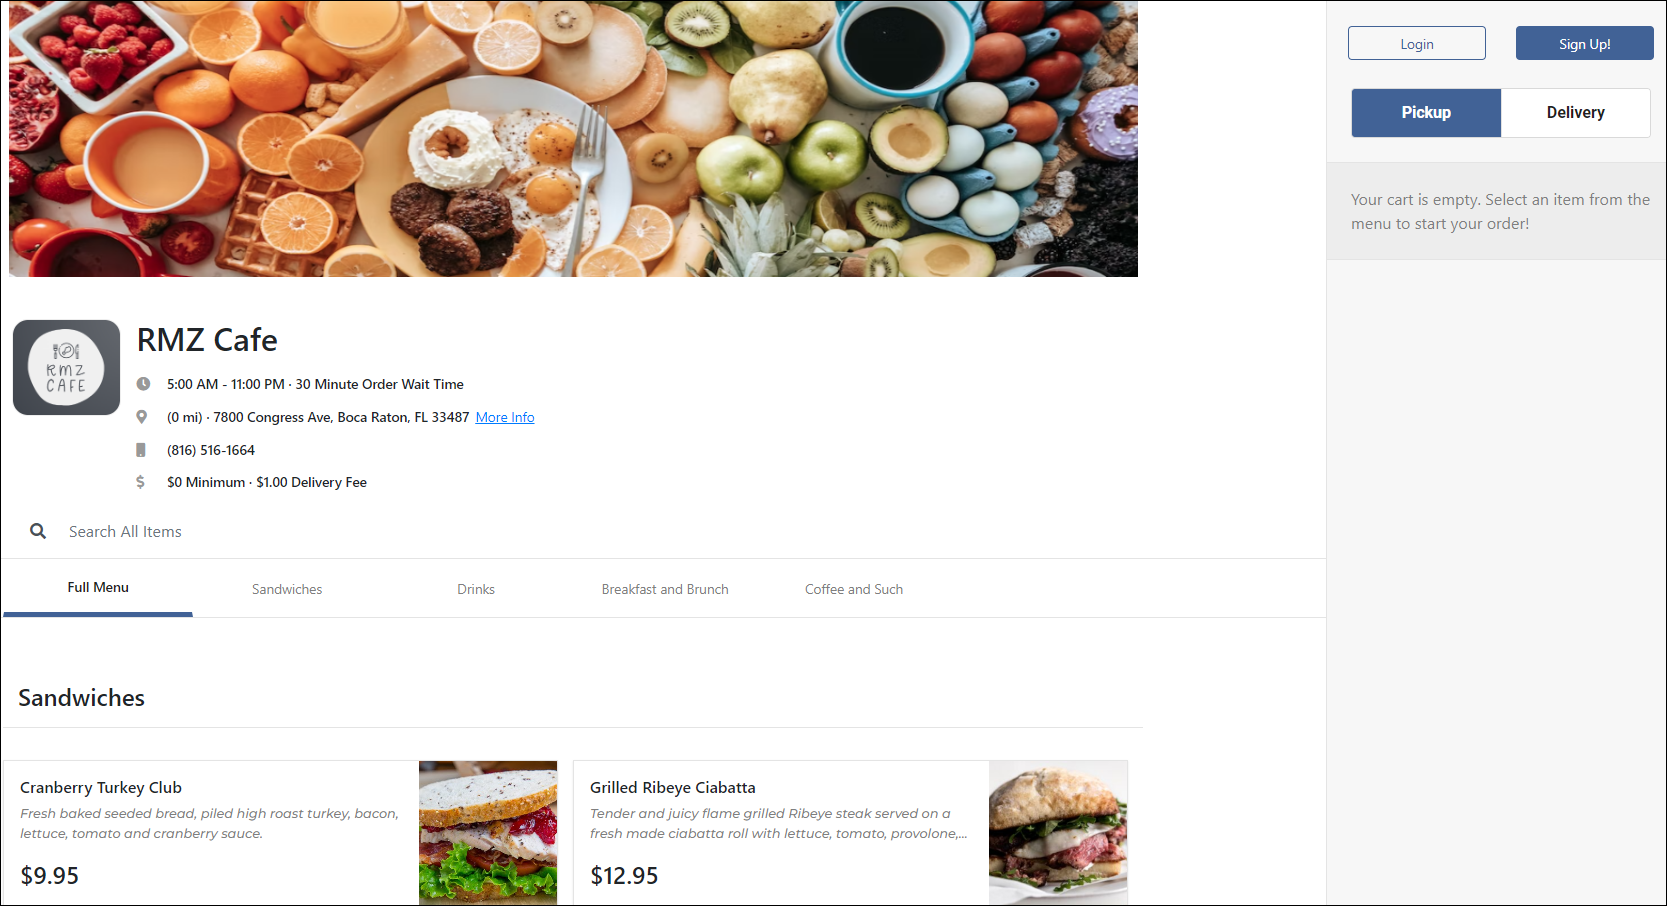
- Note: Before performing the following, Exatouch users need to perform several procedures in Exatouch during initial install of DeliverMe. See Integrating DeliverMe and Exatouch for more information.
Consider these additional points regarding the DeliverMe Dashboard:
- During initial install, settings can be imported from Exatouch, but any setting changes made in DeliverMe do not translate back to Exatouch.
- If customers view your site when delivery or pickup hours are closed (scheduled or temporary), this is replaced by a message that ASAP orders are not available. Customers can place an order for a future available date and time.
- When syncing Exatouch items to DeliverMe during the initial install, it takes about a minute for changes to display in DeliverMe.
Image Management
Your DeliverMe online ordering site includes a header image, your logo image, and images for each item. Best practice is to assign a readable file name for each item, such as beer-bottle-bud.jpg or cool-ranch-dorito-20oz.jpg. Manipulate each image prior to uploading so that it displays as desired.
- Header Image: Images provided to Support can be up to 1200 pixels by 1200 pixels. They showcase your business, highlight specialty items, and make customers feel welcome.
- Logo Image: Images provided to Support can be up to 800 pixels by 800 pixels. They are shared on your online ordering site along your other business information, and assure your return customers they are ordering from your DeliverMe online ordering site.
- Menu Item and Inventory Images: For best results, select attractive, representative images sized 800 px by 800 px.
Online Ordering – Site Information
Your DeliverMe site will have a unique web address for your business. Information about your business is a mix of static and changing information that’s configurable from the DeliverMe dashboard.
- Site Header Image
- Site Logo
- Pickup and Delivery Hours
- Order Wait Time
- Location Address
- More Info
- Location Phone Number
- Order Minimum
- Delivery Fee
- Menu Categories
Perform the following to access the dashboard:
- Navigate to the DeliverMe site.
- Click Login.
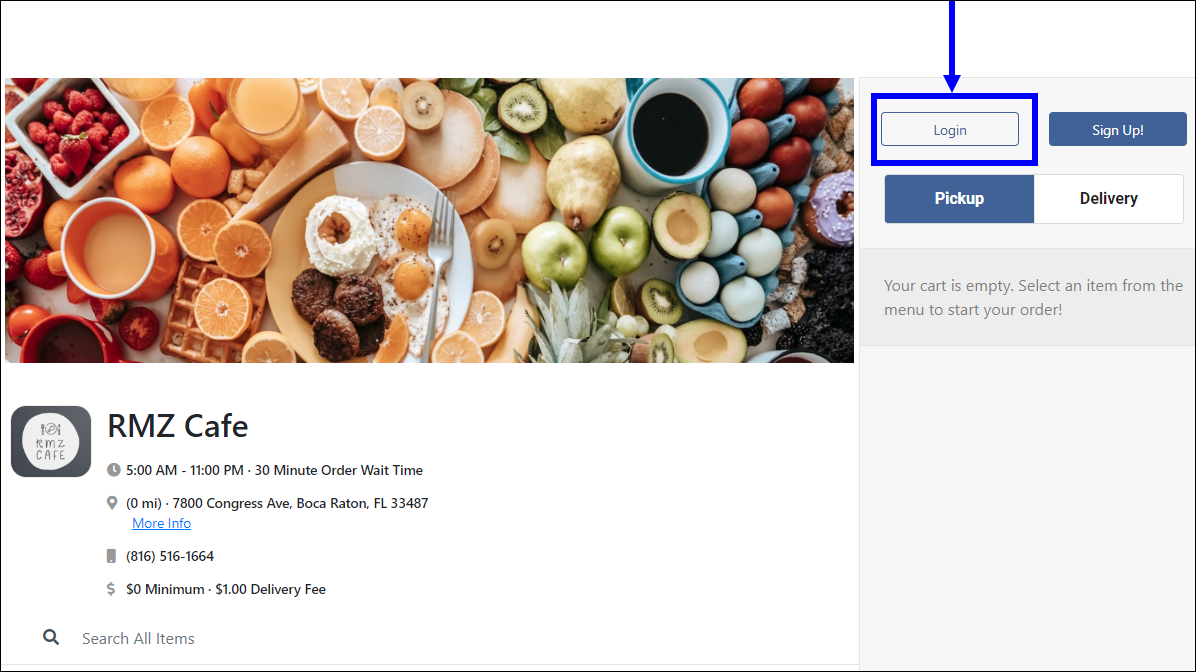
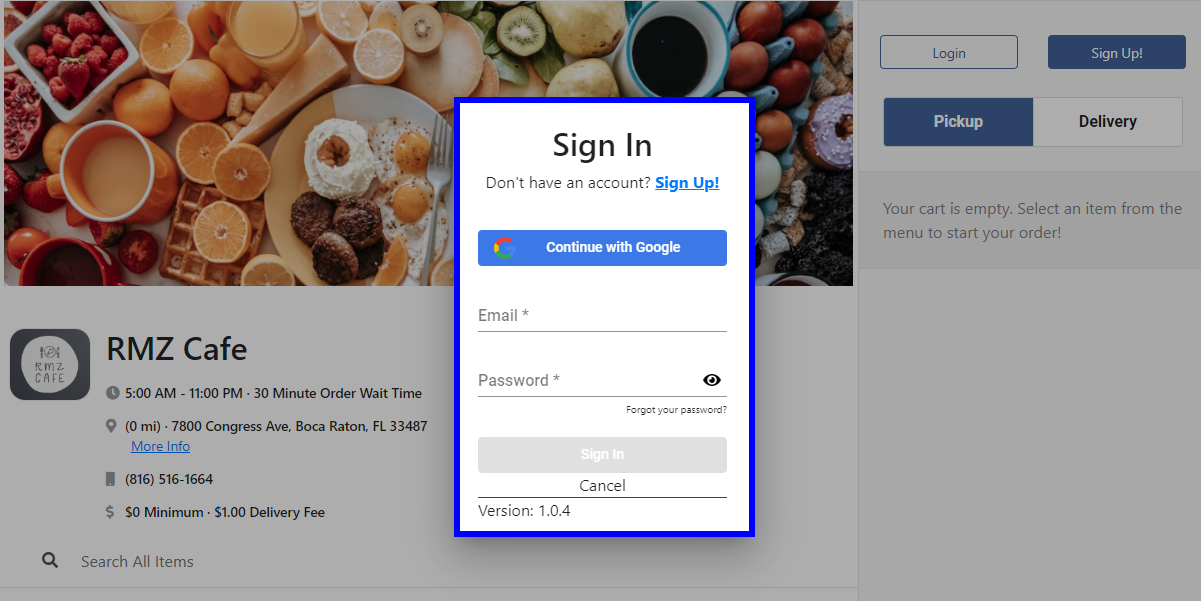
- Enter login credentials in the Sign In pop-up.
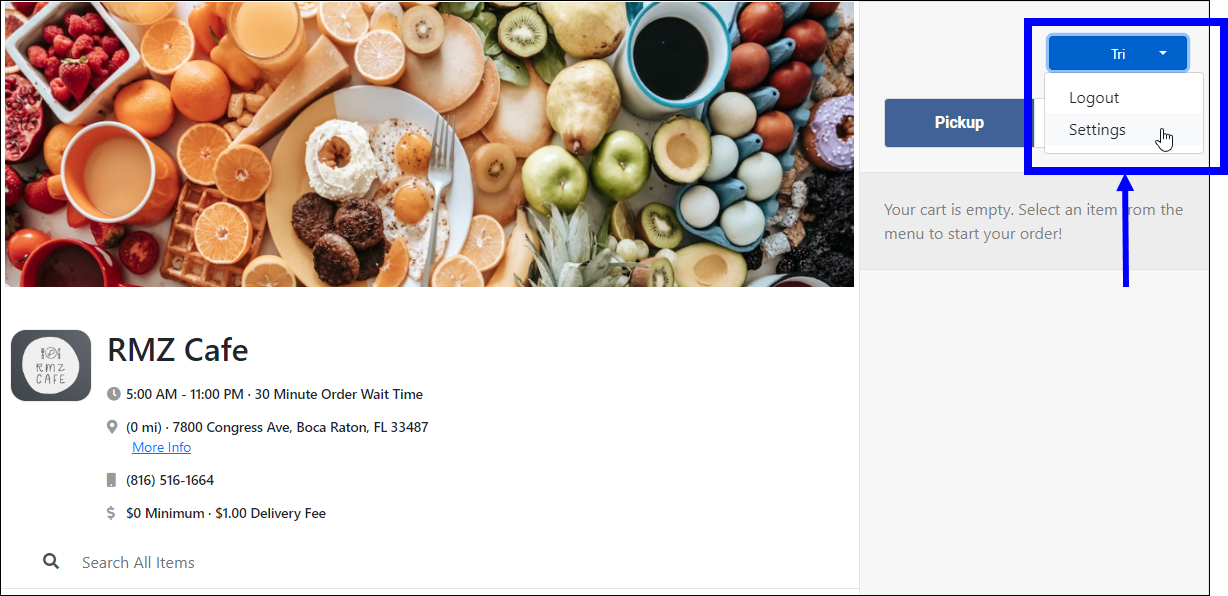
- From the account name dropdown, select Settings. The DeliverMe Dashboard displays.
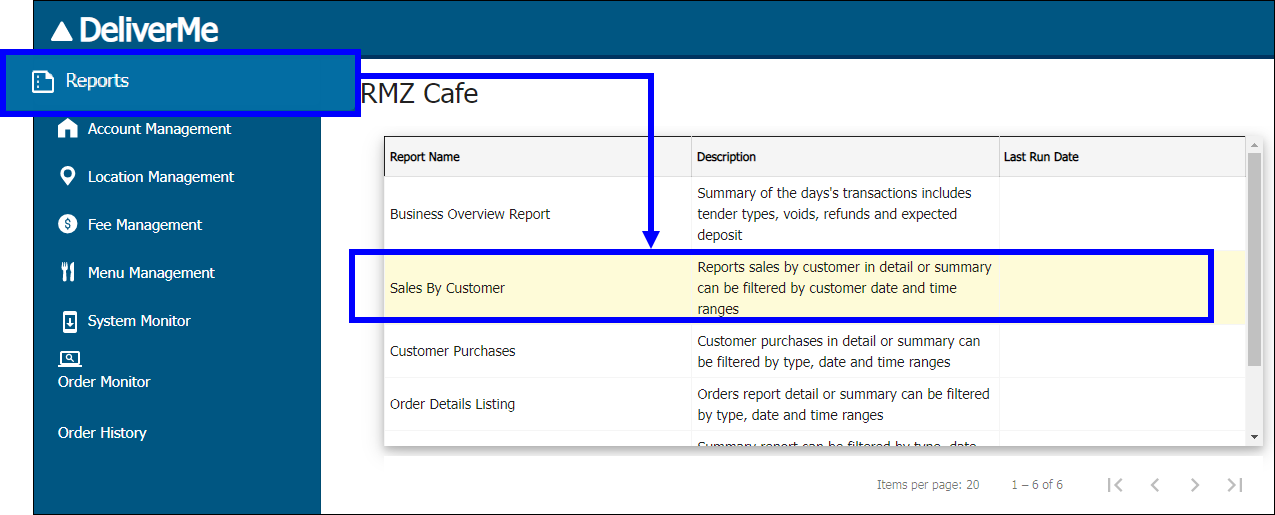
Merchants can view reports from the DeliverMe Dashboard. Select Reports to display a series of available reports, along with a description of each. Select the desired report to view report data. The following reports are available:
- Business Overview Report: Summary of daily transactions; includes tender types, voids, refunds, and expected deposit
- Sales By Customer: Reports (detailed or summary) can be filtered by customer date and time range
- Customer Purchases: Reports (detailed or summary) can be filtered by type, date, and time range
- Order Details Listing:: Orders (detailed or summary) can be filtered by type, date, and time range
- Sales Summary: Summary report that can be filtered by type, date, and time ranges
- EPI Billing Summary Report of Sales: Summary report that can be filtered by MID, date, and time ranges. EPI facing only.
User Profile
Merchants and customers can enter and update their account information on the User Profile page. Customers can also select their preferred shipping/deliver and billing addresses. Access the User Profile page from the left menu by selecting Account Management > User Profile.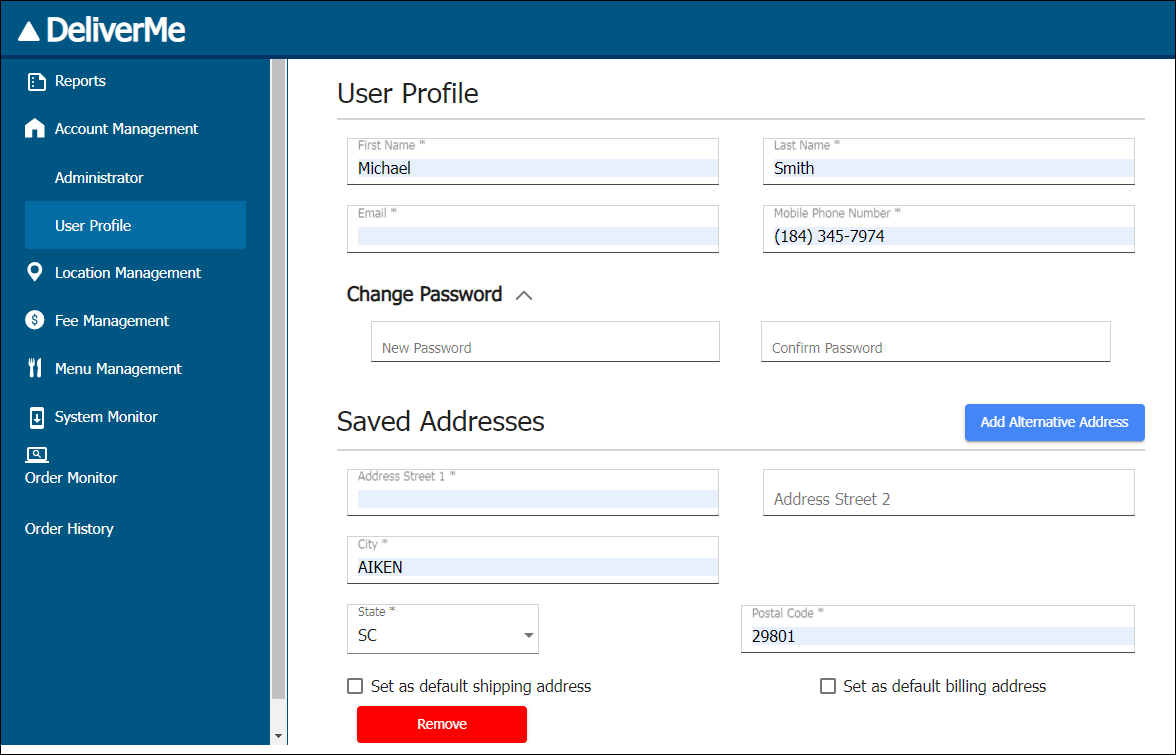
Select Location Management to configure merchant-related settings, such as the business address, images, other business-specific settings. Location Management includes the following:
- Location Settings
- Business Hours
- Banner Management
- Printer Settings
Location Settings
Perform the following to add or modify a merchant’s business information.
- In the Business Information section, enter the business name and address.
- Select a Logo.
- Select a Background Image.
- Header Image: Images can be up to 1200 pixels by 1200 pixels. They showcase your business, highlight specialty items, and make customers feel welcome.
- Logo Image: Images can be up to 800 pixels by 800 pixels. They are shared on your online ordering site along your other business information, and assure your return customers they are ordering from your DeliverMe online ordering site.
- Note: If image doesn’t look correct, re-upload the image instead of trying to adjust it.
- Enter a contact person’s name, email address, and phone number in the Business Contact section.
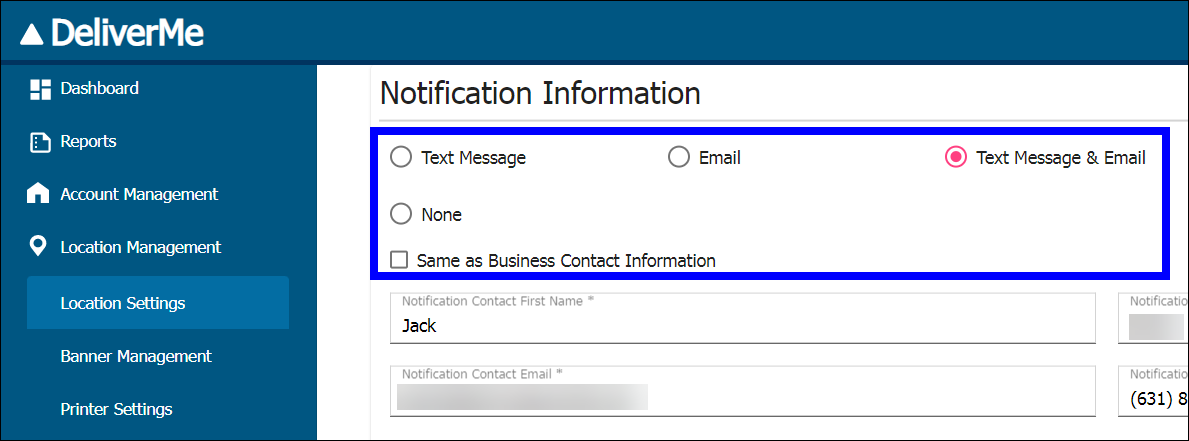
- In the Notification Information section, perform the following:
- Select a method to send notifications: Text Message, Email, Text Message & Email, or None.
- Select the Same as Business Contact Information checkbox to use the business contact for notifications. If leaving the box unchecked, enter desired contact information for notifications.
- Enter a Custom Ordering Error Message that displays when an error occurs.
- Tap Save.
Business Hours
Merchants can configure and modify delivery and pickup hours for their business. Perform the following:
- Navigate to Location Management > Location Settings.
- Scroll down to the Business Hours section
- Configure Delivery Hours and Pickup Hours as desired.
- Click Save.
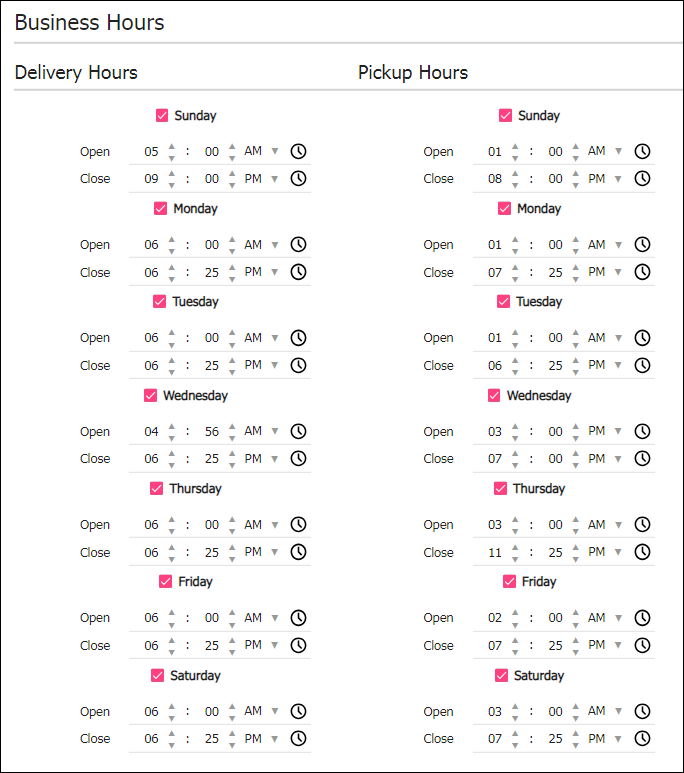
- Note: When Delivery Hours and Pickup Hours are disabled, a message displays in the upper right corner of the customer order screen stating that these features are not available.
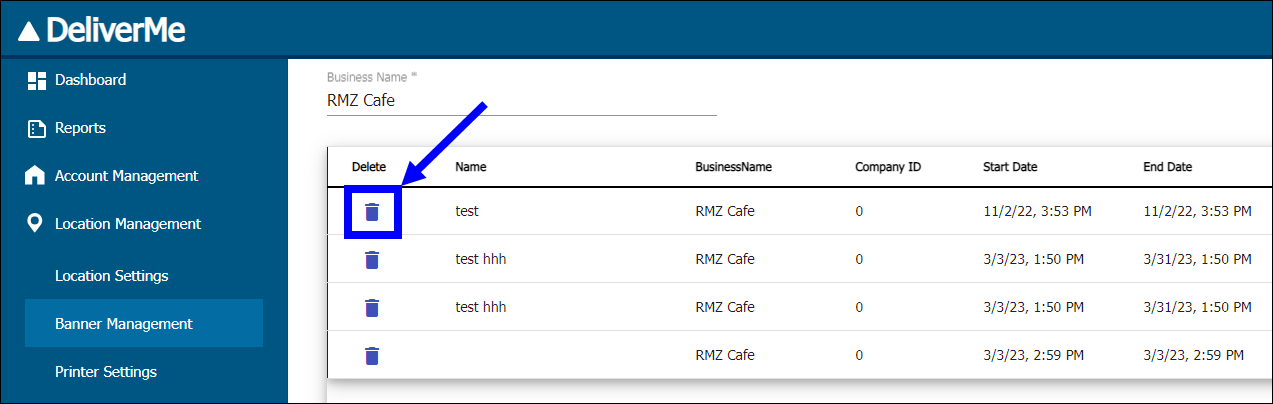
Banner Management
Banners display directly above the Background Image and can be used to call attention to special or seasonal promotions, such as a holiday sale. Merchants can also use the banner to display special messages, such as new hours of operation.
Creating a Banner
- Click New Merchant Banner.
- Enter the banner’s name in the Banner Name field.

- Design a banner using the formatting tools provided in the bottom work area.
- To delete a banner, select the banner to delete and click the trash can icon.
- Click Save.
Adding a Banner
- Select a banner from the list.
- Edit the banner in the bottom work area, as desired.
- Click Save.
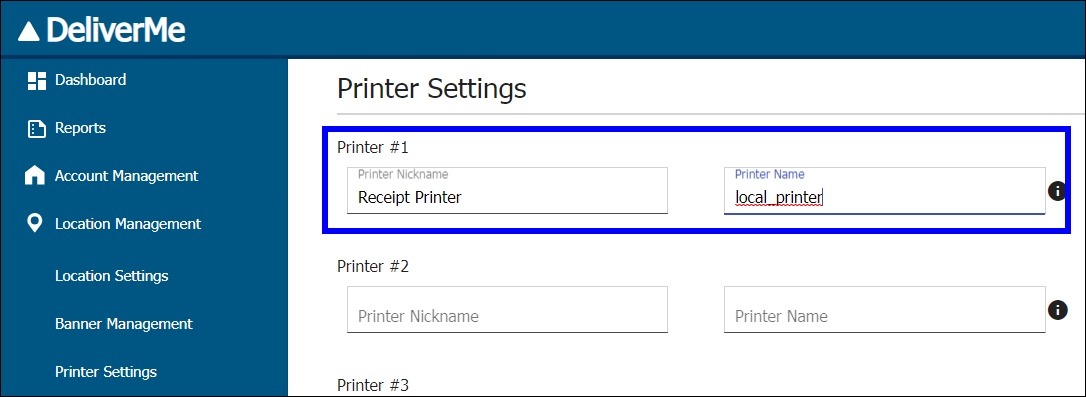
Printer Settings
DeliverMe’s Printer Settings function allows merchants to add and configure printers.
- Note: Adding printers requires additional configuration on the printer configuration website (EpsonNet Config). See Connecting the Printer below for more details.
- In DeliverMe, navigate to Location Management > Printer Settings and configure the following:
- Enter a desired name for the printer in the Printer Nickname field.
- Enter the the printer’s Device ID created on the printer website.
- Note: The Device ID and Printer Name must match for each printer configured in DeliverMe.
- Click Save.
- Navigate to Menu Management > Category Settings and configure the following:
- Categories: Select a category.
- Printer: Select the printer.
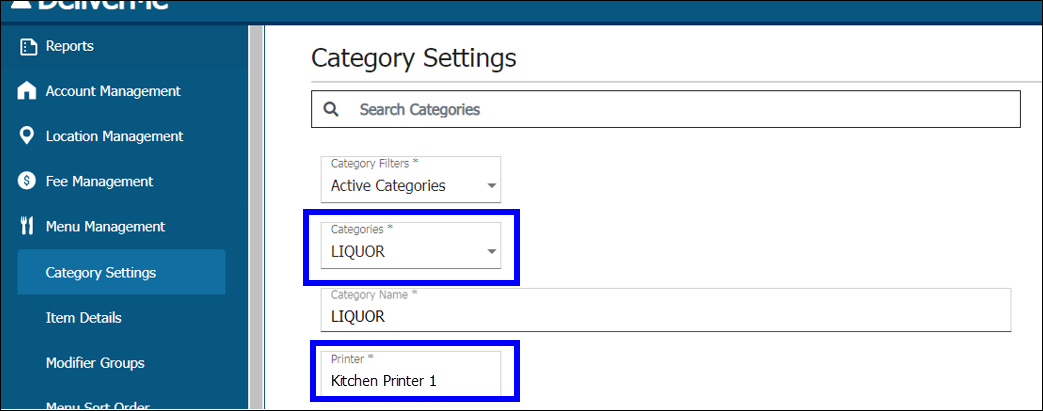
- Click Save.
Connecting the Printer
Use the Epson TM-M30 Receipt Printer to print order tickets and customer receipts for DeliverMe orders. Perform the following to add and install the TM-M30 printer:
- Connect the printer to a router using an ethernet cord.
- In the URL field of Google Chrome, enter the IP address your local network assigns to the printer.
- Note: Find the IP address by holding the printer feed button while powering the printer.
- When the warning page displays, click Advanced. A Sign In pop-up displays.
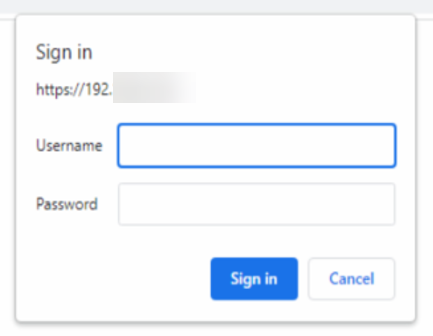
- Enter the following credentials:
- Username: epson (case sensitive)
- Password: The printer’s serial number (i.e., EX/X99M010748)
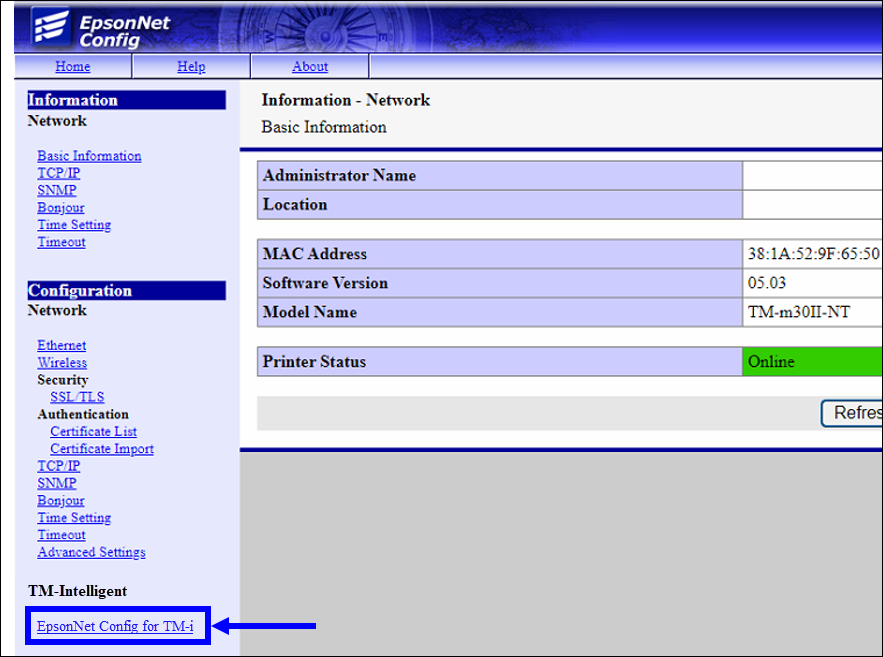
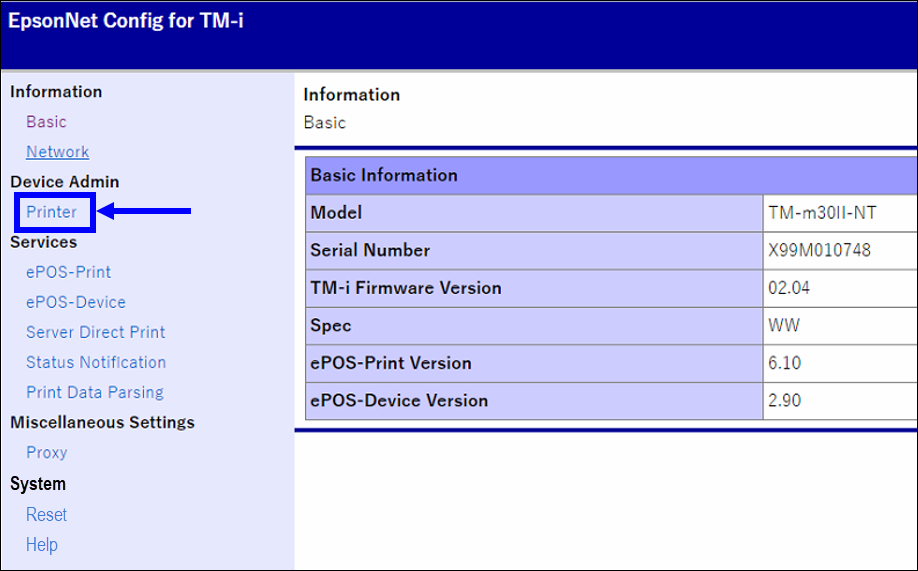
- In the left pane of the EpsonNet Config page, click EpsonNet Config for TM-i. The EpsonNet Config for TM-I page displays.
- In the System section of the left pane, click Reset.
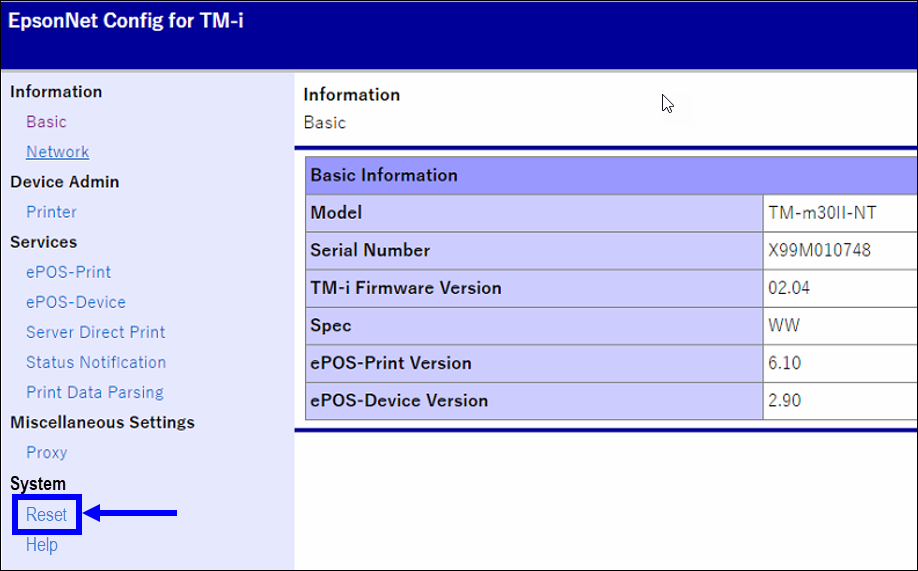
- Once the printer reset completes, click Network.
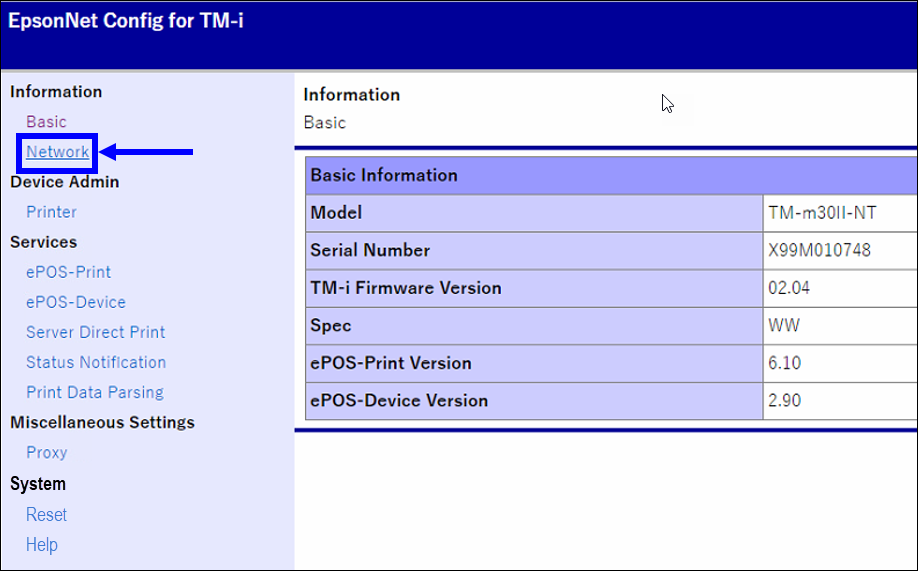
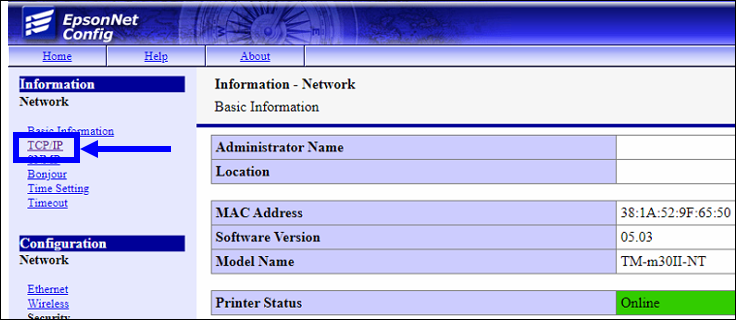
- On the Network page, click TCP/IP and then verify that Auto displays in the Acquiring the IP Address field.
- Click Epson Net Config for TM-i a second time.
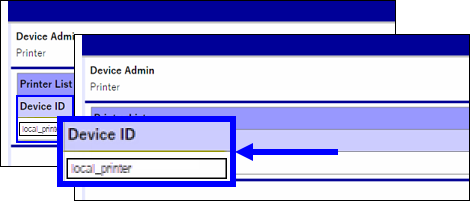
- In the Device Admin section, click Printer.
- Enter local_printer (case sensitive) in the Device ID field.
- Note: One printer must be named local_printer. This printer acts as the default.
- On the Services page, perform the following:
- Select Enable from the Server Direct Print drop-down.
- Enter “https://api.deliverme.com/api/printing” in the URL field of the Server 1 section.
- Enter 30 in the Interval field of the Server 1 section.
- In the ID field, enter the printer’s ID number. Typically, the ID consists of the merchant’s ID number followed by the name of the printer.
- Enter the name of the printer in the Name field.
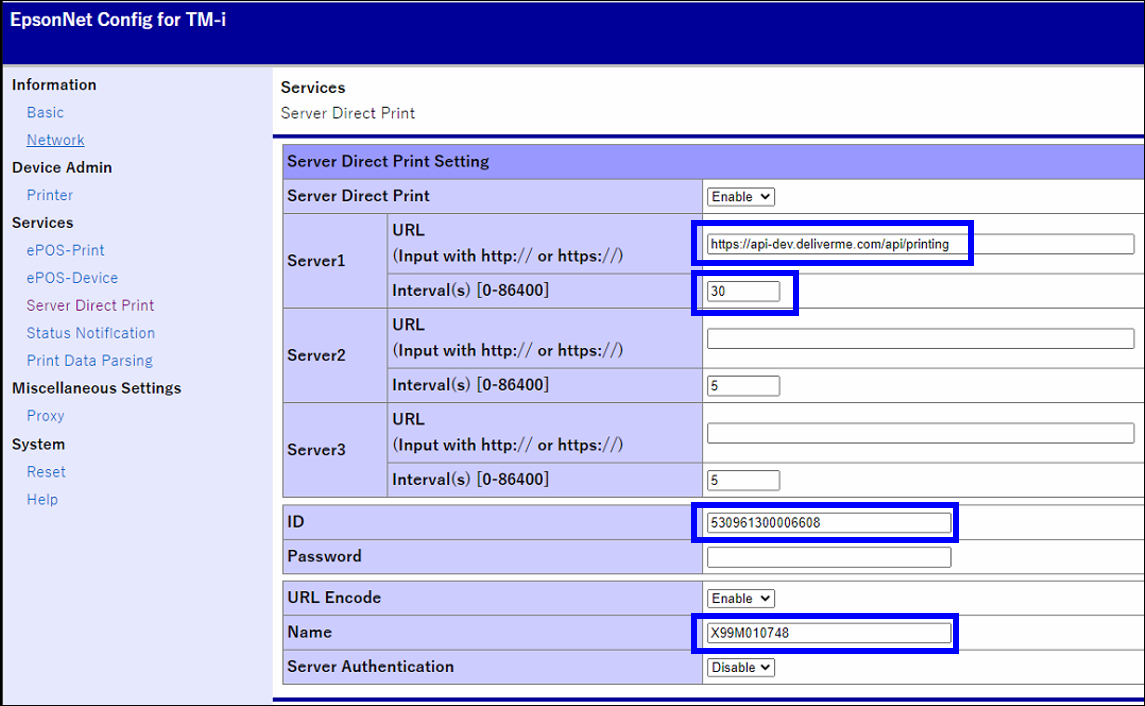
- Click Apply & Restart.
Fee Settings
Under the Fee Settings tab, merchants can configure settings in the Tax Setting and Delivery Fee sections.
Tax Setting
In the Tax Setting section, enter the Tax Rate as a percentage.
Delivery Fee
- In the Delivery Fee section, select whether to charge fees by Delivery Zones or a Flat Fee.
- If selecting Flat Fee, enter the appropriate fee (as a dollar figure).
- If selecting Delivery Zones, enter delivery zones and any associated fees (as a percentage).
- Select the Zone 1, Zone 2, and/or Zone 3 checkboxes. Up to three zones can be configured.
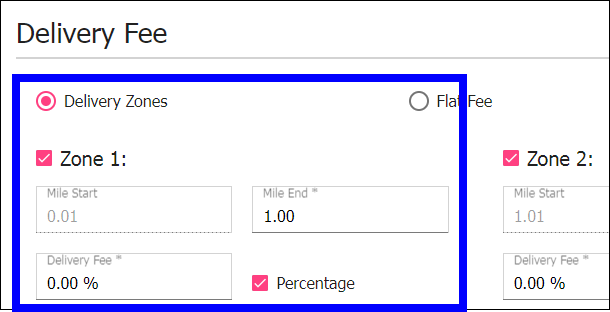
- Define zone boundaries by entering values in the Mile Start and Mile End fields. Round any decimals to two decimal places.
- Select the Percentage checkbox to calculate delivery fees as a percentage. Deselect the Percentage checkbox to calculate delivery fees by a dollar amount.
- Click Save.
Admin Fee
To enable an Admin Fee, merchants must contact Technical Support at (800) 966-5520 – Option 3 for assistance.
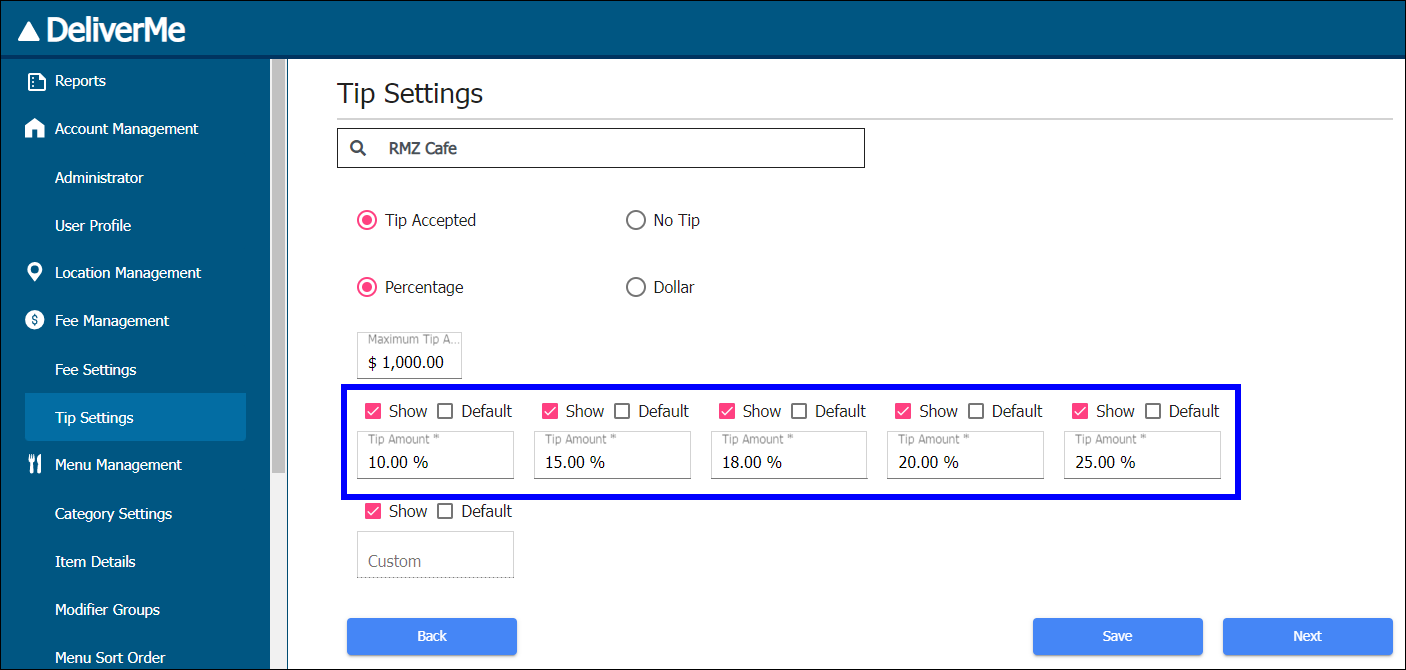
Tip Settings
- Select Tip Accepted to enable tipping or No Tip to disable tipping.
- If selecting Tip Accepted, select whether to apply tips by Percentage or Dollar.
- Enter, as a dollar figure, a maximum gratuity amount in the Maximum Tip Amount field.
- Perform the following to display suggested tips on the checkout page:
- Select the Show checkboxes for each field you wish to enter a suggested tip amount.
- Enter suggested tip amounts, by percentage, each field where the Show checkbox is selected.
Navigate to Menu Management > Category Settings to configure categories and subcategories. Category Settings also allows merchants to specify when items should or should not be sold.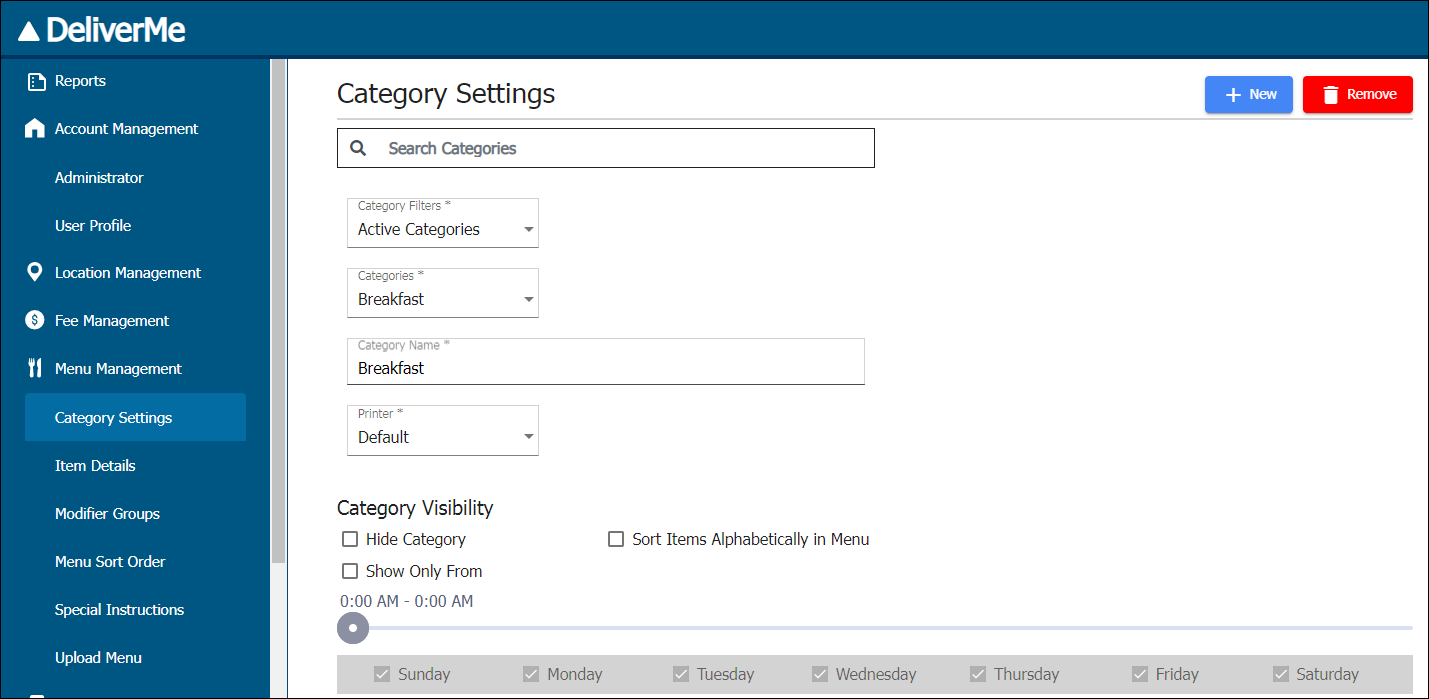
The following steps apply to Category Settings:
- Select the Category Filters dropdown to view Active Categories, Inactive Categories, or All Categories.
- Select the Categories dropdown to toggle between individual categories.
- In the Category Name field, rename the category, if desired.
- From the Printer dropdown, select the printer where currently displayed items print.
- In the Category Visibility section, select one or more of the following checkboxes:
- Select Hide Category to hide categories.
- Select Sort Items Alphabetically in Menu to display items in alphabetical order.
- Select Show Only From to define when items are available for sale. Adjust the slider to specify the time and/or select checkboxes for which days items are sold.
- Example: A restaurant wants to stop selling breakfast items after 11:00 a.m.

- Example: Local laws may prohibit the sale of alcohol on Sunday.

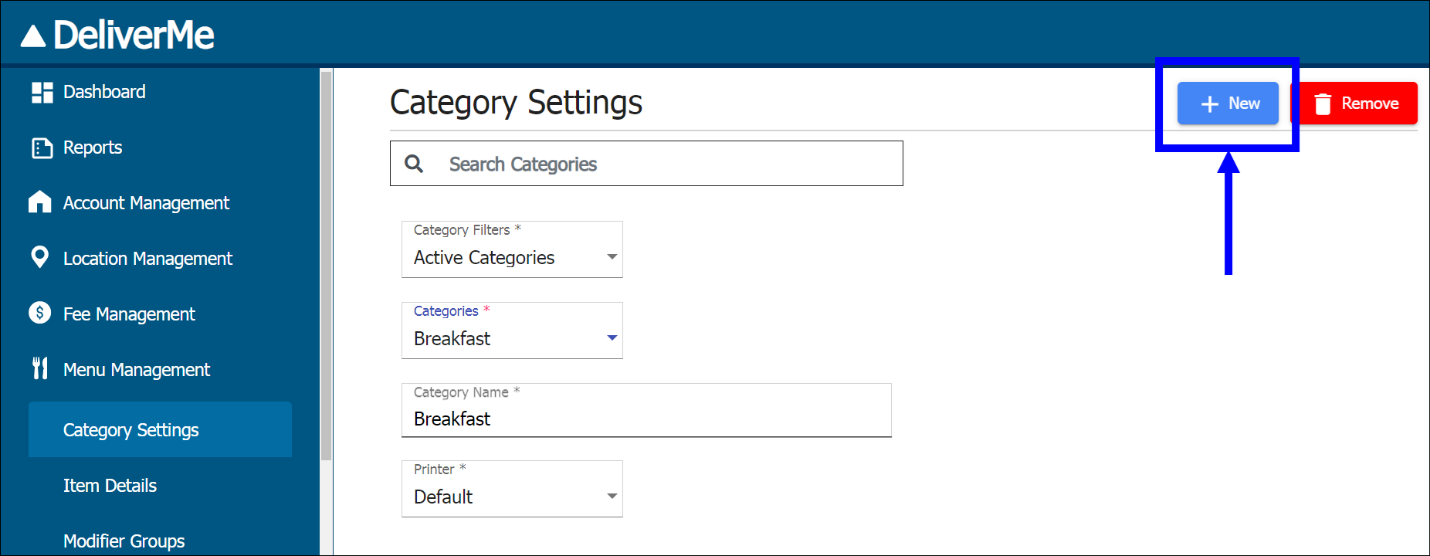
Creating Categories
Perform the following to create new categories:
- Click New.
- Enter the desired category name (i.e., Sides) in the Category Name field.
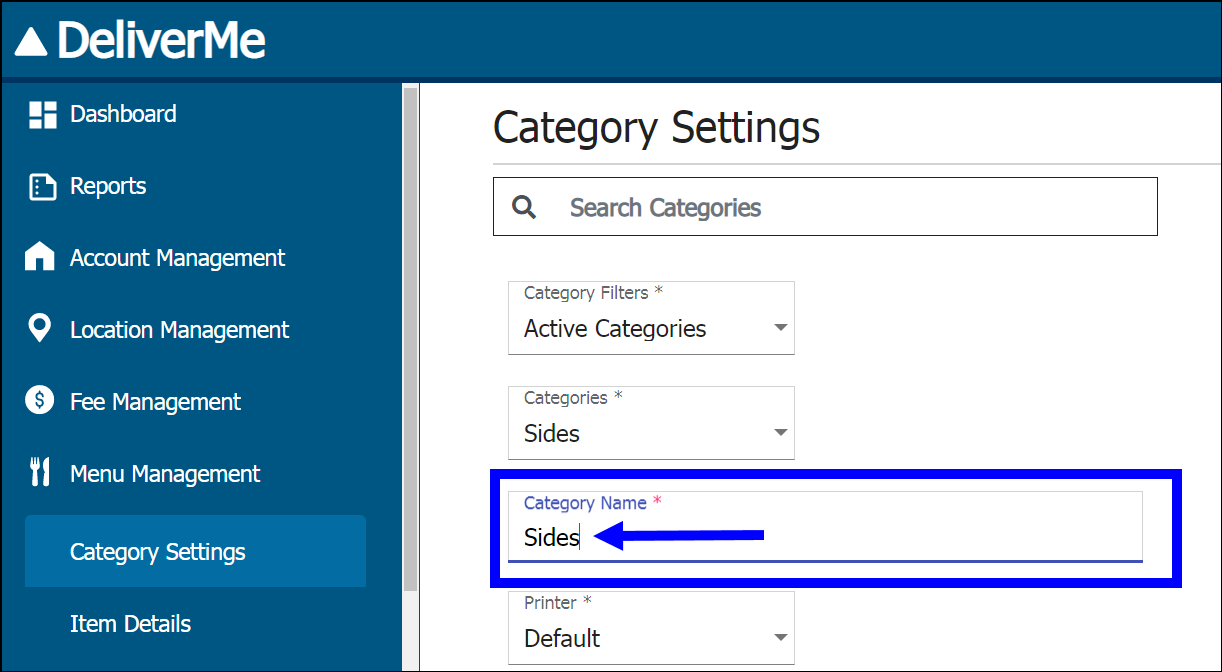
- Optional: Click Clone to create a duplicate of the category.
- Click Save and Add New Category to save and continue adding more categories.
- Click Save after adding all desired categories.
- Optional: Click Back or Next to toggle between configuration pages.
- Note: Click Save before selecting Back or Next to avoid losing unsaved changes.
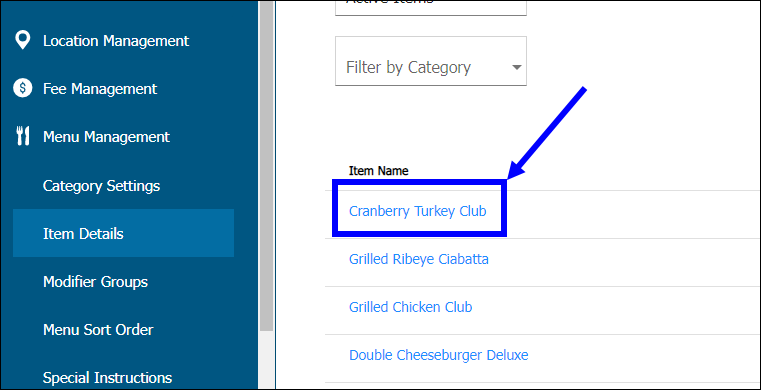
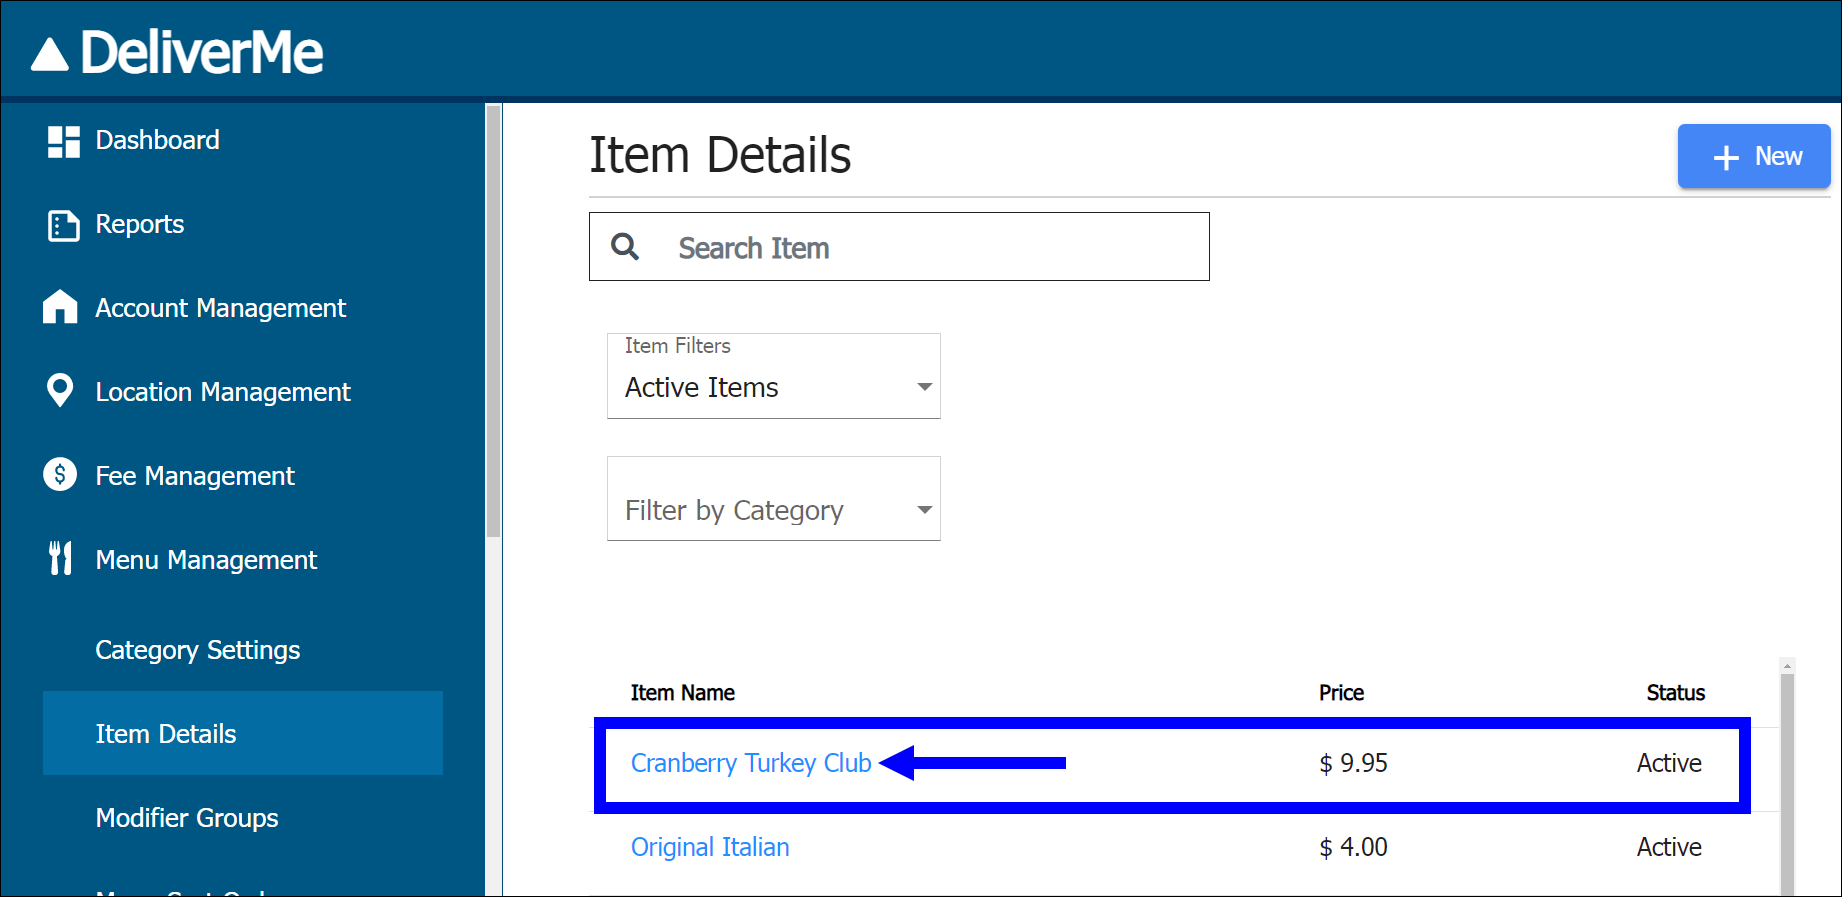
Navigate to Menu Management > Item Details to view items and associated details. You can add images, enter item prices and cost, and provide a description of the item that displays on the DeliverMe site. Best practice for images is to assign a readable file name for each item, such as beer-bottle-bud.jpg or cool-ranch-dorito-20oz.jpg. Size each image prior to uploading so that it displays as desired.
- Select an item from the Item Name list. The item’s details page displays.
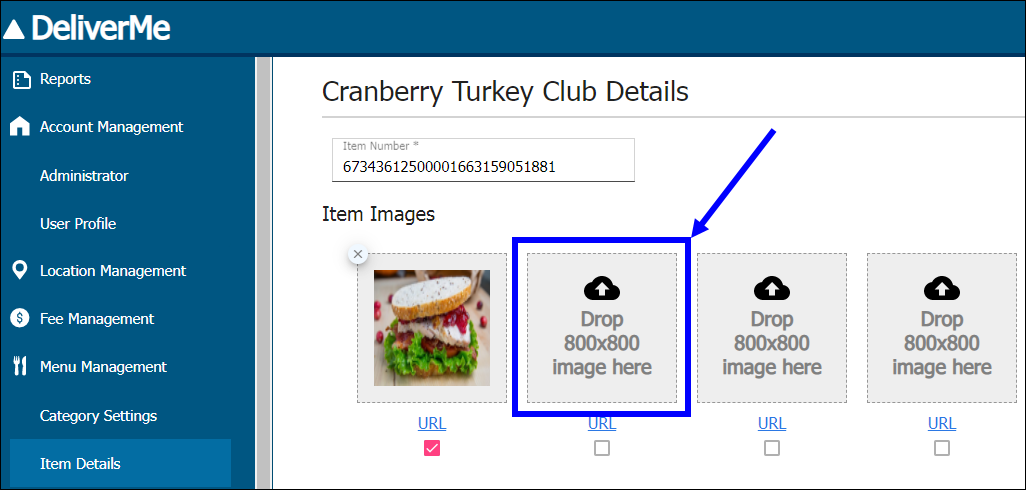
- In the Item Images section, select an empty image box to upload an image of the item.
- Menu Item and Inventory Images: For best results, select attractive, representative images sized 800 px by 800 px.
- Verify additional item details in the Item Information section.
- In the Item Quantity Min – Max section, enter the minimum and maximum amount of the item that customers can purchase.
- Configure Age Verification Settings, as desired.
- Configure Item Visibility settings. This section functions similarly to the Category Visibility functionality under Category Settings.
- Verify and/or revise any modifiers in the [Item Name] Modifications section.
- Enter any Special Instructions, if desired.
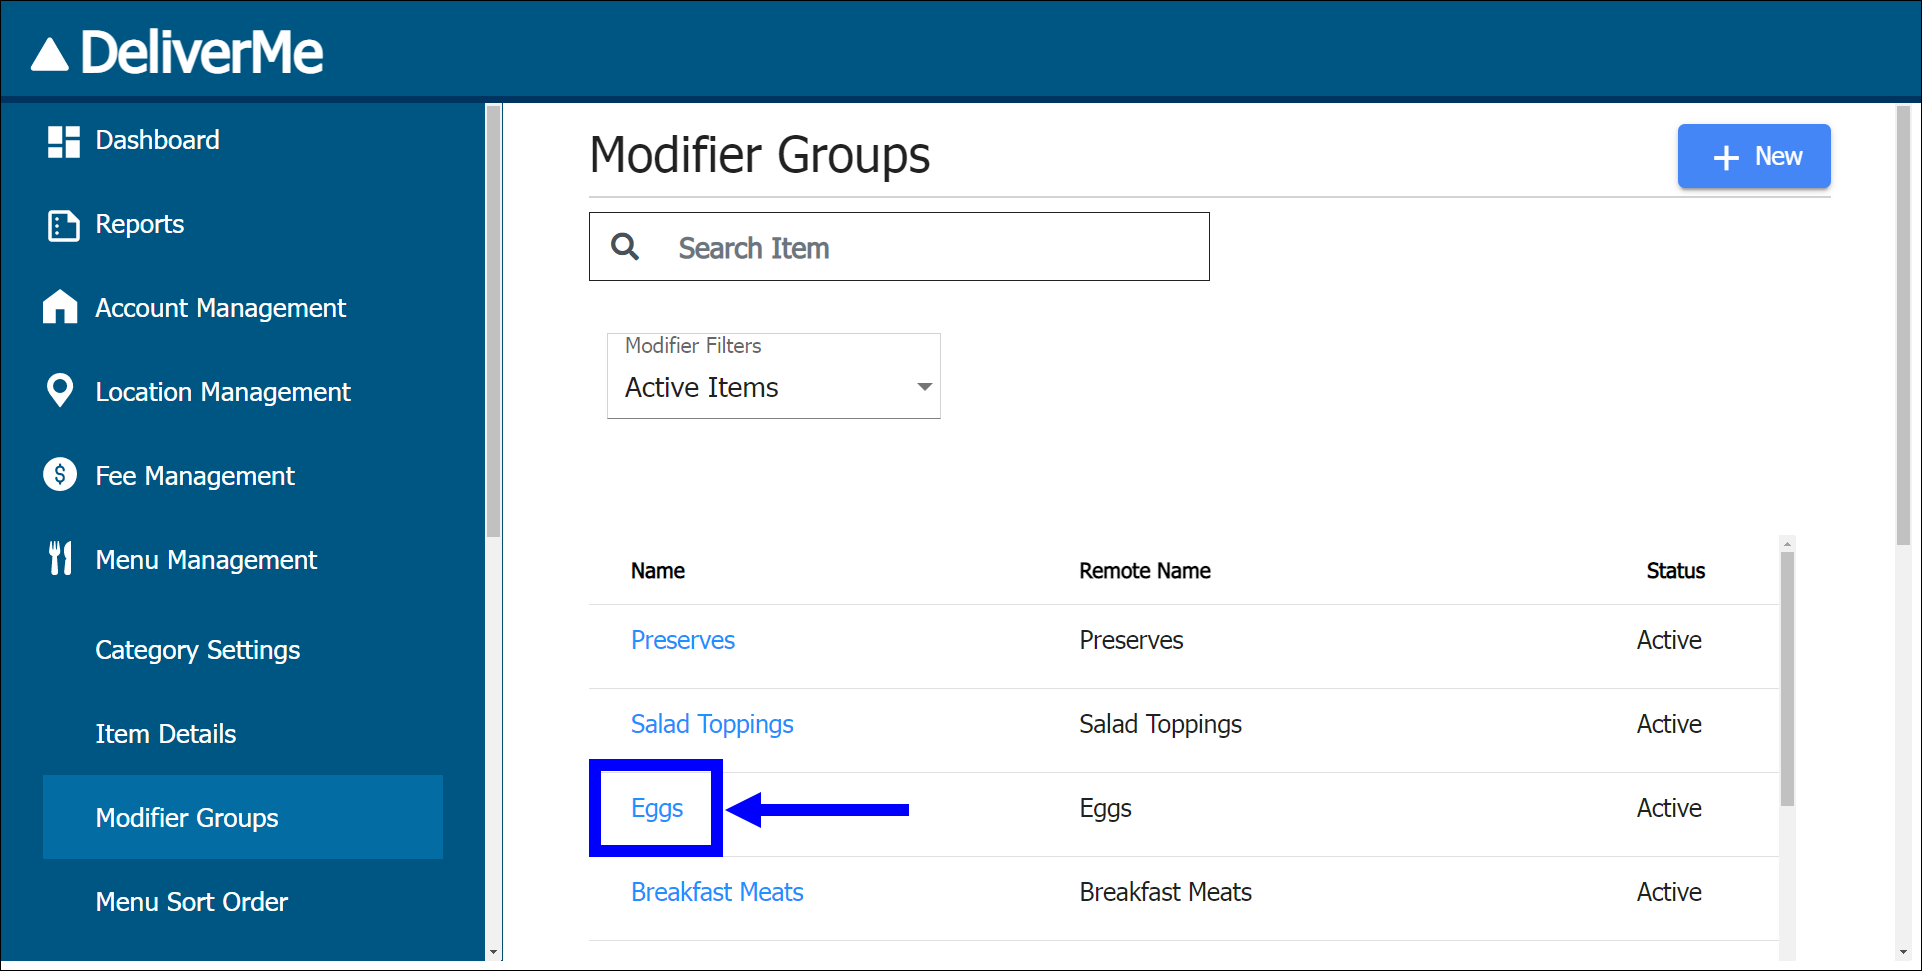
Navigate to Menu Management > Modifier Groups to create or edit modifier groups. Select a modifier group from the list that displays to add, edit, or delete modifier groups.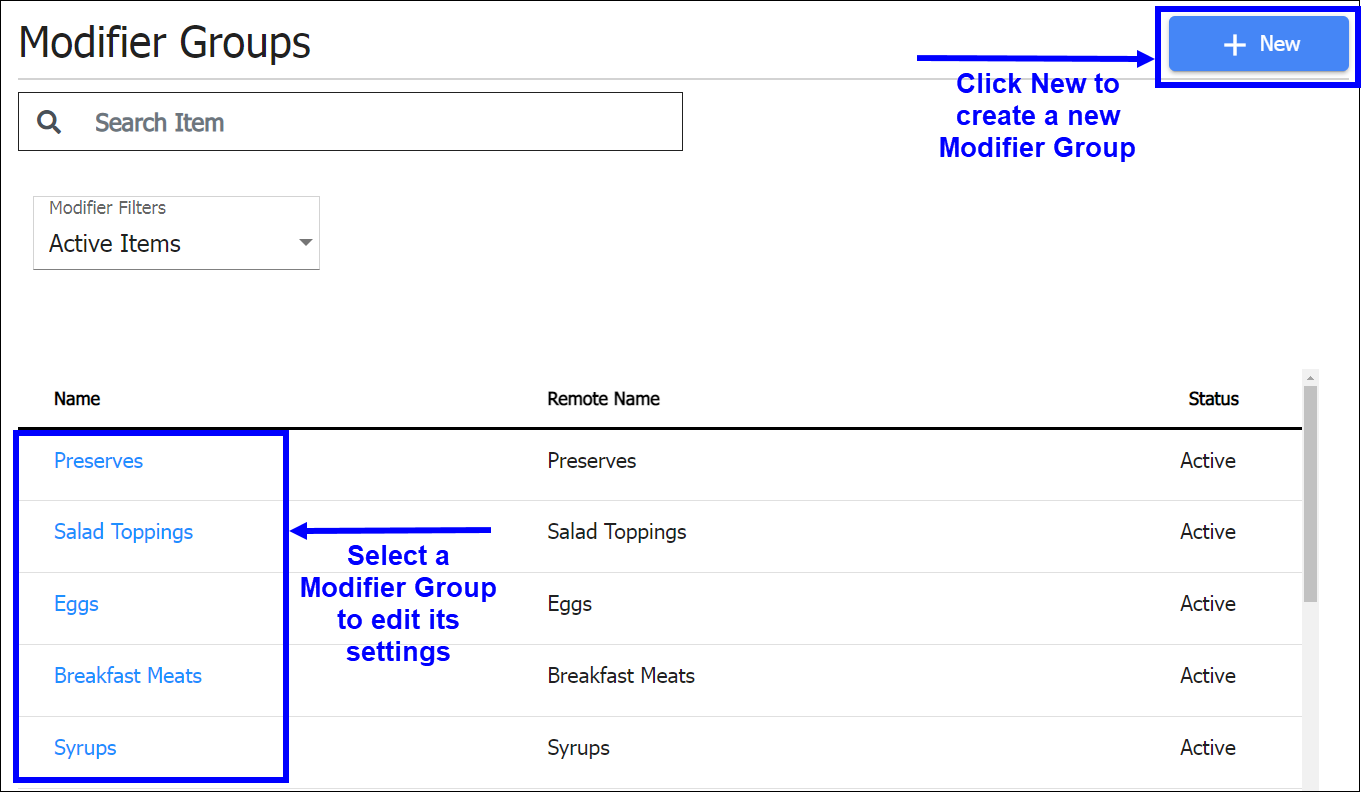
- Create a new modifier group or edit an existing modifier group.
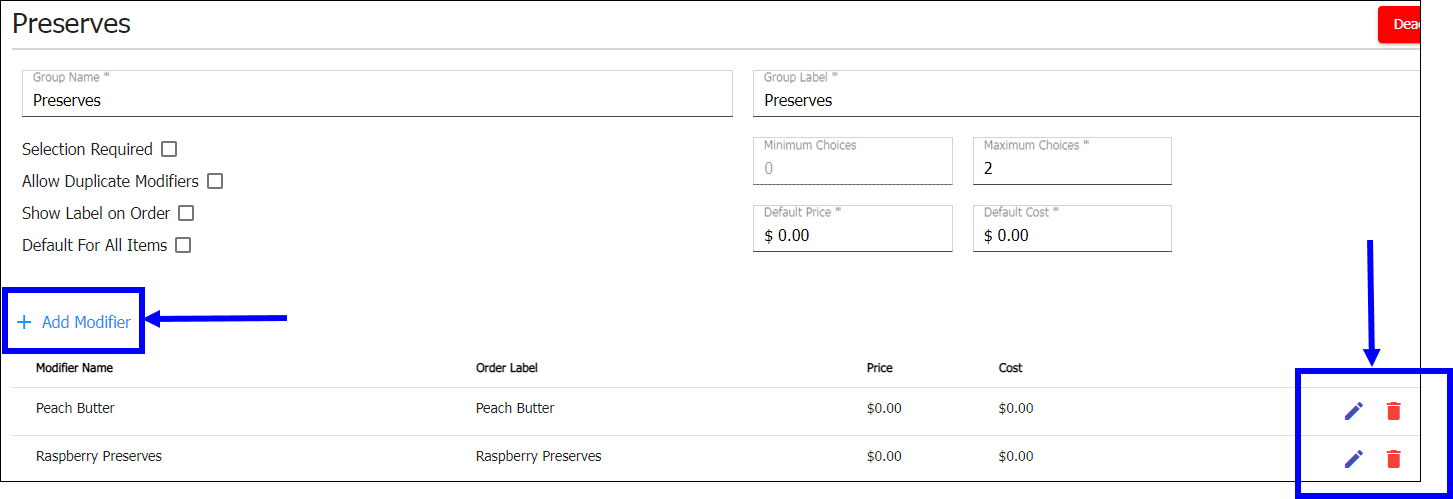
- After selecting a modifier group, select the following checkboxes, as desired:
- Selection Required – requires a modifier group to be selected
- Allow Duplicate Modifiers – allows the same modifier to be selected twice
- Show Label on Order – displays modifier label on order ticket
- Default For All Items – modifier group displays for all items.
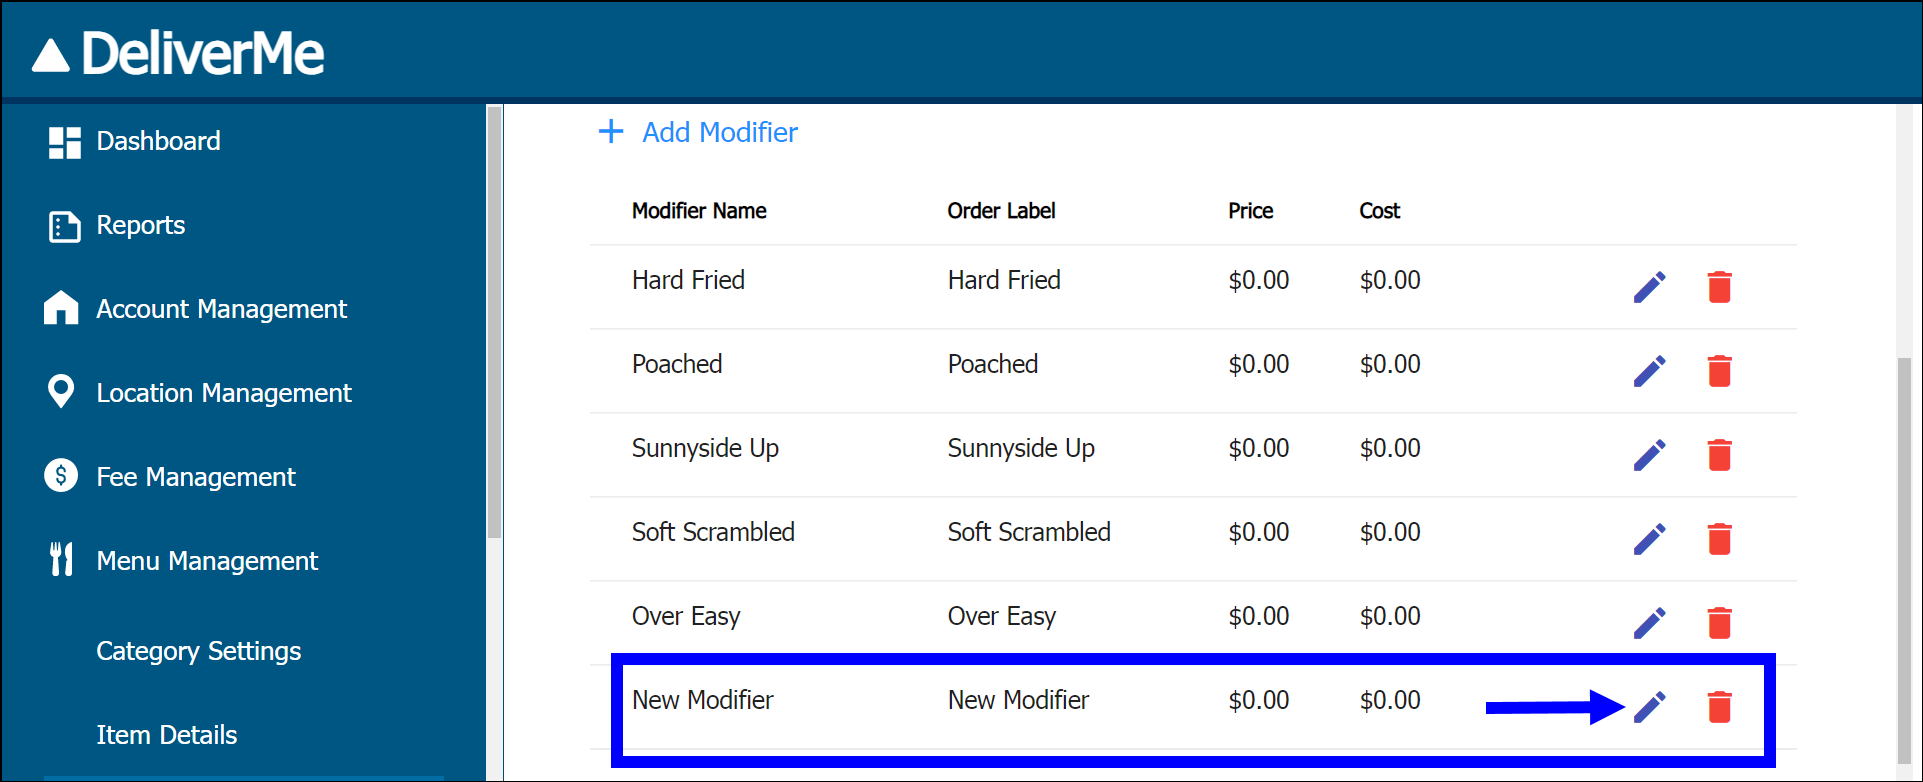
- Add, edit, or delete modifiers from the list.
- Click Add Modifier to add a new modifier.
- Select the pencil icon to change the modifier’s name, order label, price, or cost.
- Select the trash icon to delete the modifier.
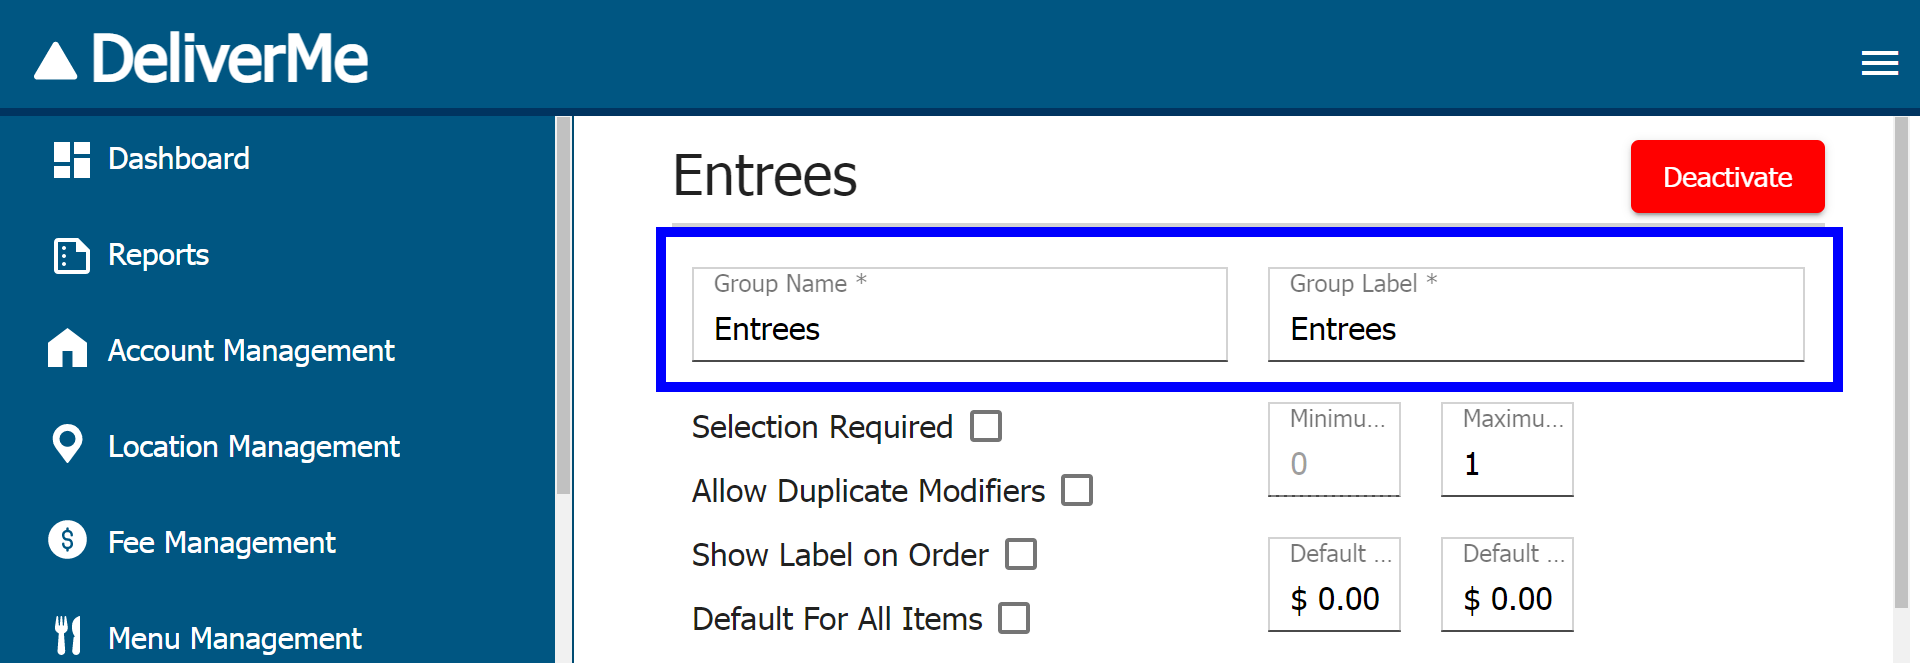
Creating Modifier Groups
- Click New.
- Enter the Group Name and Group Label.
- Optional: Click Clone to create a duplicate of the modifier group.
- Click Save and Add New Category to save and continue adding more items.
- Click Save after adding all desired categories.
- Delete a Modifier by clicking the trash can icon.
Adding Modifiers to Modifier Groups
- Select a Modifier Group from the list.
- Click Add Modifier.

- Scroll to the newly created modifier and click the pencil icon to edit the modifier.
- Enter names/values in the following required fields: Modifier Name, Order Label, Price, and Cost.

- Optional: Click Clone to create a duplicate of the modifier group.
- Click Save and Add New Category to save and continue adding more items.
- Click Save after adding all desired categories.
Adding Modifier Groups to Items
- From the Dashboard, navigate to Menu Management > Item Details.
- Select an item.
- Click Add Modifier Group.
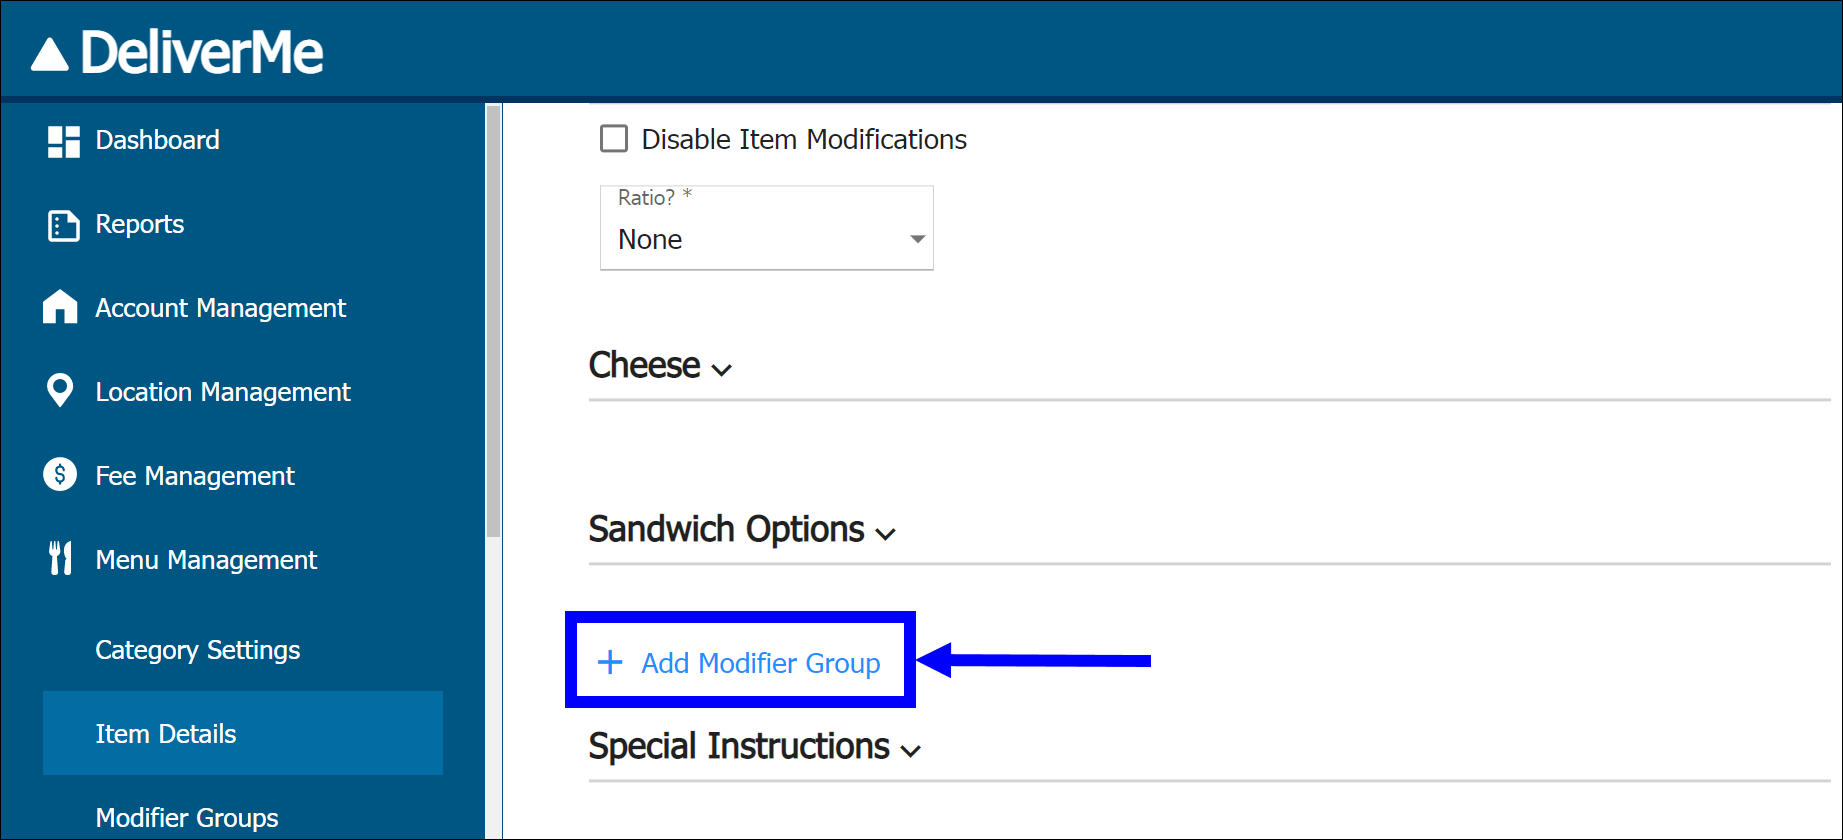
- Select the desired Modifier Group(s) from the pop-up.
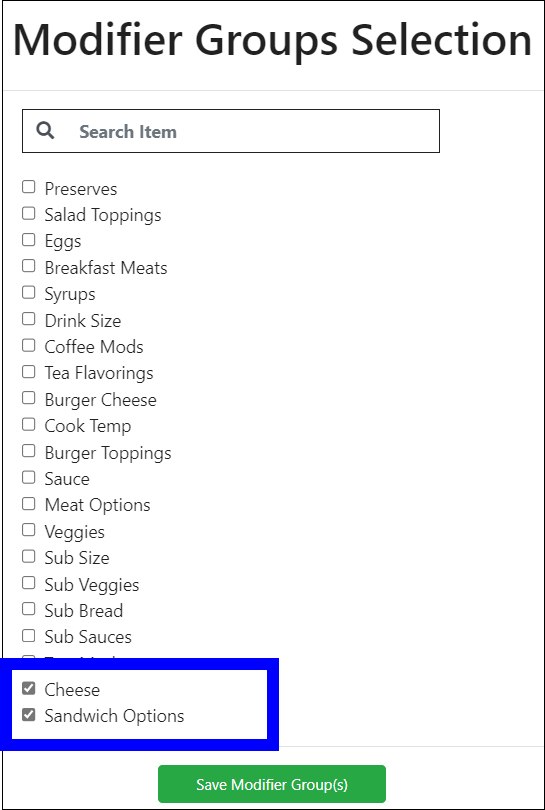
- Click Save Modifier Group(s).
- Click Save and Add New Category to save and continue adding more items.
- Save after adding all desired categories.
Menu Sort Order
Merchants can configure how menu items display on the DeliverMe ordering page by arranging categories and items on the Menu Sort Order page. From the dashboard, navigate to Menu Management > Menu Sort Order. Simply drag and drop categories and items as desired.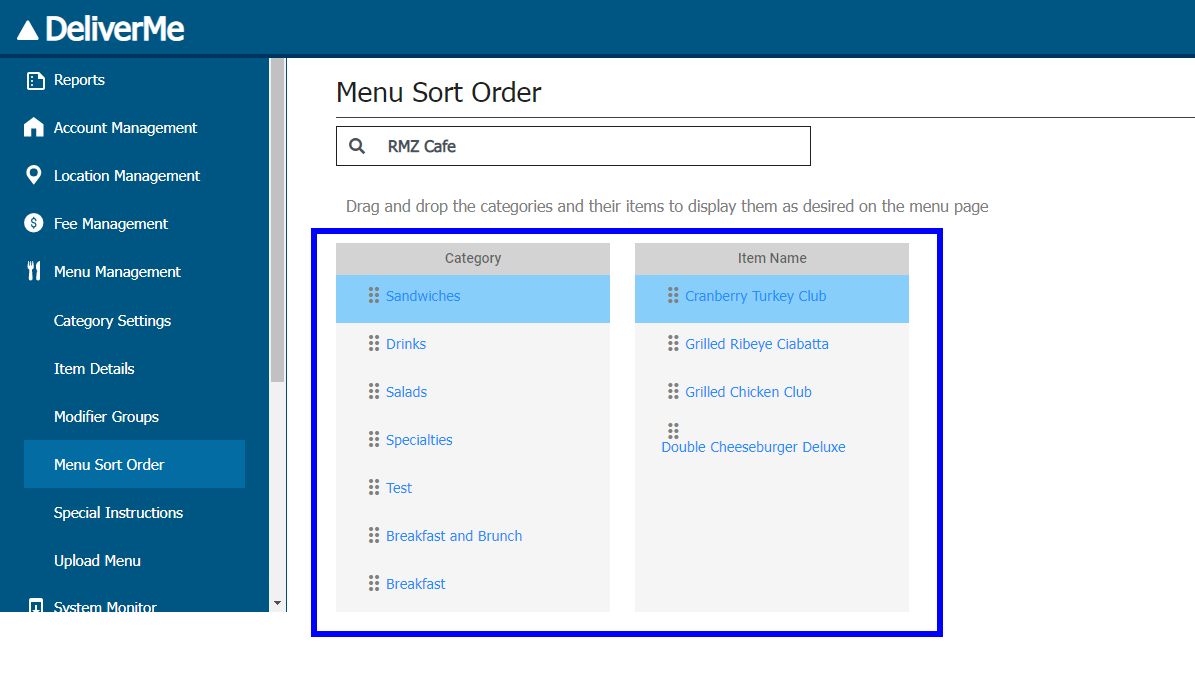
Merchants can specify how Special Instructions apply to menu items.
- Select Allow Special Instructions to enable special instructions.
- Select All Categories to apply special instructions to all categories.
- If the All Categories checkbox is not selected, you can apply special instructions to specific categories of your choosing by selecting the appropriate category checkbox(es) in the By Category section.
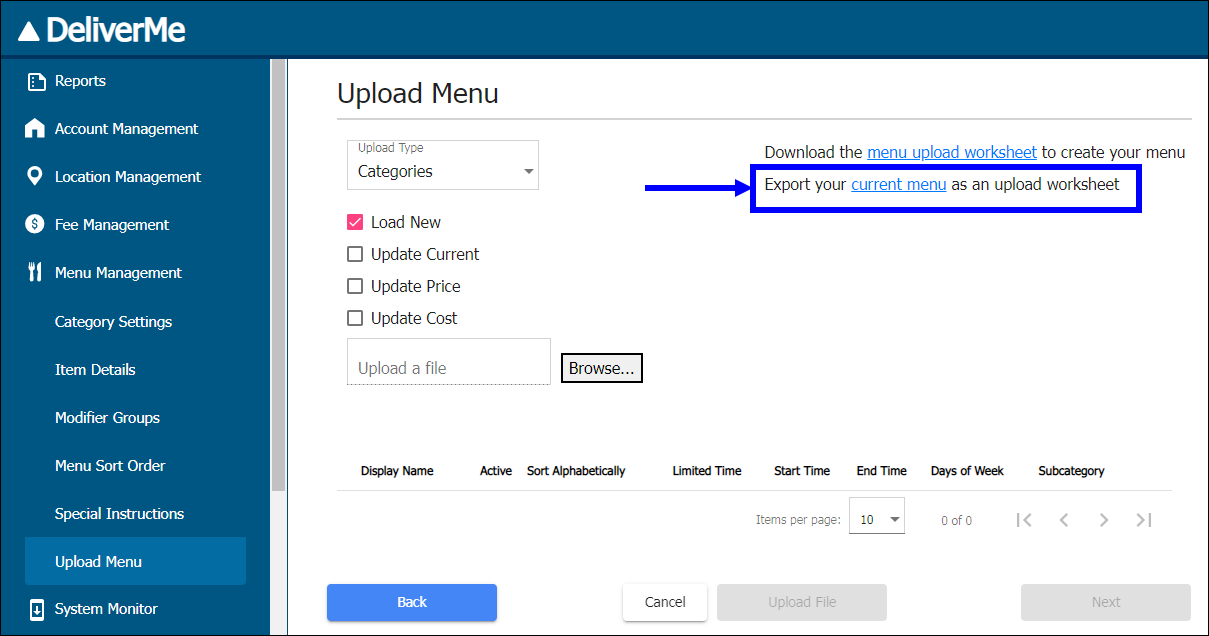
Upload Menu
Merchants also have the option of uploading menu items as an Excel document directly into DeliverMe. Users can upload a new menu or modify an existing DeliverMe menu.
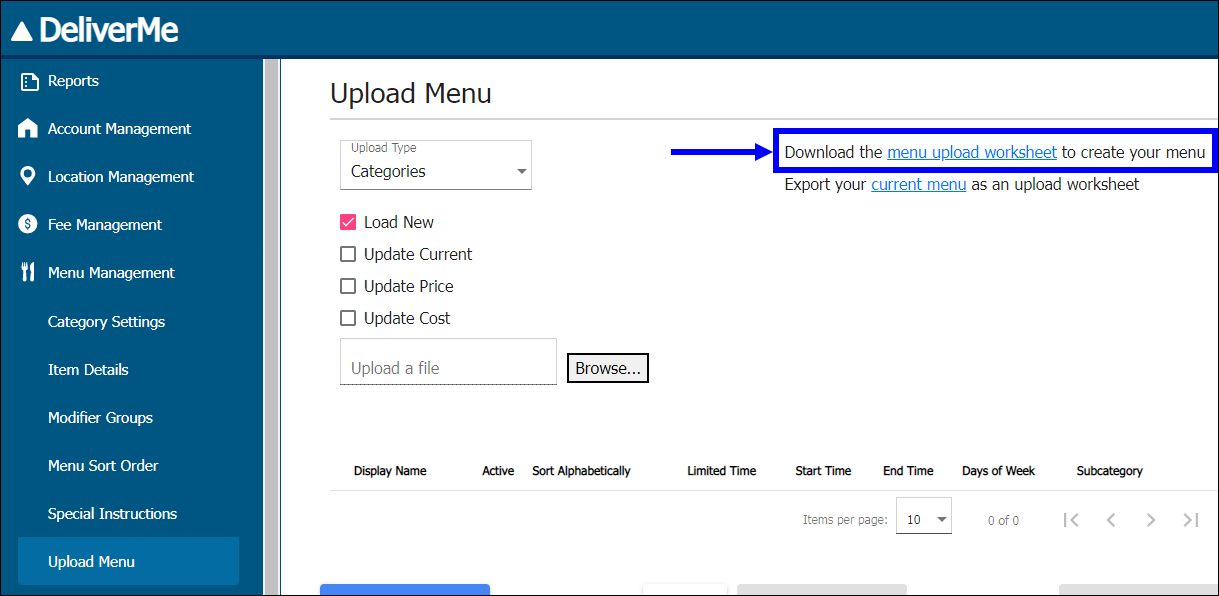
Upload a Menu
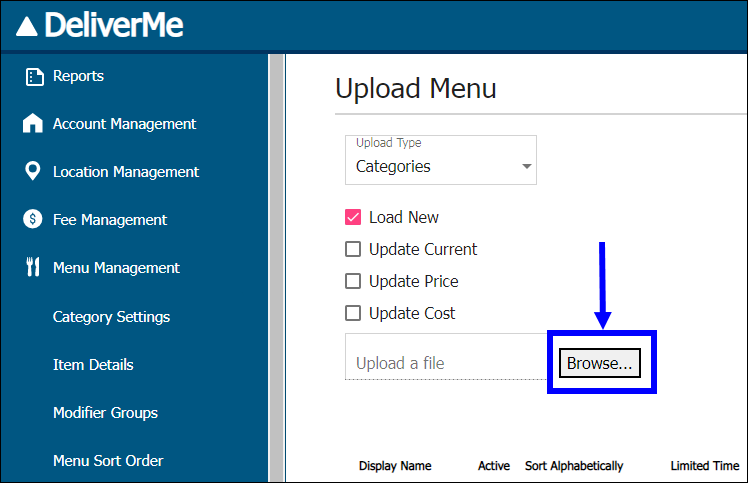
- Navigate to Menu Management > Upload Menu.
- Select the Load New checkbox.
- Download the Excel menu template.
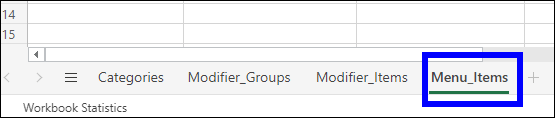
- Select the Menu_Items tab toward the bottom left of the page.
- Note: Unused tabs should be deleted from the spreadsheet, where applicable.
- Delete all data from Rows 2-5.
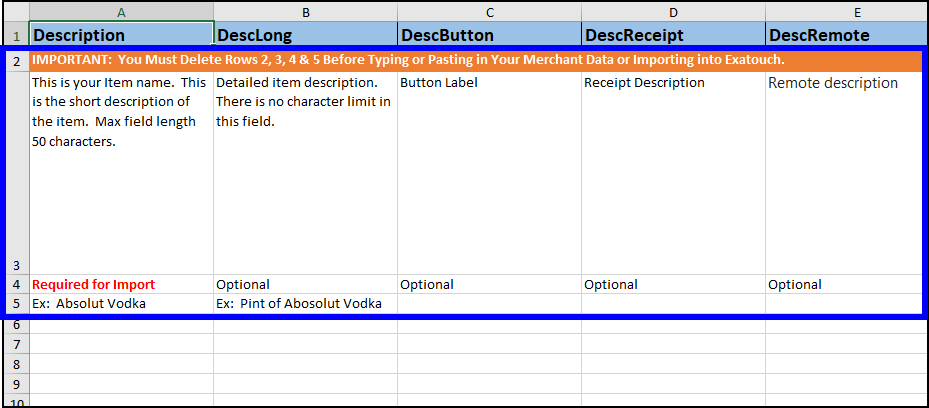
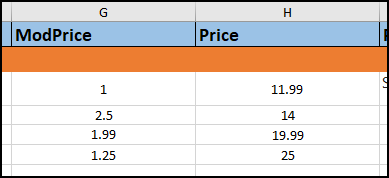
- Enter item names, prices, and other product information in the required fields. Do not enter special characters, such as dollar ($) or percentage (%) signs, when entering numerical values.
- Enter data into any optional fields as desired.
- Repeat, if desired, for the Categories, Modifier_Groups, and Modifier_Items tabs.
- Click File > Save As.
- Save the document as an .xlsx file to your hard drive.
- In DeliverMe, click the Browse button to locate your saved worksheet.
- Click Upload File.
Modify an Existing Menu
- Navigate to Menu Management > Upload Menu.
- Select the Update Current checkbox.
- Click the link to download your current DeliverMe menu.
- Modify menu items in the Excel document as desired.
- Click File > Save As.
- Save the document as an .xlsx file to your hard drive.
- Click Save.
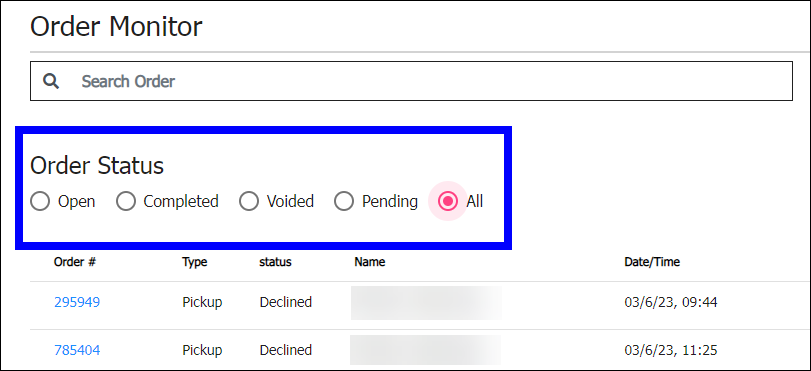
Merchants can view incoming, in progress, and outgoing orders from the Order Monitor page.
- Enter keywords in the Search Order field to find a specific order or group of orders.
- In the Order Status section, select Open, Completed, Voided, or All to view orders according to those classifications.
- Click an order in the Order # column to preview the ticket.
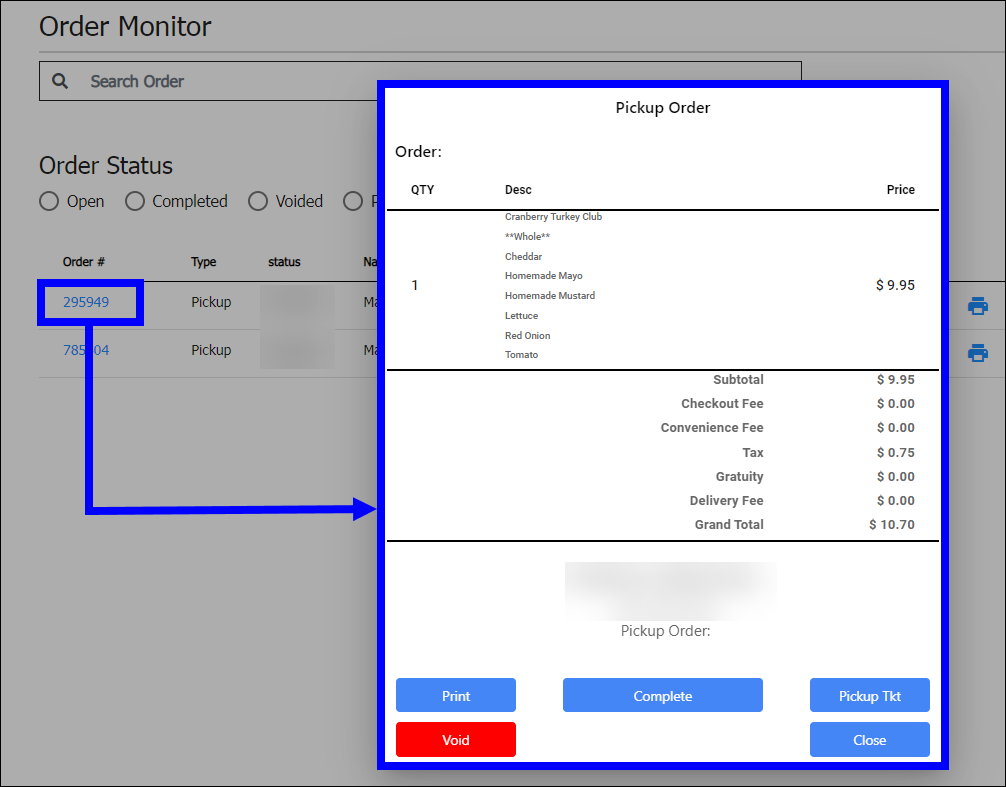
- Merchants can perform the following with the Pickup Order ticket displays:
- Print: Prints an order for the kitchen
- Complete: Completes the order
- Pickup Tkt: Manually prints a ticket that is affixed to the order
- Void: Voids the order
- Click Close.
Merchant Notifications
- Merchants receive an order notification, alerting them that a customer has completed an order.
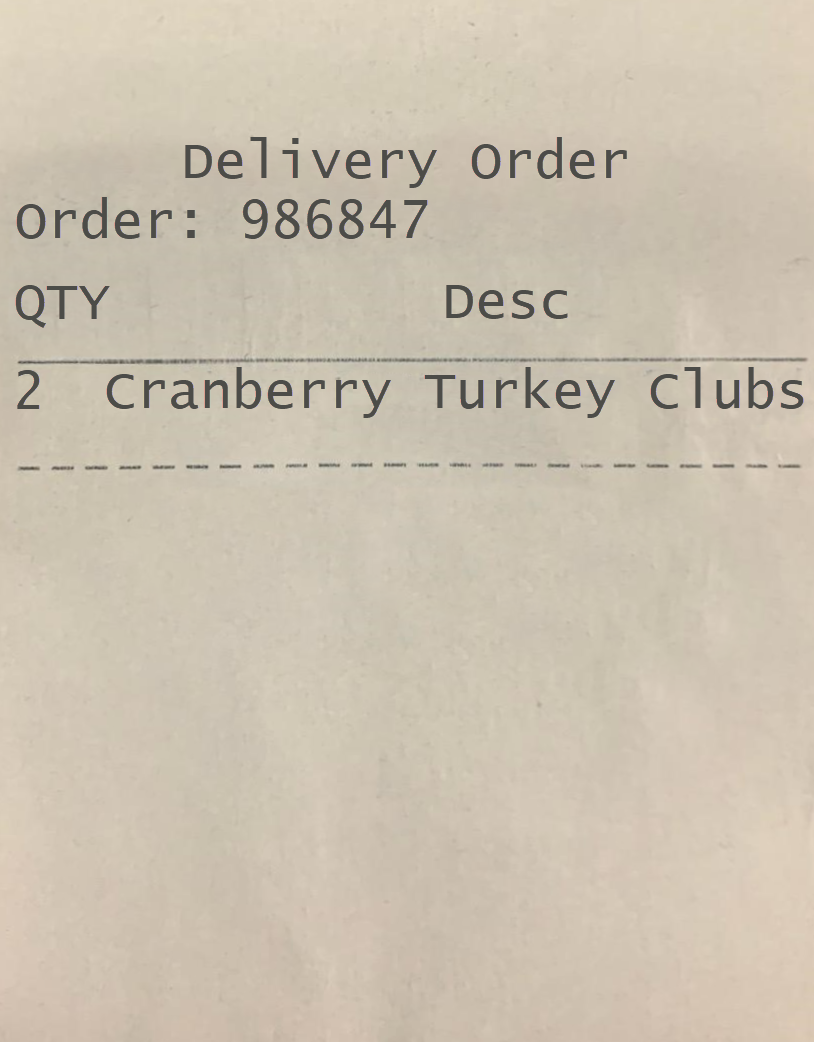
- A delivery order notification prints.
Select Order History to display a history of DeliverMe orders. Refunds can also be performed under the Order History tab.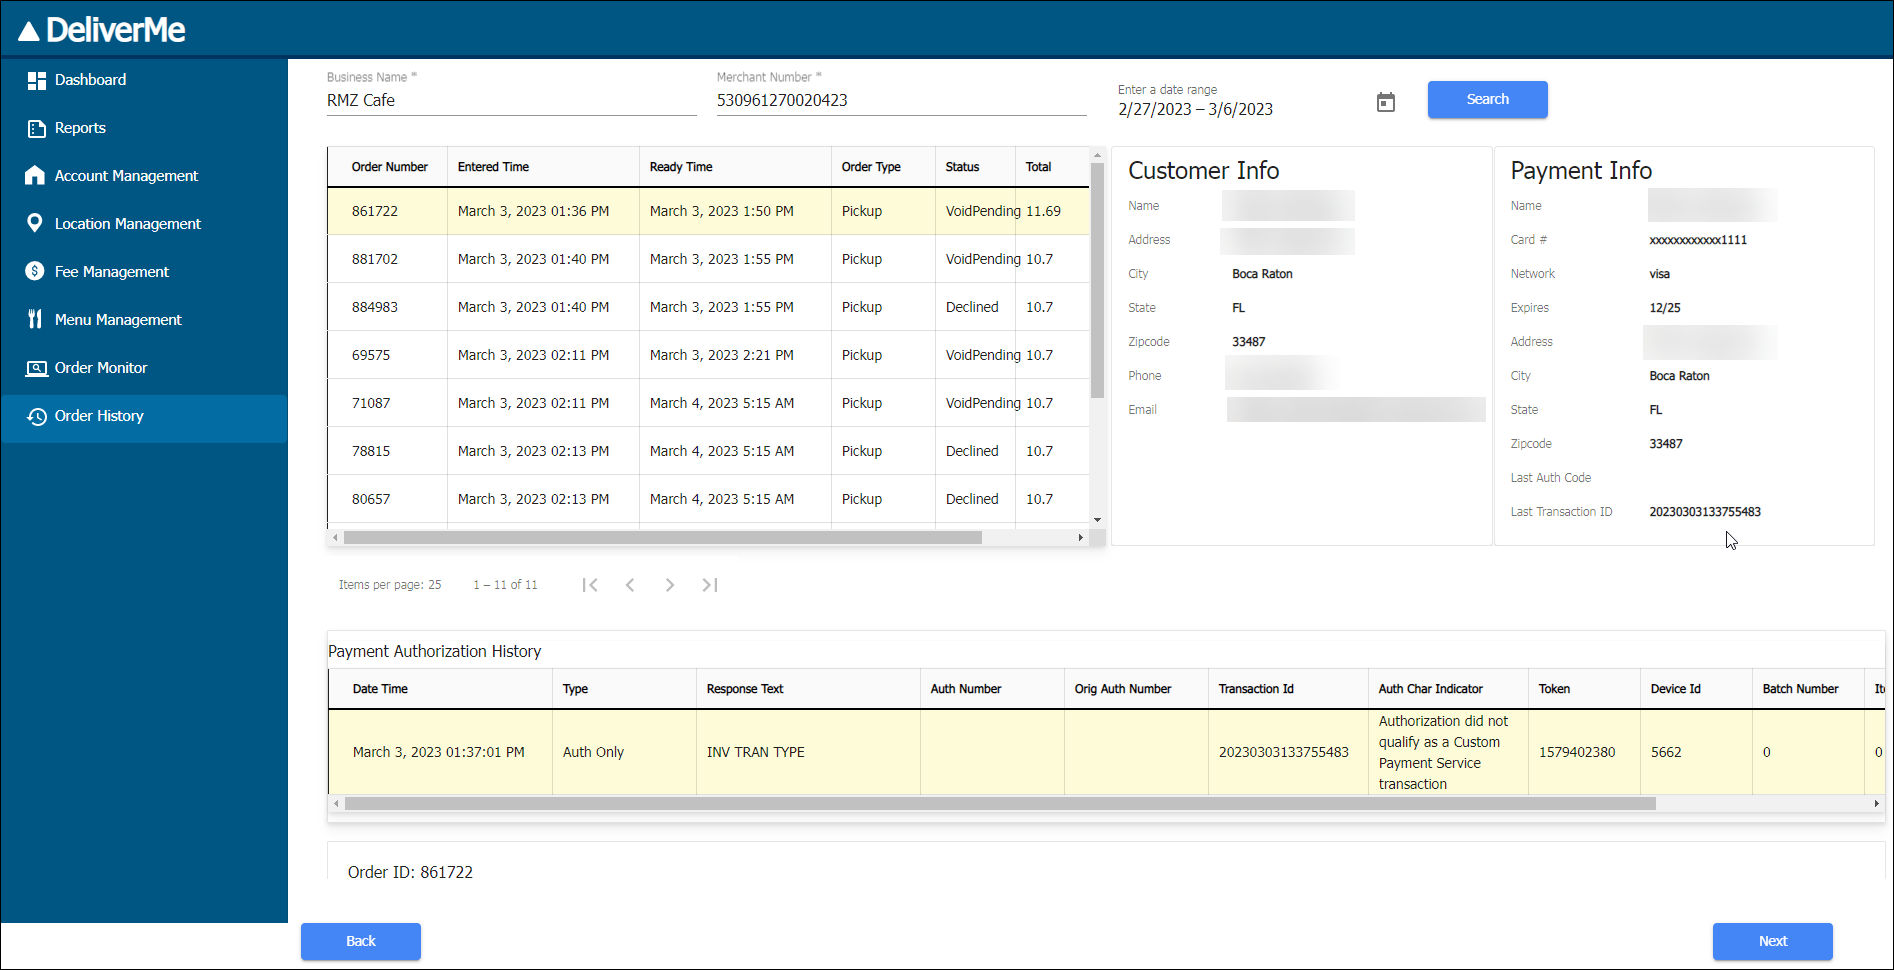
Refunds
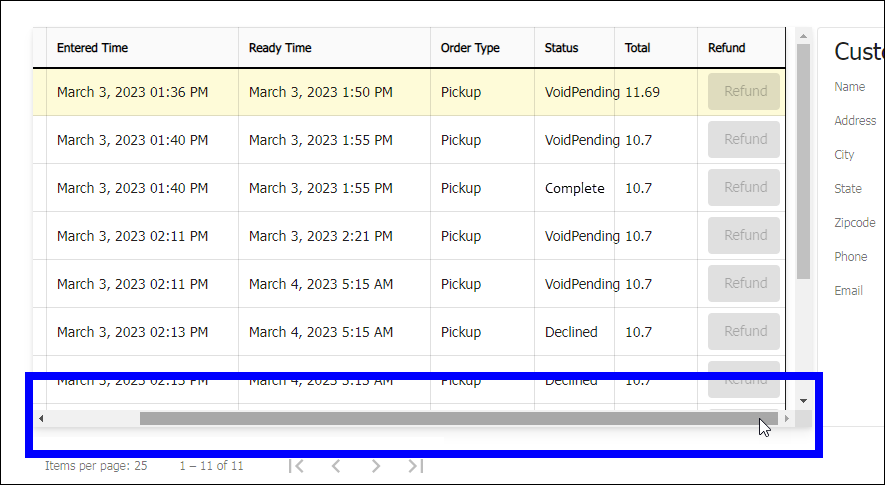
Merchants can perform refunds by performing the following under the Order History tab:
- In the Order History work area, drag the bottom scroll bar to the right.
- Select an Order.
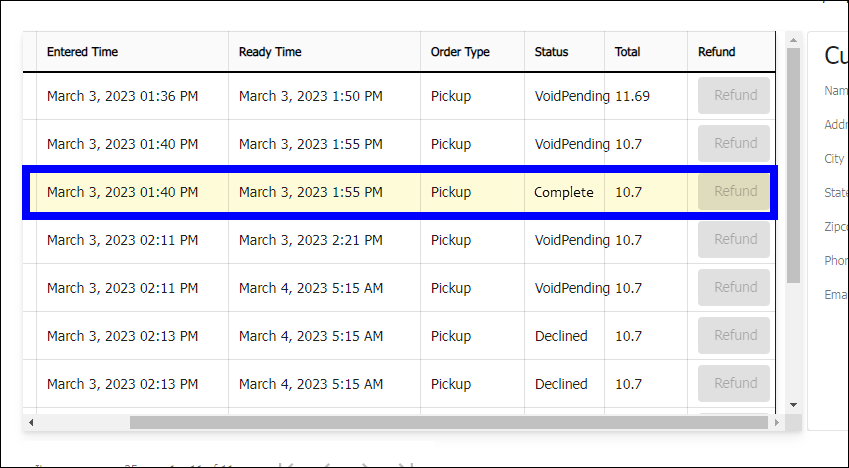
- Click Refund.
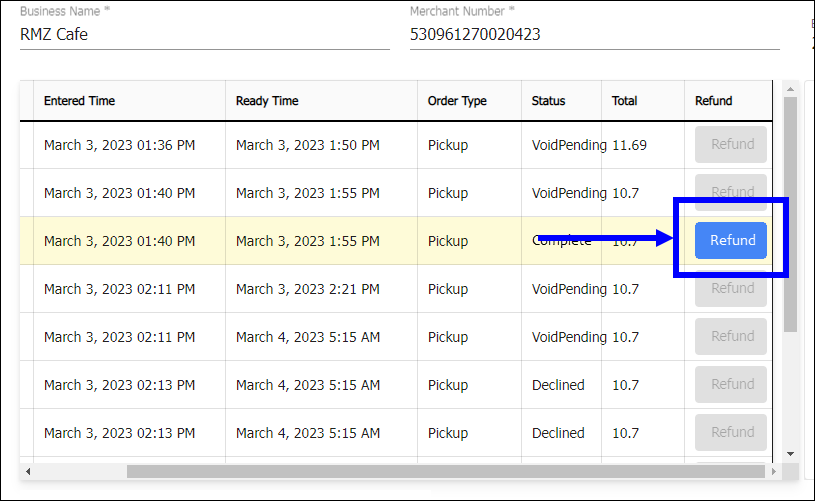
- Follow the prompts to complete the refund.
Before ordering, card holders may log in or sign up for an account or check out as a guest.
- Note: If customers view your site when delivery or pickup hours are closed (scheduled or temporary), this is replaced by a message that ASAP orders are not available. Customers can place an order for a future available date and time.
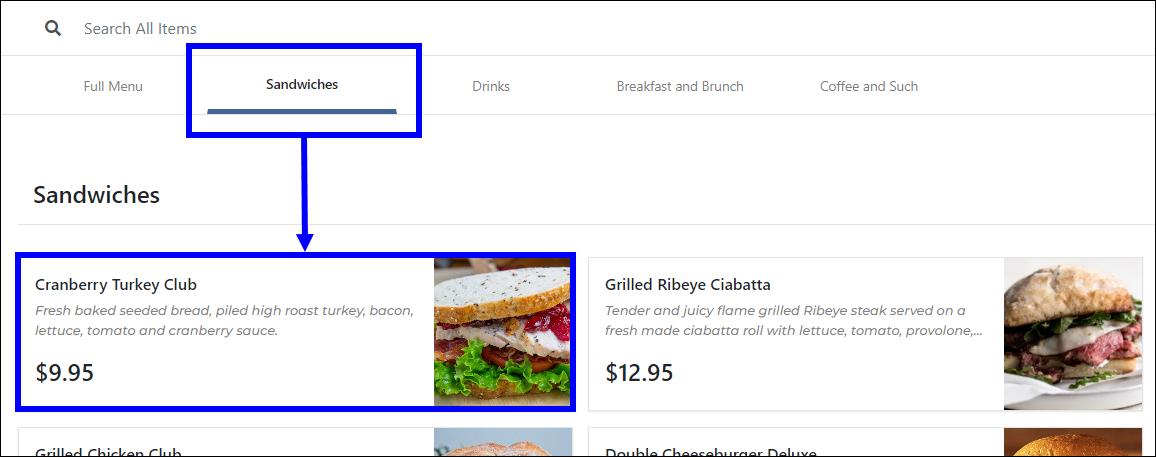
Add Items to an Order
- Access the DeliverMe site or app.
- Select a category, and then select an item to purchase.
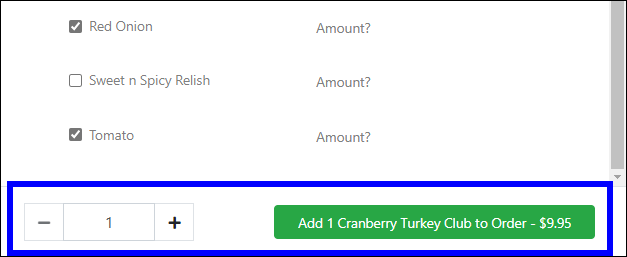
- From the pop-up that displays, select desired modifiers and quantity.
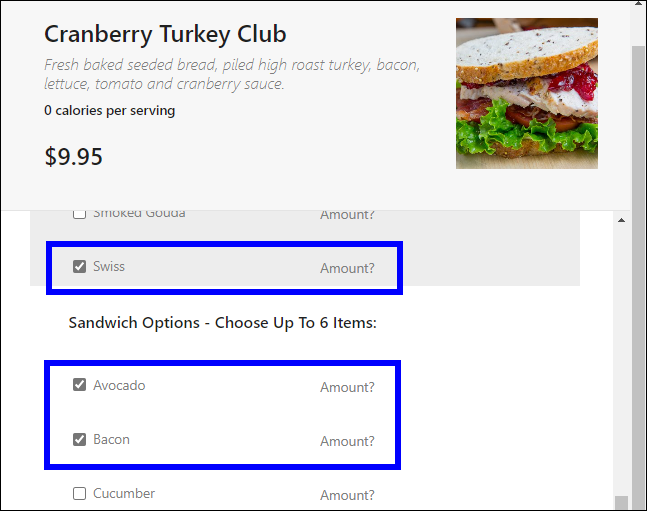
- Scroll to the bottom of the pop-up and tap the Add to Order button. Orders display in the right pane.
- Tip! Click the plus sign to add more of the same item to the order. Clicking the minus sign subtracts duplicate items from the order.
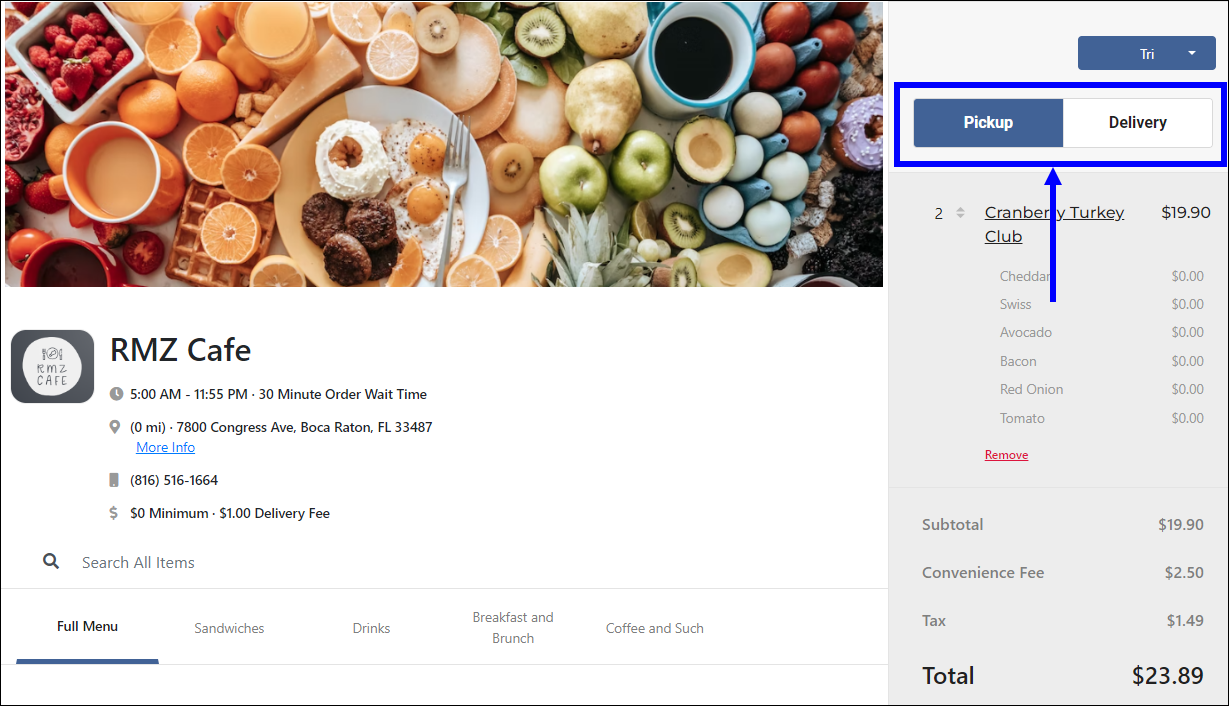
- In the right pane, click either Pickup or Delivery.
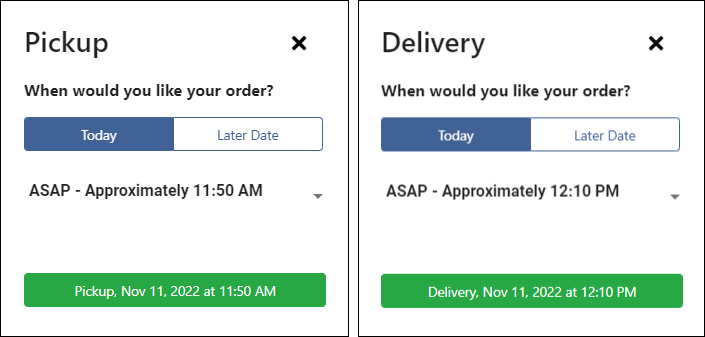
- Select a day and time for Pickup or Delivery from the appropriate pop-up, depending on the delivery method you selected.
- Note: If a customer enters invalid times or the order times out before it is completed, an error message displays. Click either Cancel Order or Correct Order.

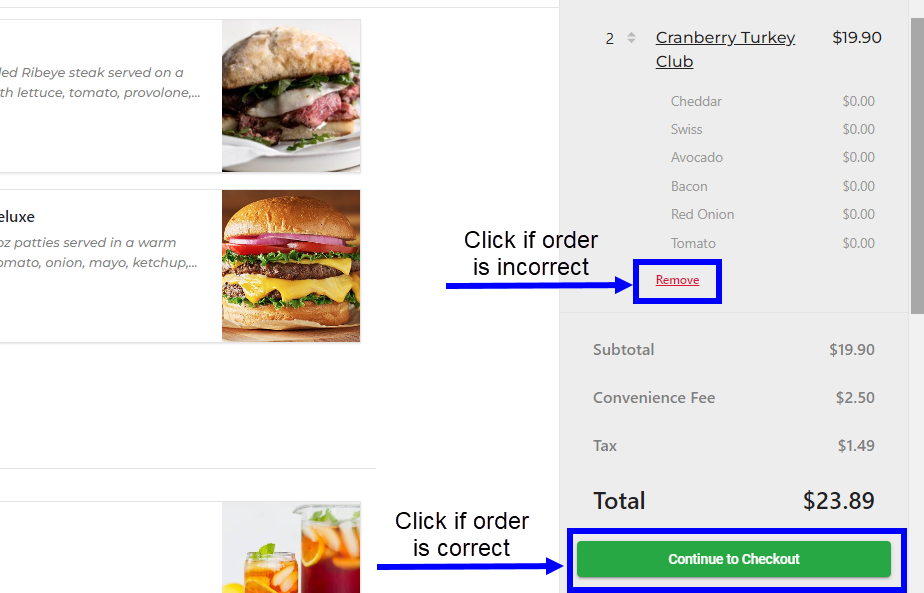
- Review the order for accuracy in the right pane, and then perform one of the following.
- Click Remove if the order is incorrect.
- Click Continue to Checkout if the order is correct.
- In the To be Delivered to: section, enter a delivery address with any delivery instructions.
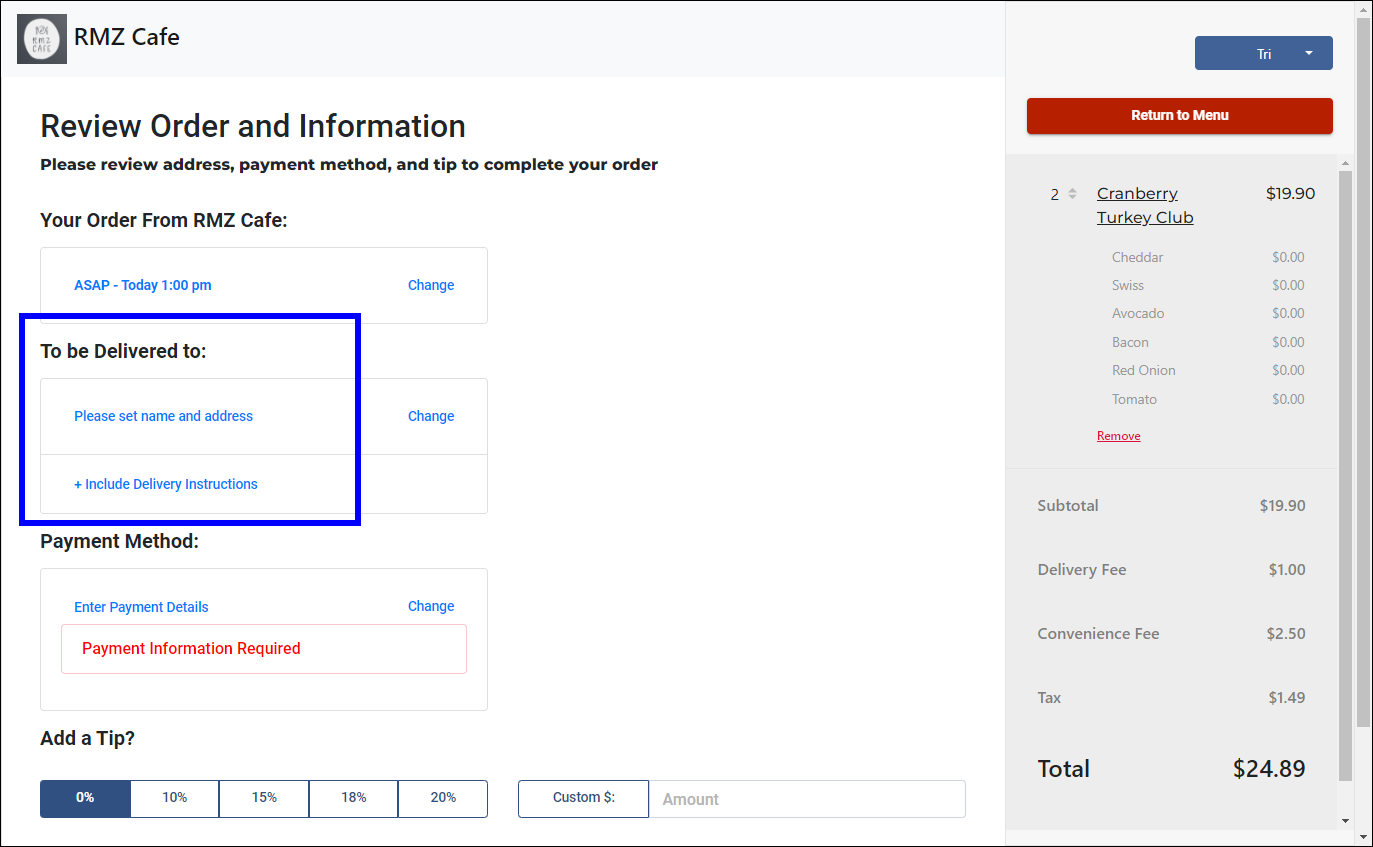
- Enter a Payment Method.

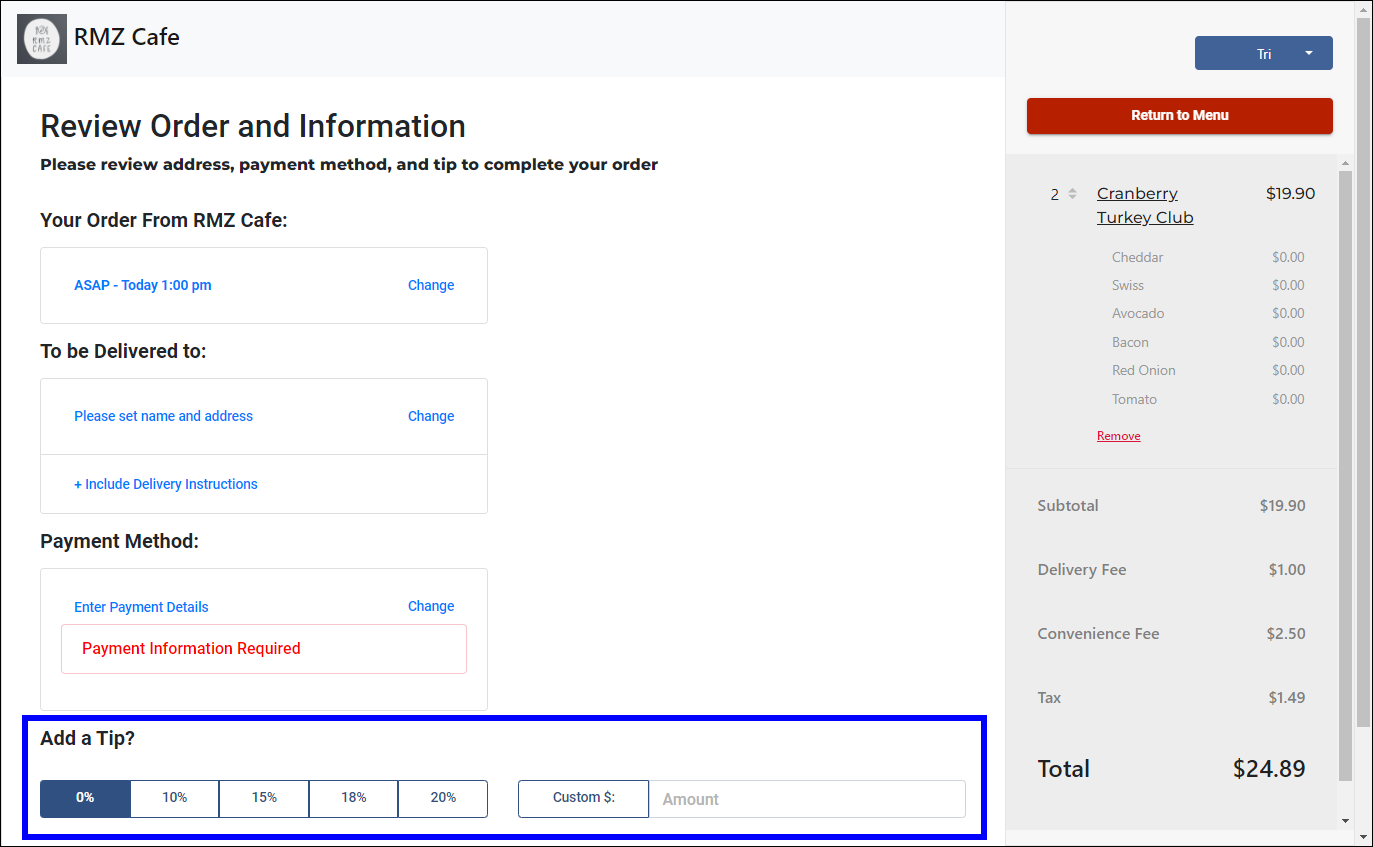
- Select a tip amount in the Add a Tip? section or add a custom tip amount, if desired.
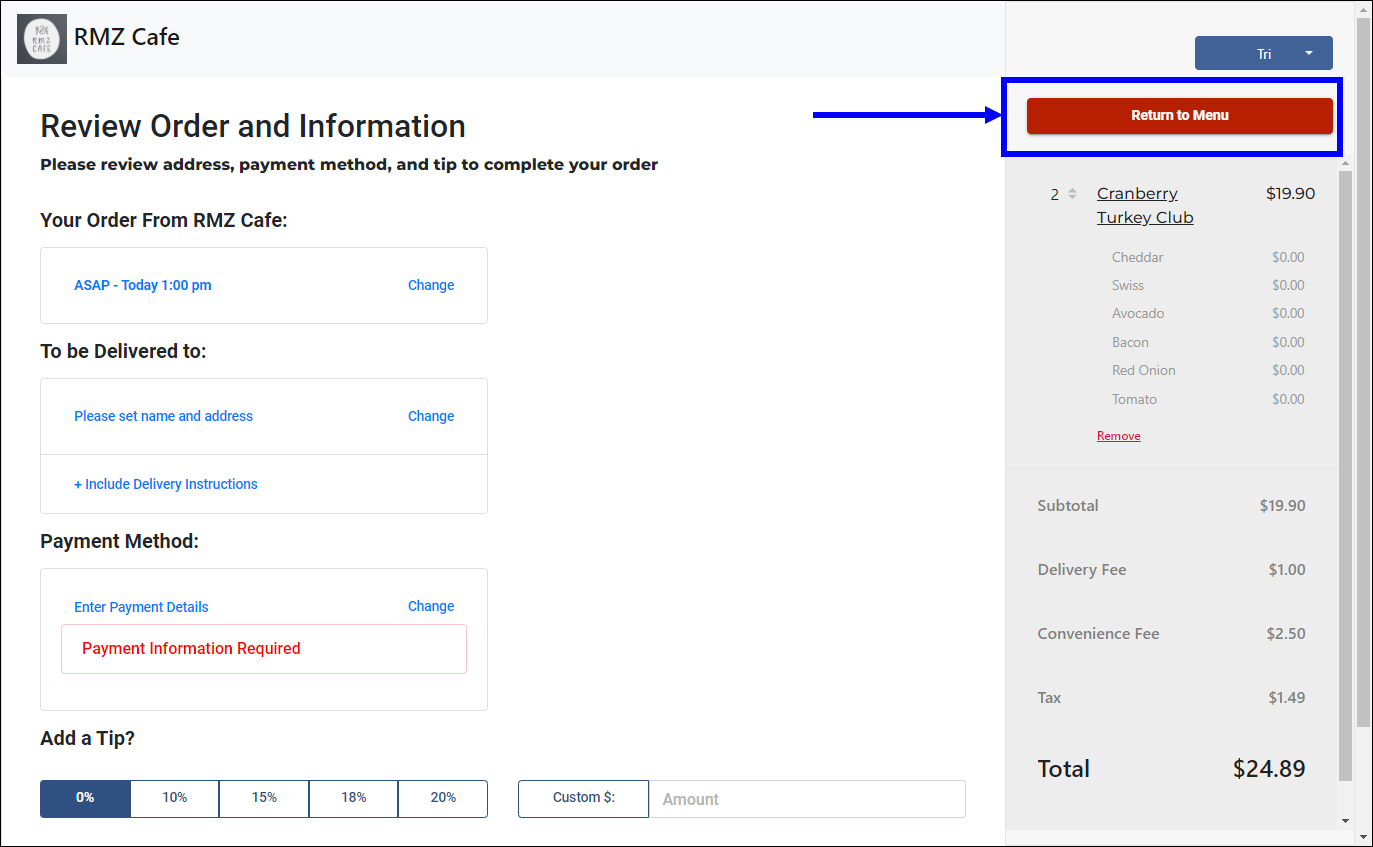
- Click the Return to Menu button in the right pane at any point to make revisions.
- Click the Place Your Order button at the bottom of the screen.
- The customer receives a message confirming the order.
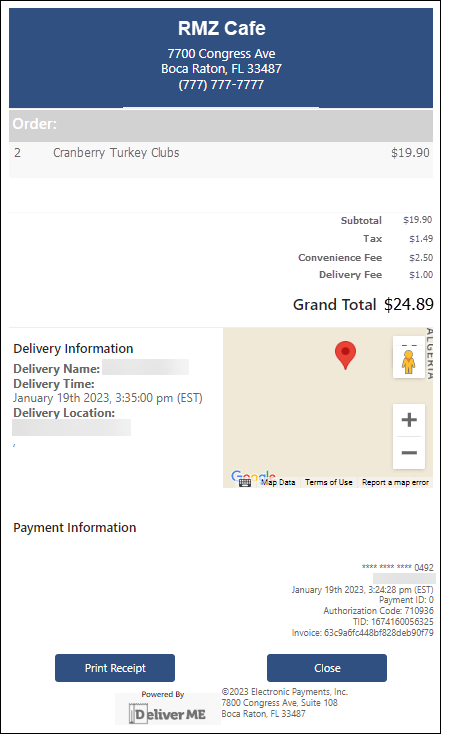
- A receipt is emailed to the customer.
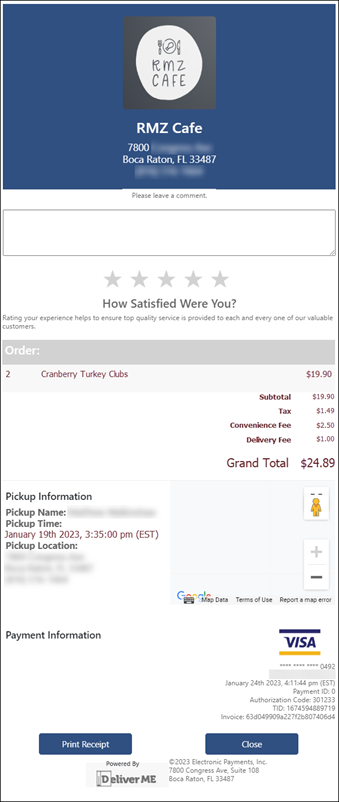
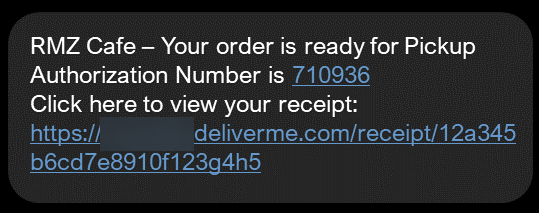
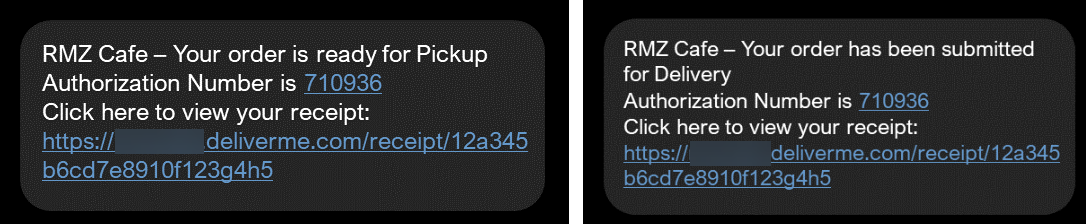
- Once the order is ready, the customer receives a text message stating the order is ready for either pickup or delivery, depending on the type of order.
Schedule the Order
Complete the Order
On the Review Order and Information page, perform the following to verify the pickup/delivery time:
How can we improve this information for you?
Registered internal users can comment. Merchants, have a suggestion? Tell us more.