Customer Facing Display (CFD) settings provide a customer checkout experience that is simple and engaging.
Merchants can configure the CFD to display a variety of customer-facing features, such as ratings, signature lines, and more. The CFD can also be set up to display order total, tax, and discount amounts. These settings are especially valuable for quick service restaurants.
- Note: The CFD can operate in touch screen or non-touch screen mode. Contact Exatouch to have a member of our staff enable the desired setting for you.
Display Settings
Perform the following to configure CFD display settings:
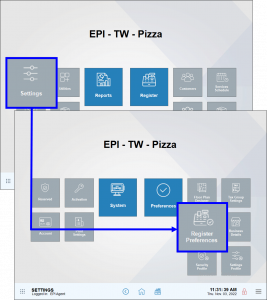
- From Home, navigate to Settings > Preferences.
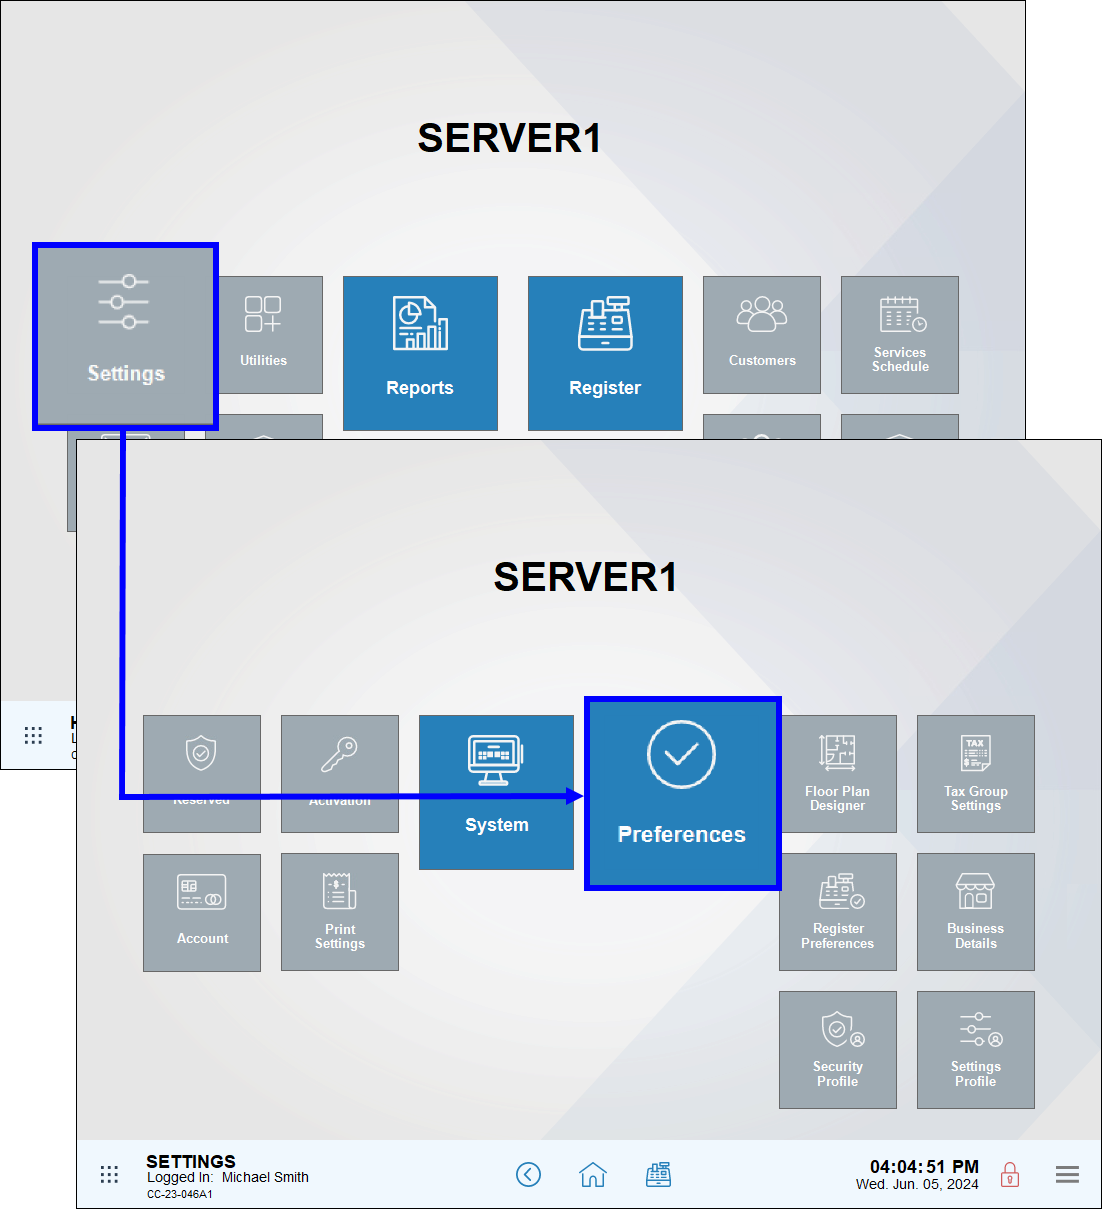
- Tap the CFD tab. The CFD settings screen displays.
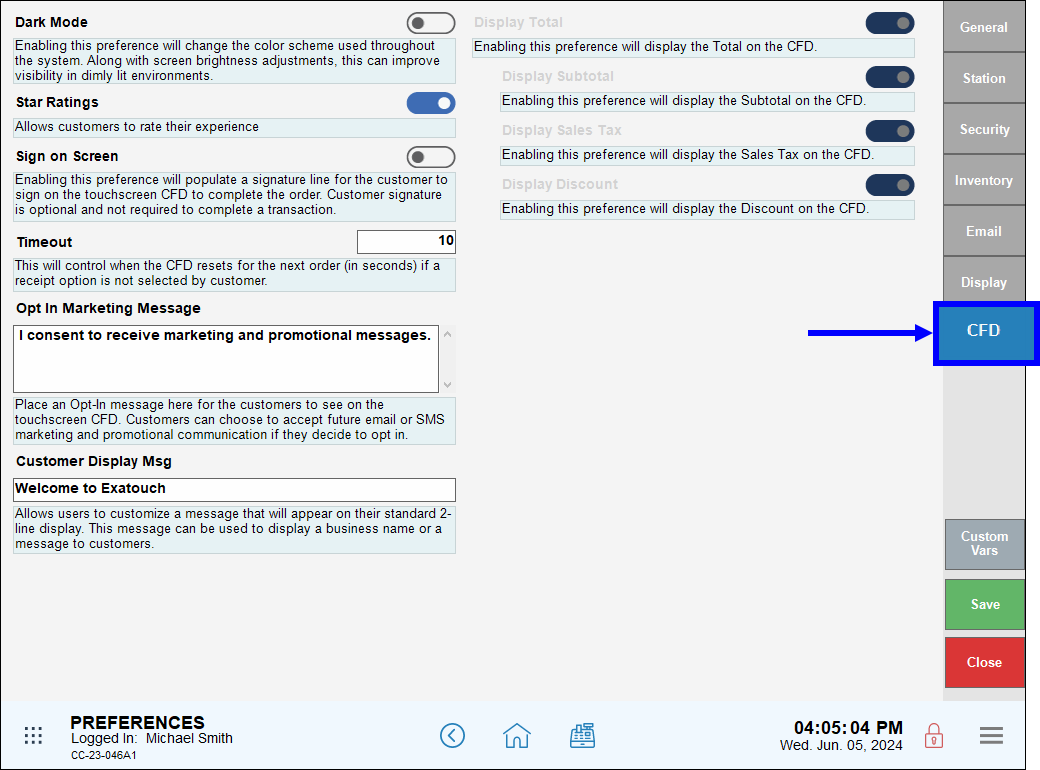
- Configure the following display settings, as desired:
- Dark Mode: Enable to display the CFD background as black. Disable to display a white background. Adjusting the lighting can make it easier for users to view the CFD in low-light environments.
- Star Ratings: Enable to allow customers to rate their experience.
- Sign on Screen: Enable to add a signature line to the tip screen on the CFD.
- Timeout: Enter the time, in seconds, that elapses before the CFD resets if the customer does not select a receipt option. Default: 10.
- Opt in Marketing Message: Enter a message asking customers if they want to accept marketing and promotional emails or text messages.
- Customer Display Msg: Enter a customized message (e.g., Welcome to Exatouch) that customers can view on the CFD.
- *Display Total: Enable to display the Order Total line on the CFD.
- *Display Subtotal: Enable to display the Subtotal line on the CFD.
- *Display Sales Tax: Enable to display the Sales Tax line on the CFD.
- *Display Discount: Enable to display the Discounts line on the CFD.
- Note: Items with an asterisk (*) will be disabled when Dual Price settings are enabled.
Receipt Prompts
To enable receipts to be printed on orders:
- Go to Home > Settings > Print Settings > Receipt Options.
- Check Receipt Prompt.
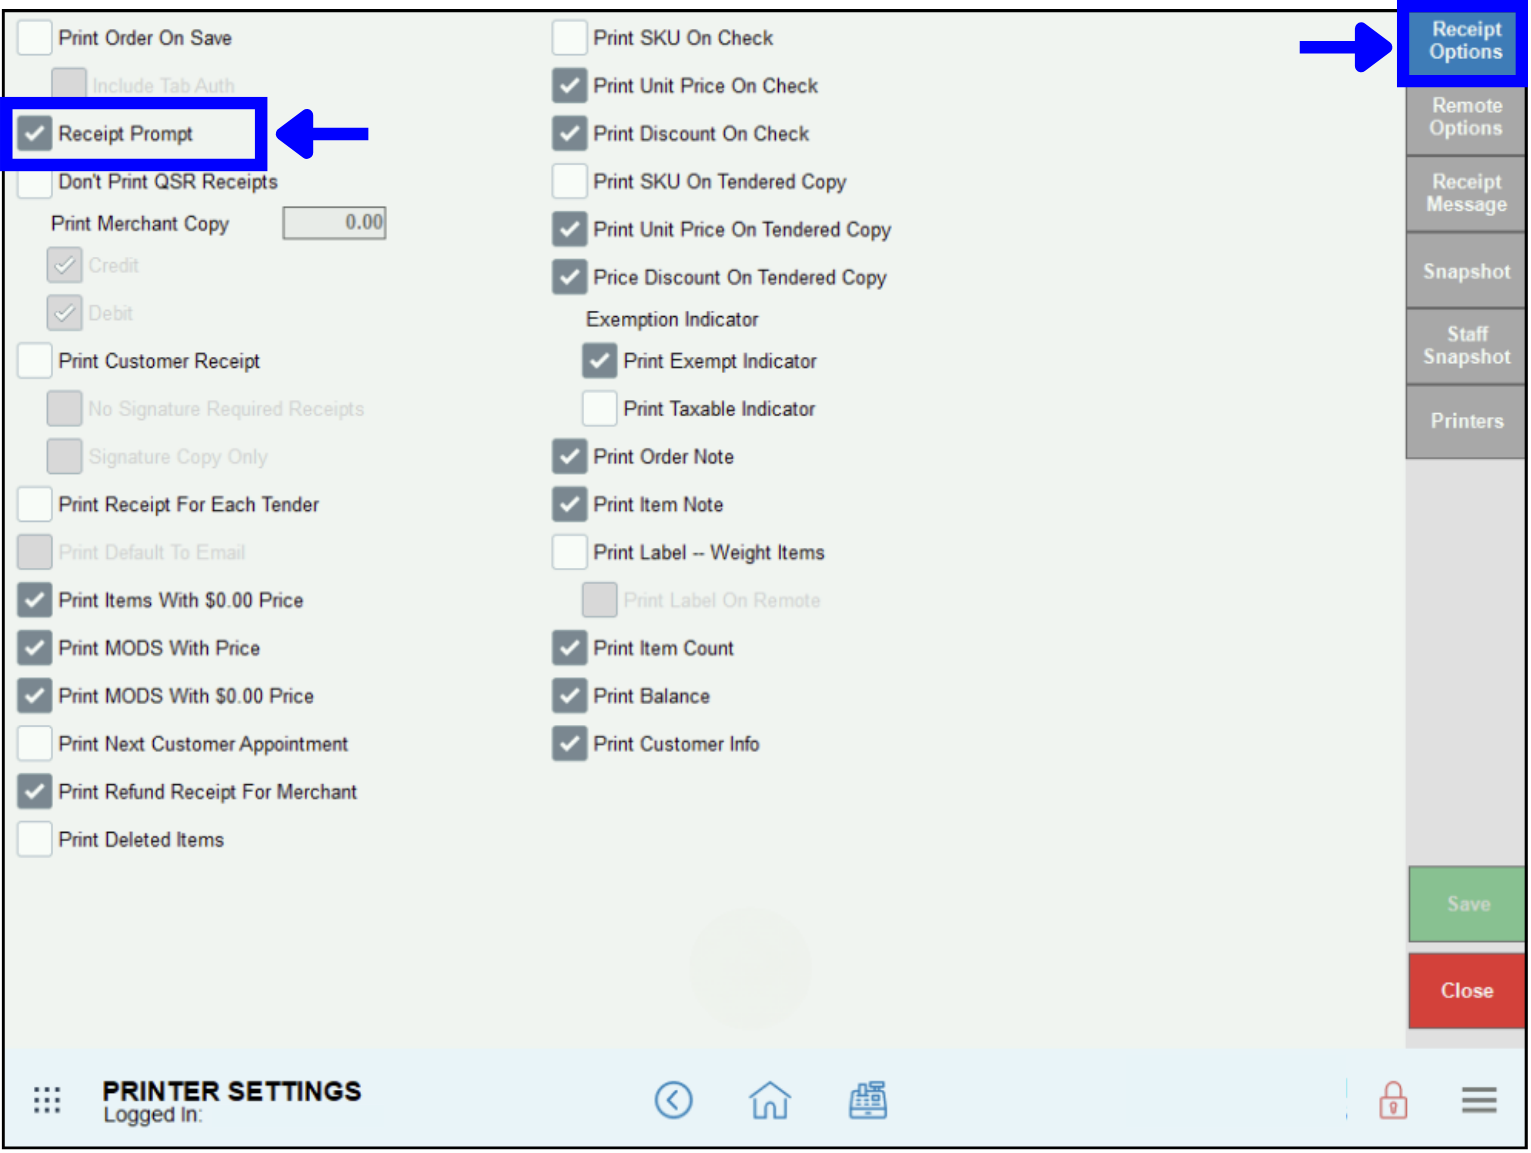
This is a convenient way to empower customers when their receipts should print on their orders. Note: Enabling the Receipt Prompt setting will override all other receipt printer settings.
See Print Settings and Enable Receipt Prompts for more information.
- From Home, navigate to Settings > Preferences.
- Tap Display.
- To update the promotional images on the CFD, tap the radio button next to CFD.
- To update the CFD’s screensaver, tap the radio button next to Screen Saver (CFD). In the Image below, this is selected.
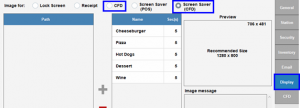
- Use the + and – buttons to add and remove images and use the arrows to change the placement of the selected photo in the list. A preview of the selected image will display in the Preview.
- Note: The Image message textbox can be used as an advertising space for deals, upcoming events, or brand partnerships.
- To change the duration of time in seconds that an image is displayed on the CFD, tap the existing number and type in a new one with the on-screen keyboard.

- Tap Save.
- Note: The touch screen CFD capability setting must be enabled for tip options to appear. If it is not enabled on your device, contact EPI to have a member of our staff enable this setting for you.
To enable pre-configured tip options to display on the CFD, do the following:
- From Home, navigate to Settings > Register Preferences.
- Tap the Tips tab.
- Confirm that Allow Tips is enabled, and then configure the desired tip settings. See Manage Tip Settings > Notable Fields for more detailed descriptions of tip options.

- Tip! To enable suggested gratuity, adjust the amounts in the Suggested Tips: (%) section.
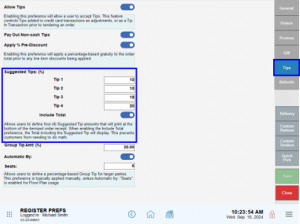
- Tap Save.
Customers can use the CFD to receive an SMS receipt. This is triggered at the end of a transaction after a payment is complete.
This will trigger the CFD to enable the customer to select SMS as the method to receive their receipt.
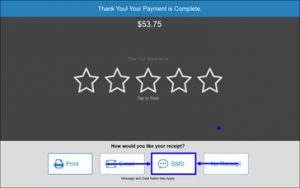
For more information on how to enable SMS receipts, see SMS Receipts from the Customer Facing Display.
How can we improve this information for you?
Registered internal users can comment. Merchants, have a suggestion? Tell us more.