Course firing allows restaurants to effectively prepare and present multi-course meals. Merchants control when food is sent to the kitchen through the use of a Fire button, giving staff the ability to provide steady and timely table service. These instructions describe course firing from the register.
Course firing allows you to take orders for each course, and then fire each course separately.
- Note: Course firing can also be used from the Floor Plan. See: Course Firing from the Floor Plan.
- Tip! Before using course firing, enable print preferences. See: Setup Course Firing Print Preferences.
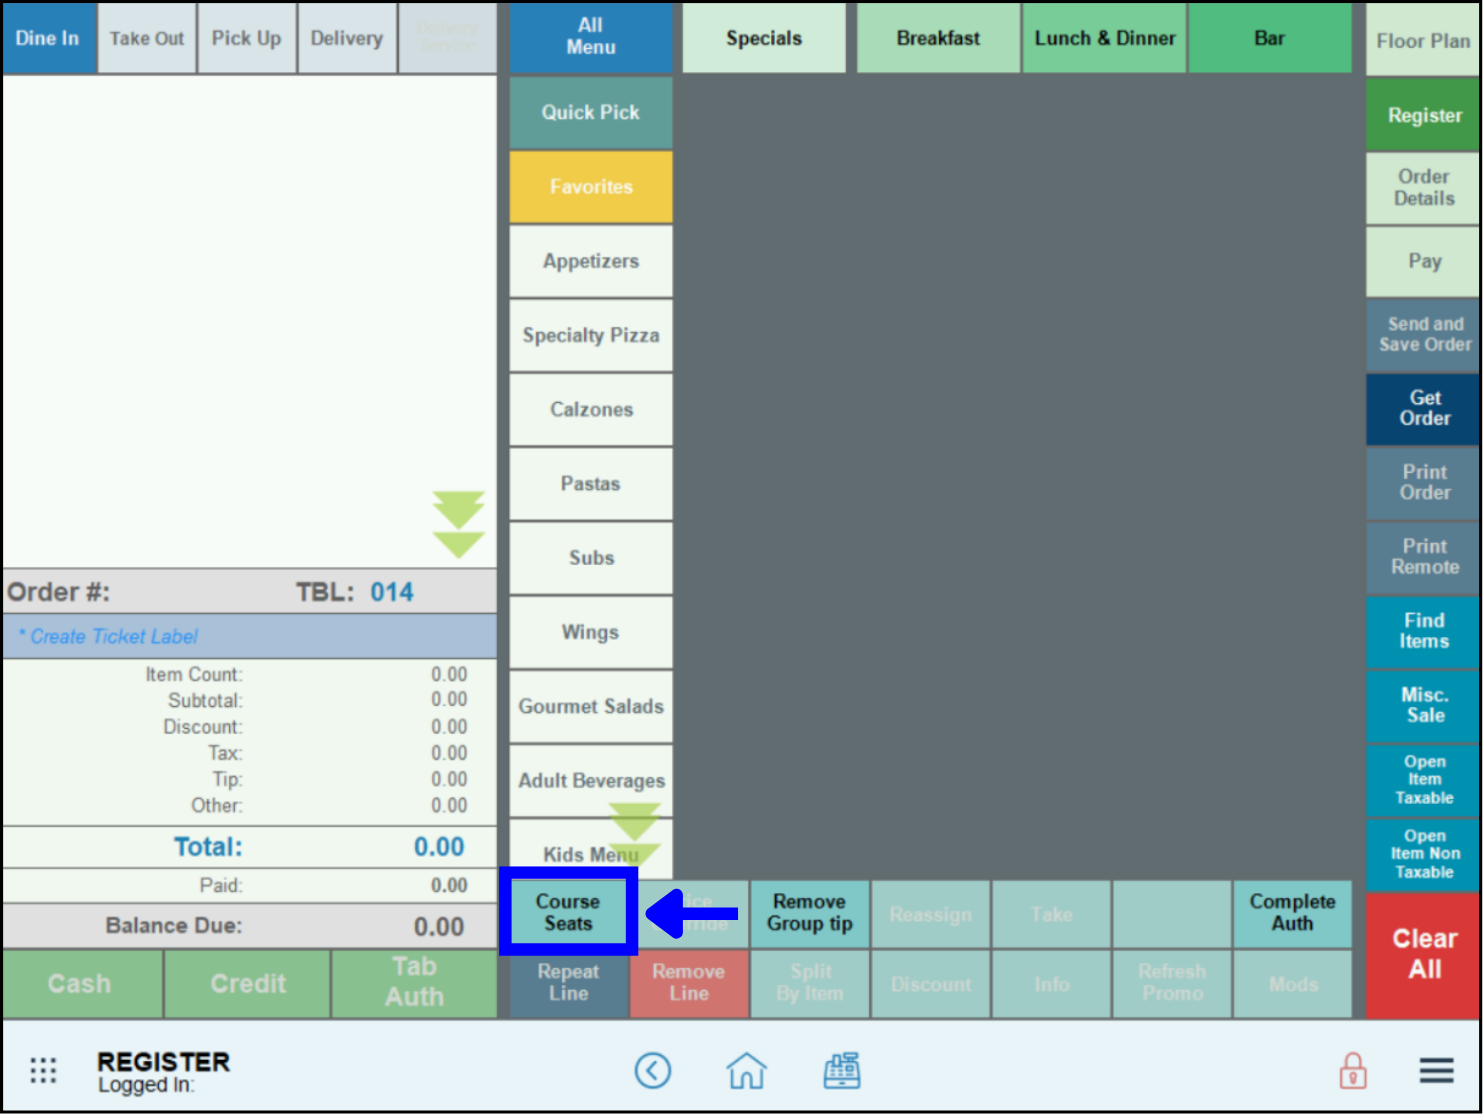
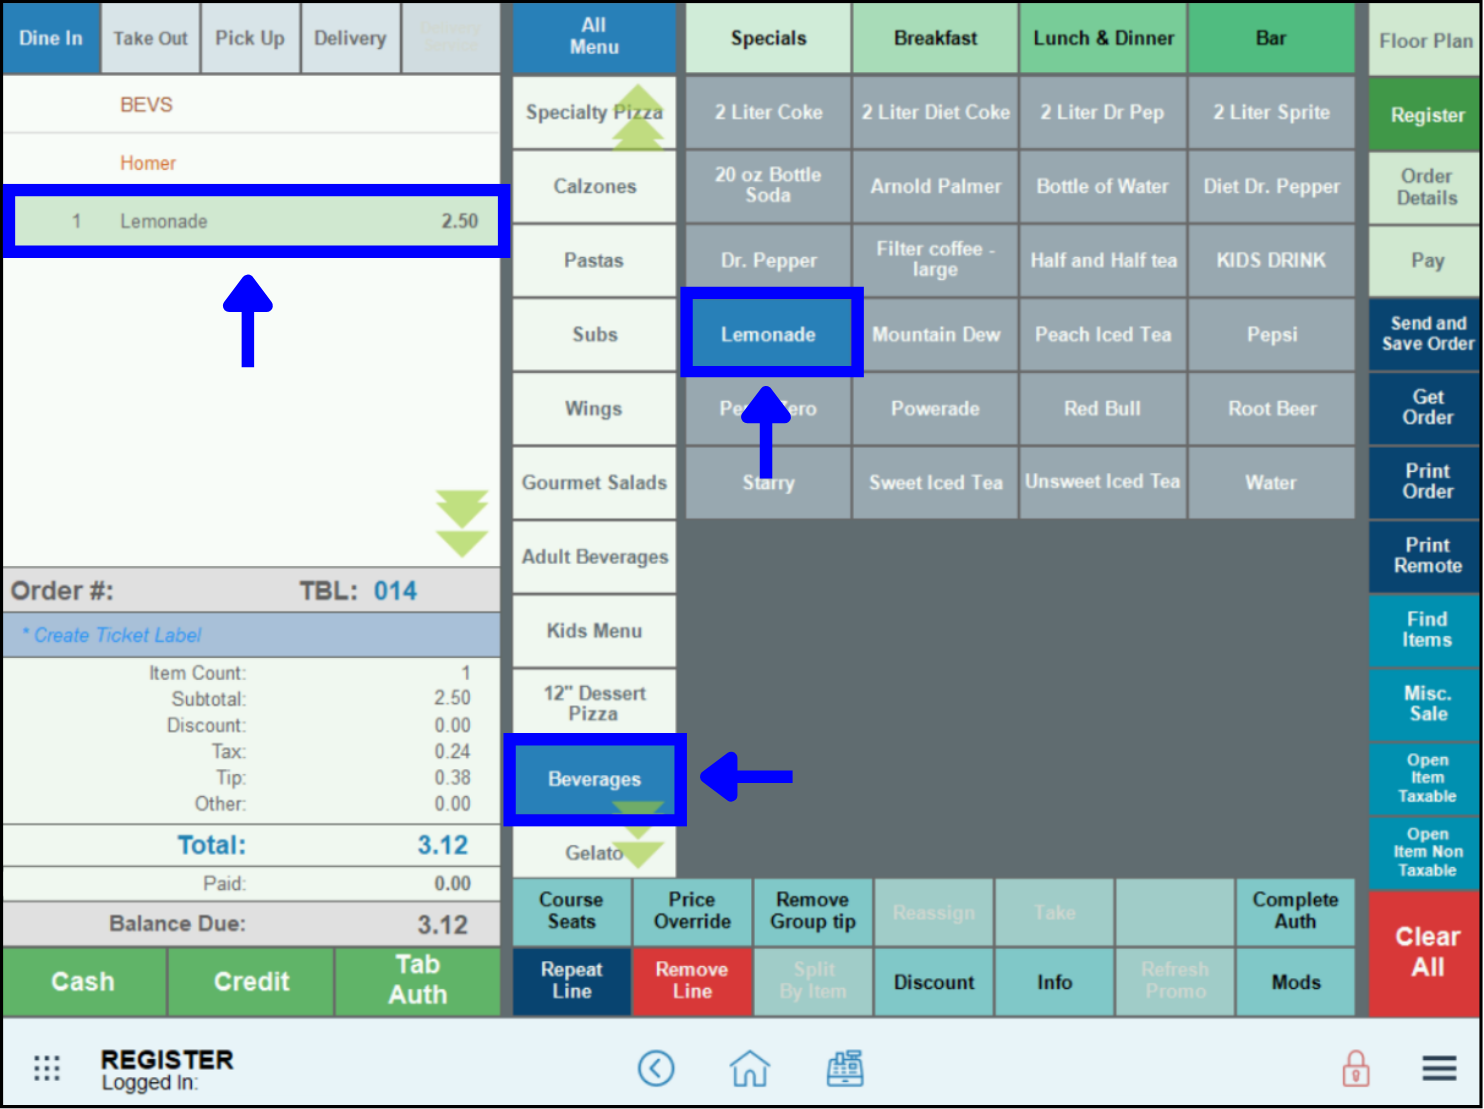
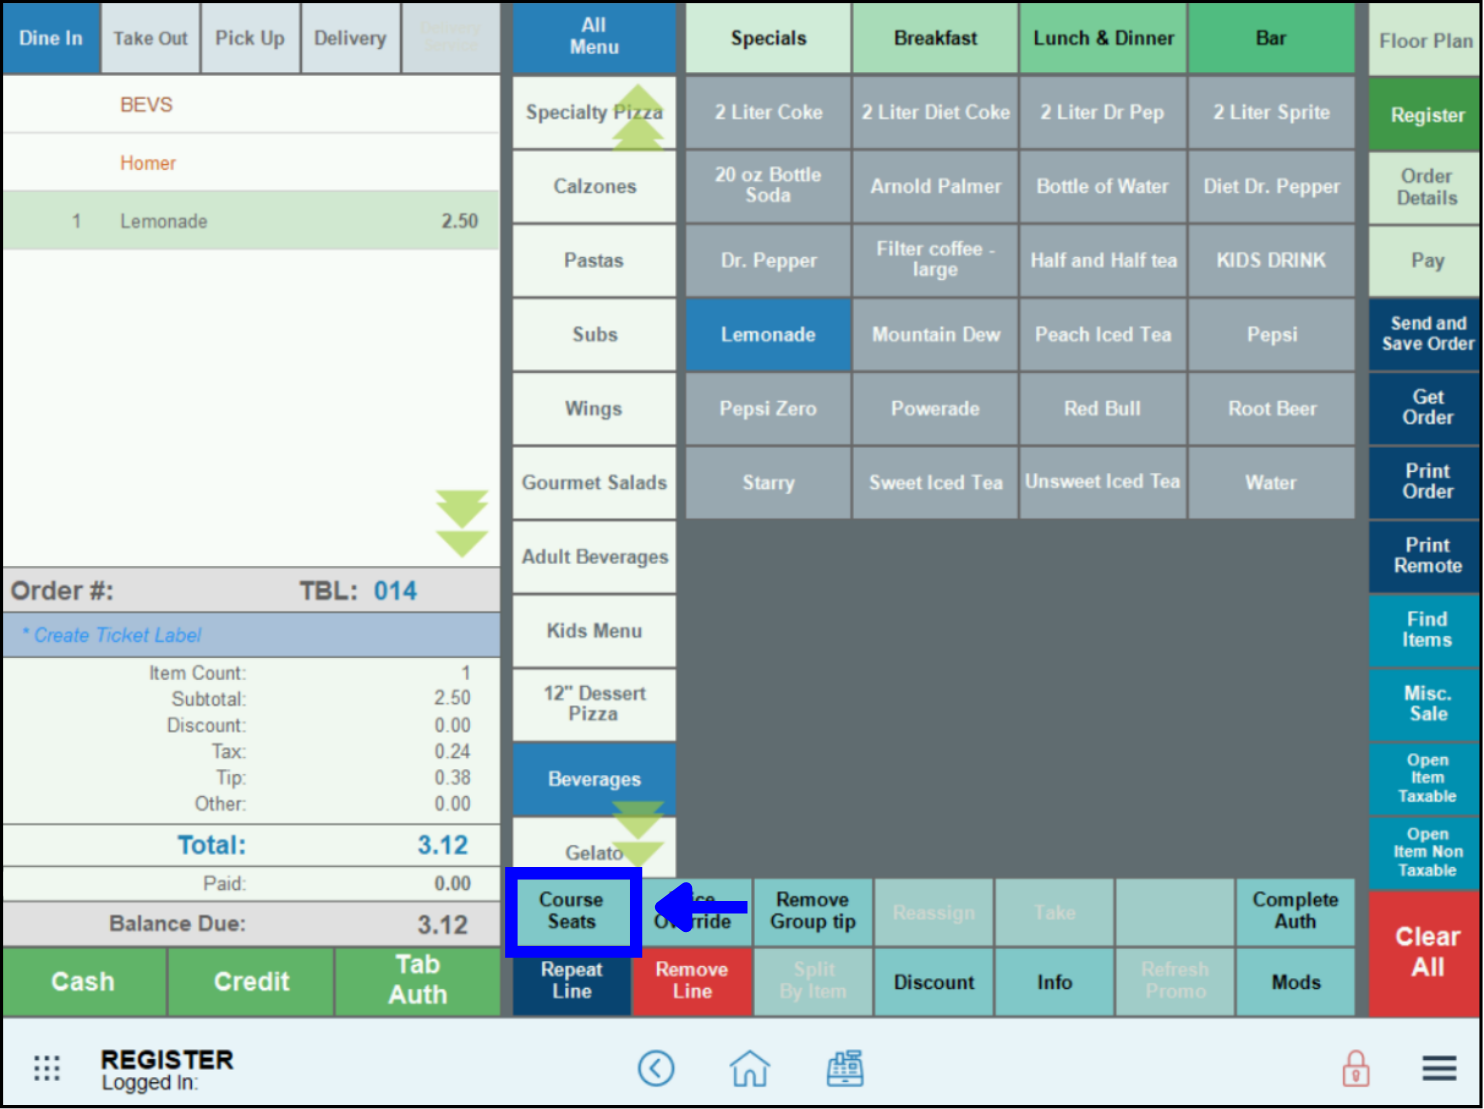
- Navigate to the Register app and tap Course Seats.
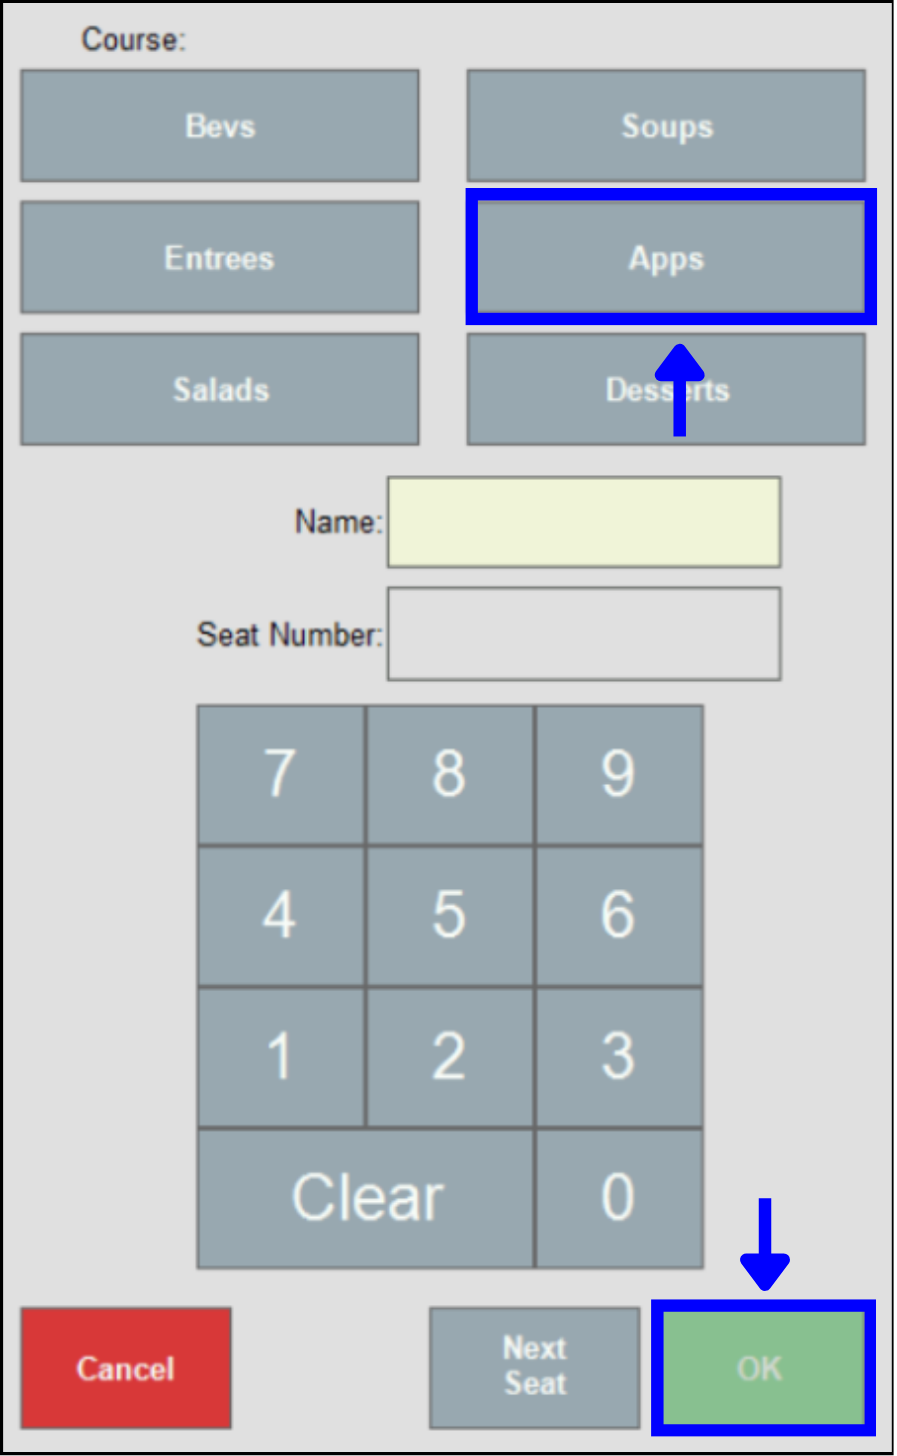
- When prompted, select the first course. This will be the first course provided to the customer.
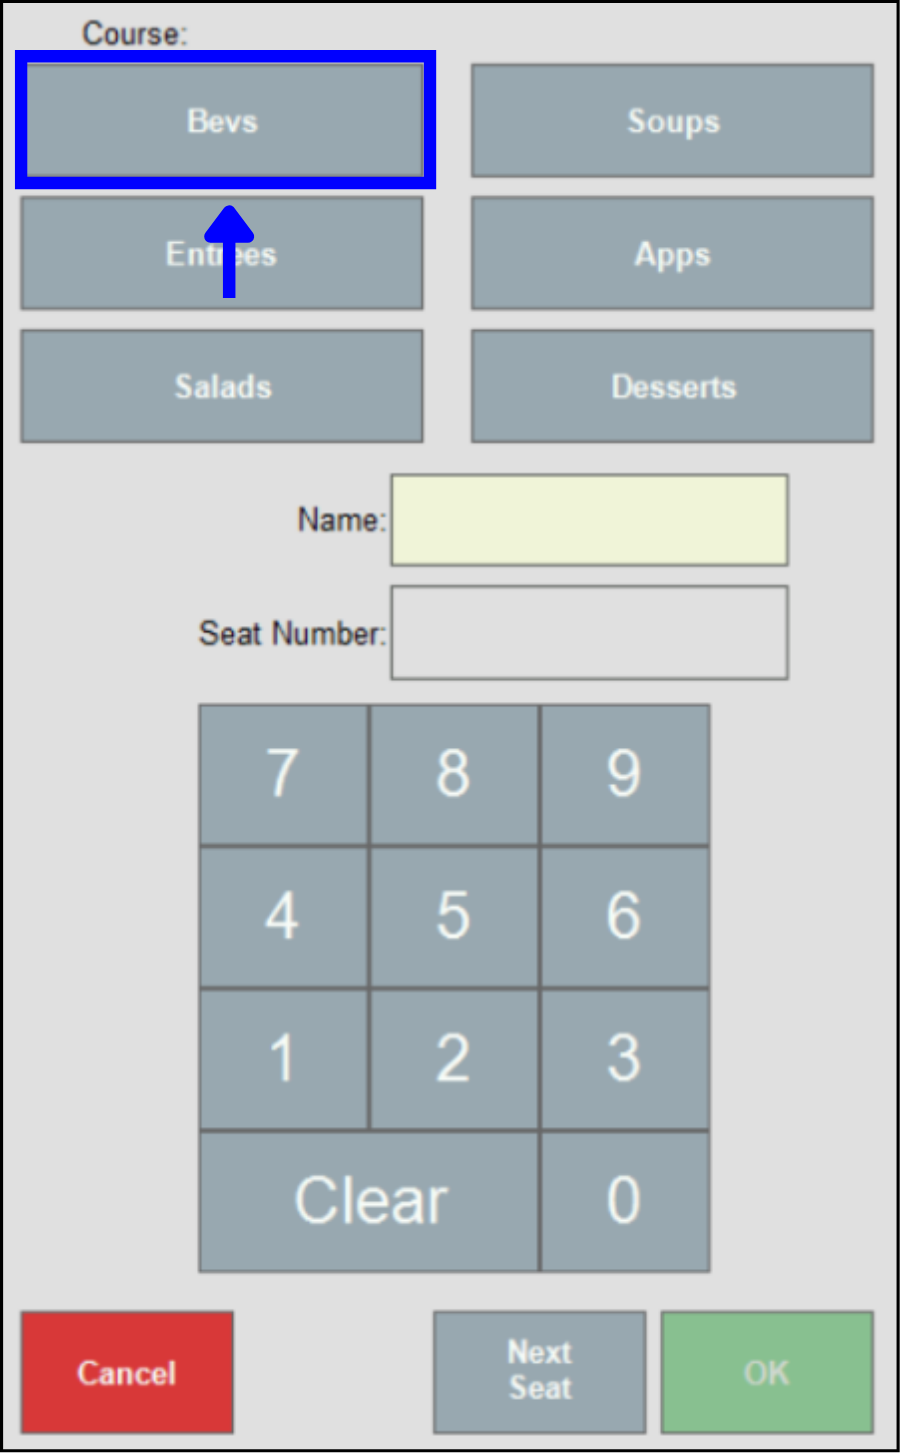
- Tip! By default there are six course options named Course 1, Course 2, etc… Courses are renamed in Settings. For example, common renames are Beverages, Appetizers, Soup, Salad, Entrees, and Dessert. See: Rename Restaurant Courses
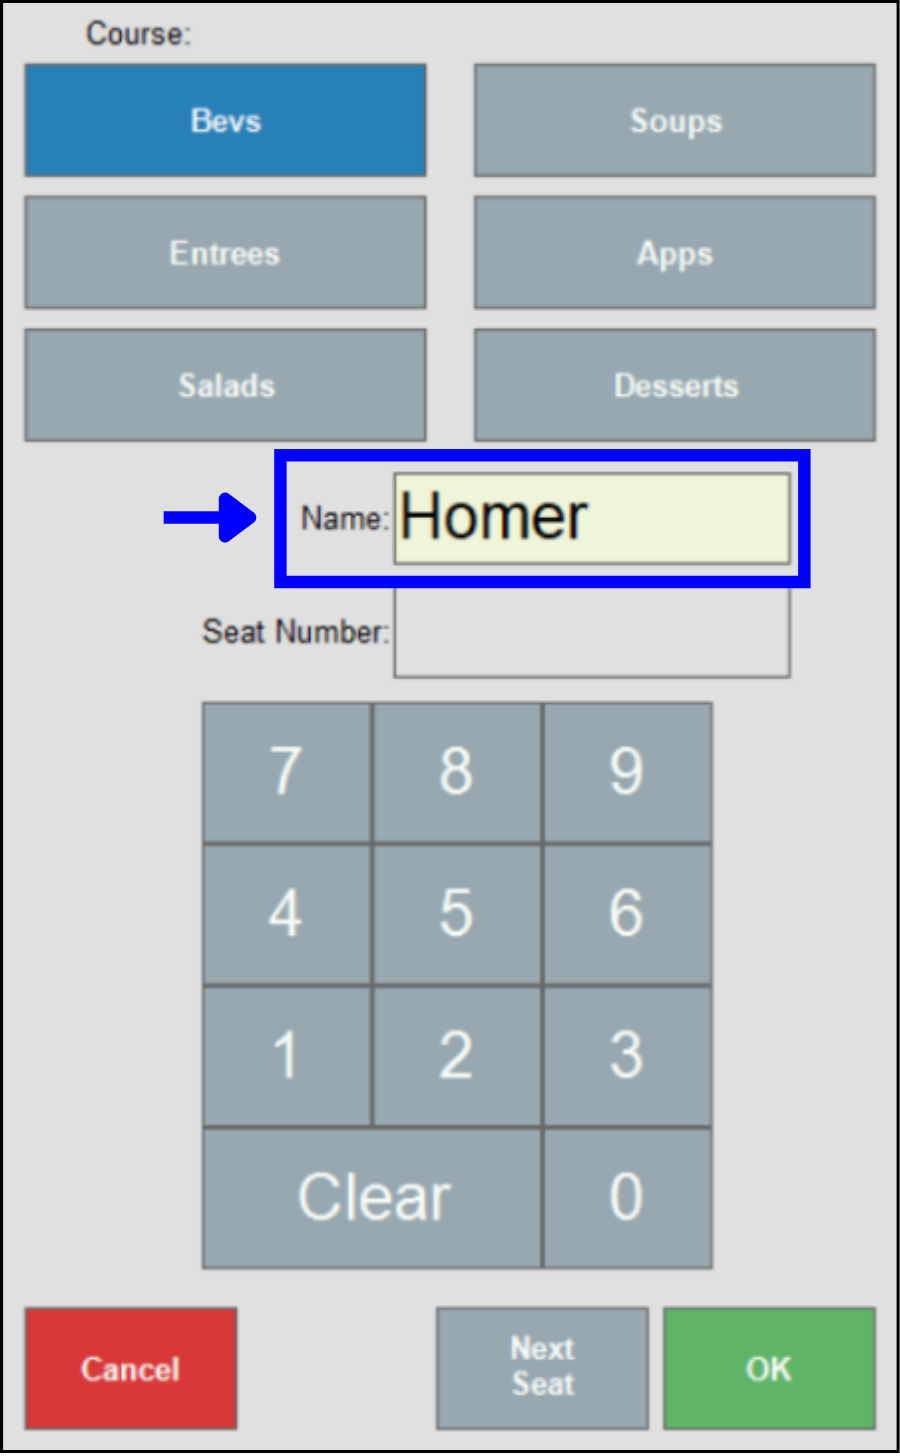
- Note: Customer names or seats can be added to each course by typing in a customer’s name in the Name field, or by assigning a number in the Seat Number field. A name/seat can be assigned to each customer on an order.
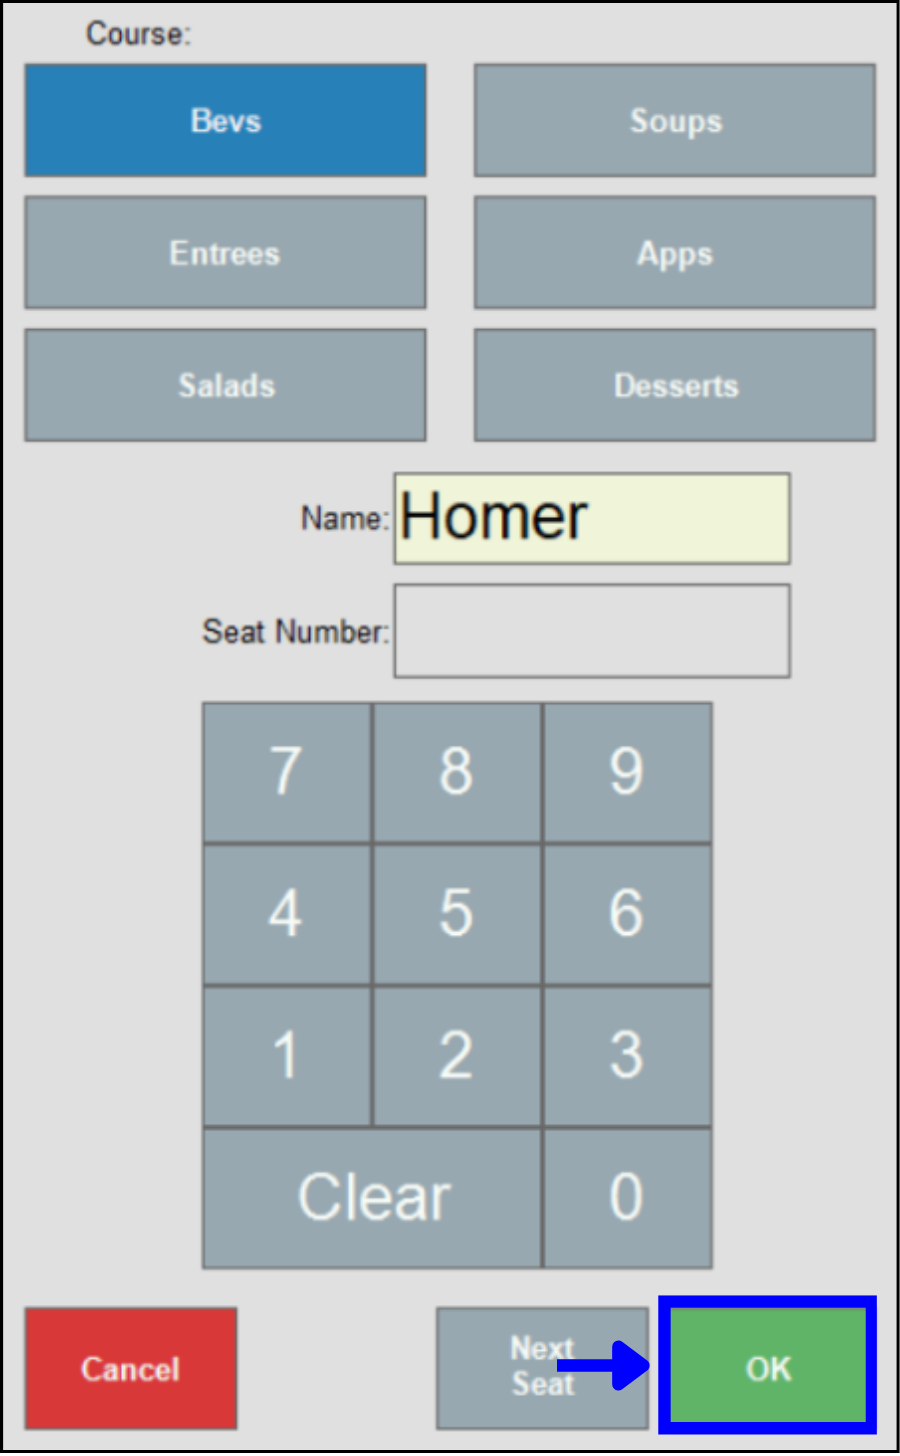
- Tap OK.
- View the first course heading. Add items for the first course by tapping items. For example, select “Lemonade.”
- When ready to add a second course, tap Course Seats again.
- Select a second course, and then tap OK.
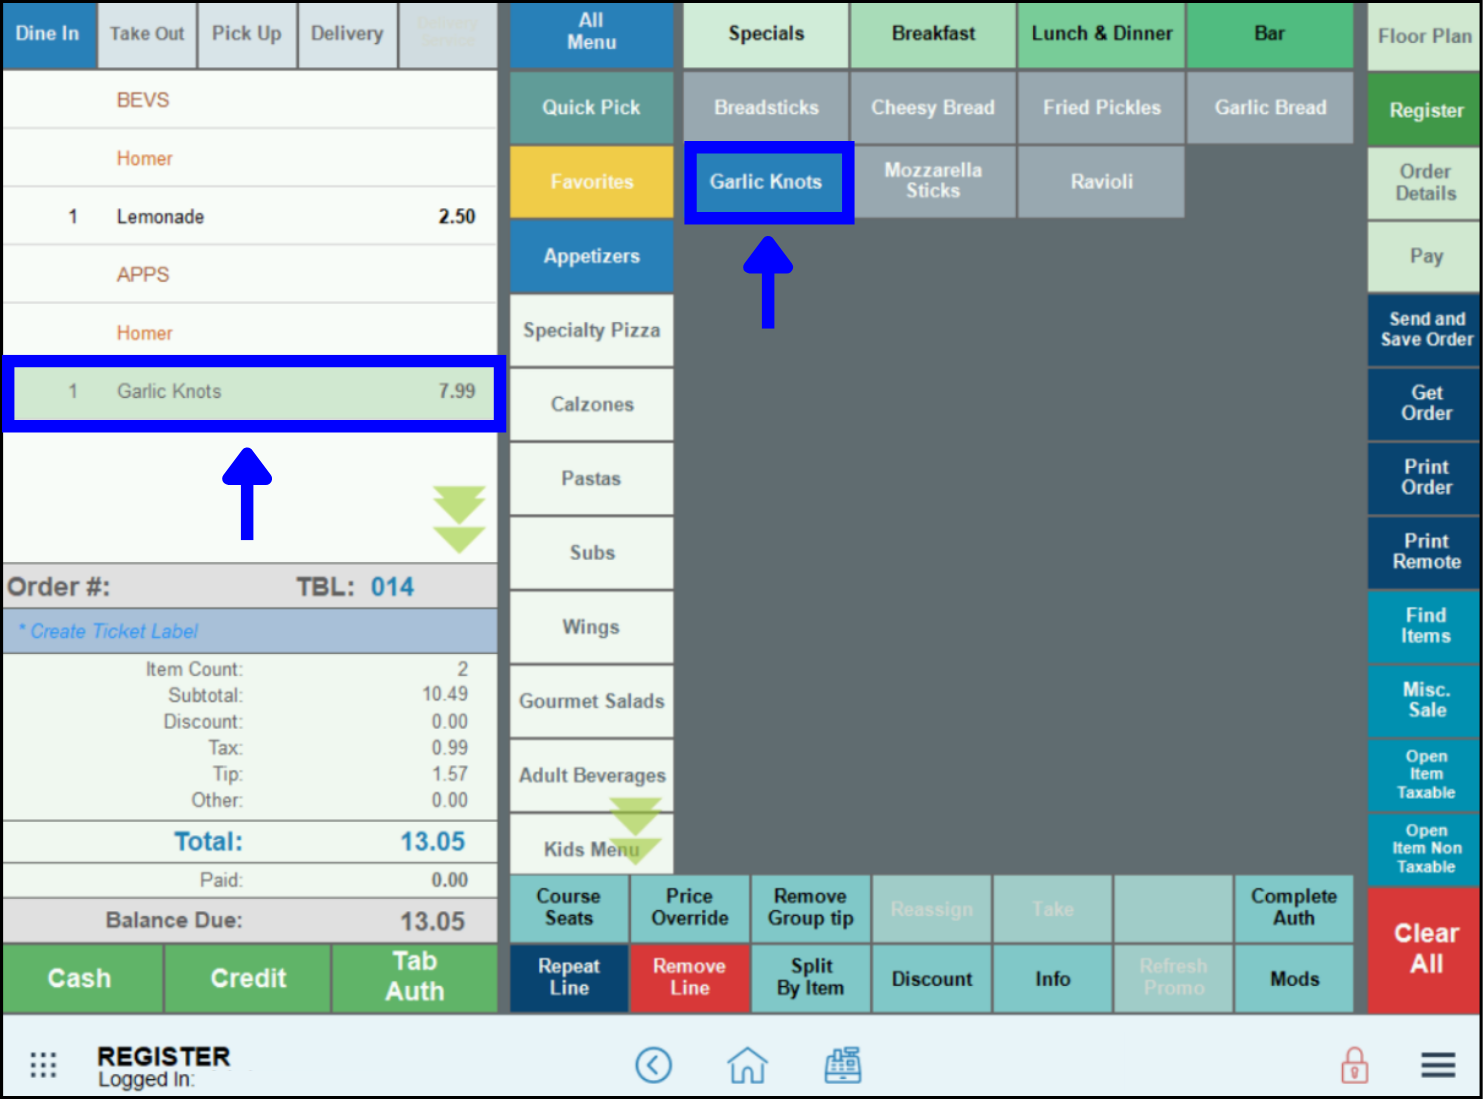
- View the second course heading, then add items. For example, select “Garlic Knots”.
- Take additional course orders by tapping Course Seats as described in previous steps.
When a course is fired, course items are sent to a remote kitchen printer so staff can begin food preparation. Course 1 items are automatically fired when Send Order is selected. Items that have been fired are colored PURPLE at the register.
- When ready to fire the first course, tap Save and Send Order.
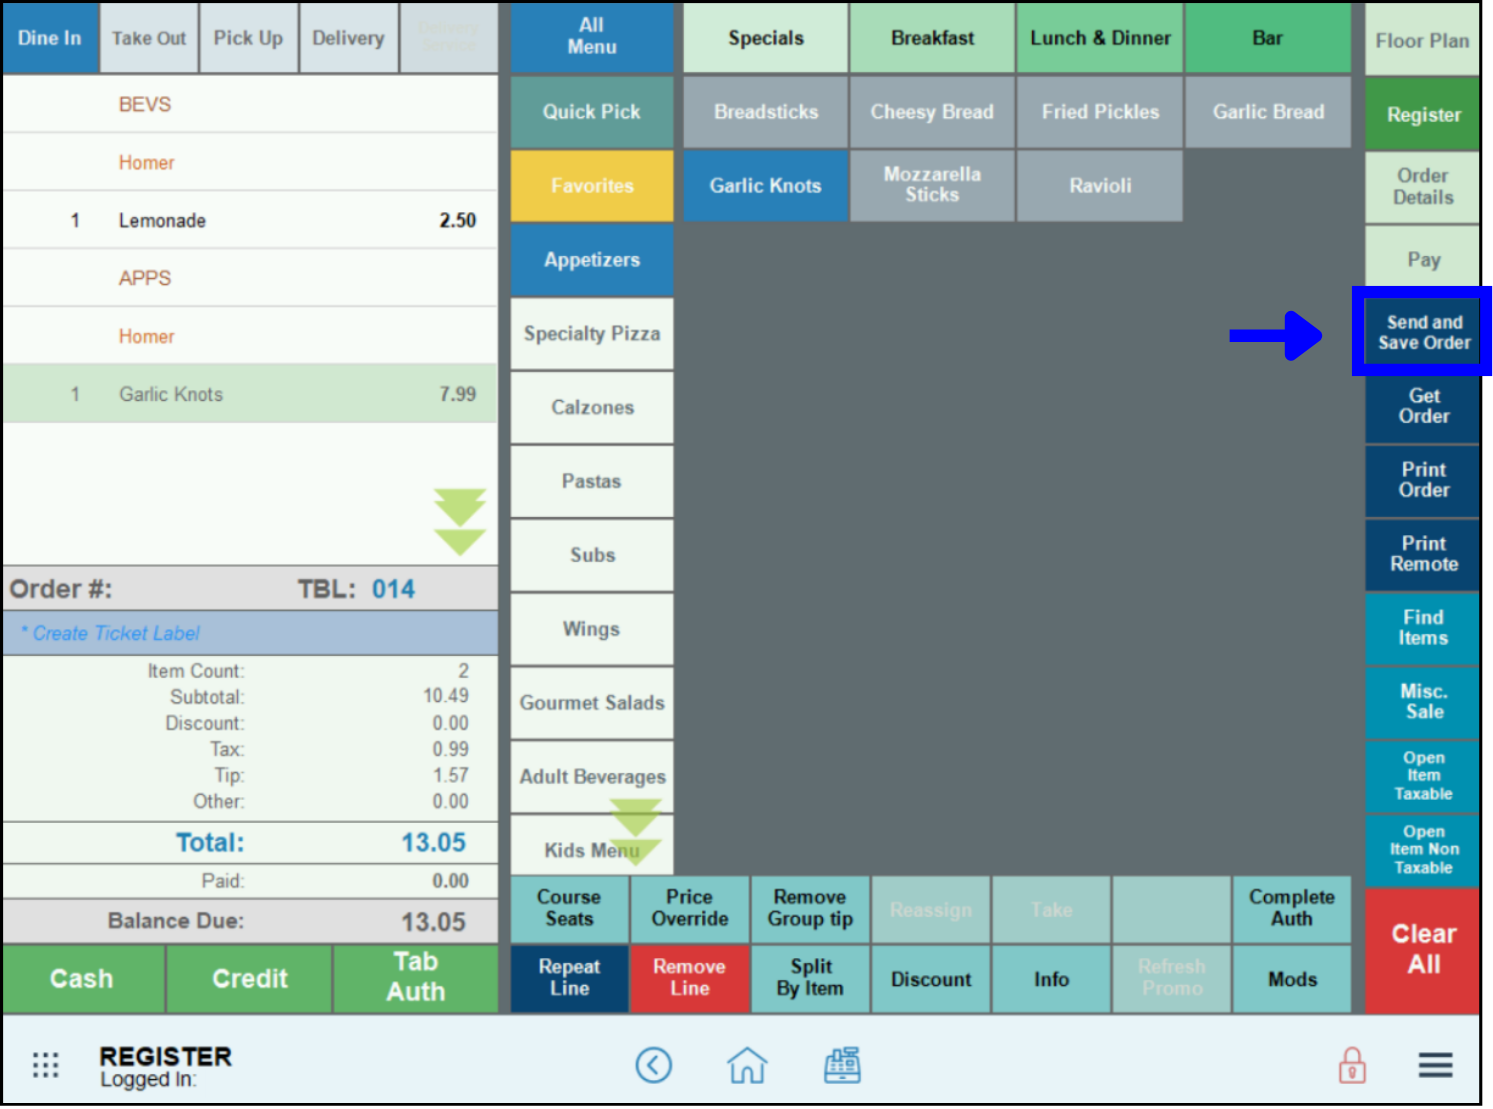
- Note: If course firing print preferences have not been set up, the ENTIRE order will send to the remote kitchen printer when tapping Send Order. Set up course firing print preferences to ensure that each course is fired separately. See: Setup Course Firing Print Preferences
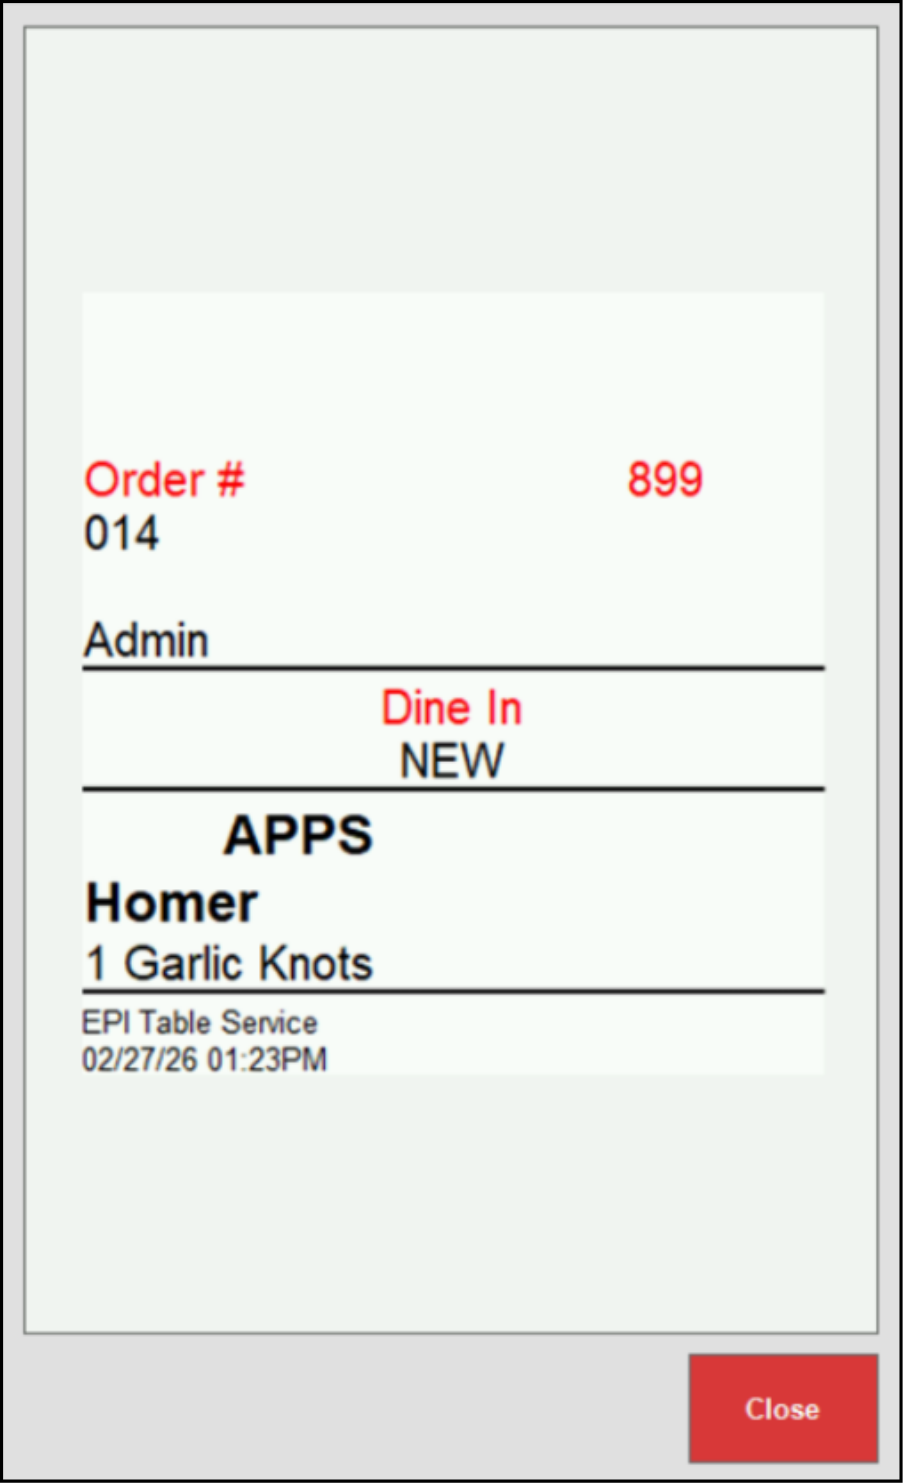
- The first course is sent to a remote kitchen printer so kitchen staff can begin preparation of the items.
Fire additional courses either from the Register app or Floor Plan view:
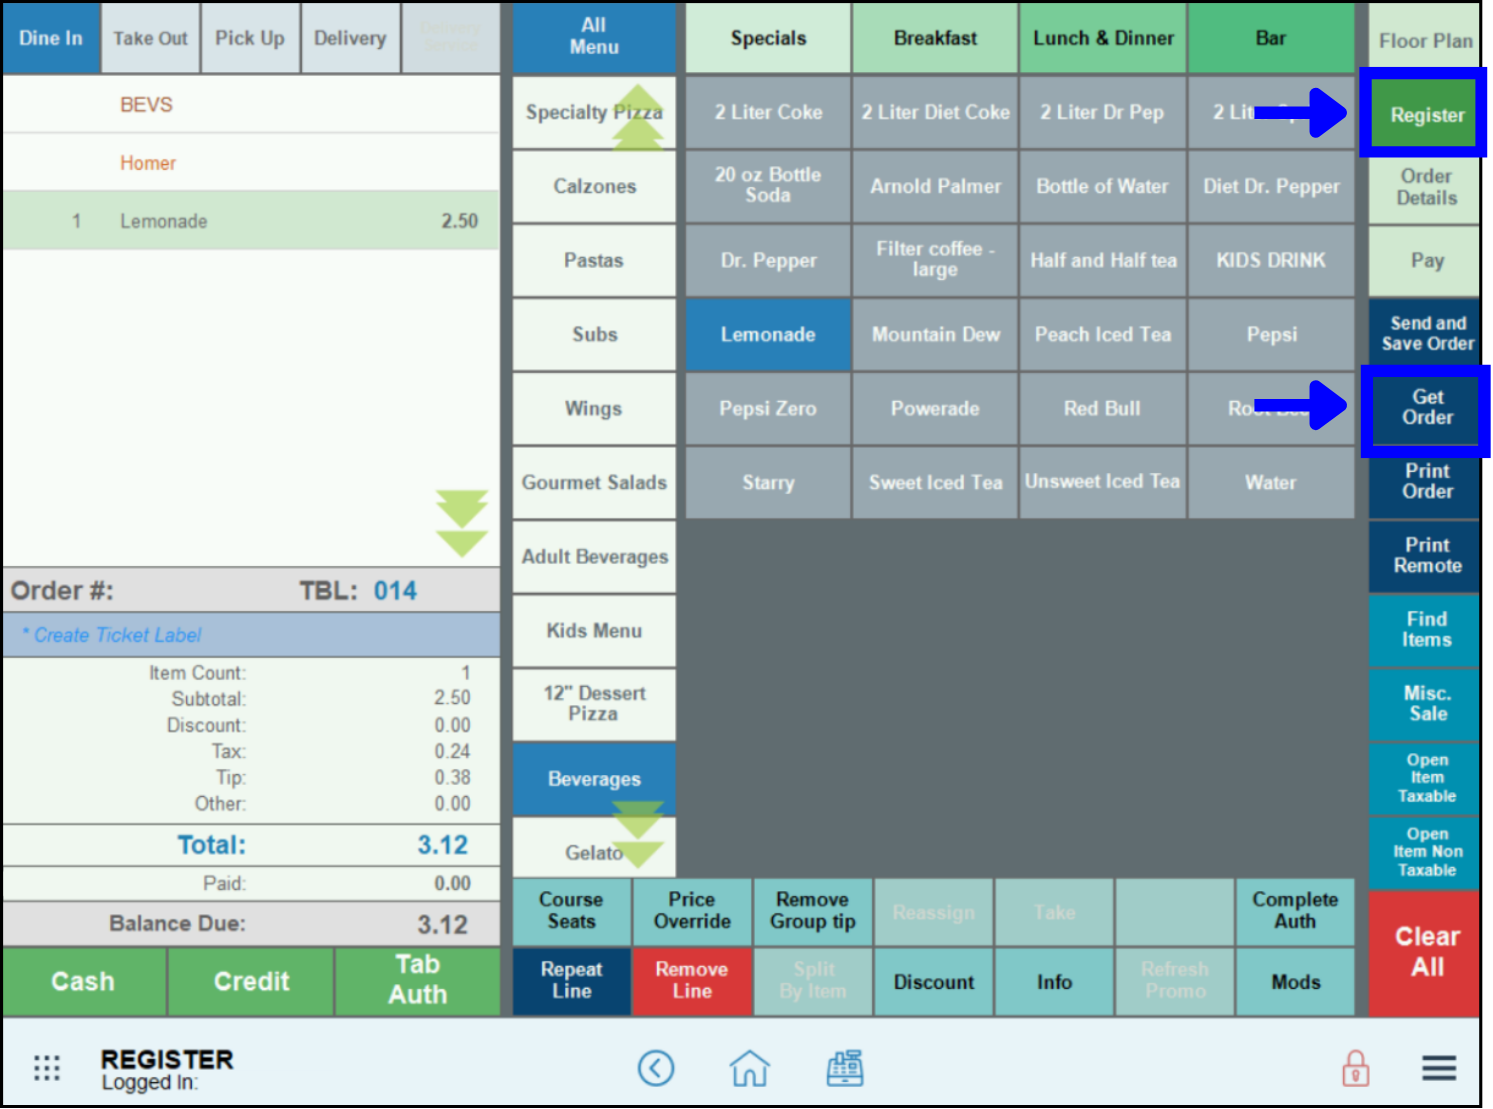
- Pull up an order to fire the next course.
- Tap Get Order, accessible from the Register tab.
- Or tap Get Order from the Floor Plan tab.
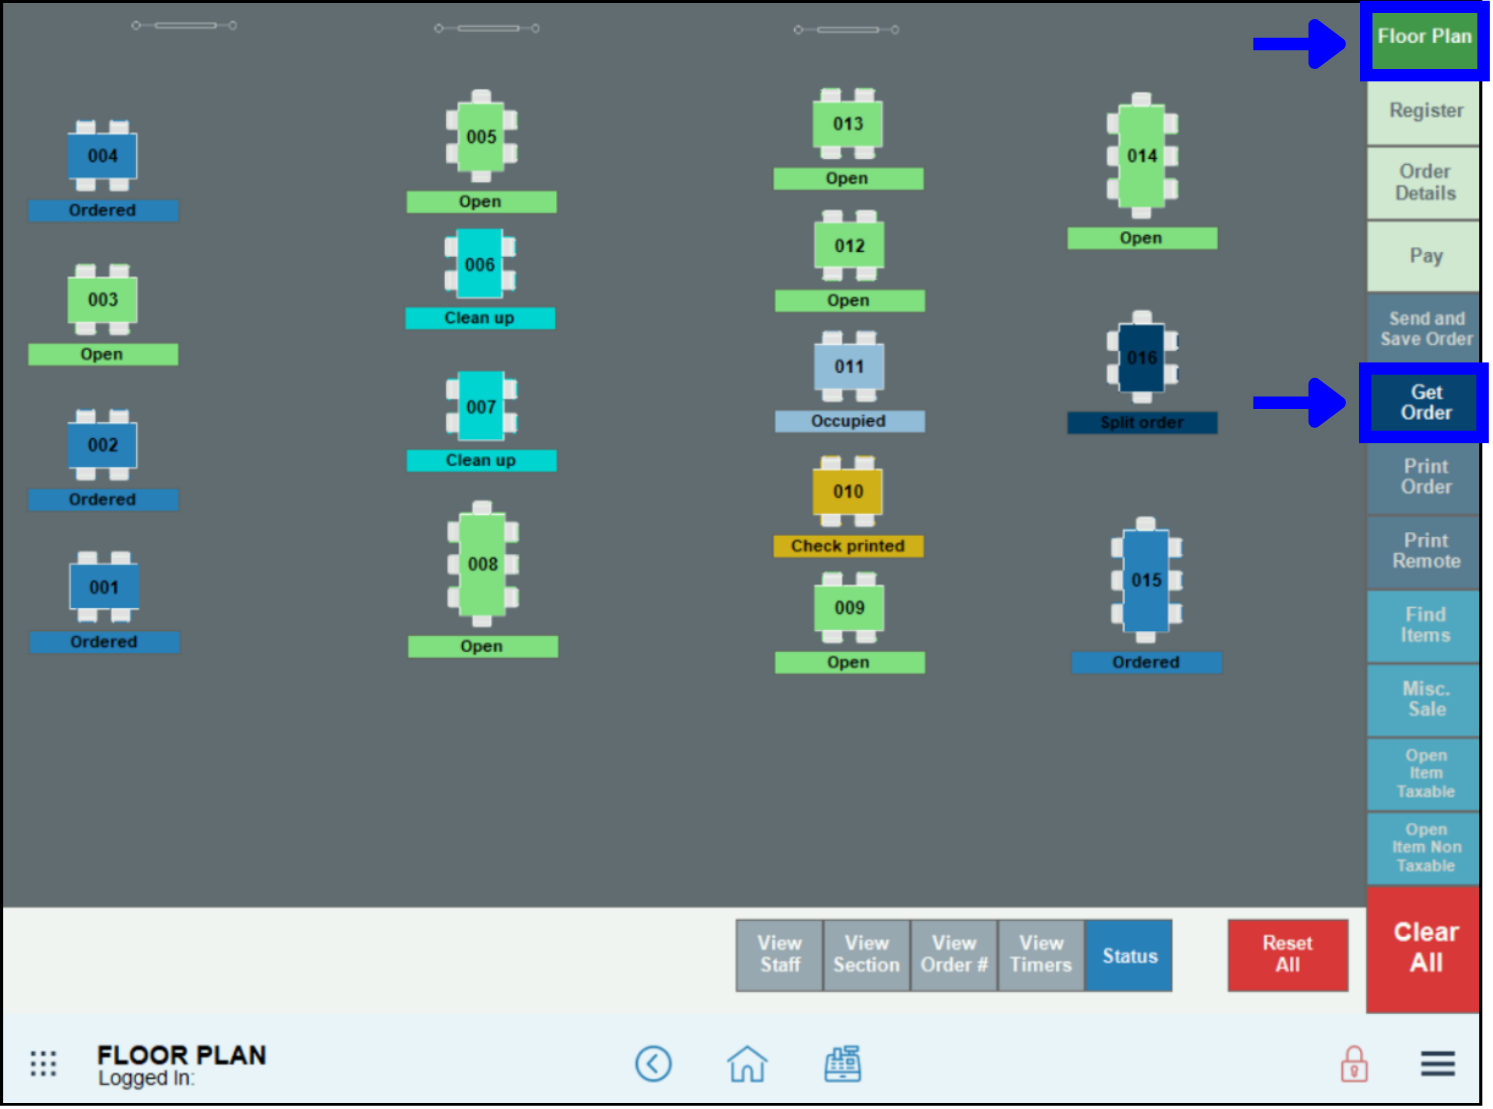
- Highlight the order and tap Open.
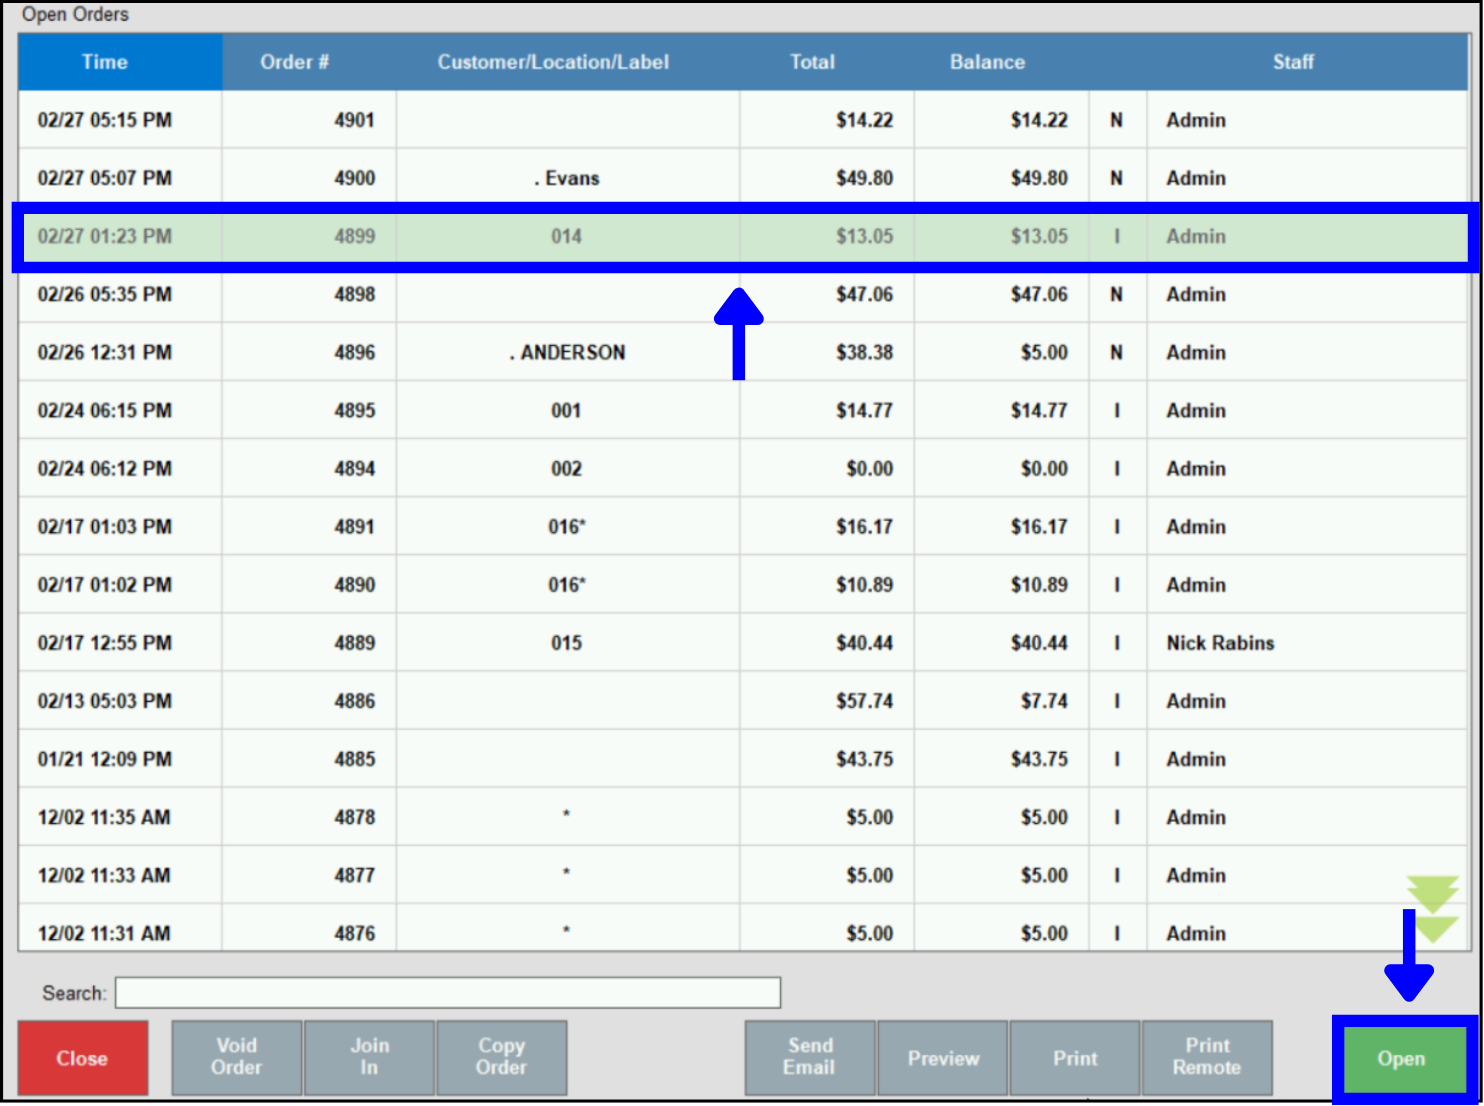
- Note: Items that have been sent to the printer display as PURPLE.
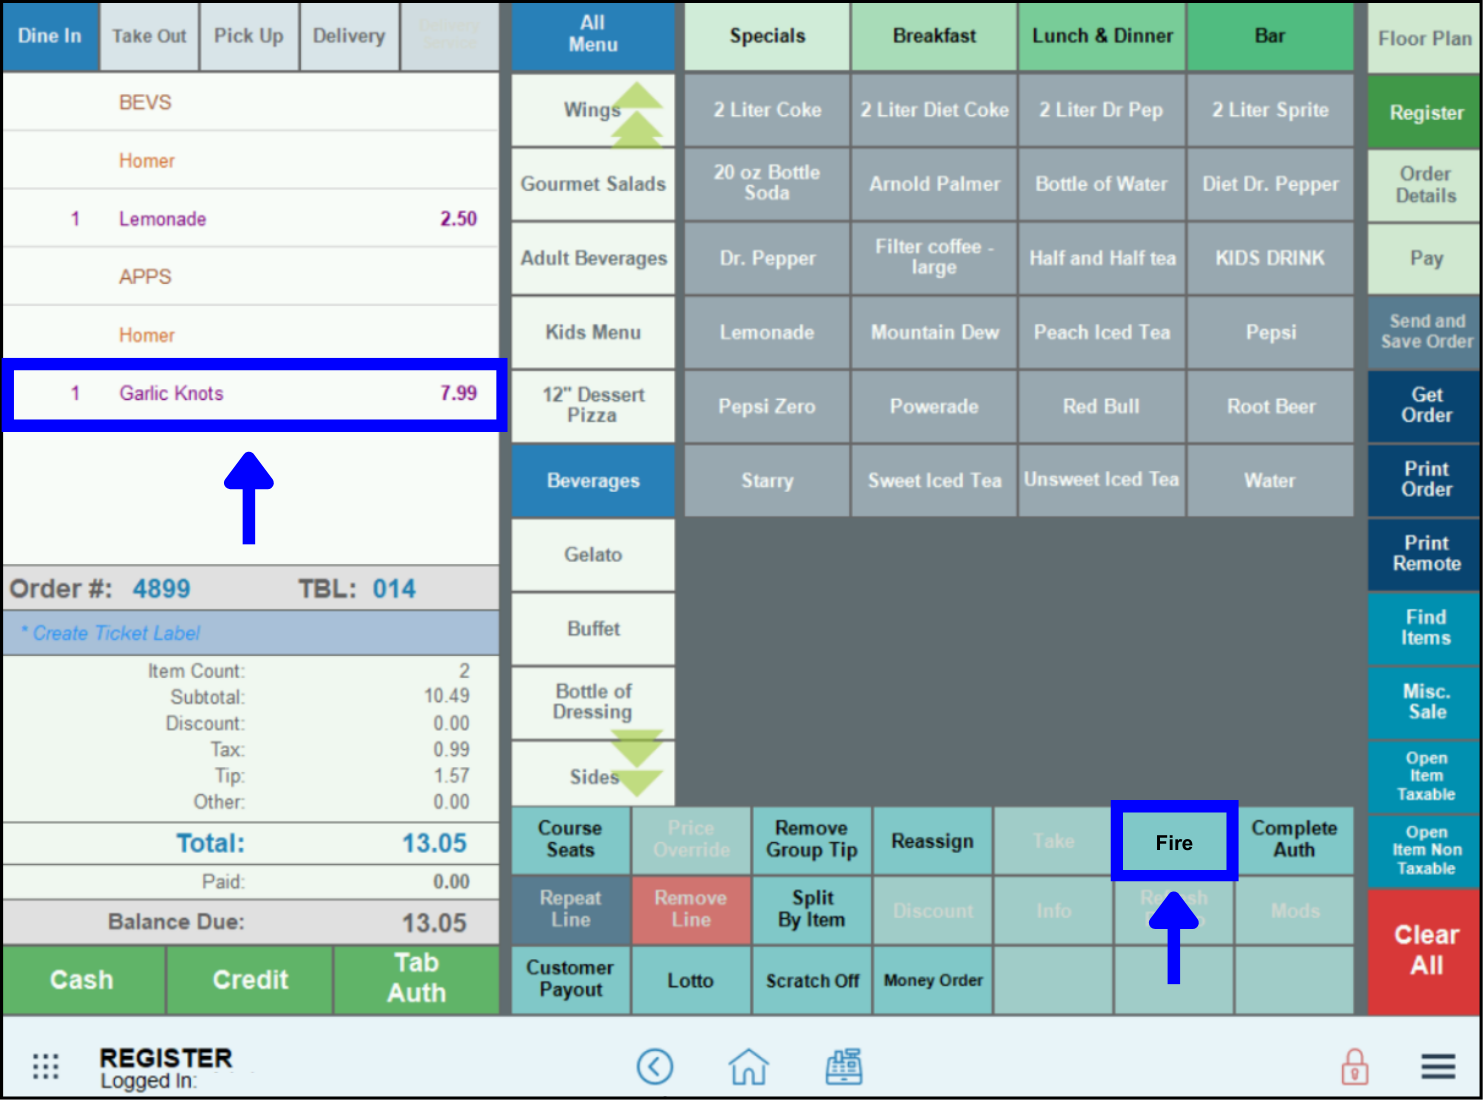
- Tap Fire.
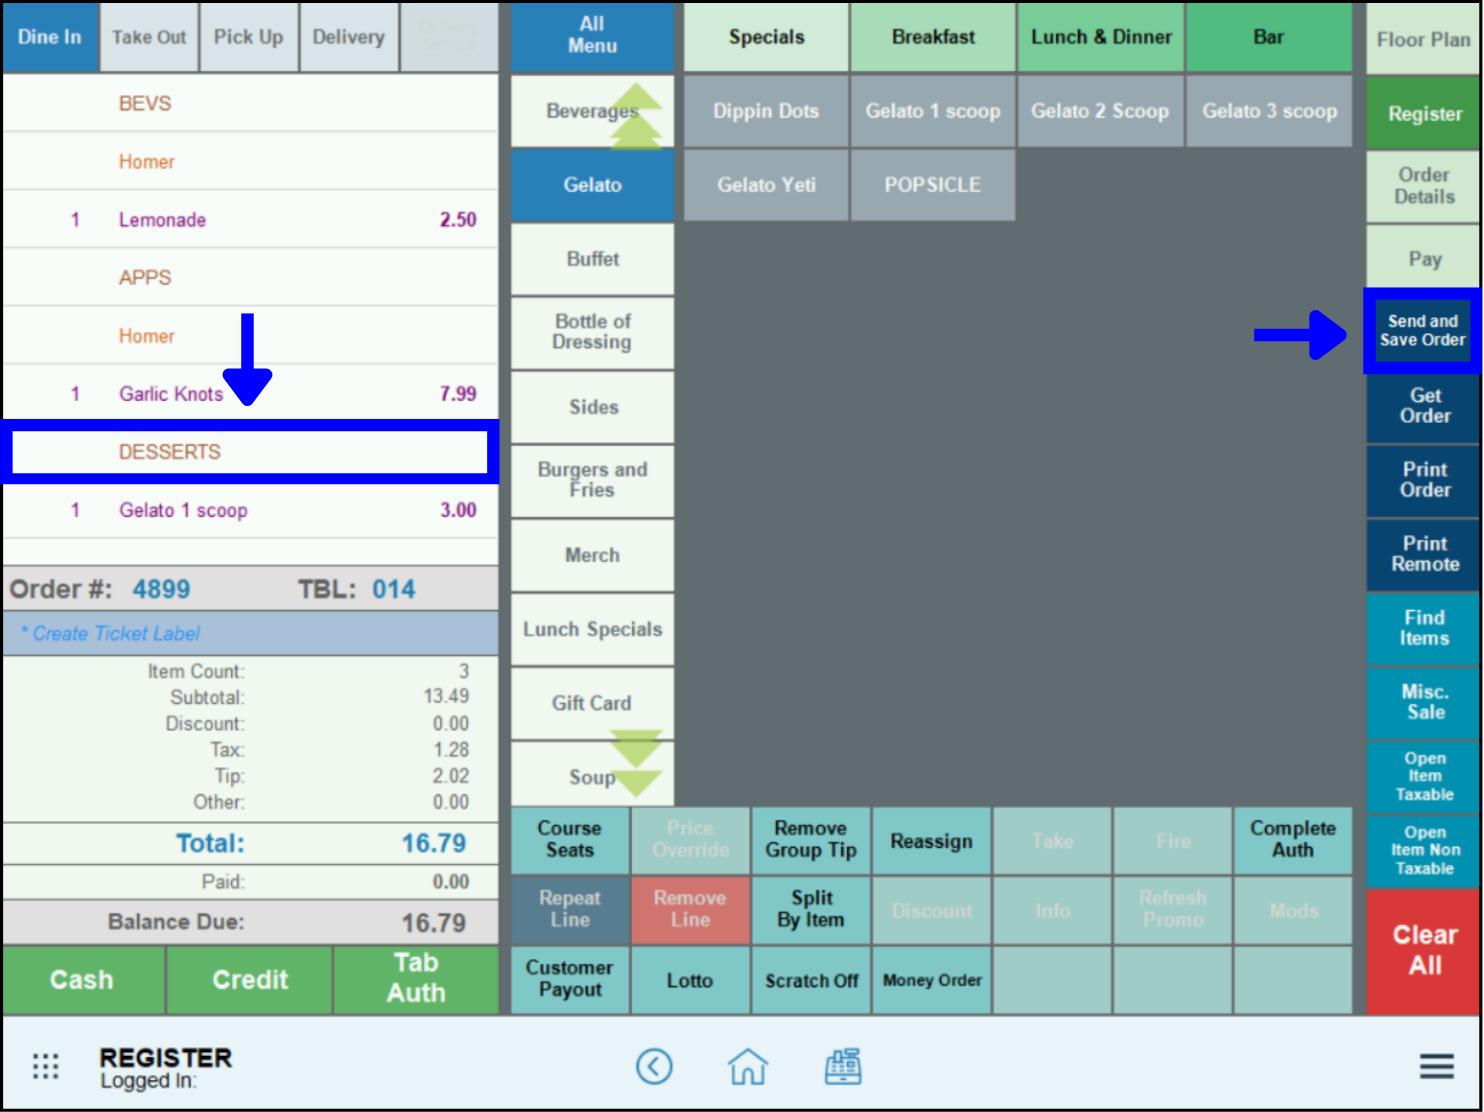
- Highlight the next course name. For example, tap Desserts to fire the nextcourse.
- Tip! Individual items can be fired by highlighting an individual item instead of a course name.
- Tap Save and Send Order.
- The highlighted course (or the highlighted item) is sent to the remote kitchen printer.
- Pull up the order, and fire each course until the entire order has been sent to the kitchen.
How can we improve this information for you?
Registered internal users can comment. Merchants, have a suggestion? Tell us more.