Quick Payout buttons are the fastest way for retailers to process customer payouts! Specific types of payouts such as “Lotto” and “Money Orders” can be added directly to the Register through the use of custom buttons.
Quick Payouts are set up by first defining custom variables for customer payout. Then custom buttons are added to the register. A “Customer Payout” button can be added to the register, or specific variables such as “Lotto” and “Money Orders” can be added to the register.
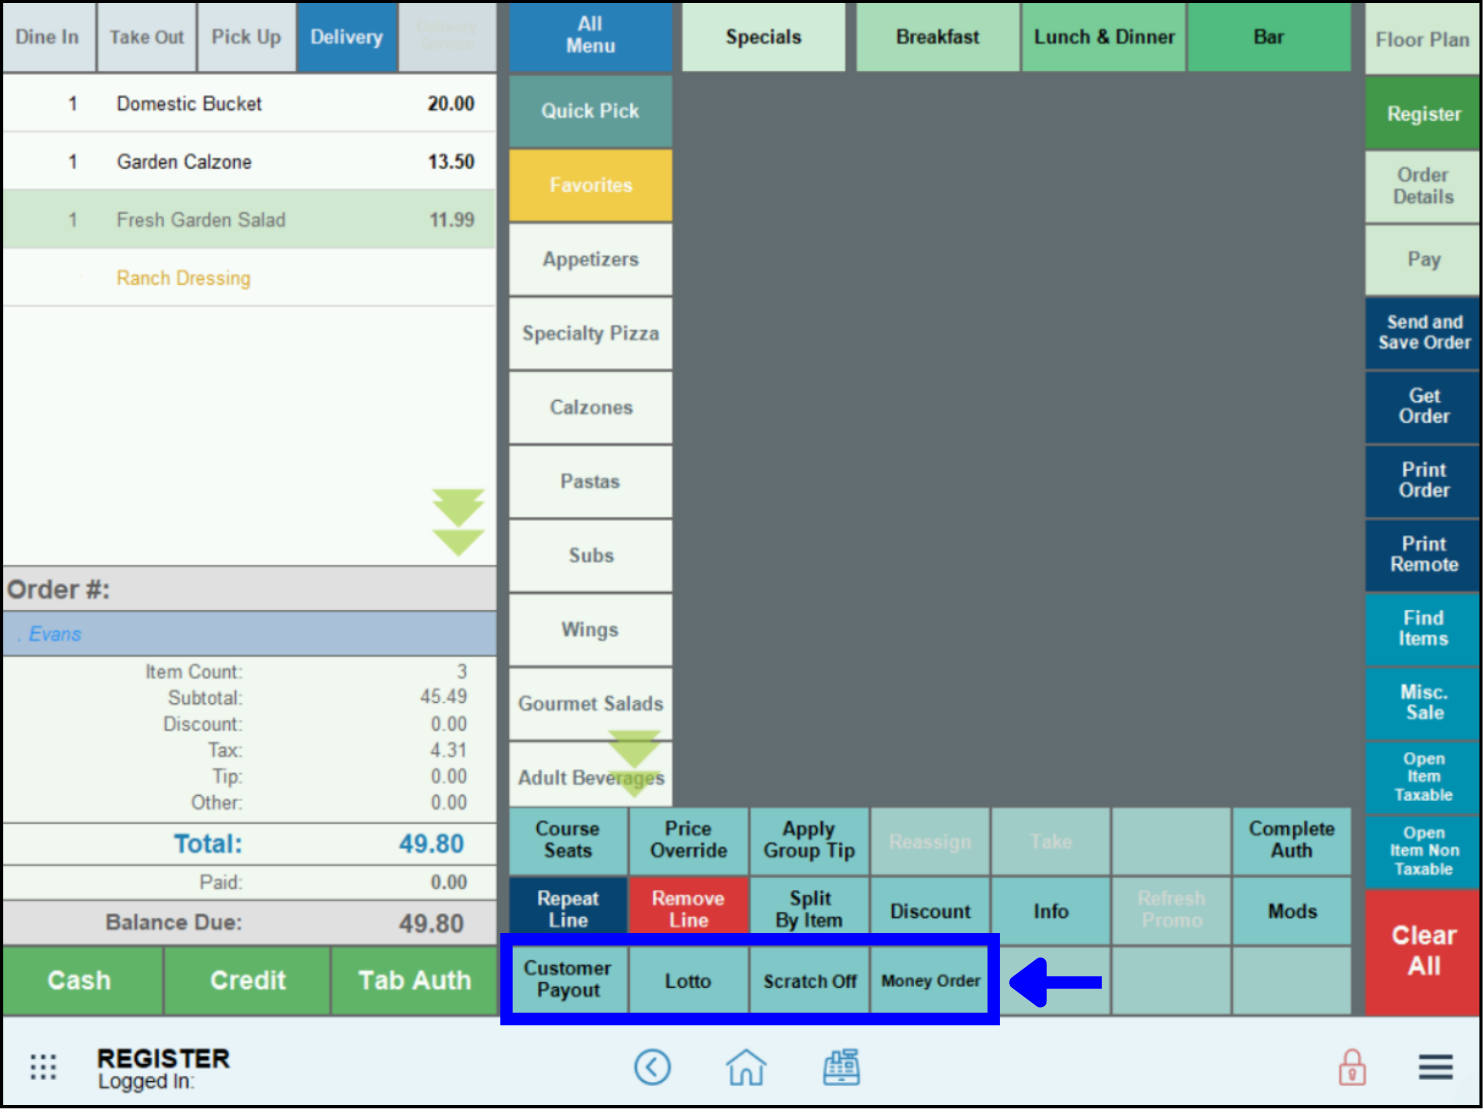
- Example: This is how Quick Payout buttons display on the Register:

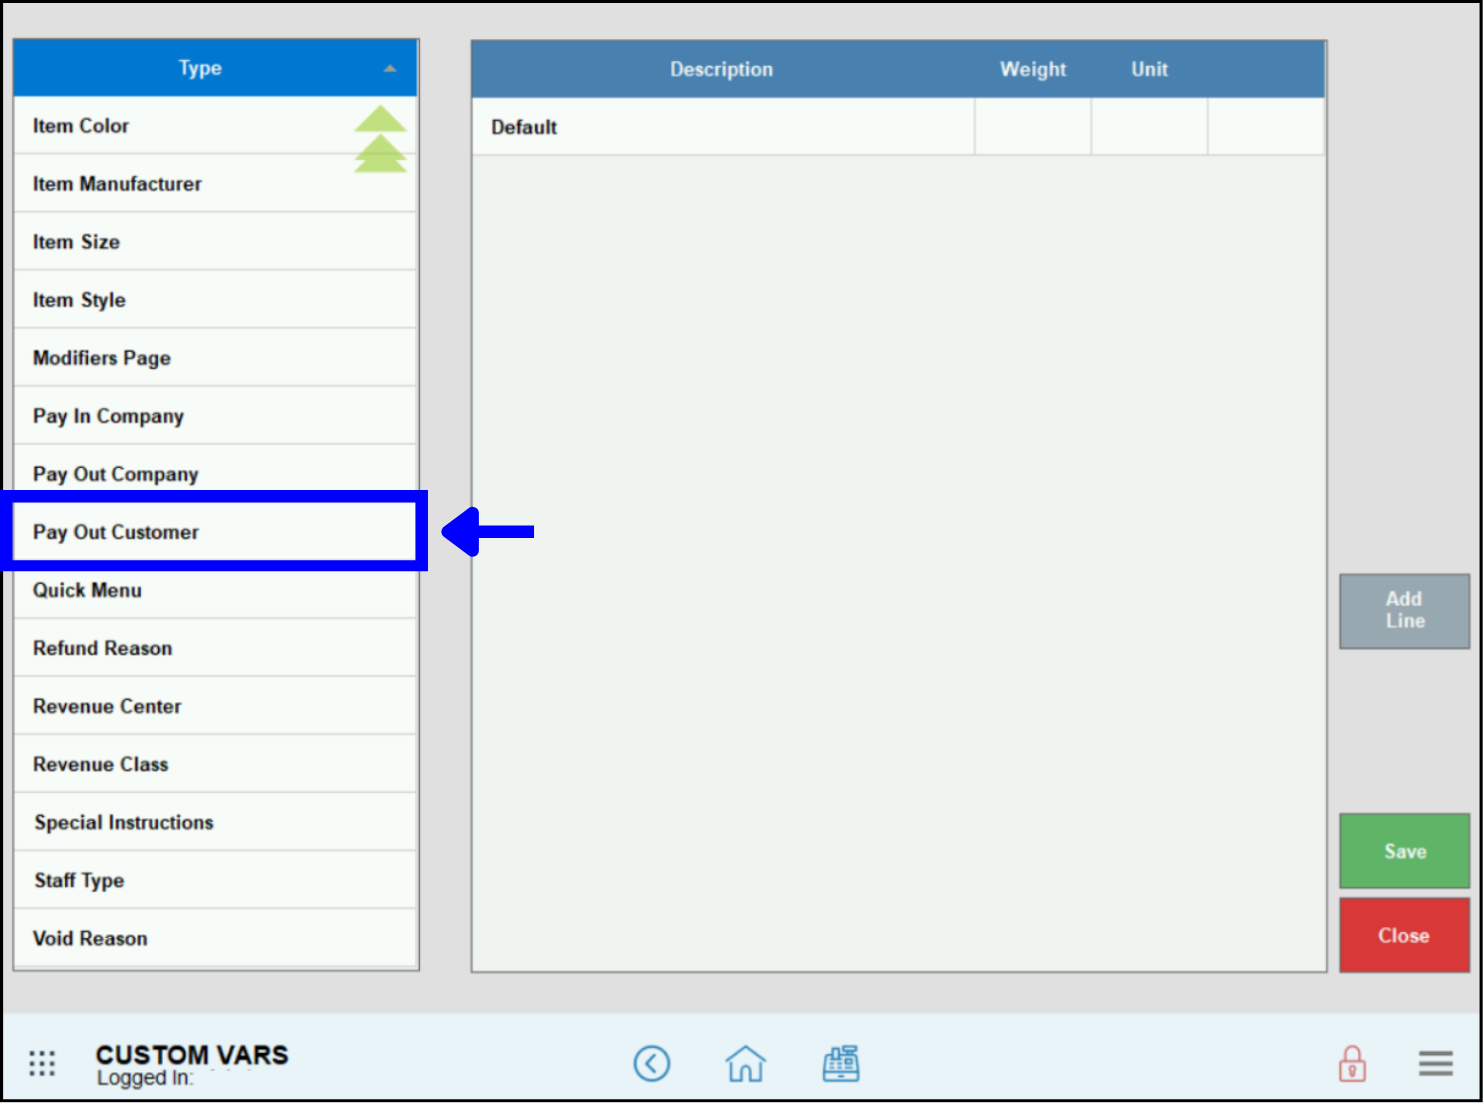
Customer payout types are defined using custom variables.
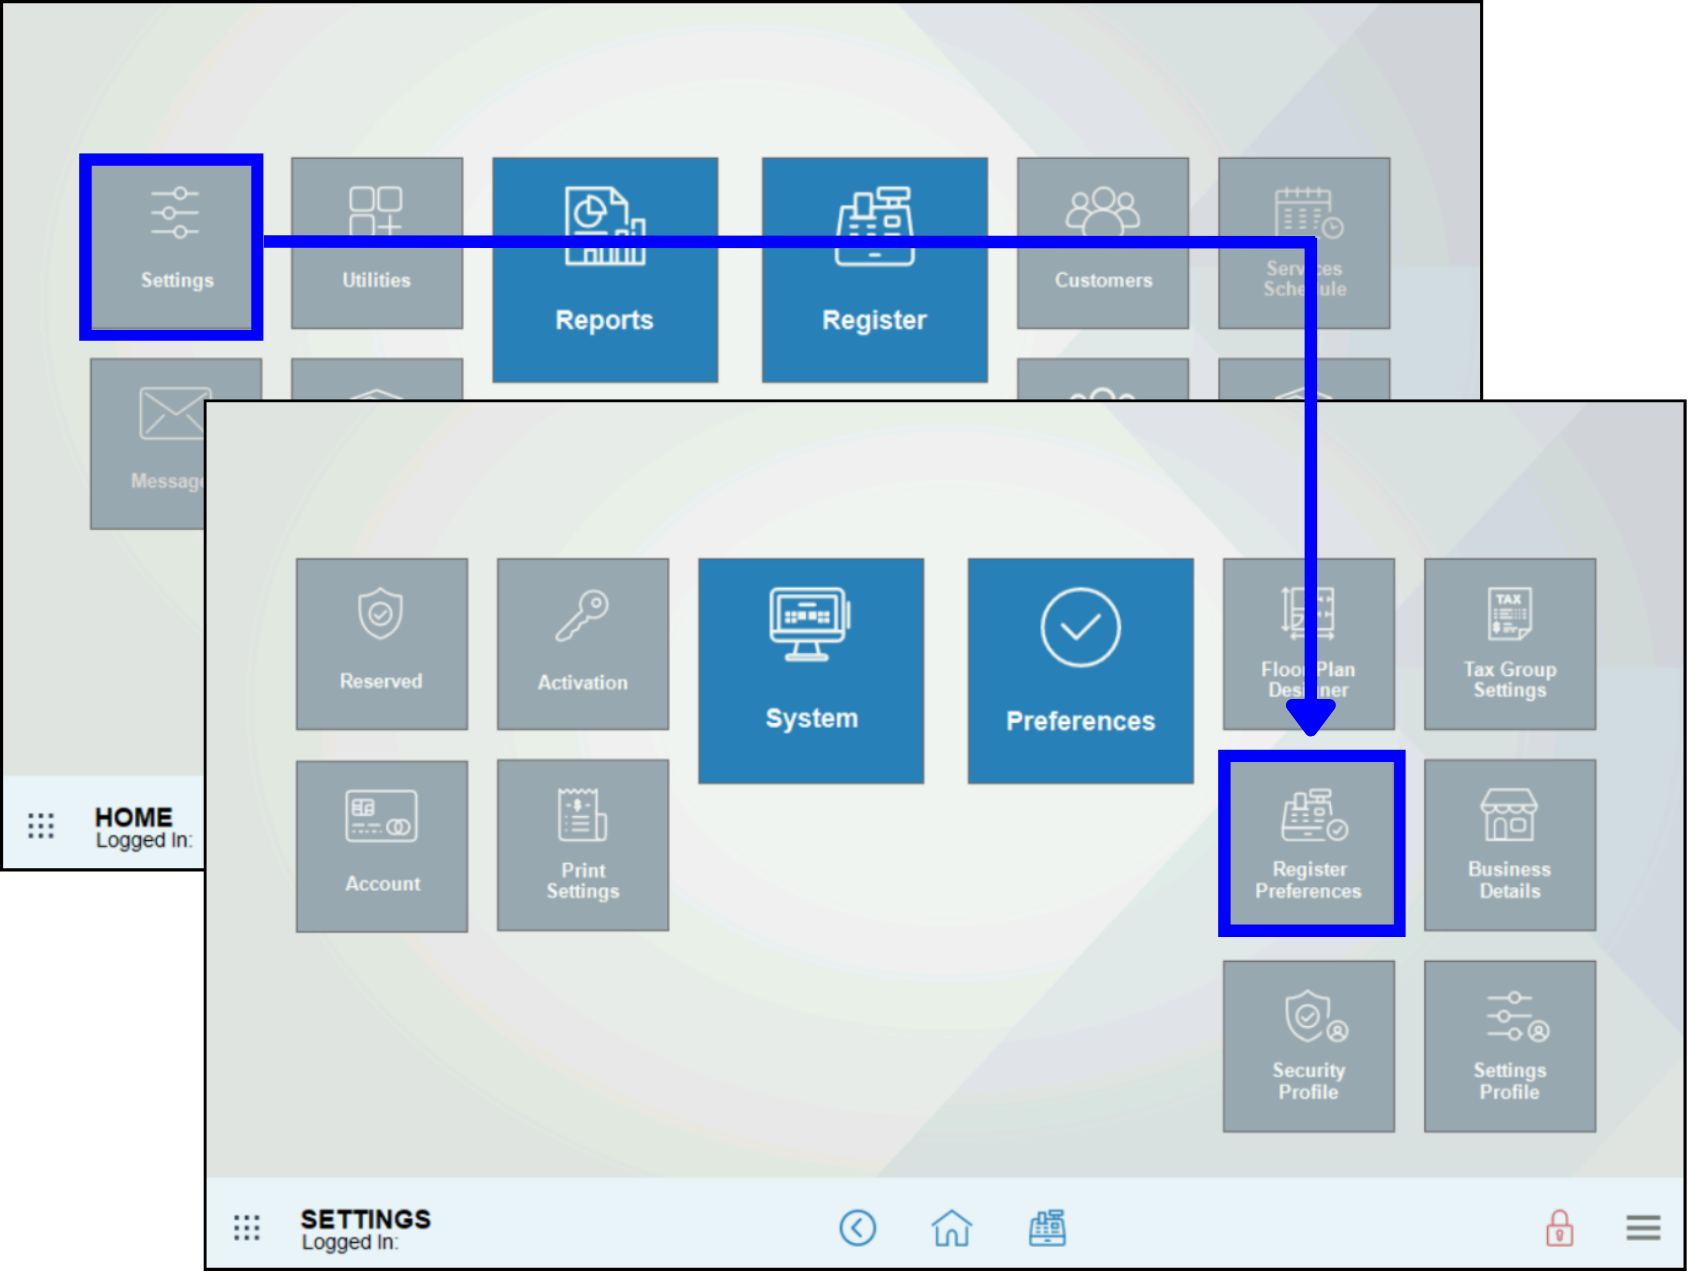
- From Home, navigate to Settings > Preferences.
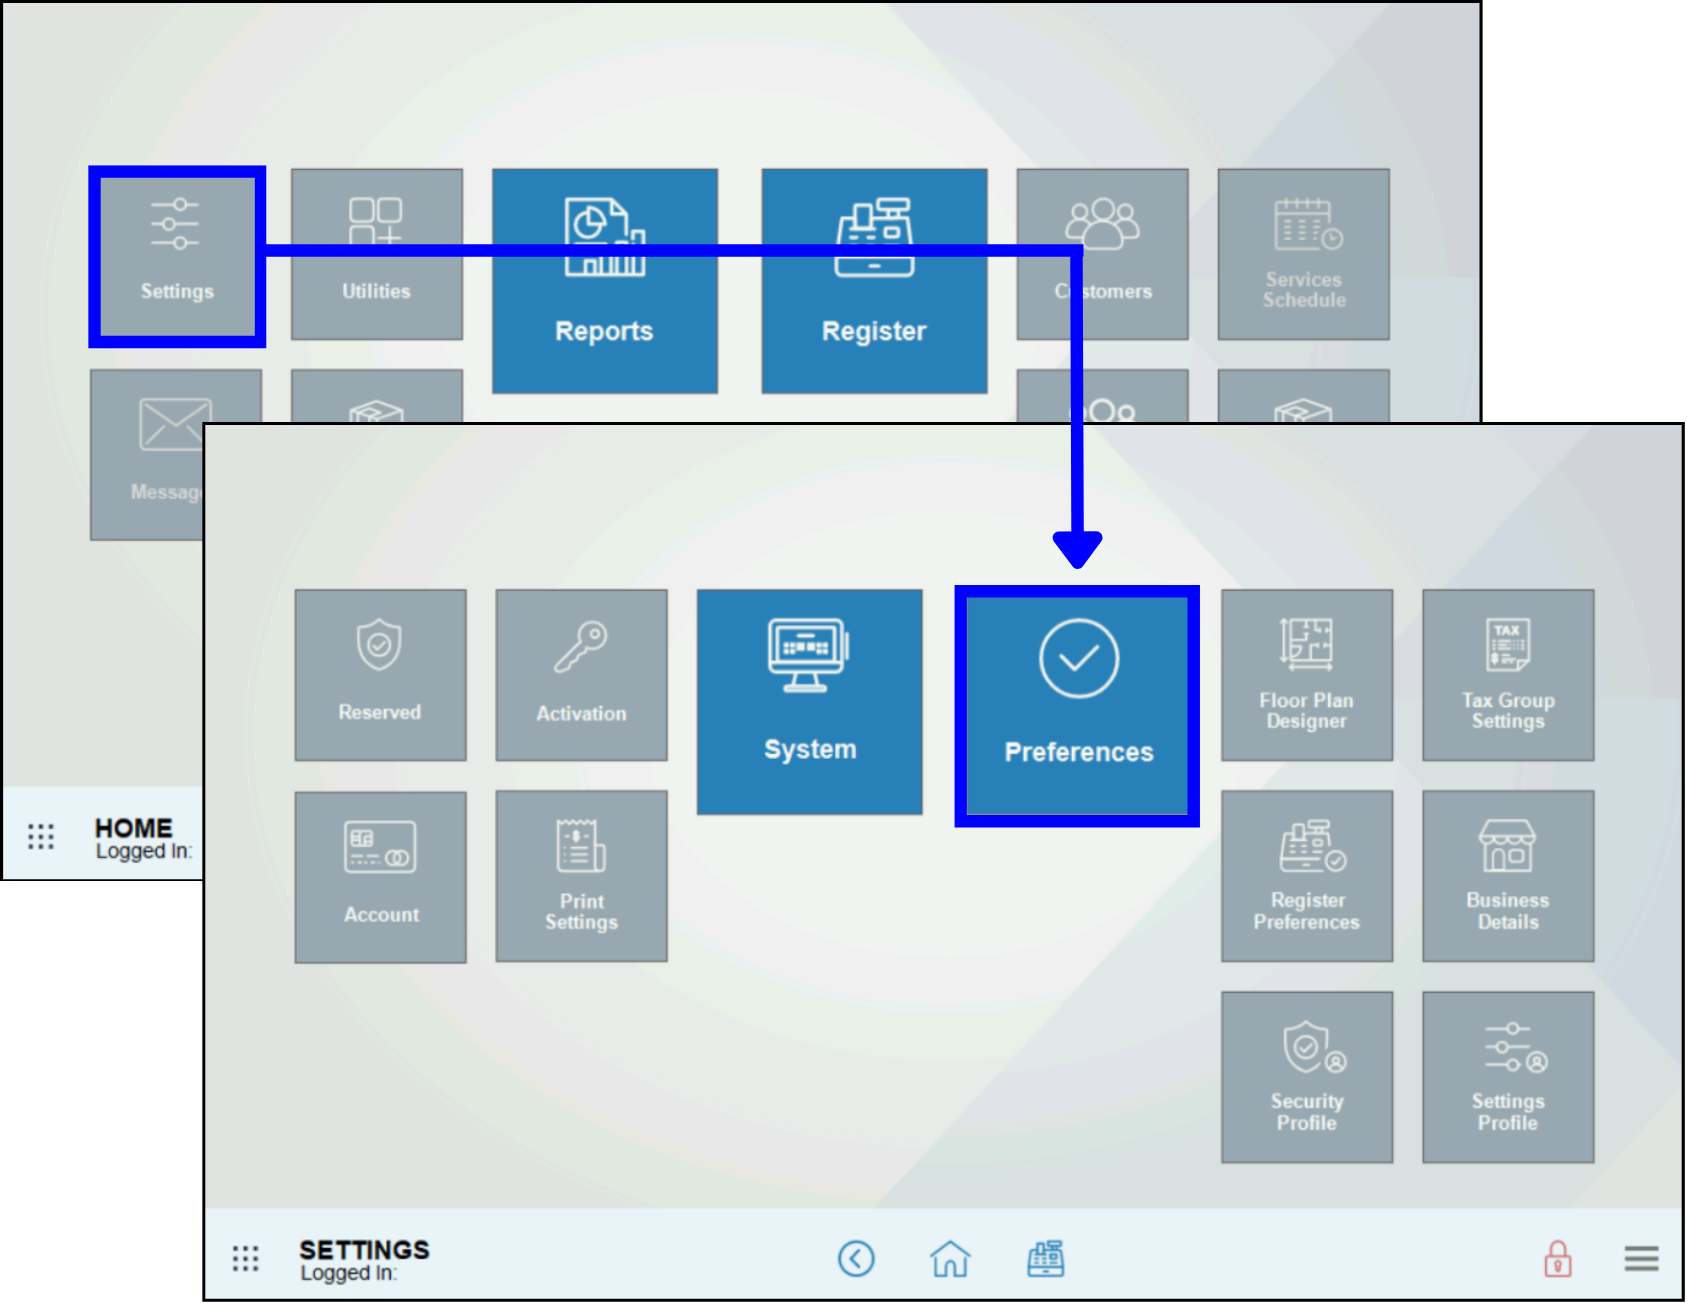
- Tap the Custom Vars (custom variables) tab.

- In the Type section, select Pay Out Customer.
- Tap Add line.
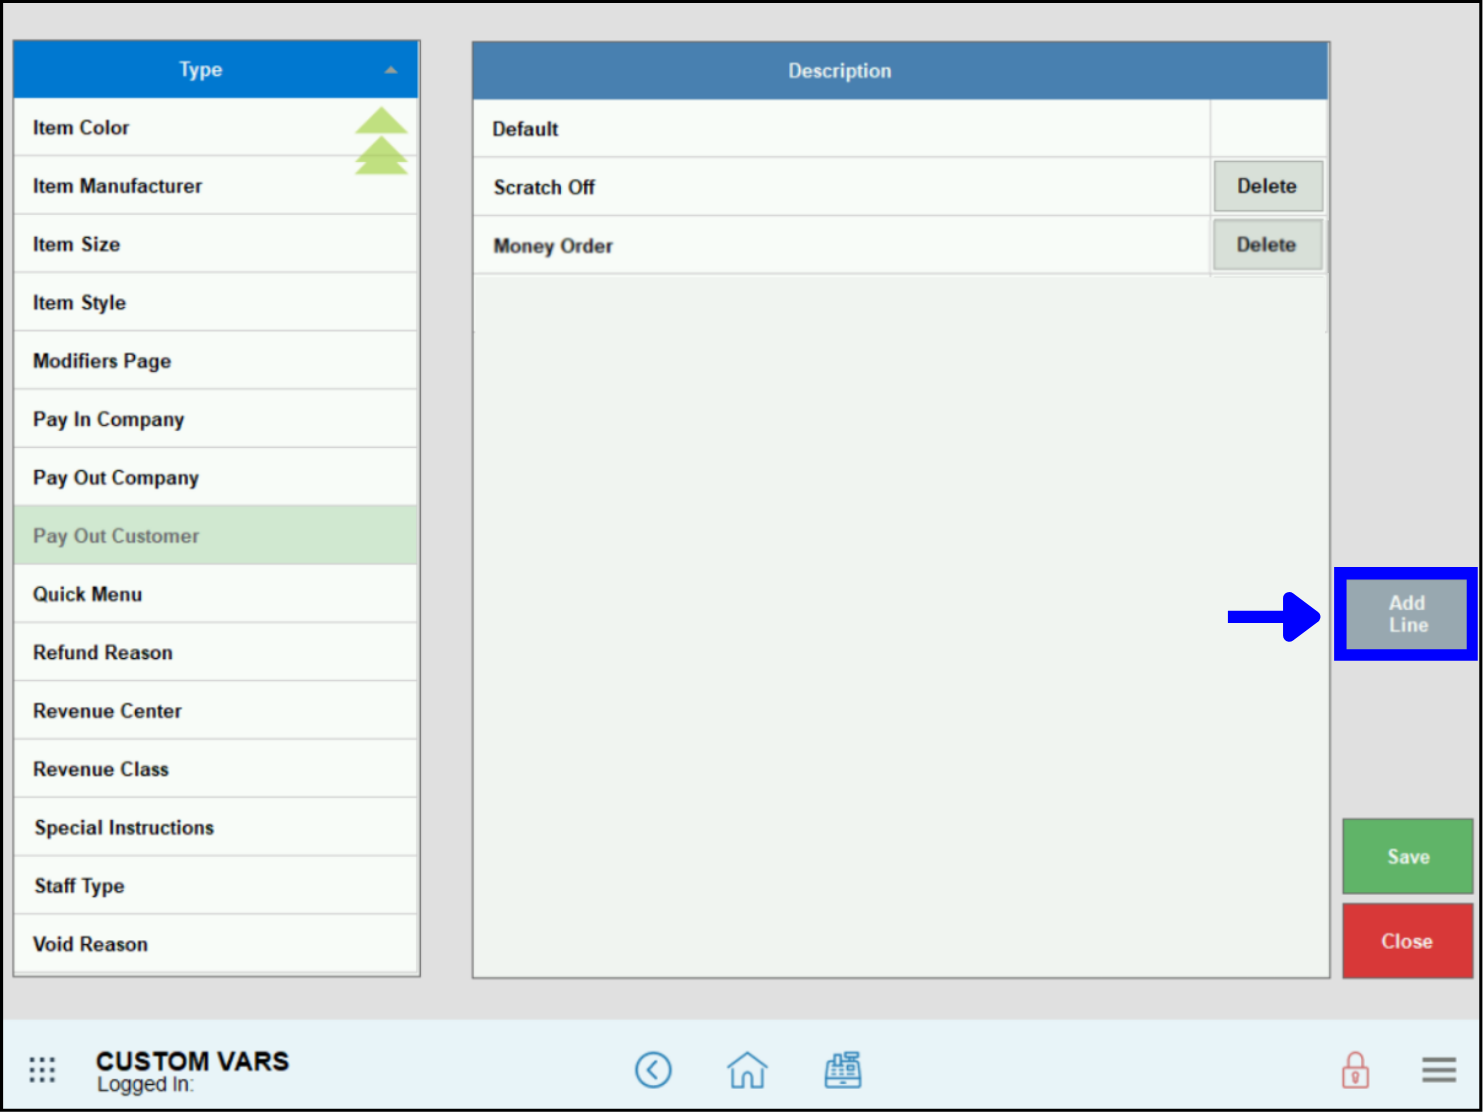
- Enter the name of a variable, such as “Lotto.”
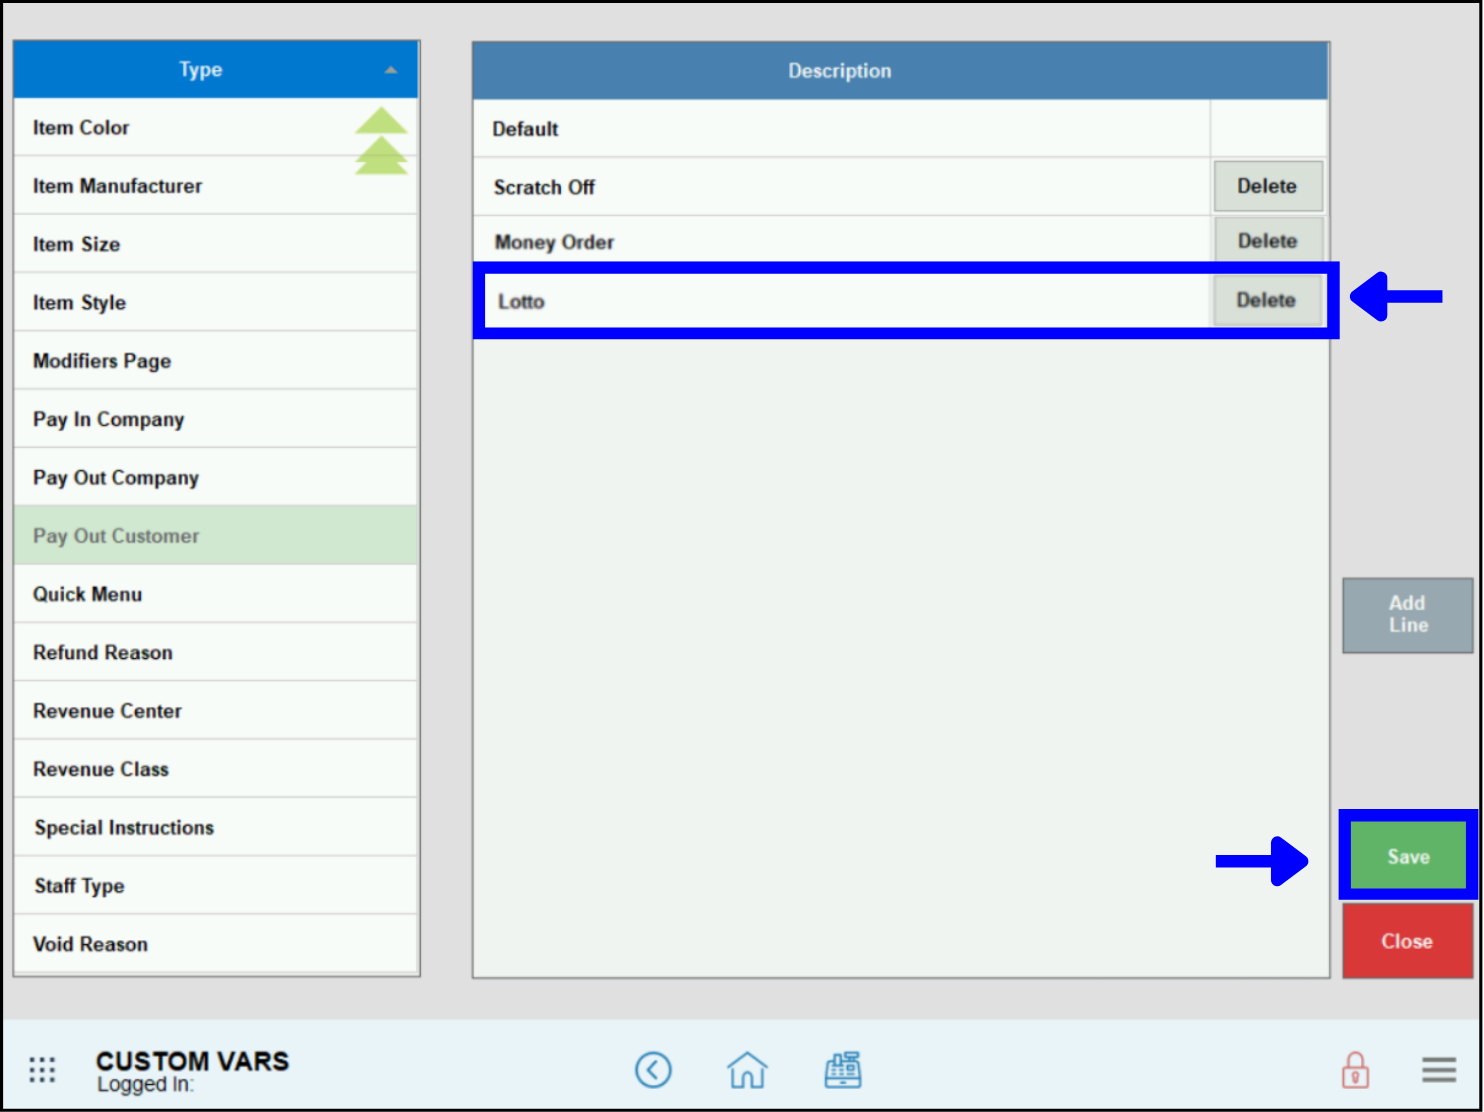
- Tap Save.
- After custom variables are defined for “Customer Payouts,” the “Quick Payout” function becomes available in custom buttons. If no variables are defined, “Quick Payout” does not appear as a function.
- Tip! Merchants who define customer payout types collect valuable data whenever a customer payout is processed! Now Snapshot and Business Overview reports display payout data so you can gain tangible insight into your business’ payout activity.
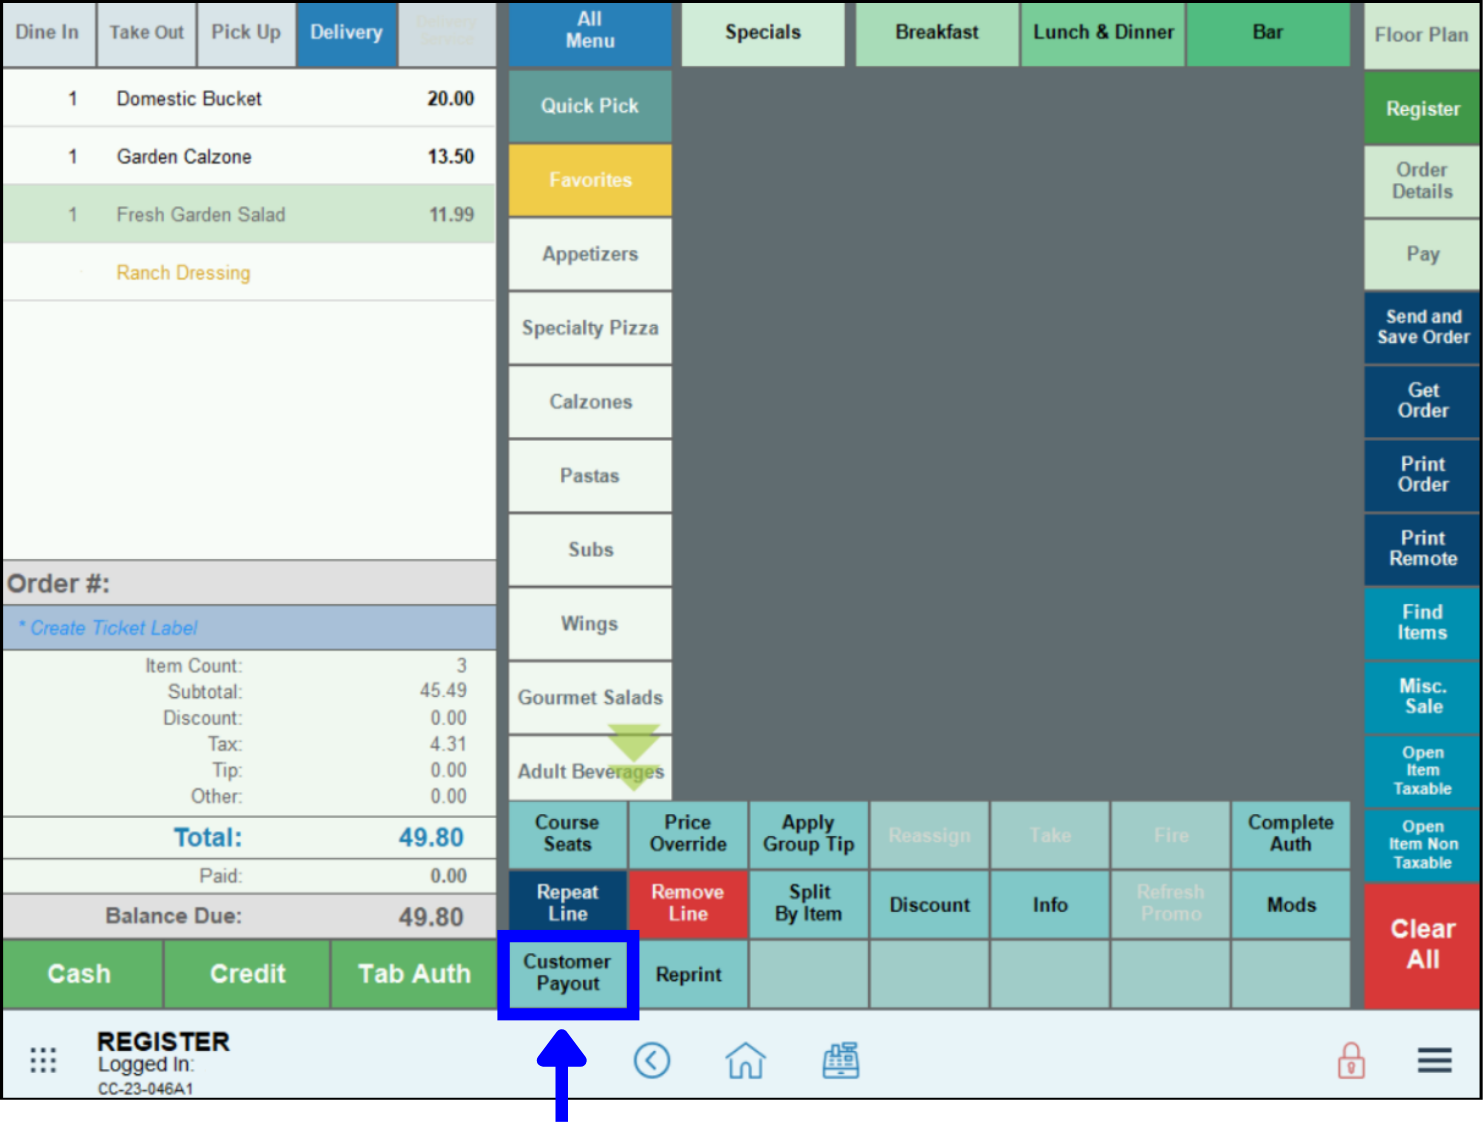
“Customer Payout” can be added as a button to the register.
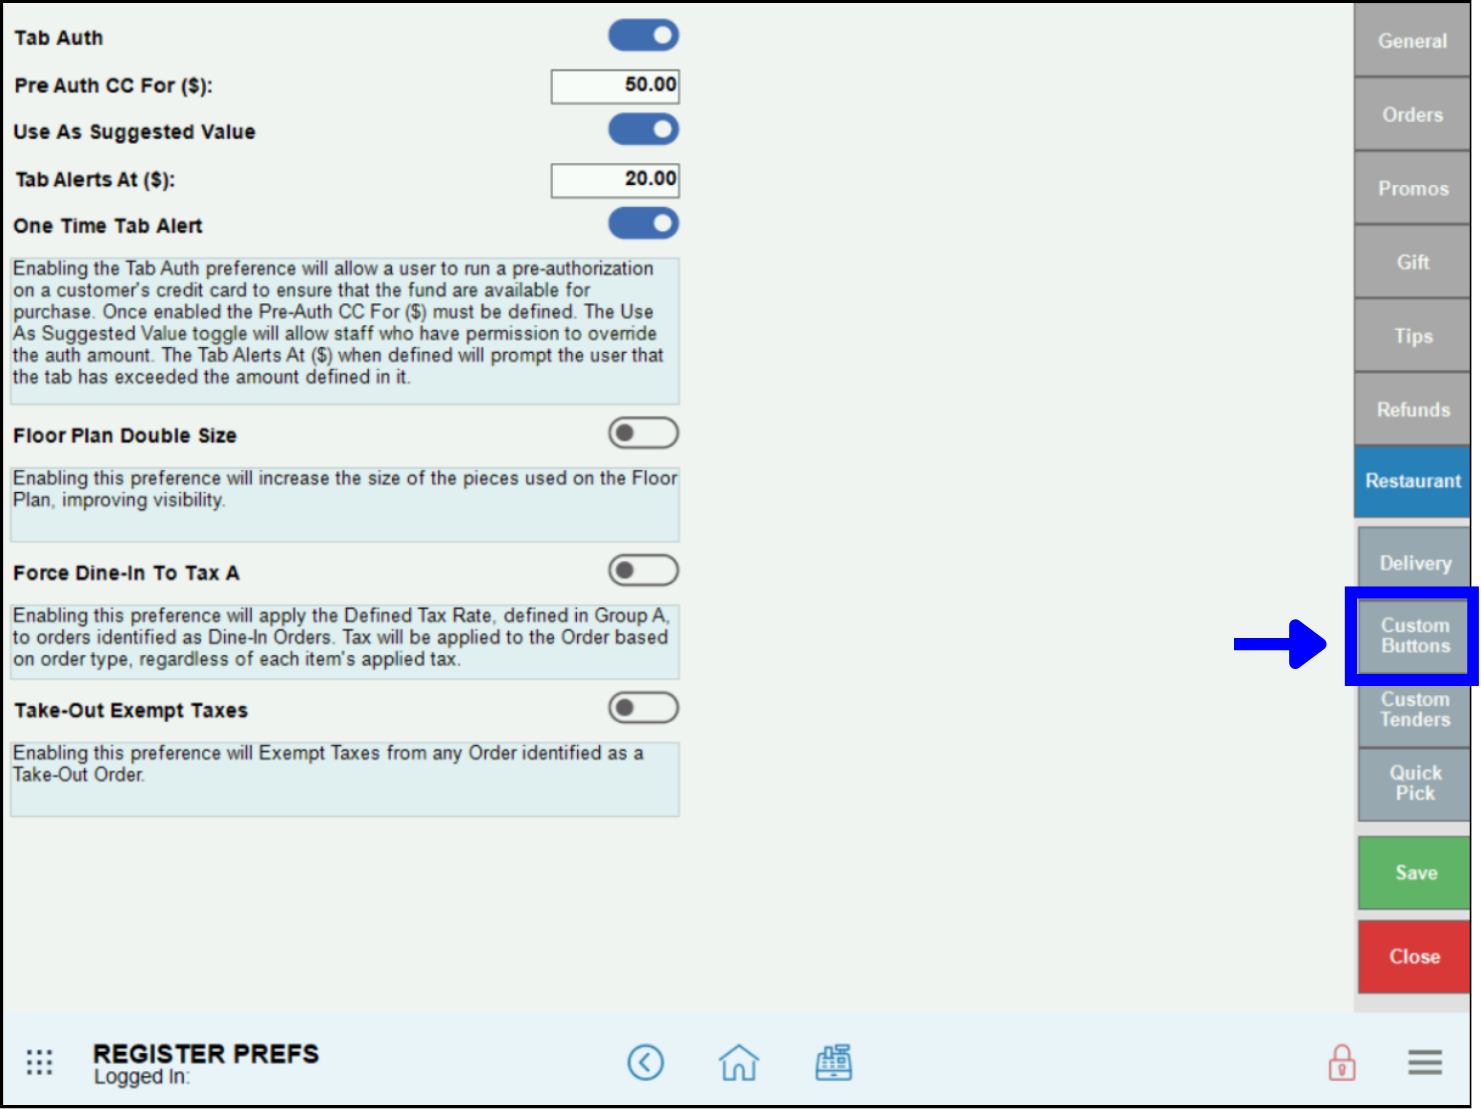
- From Home, navigate to Settings > Register Preferences.
- Tap the Custom Buttons tab.
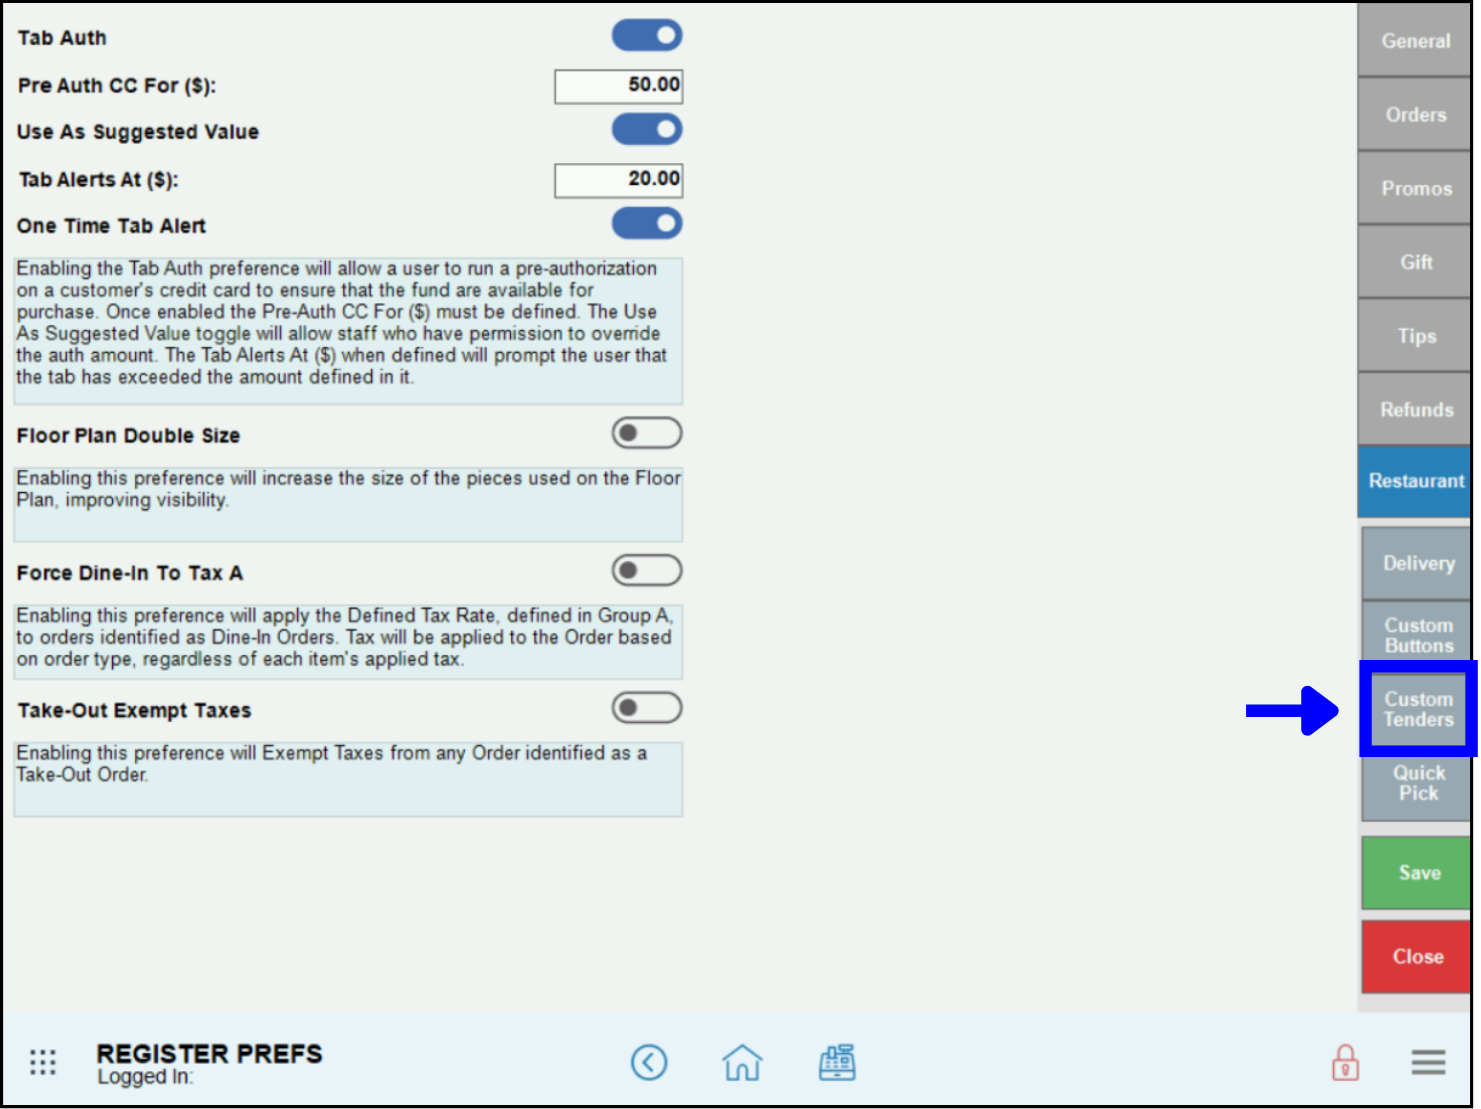
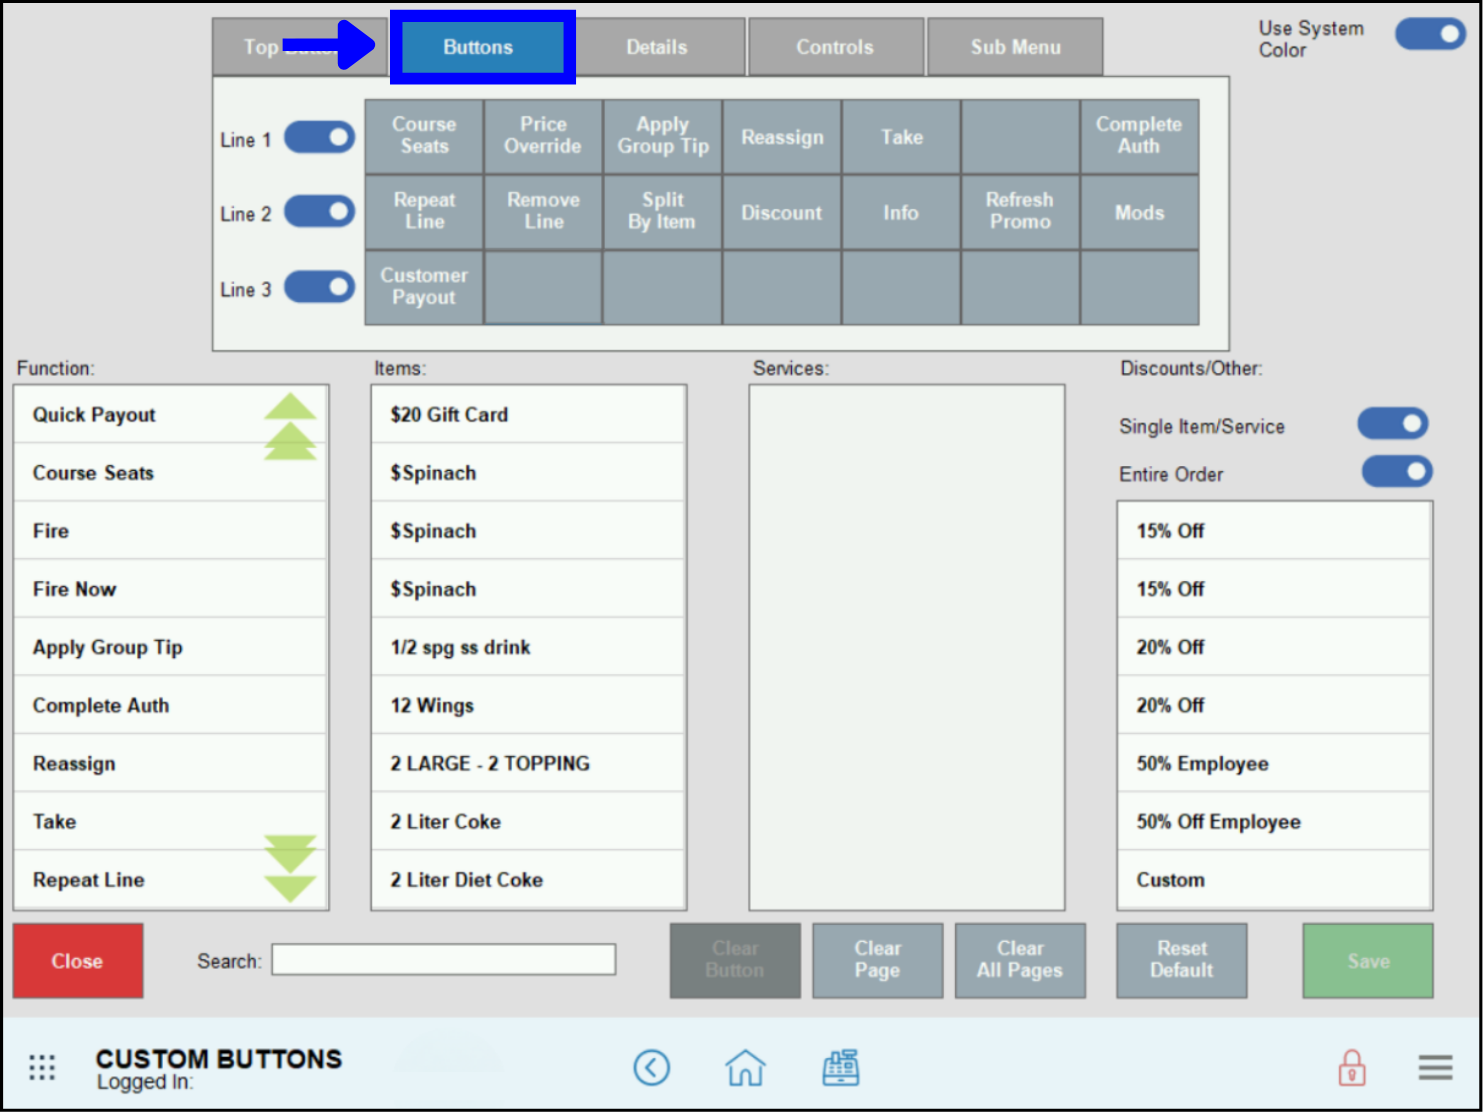
- Select the Buttons section.

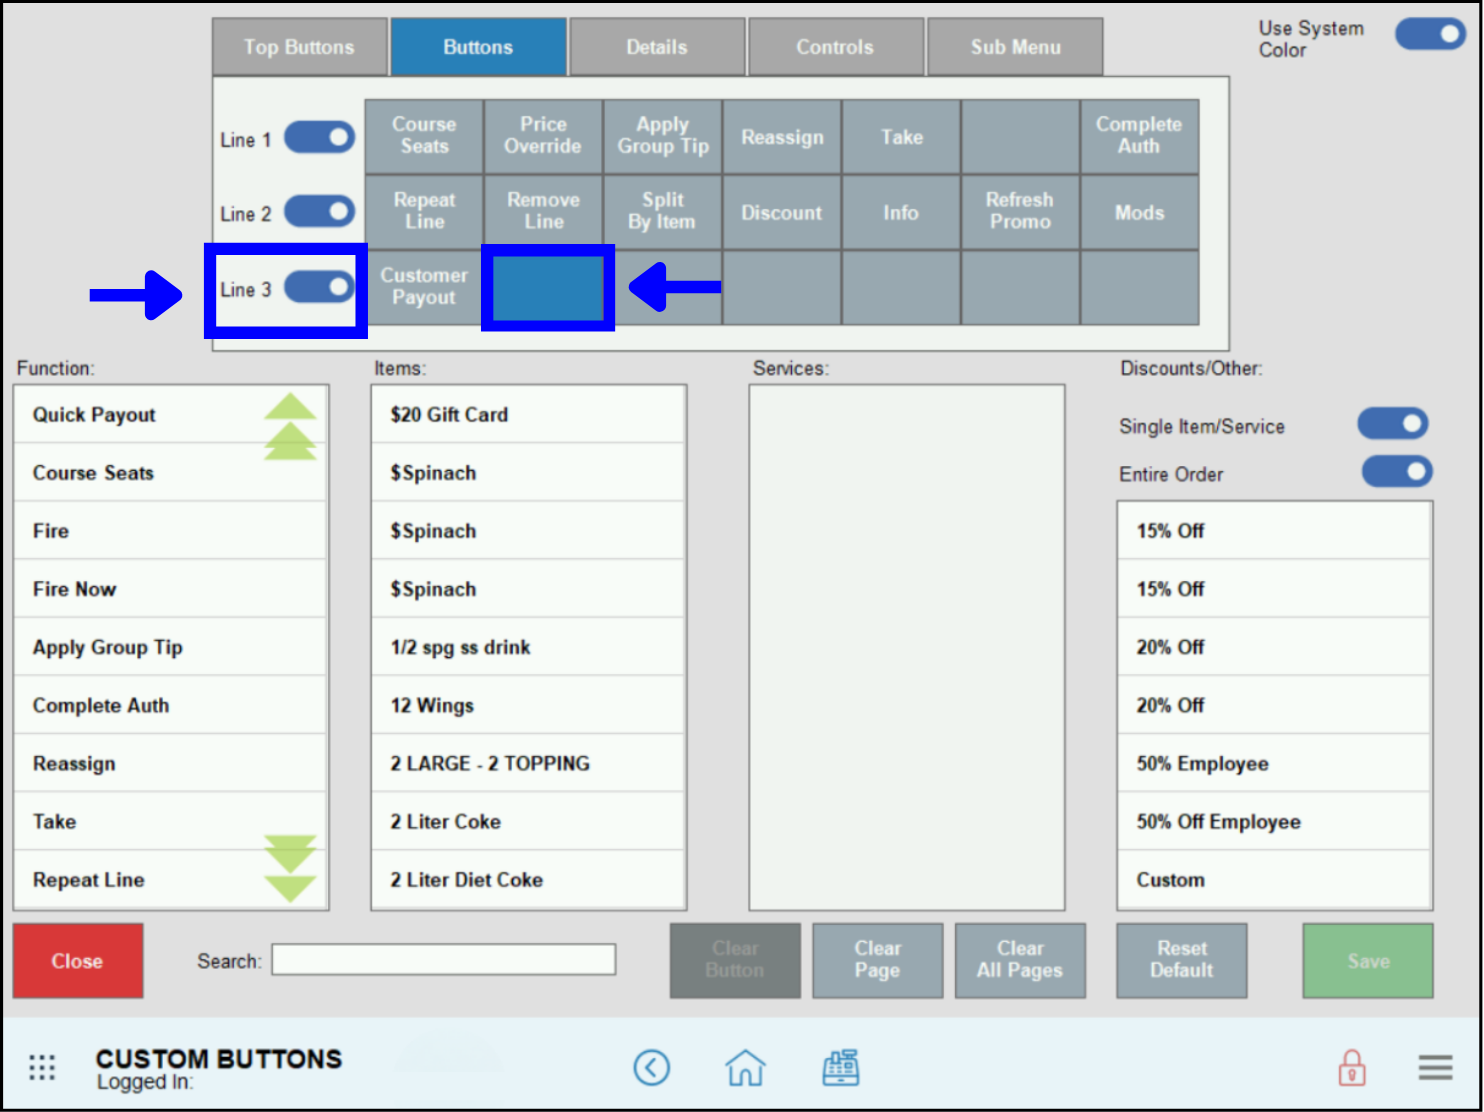
- Highlight a button location.
- Example: To place a button on Line 1, enable the Line 1 slider. Then select an available button. Available buttons are blank, while occupied buttons have a label assigned to them, such as Apply Group Tip or Mods.
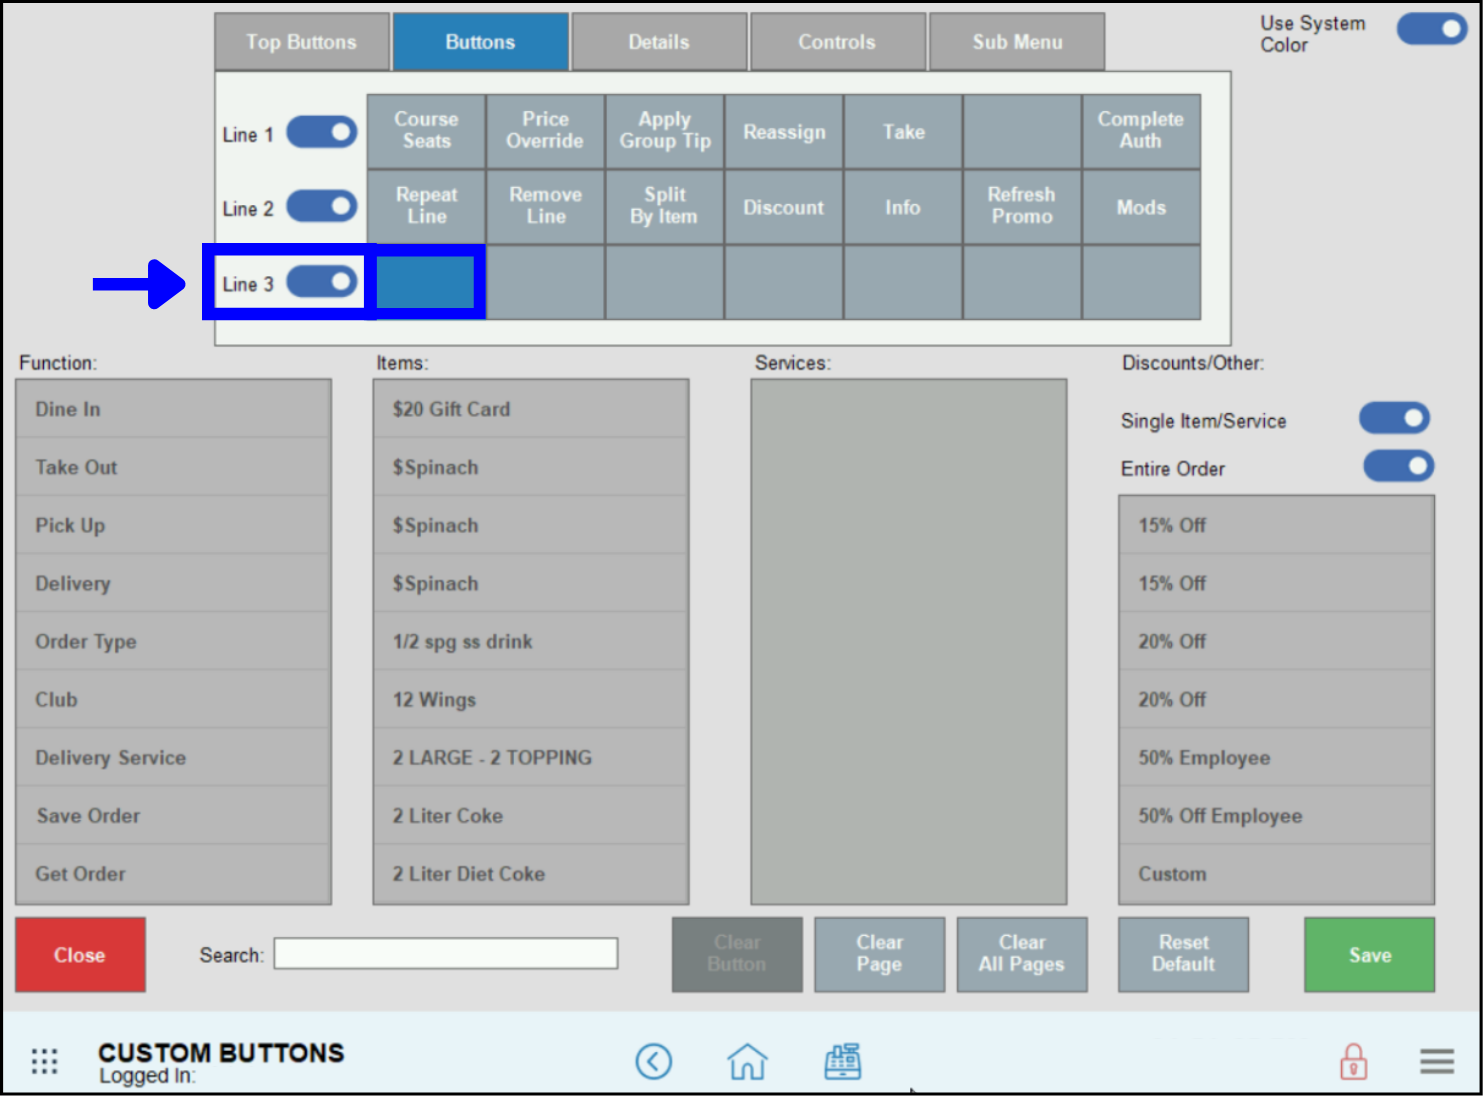
- Review available functions in the Function section.
- Select Customer Payout from the Function section. The previously blank button on Line 1 now displays Custom Payout.
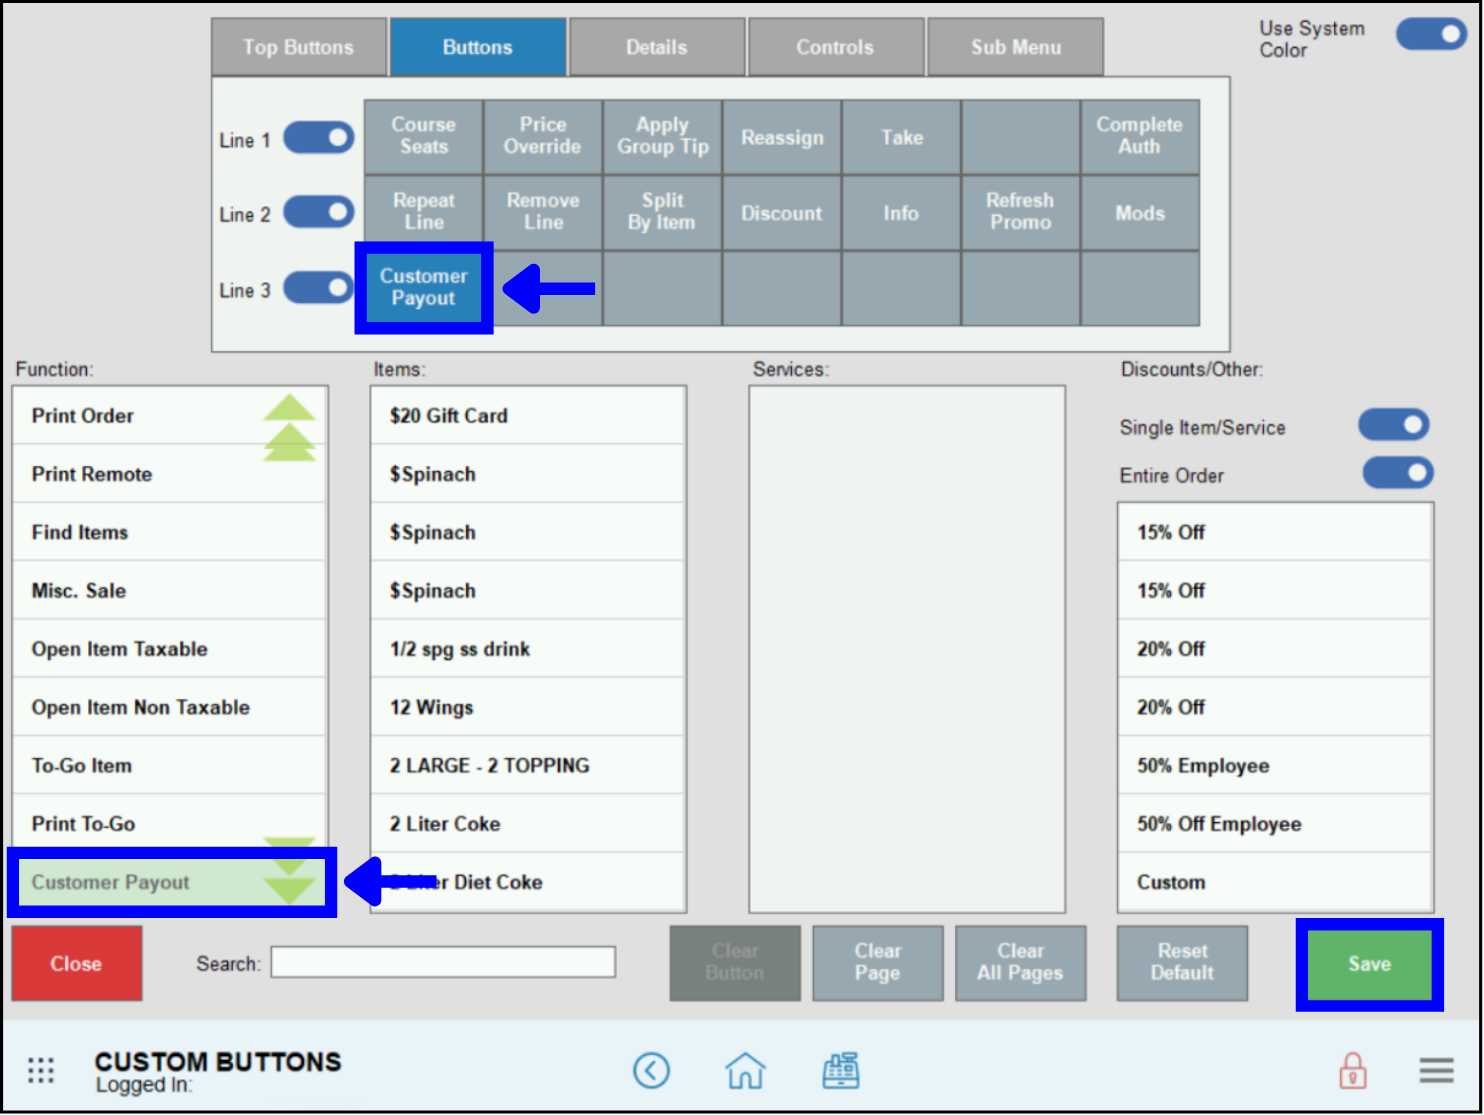
- Tap Save.
- This is how the Customer Payout button displays on the Register:
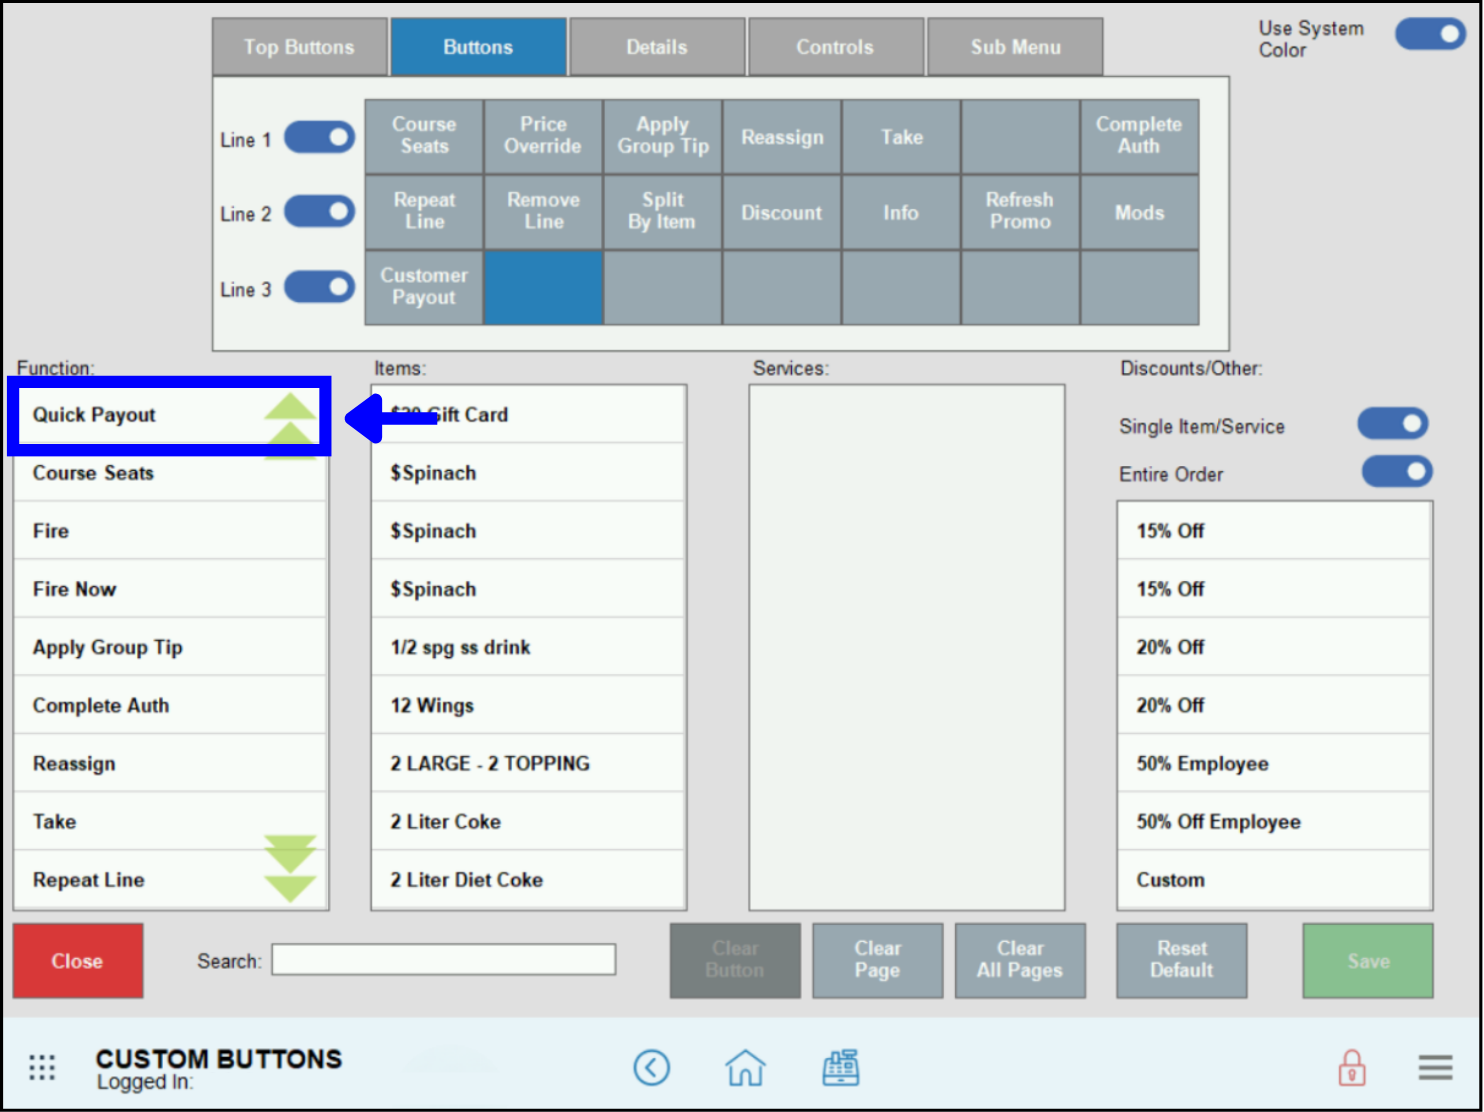
Implement Quick Payout by adding payout “Types” as custom buttons to the Register.
- From Home, navigate to Settings > Register Preferences.
- Tap the Custom Buttons tab.
- Select the Buttons section.
- Highlight a button location.
- Example: To place a button on Line 1, confirm that the Line 1 enabler displays as active. Then select a blank button or a previously named button to replace. Available buttons are blank while occupied buttons have a function label on them, such as Discount or Mods. The button changes color when you select it.
- Review available functions by scrolling down the Function section.
- Select Quick Payout.
- Select a Customer Payout type, such as Lotto. This is the label that will appear on the Register.
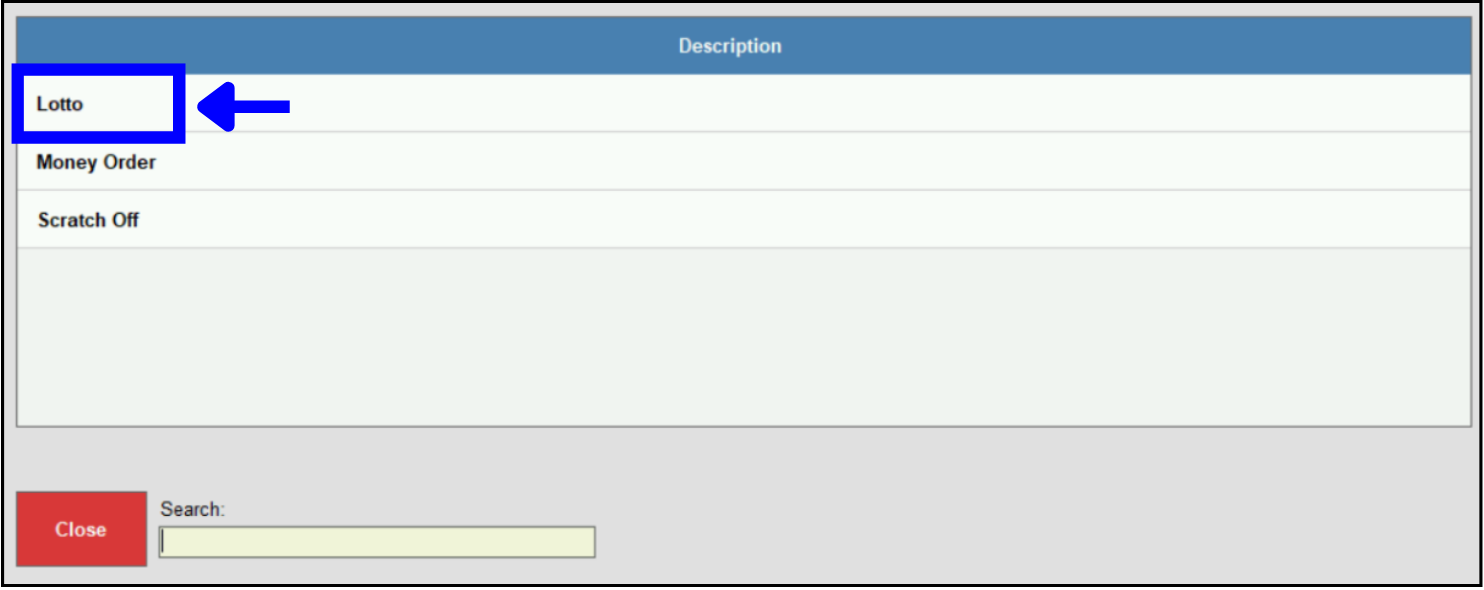
- Note that the button label changes from empty to Lotto.
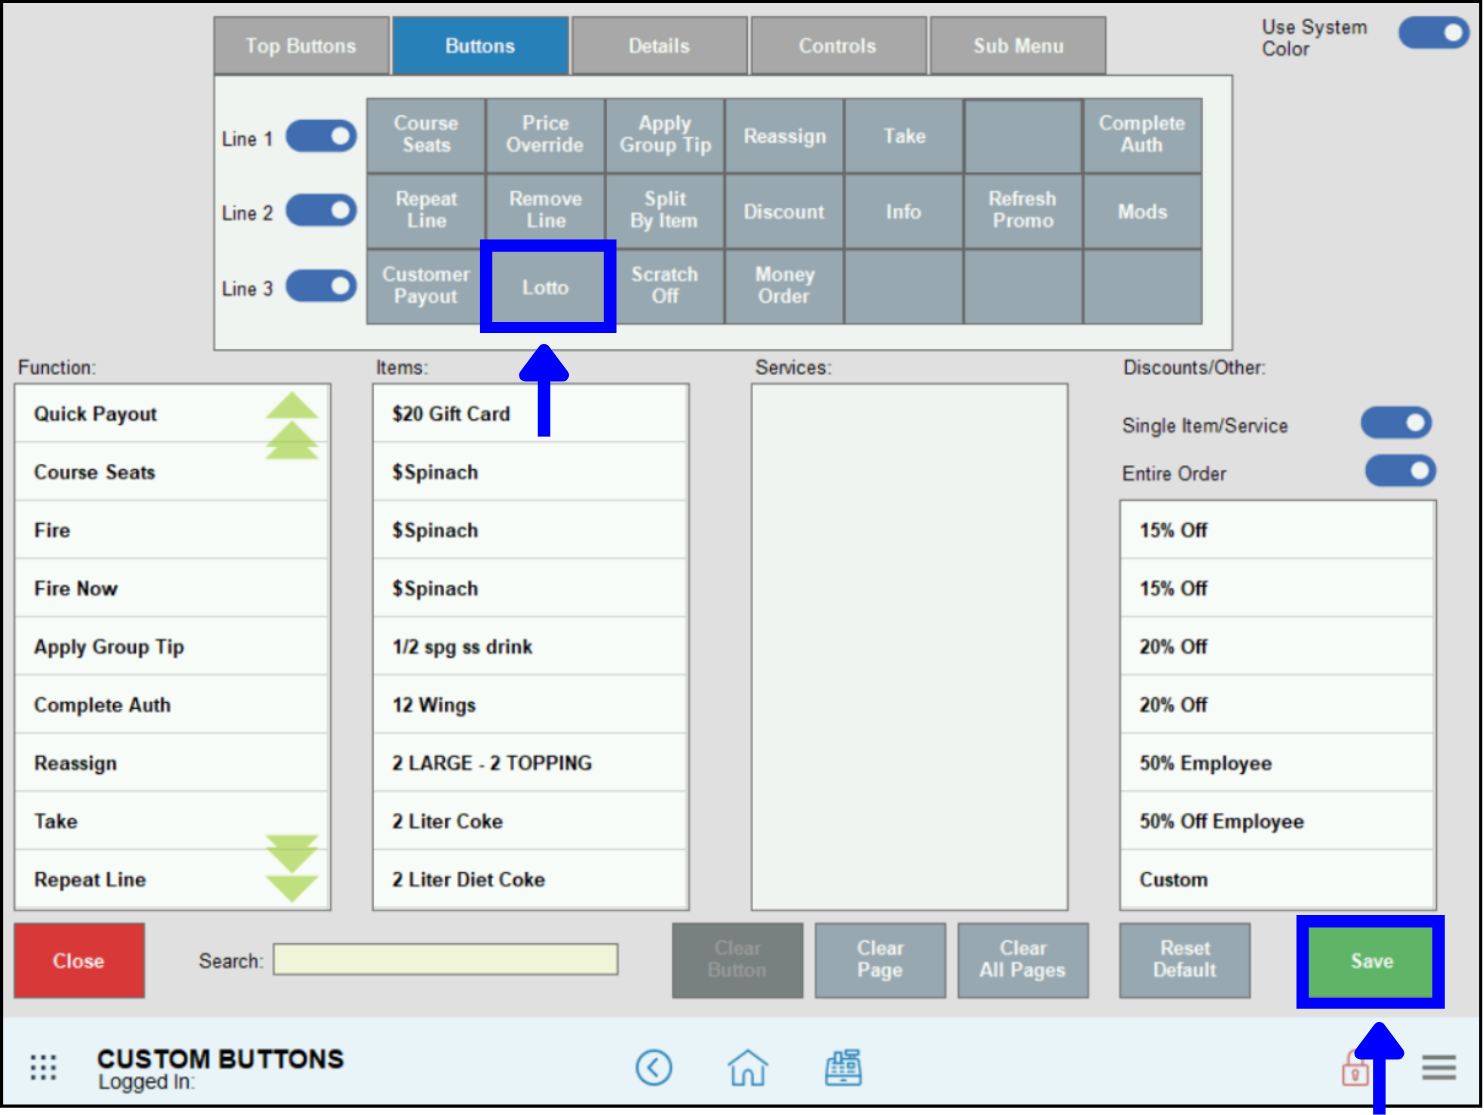
- Repeat these steps to add additional Quick Payout Types, such as Scratch Off or Money Order, as register buttons..
- Tap Save.
- This is how Quick Payout buttons display on the Register:
How can we improve this information for you?
Registered internal users can comment. Merchants, have a suggestion? Tell us more.