The Floor Plan Designer provides merchants with many options for creating floor plans, including dining, patio, special event, and other seating arrangements.
Perform the following to begin adding design elements, such as tables and booths, to the Floor Plan:
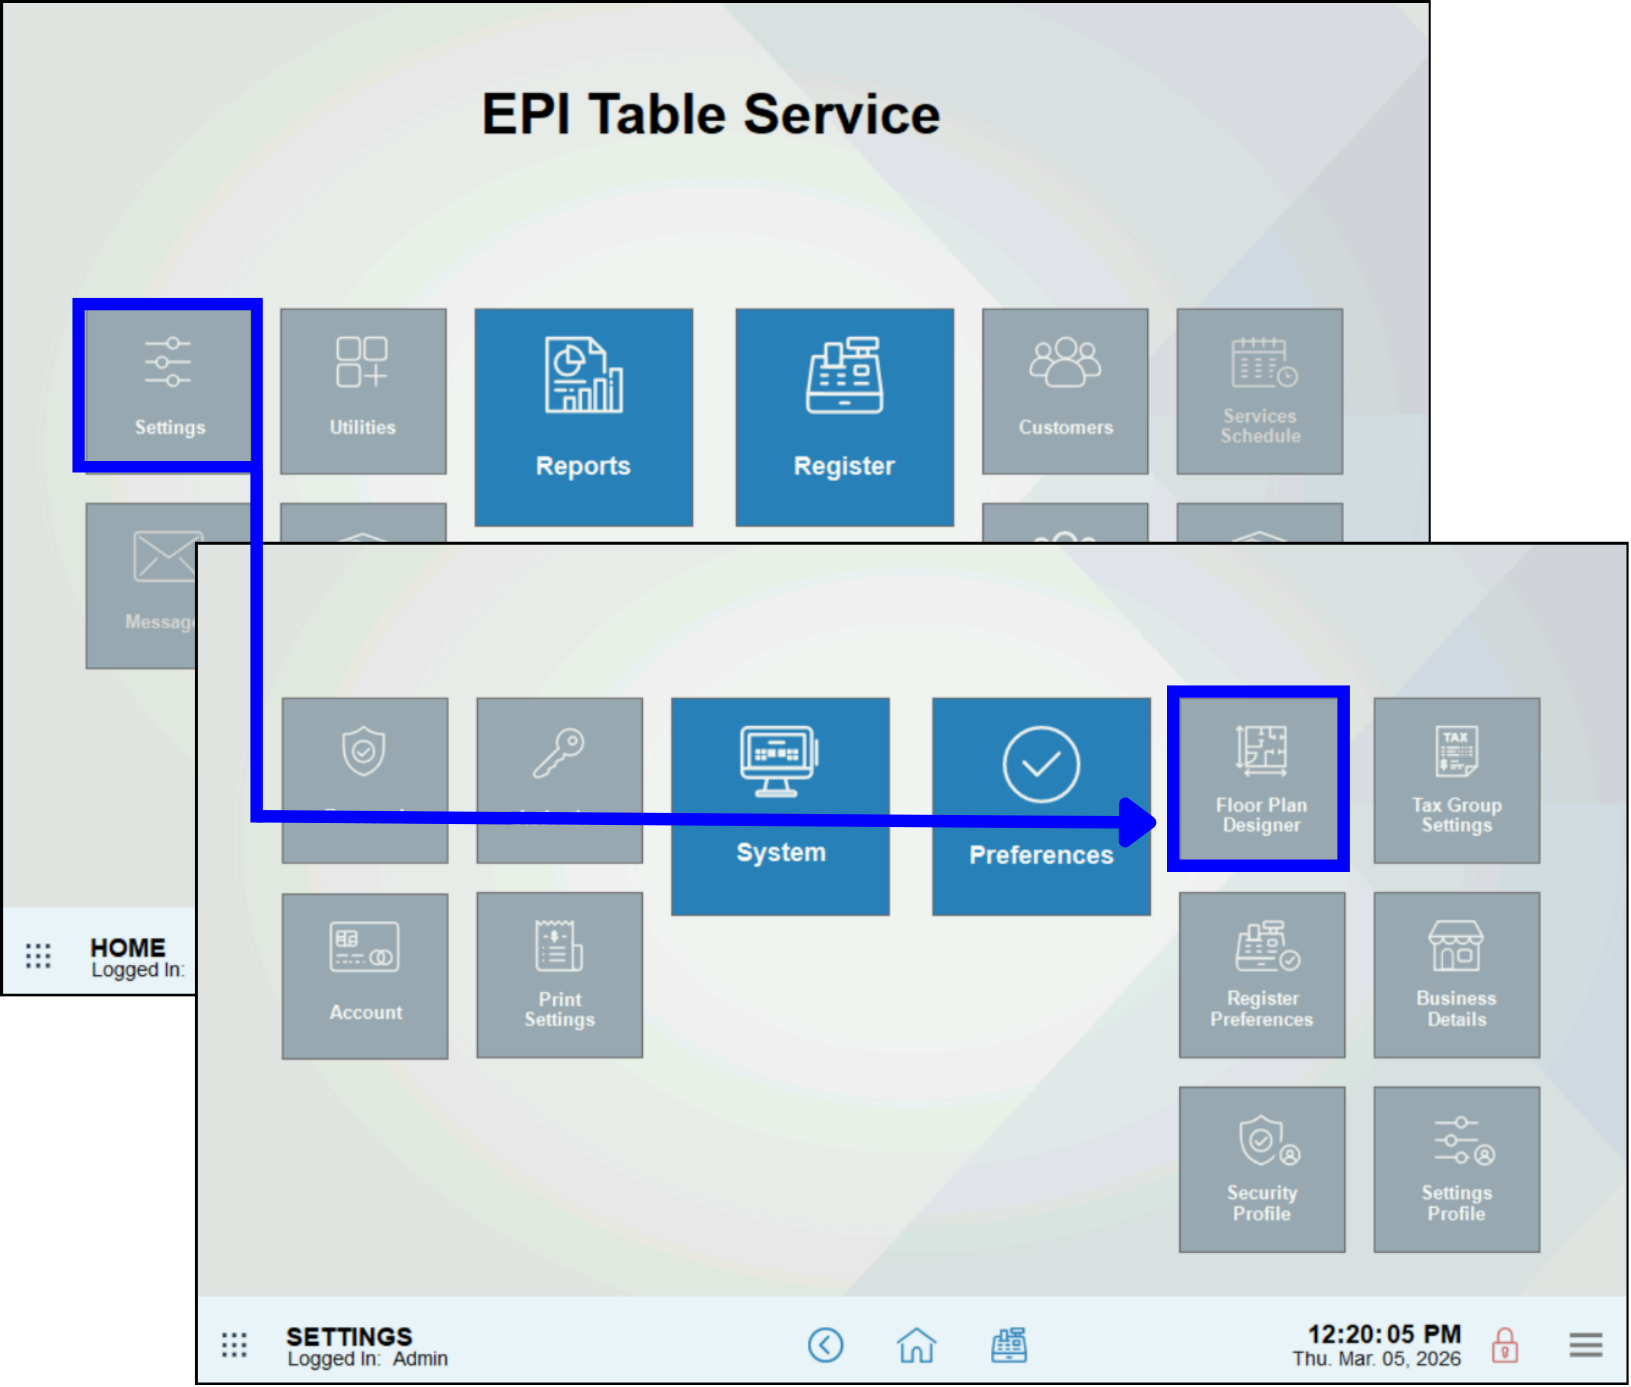
- Go to Home > Settings > Floor Plan Designer.
- On the Floor Plan Setup screen, tap Add.
- Select the desired Floor Plan element (e.g., Table, Booth, etc.) from the pop-up screen to add it to the Floor Plan Designer.

- Drag the element to a desired location. Optional: Tap one of the directional arrows to make minor adjustments to the floor plan element’s location, or rotate via the pop-up screen.
- Tap Save.
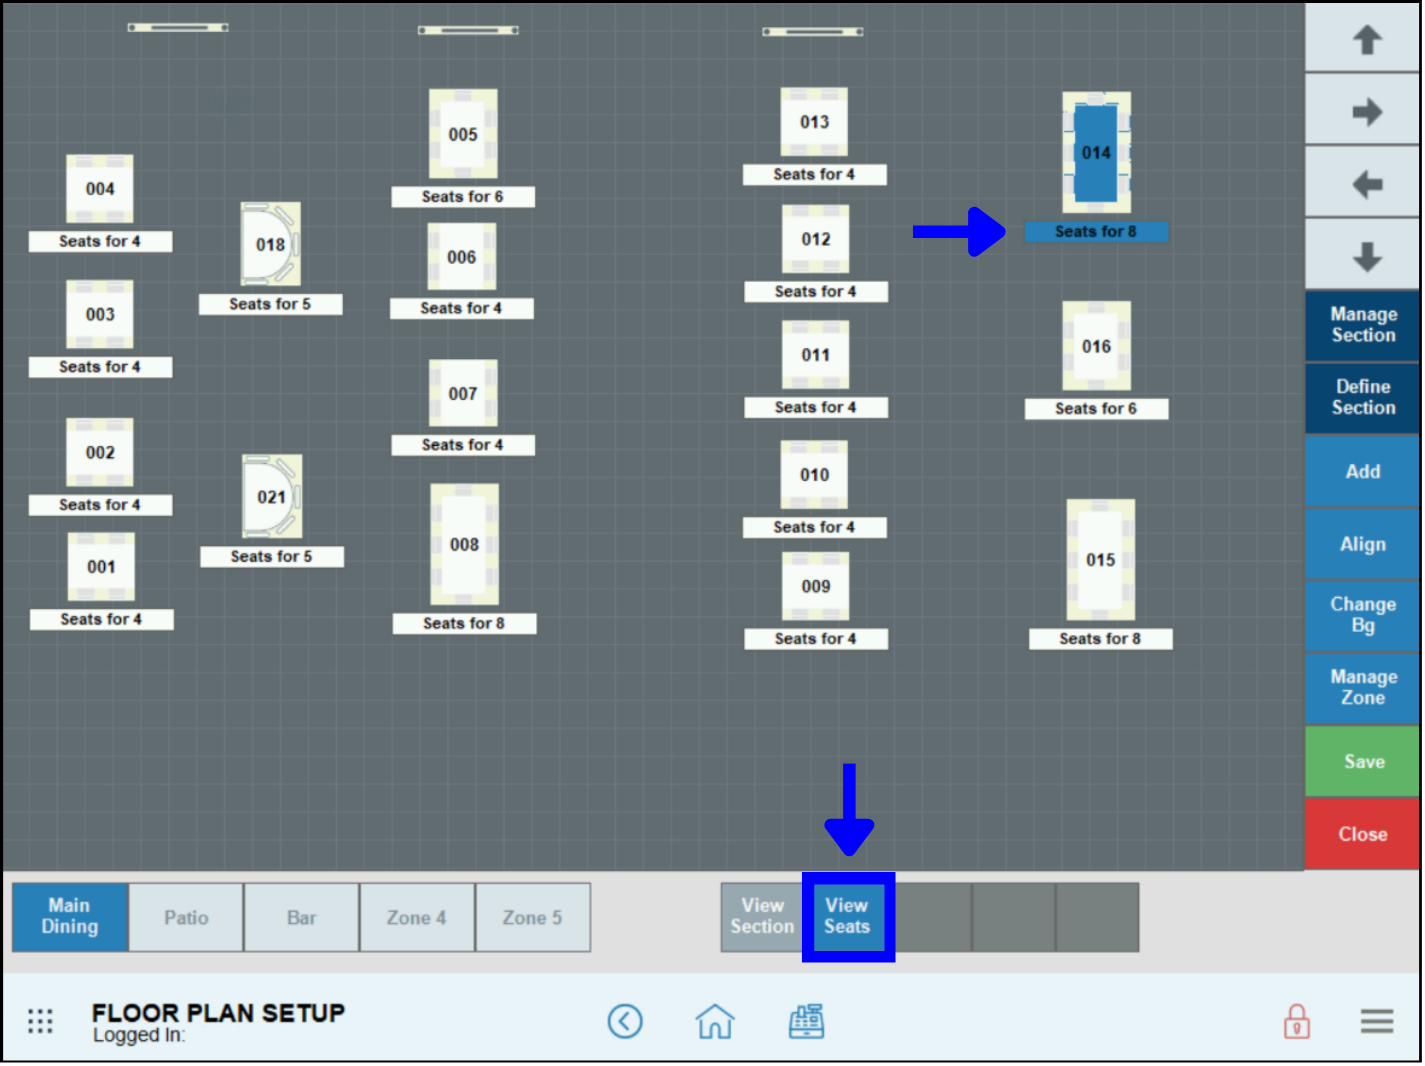
- Tap View Seats to display the number of seats available for each table.
- Tip! Merchants can enable the Apply Group Tip setting in Register Preferences to automatically apply gratuities for large parties when ordering from the Floor Plan. See Apply a Group Tip.
Merchants can quickly and easily modify floor plan elements in the Floor Plan Designer.
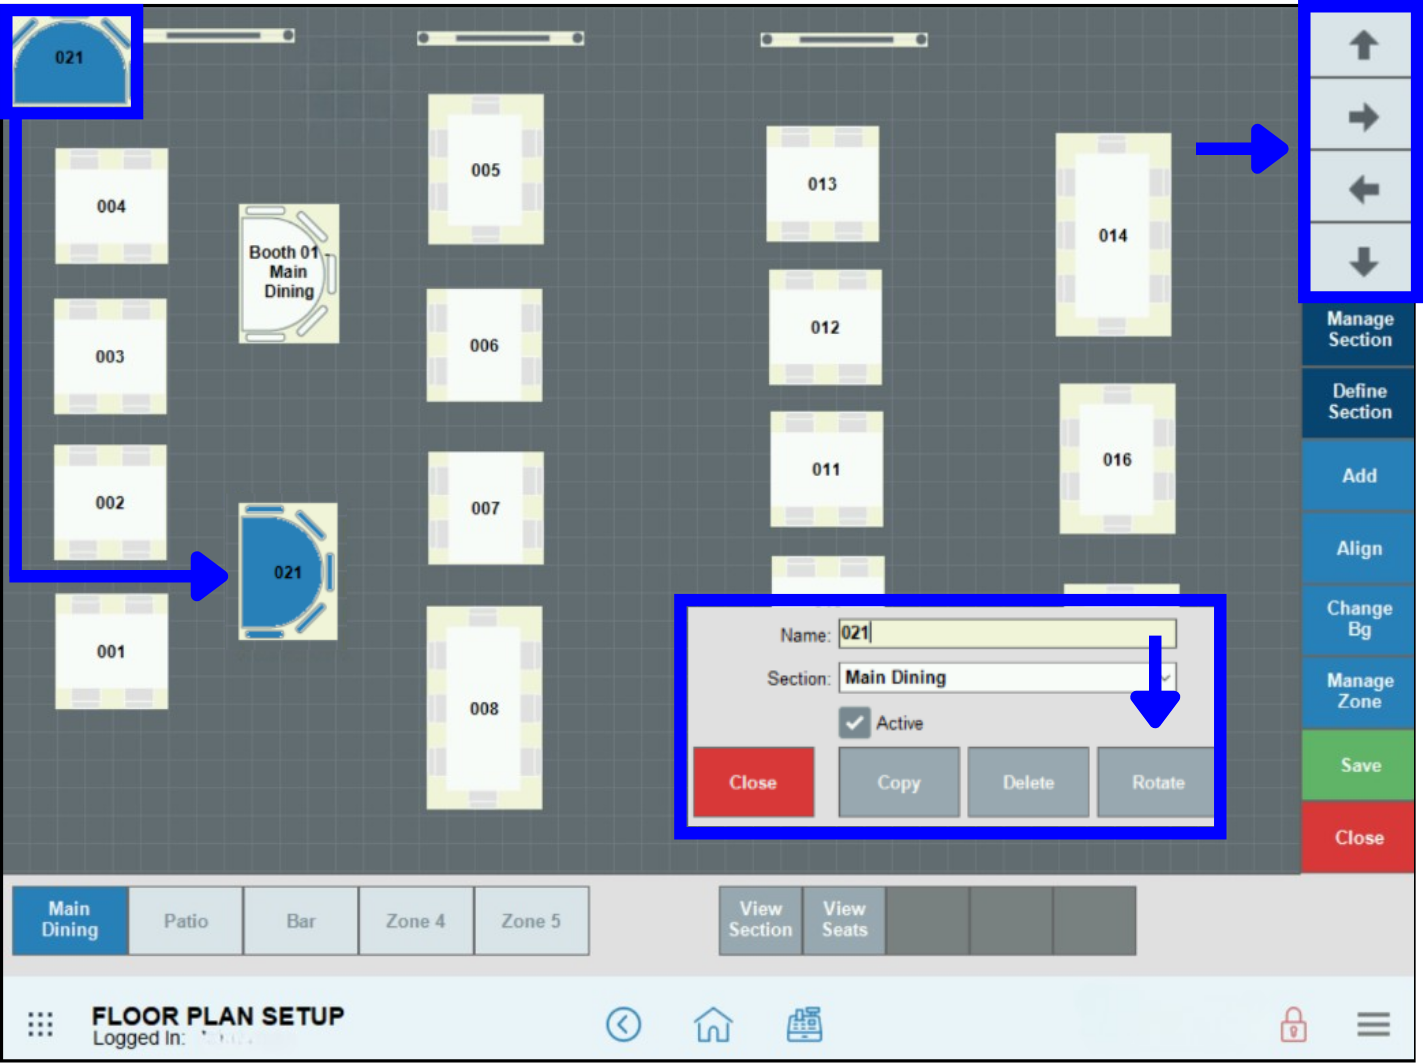
- Select an existing Floor Plan element.
- In the pop-up screen that displays, configure the following as desired:
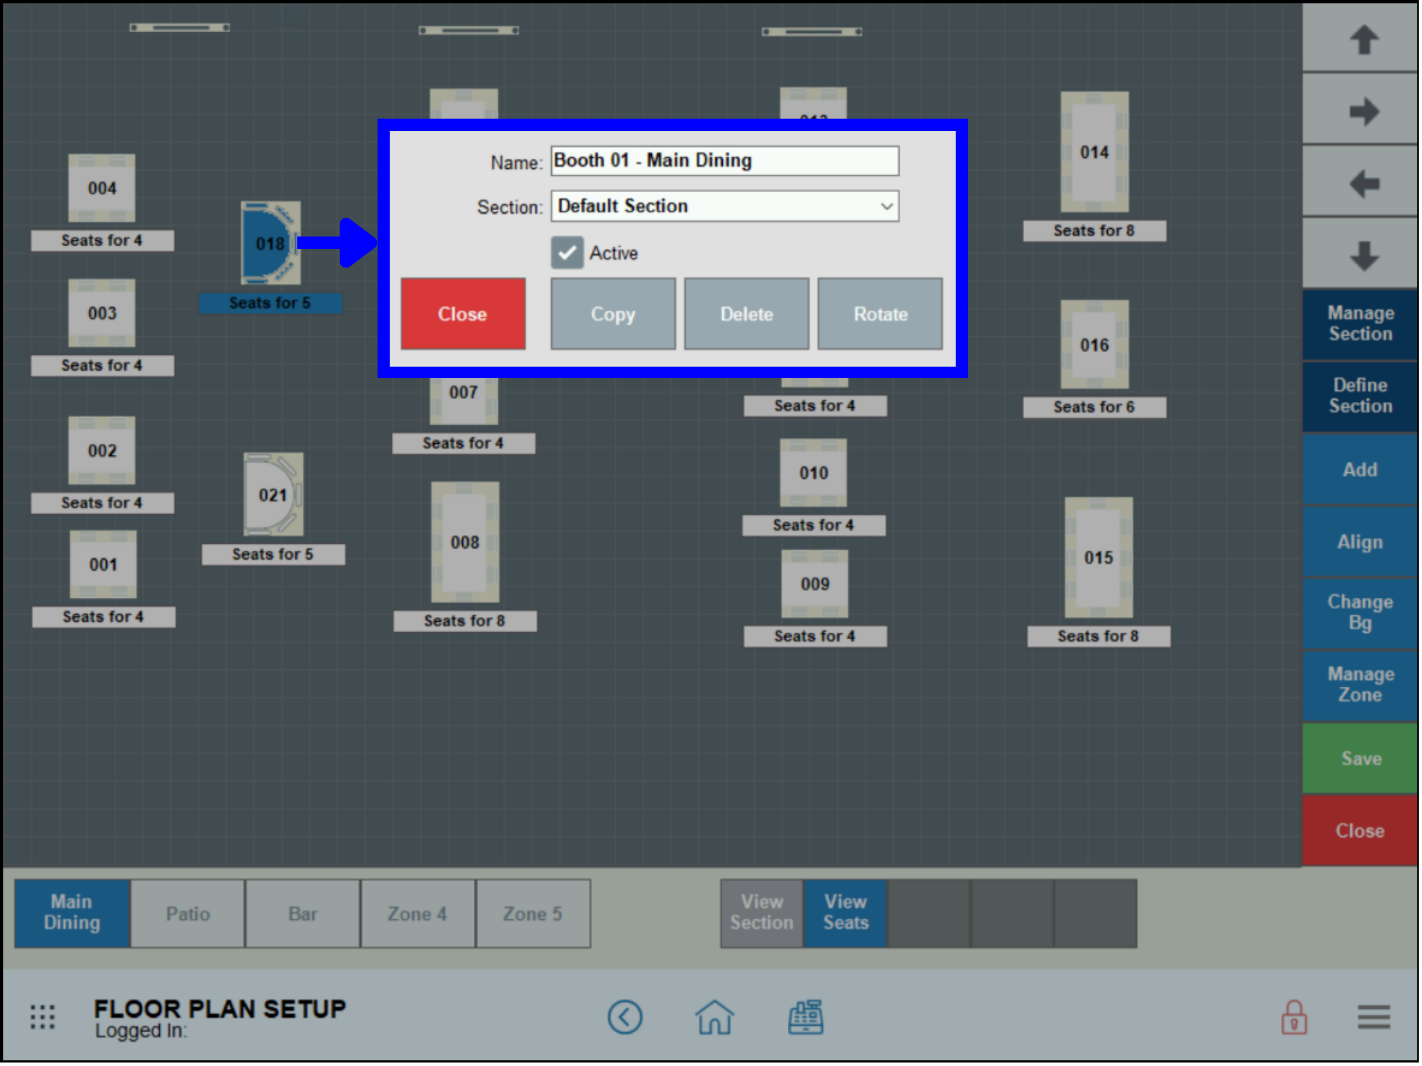
- Name: Enter a name for the element (e.g., Table 1).
- Note: Zone names do not print on customer tickets. To avoid confusion, best practice is to add the zone name to the table name (e.g., Table 1-Main Dining, Table 1-Patio, etc.)
- Section: Assign the element to a section.
- Active: Select the checkbox to activate the element.
- Note: Customers cannot be seated at inactive locations.
- Copy: Duplicate the selected element.
- Delete: Delete the selected element.
- Rotate: Rotate the selected element 90 degrees clockwise.
- Close: Close the pop-up screen.
After creating and/or modifying the desired floor plan elements, users can create zones to represent specific rooms, such as Main Dining, Patio, or Bar.
- On the Floor Plan Setup screen, tap Manage Zone.
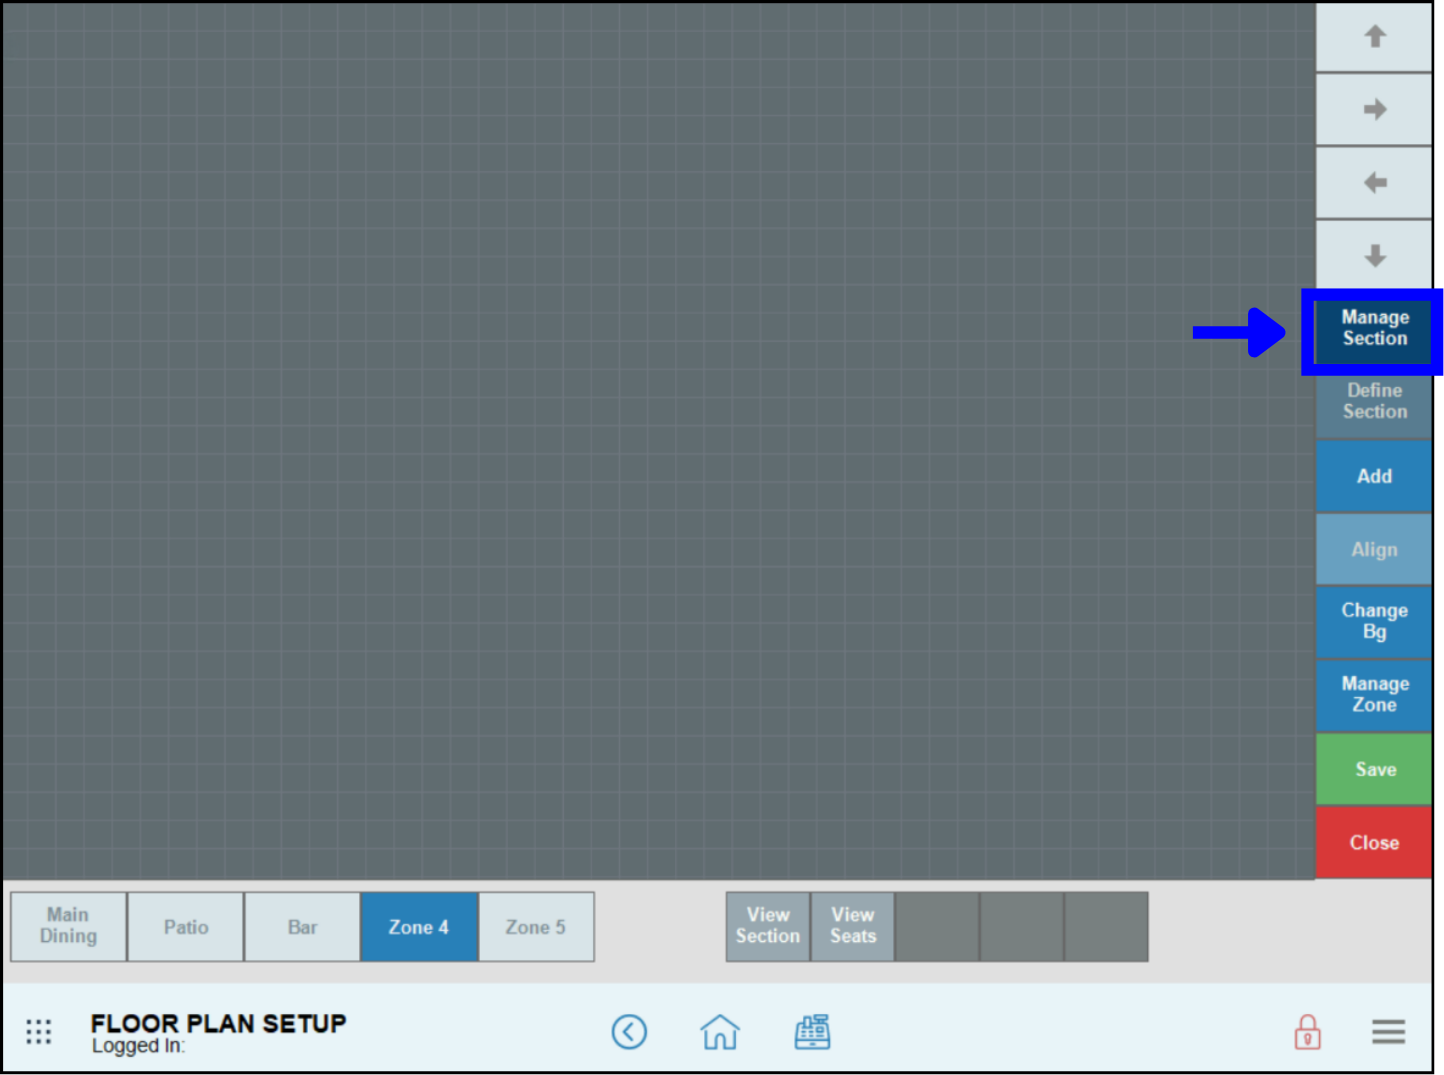
- In the work area, create up to five zones.
- Enable desired zones by toggling the matching slider to Active.
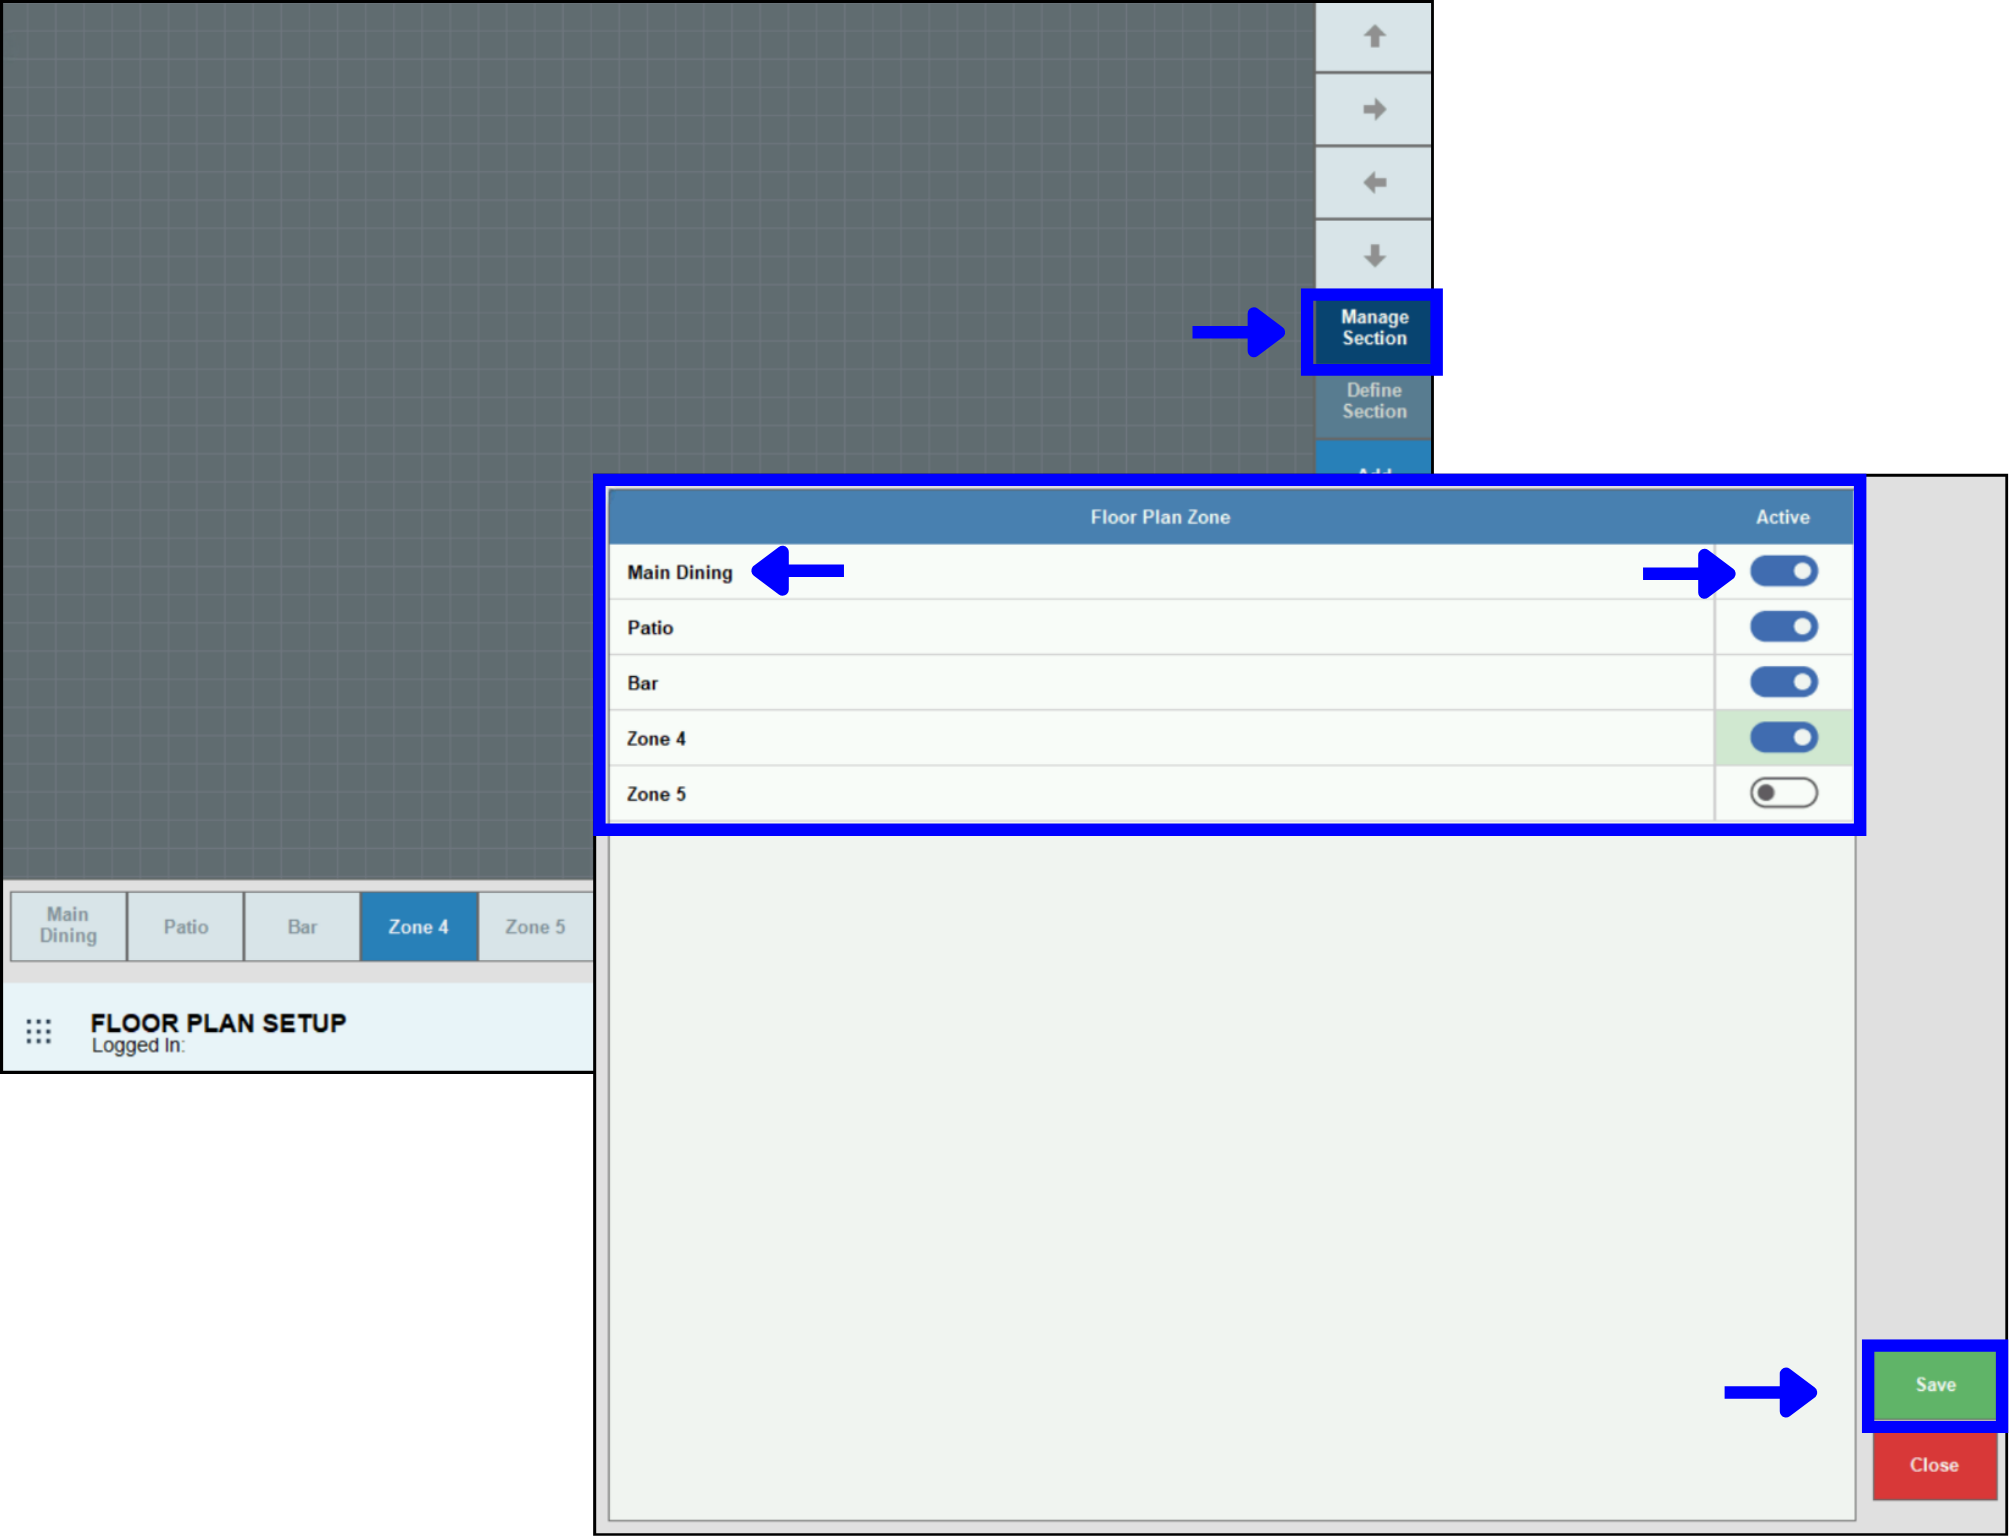
- Tap Save.
Within each zone, users can assign tables, booths, and other floor plan elements to a specific section. There can be multiple sections in each zone. This is particularly useful in restaurant settings where waiters are assigned to serve tables in a designated section.
- On the Floor Plan Setup screen, select a seating element and tap Define Section.
- Select the desired Section from the dropdown and tap OK. Users can also tap the desired table a second time to assign a section from the drop-down.
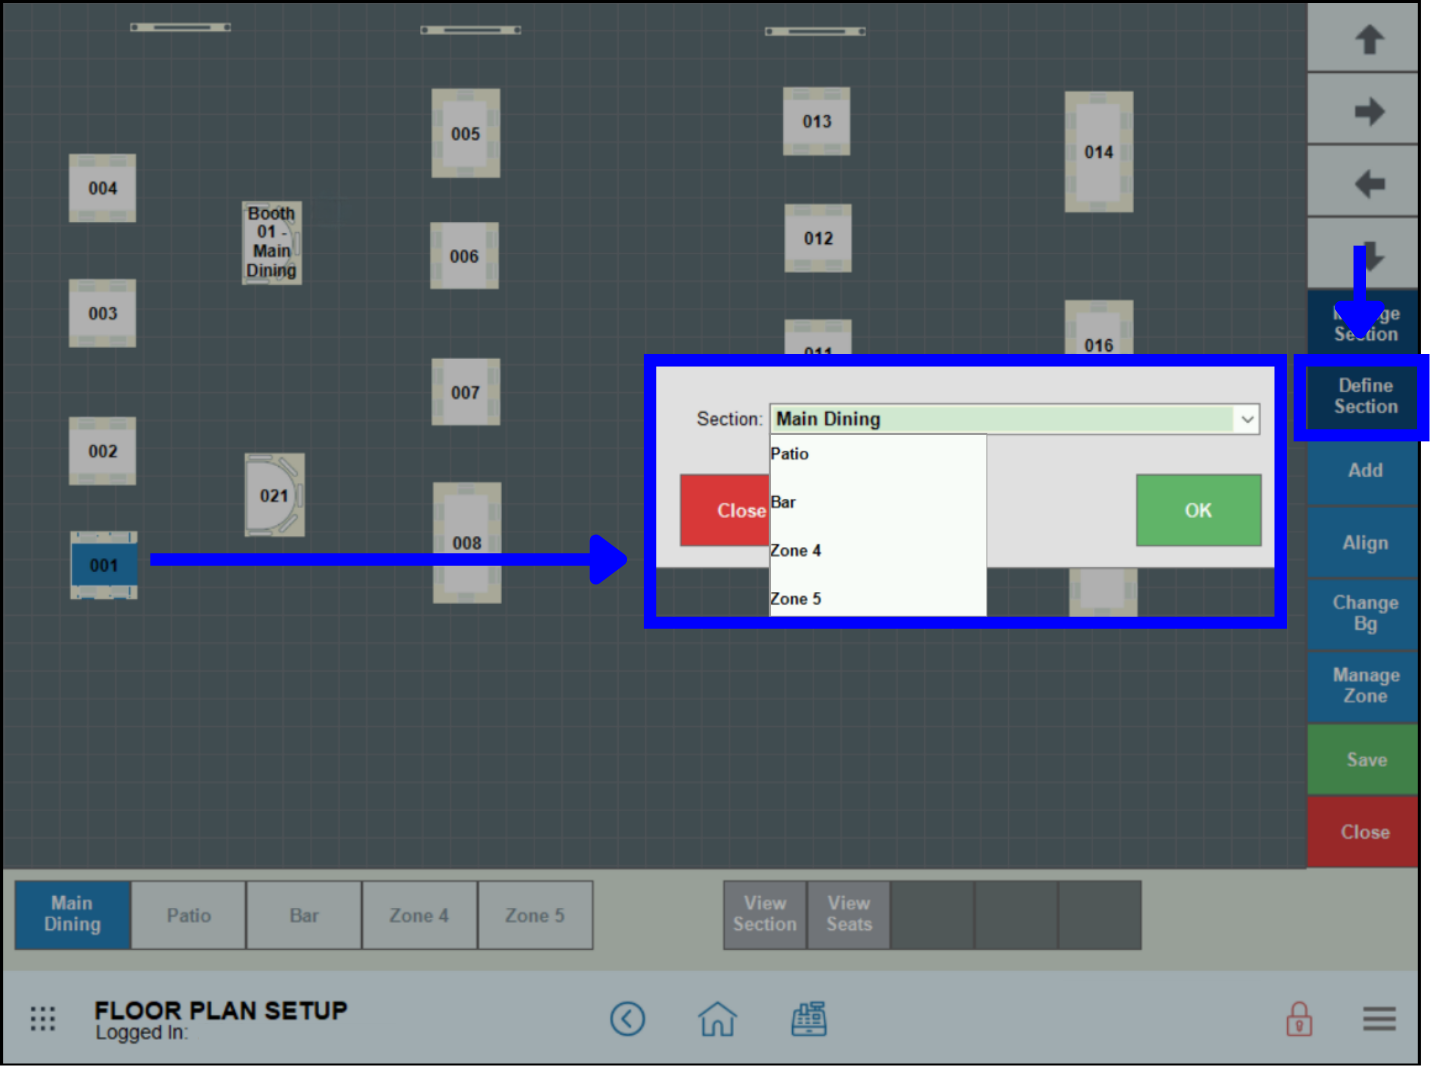
- Tip! Tap View Section to display the current Section assignments.
- Repeat Steps 1-2 as desired.
- Tap Save.
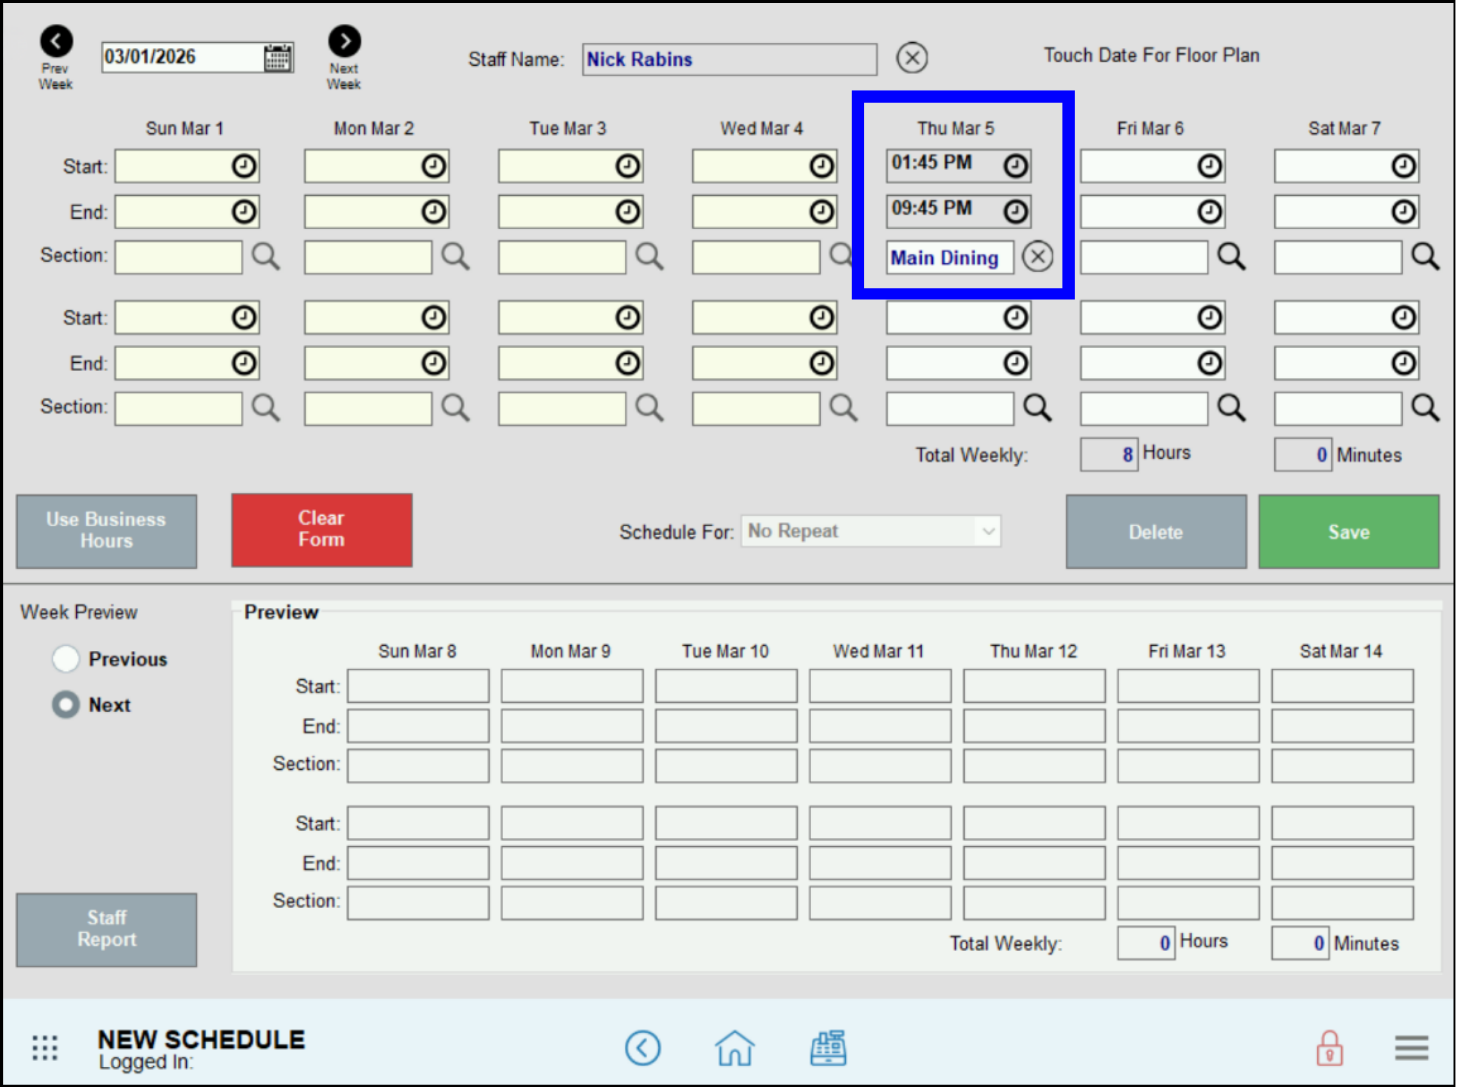
- Tip! Employees can be assigned to sections on the Staff Scheduling screen at Home > Staff > Work Schedules. See: Create a Staff Work Schedule.
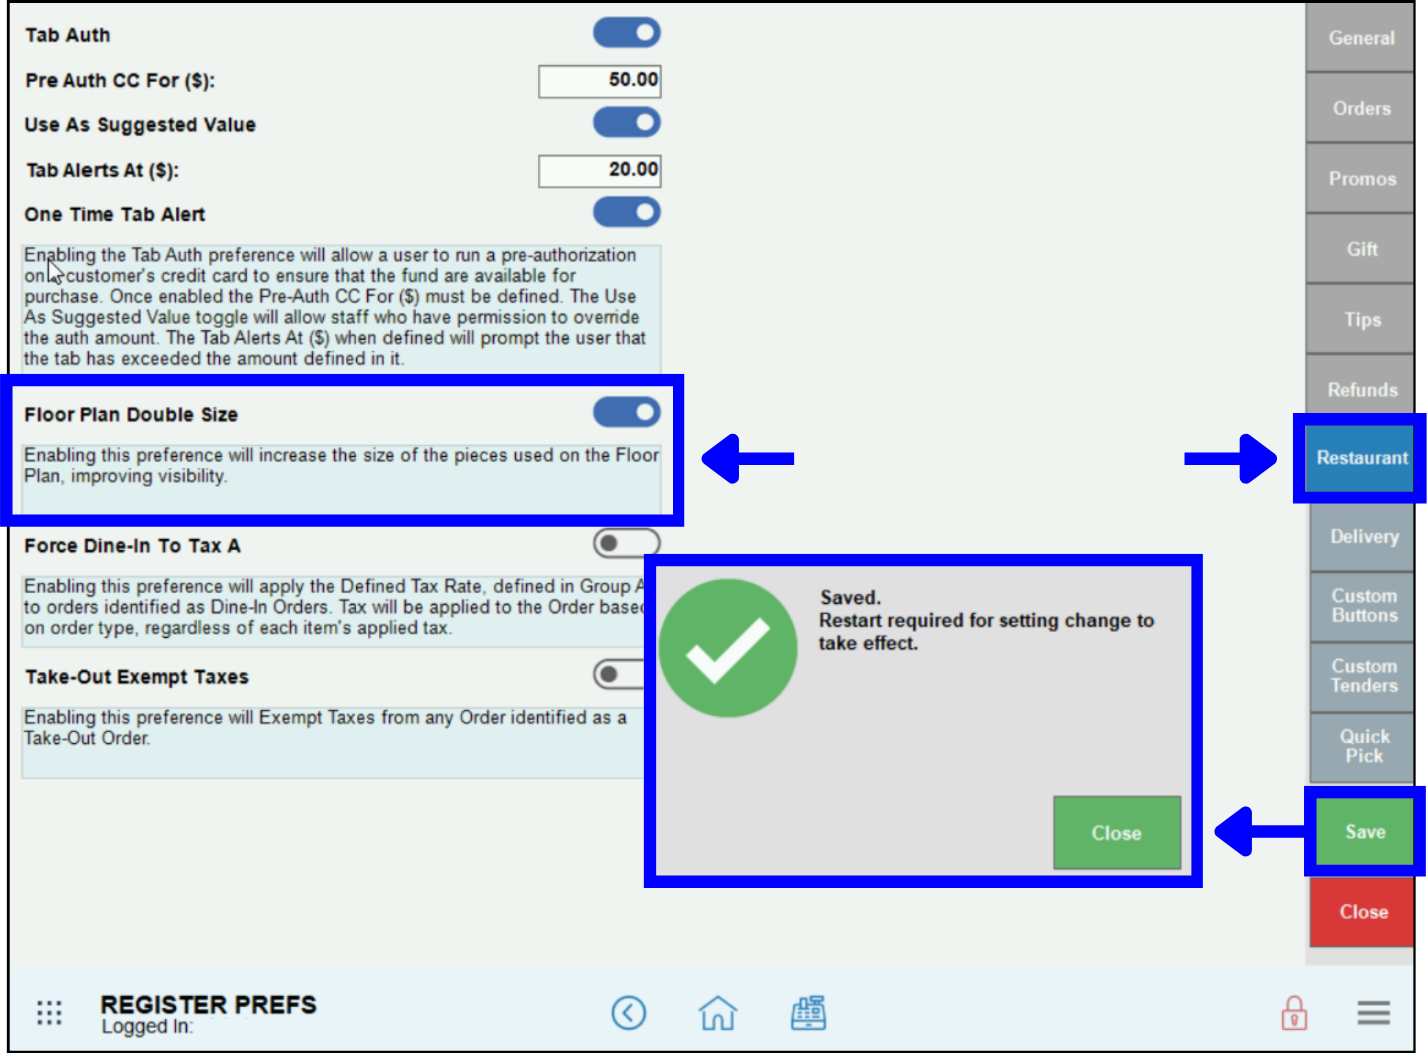
Floor Plan elements can be resized by enabling or disabling the Floor Plan Double Size setting in Register Preferences. This setting is handy for smaller locations where fewer tables are needed. It also increases visibility by displaying larger Floor Plan elements.
- Note: The Floor Plan Double Size setting applies to all floor plan zones when enabled.
- Go to Home > Settings > Register Preferences.
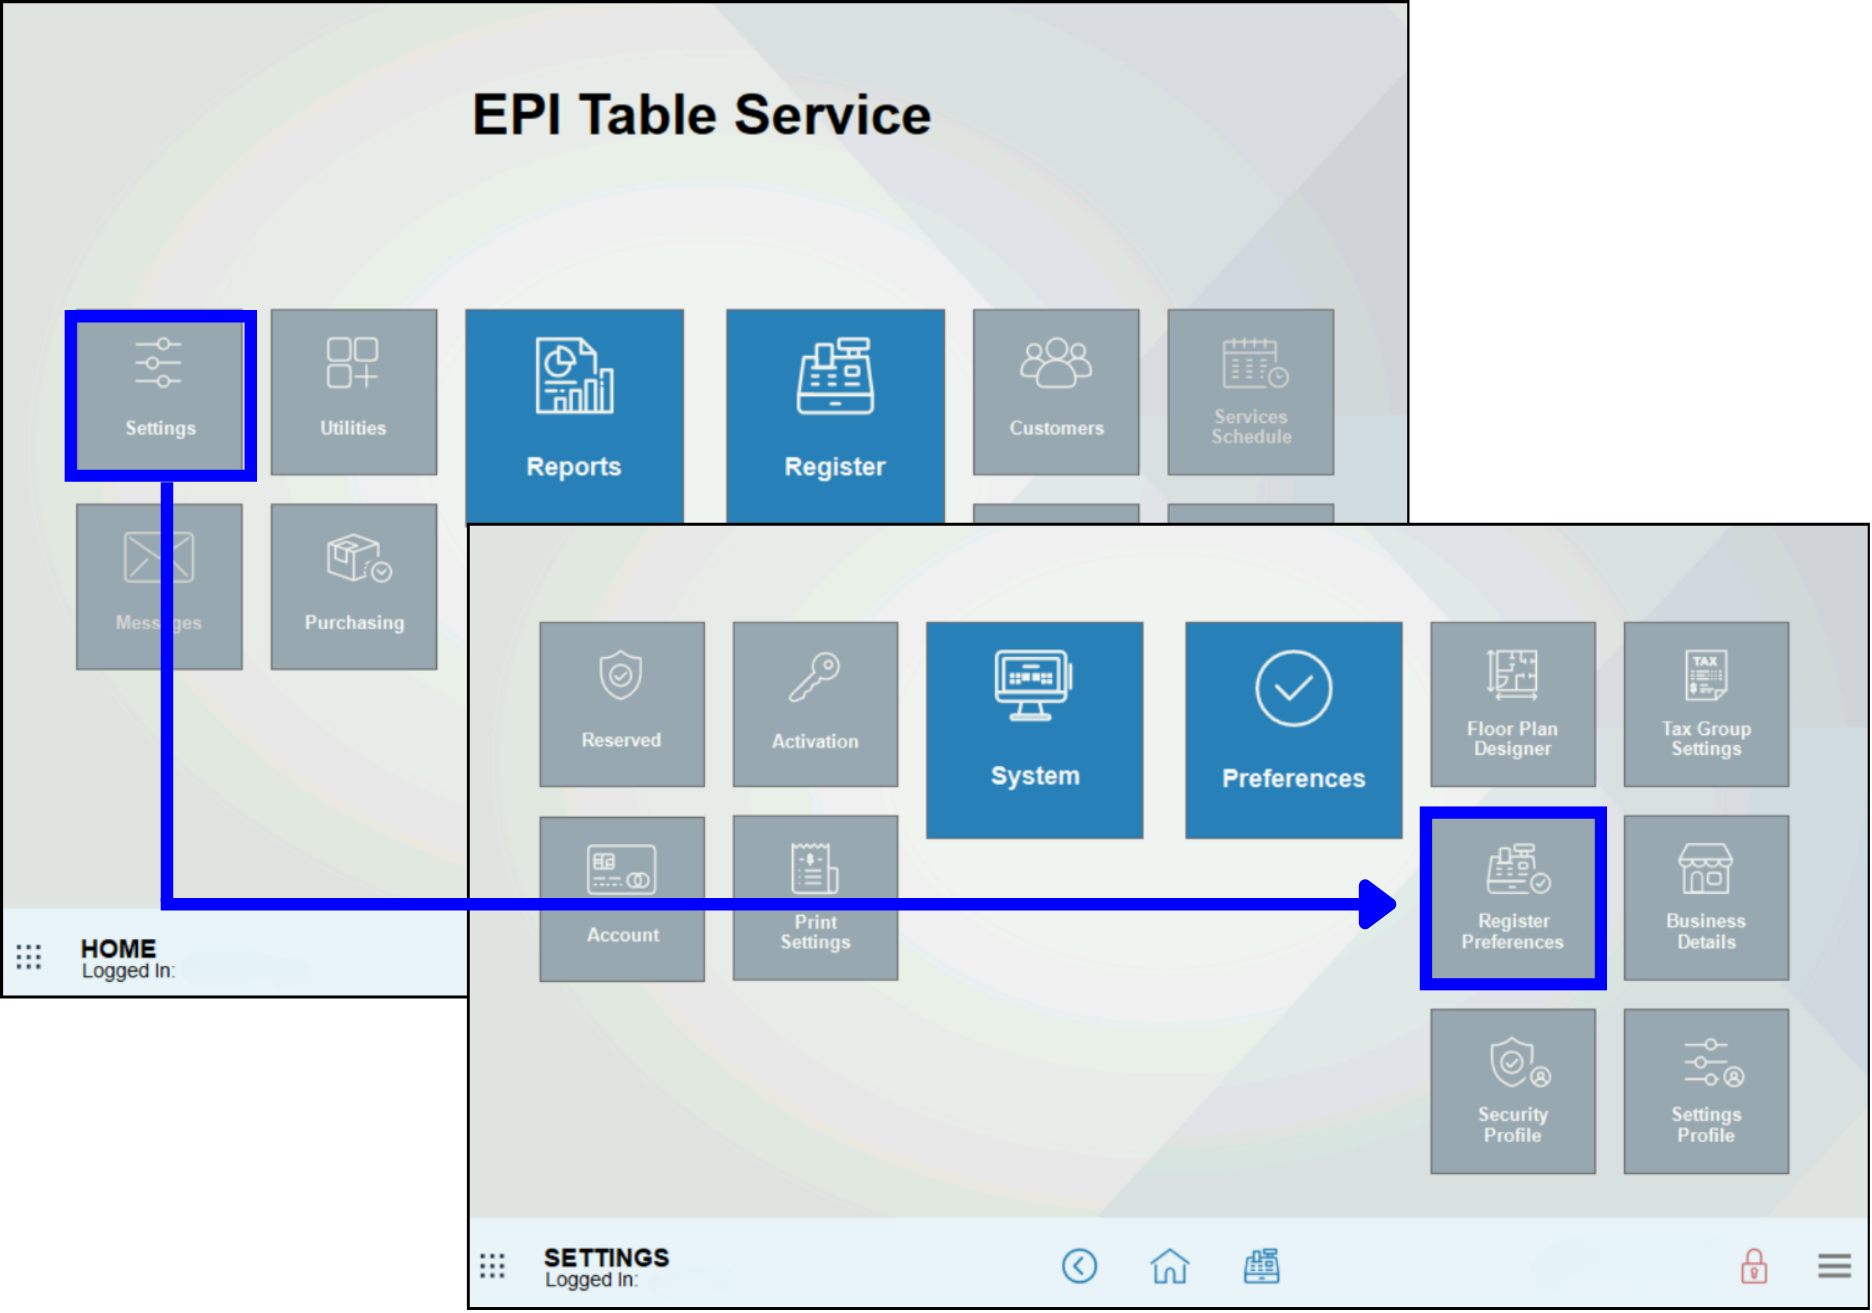
- Tap the Restaurant tab.
- Enable the Floor Plan Double Size slider.
- Tap Save, then tap Close on the restart notification pop-up.
- Restart Exatouch.
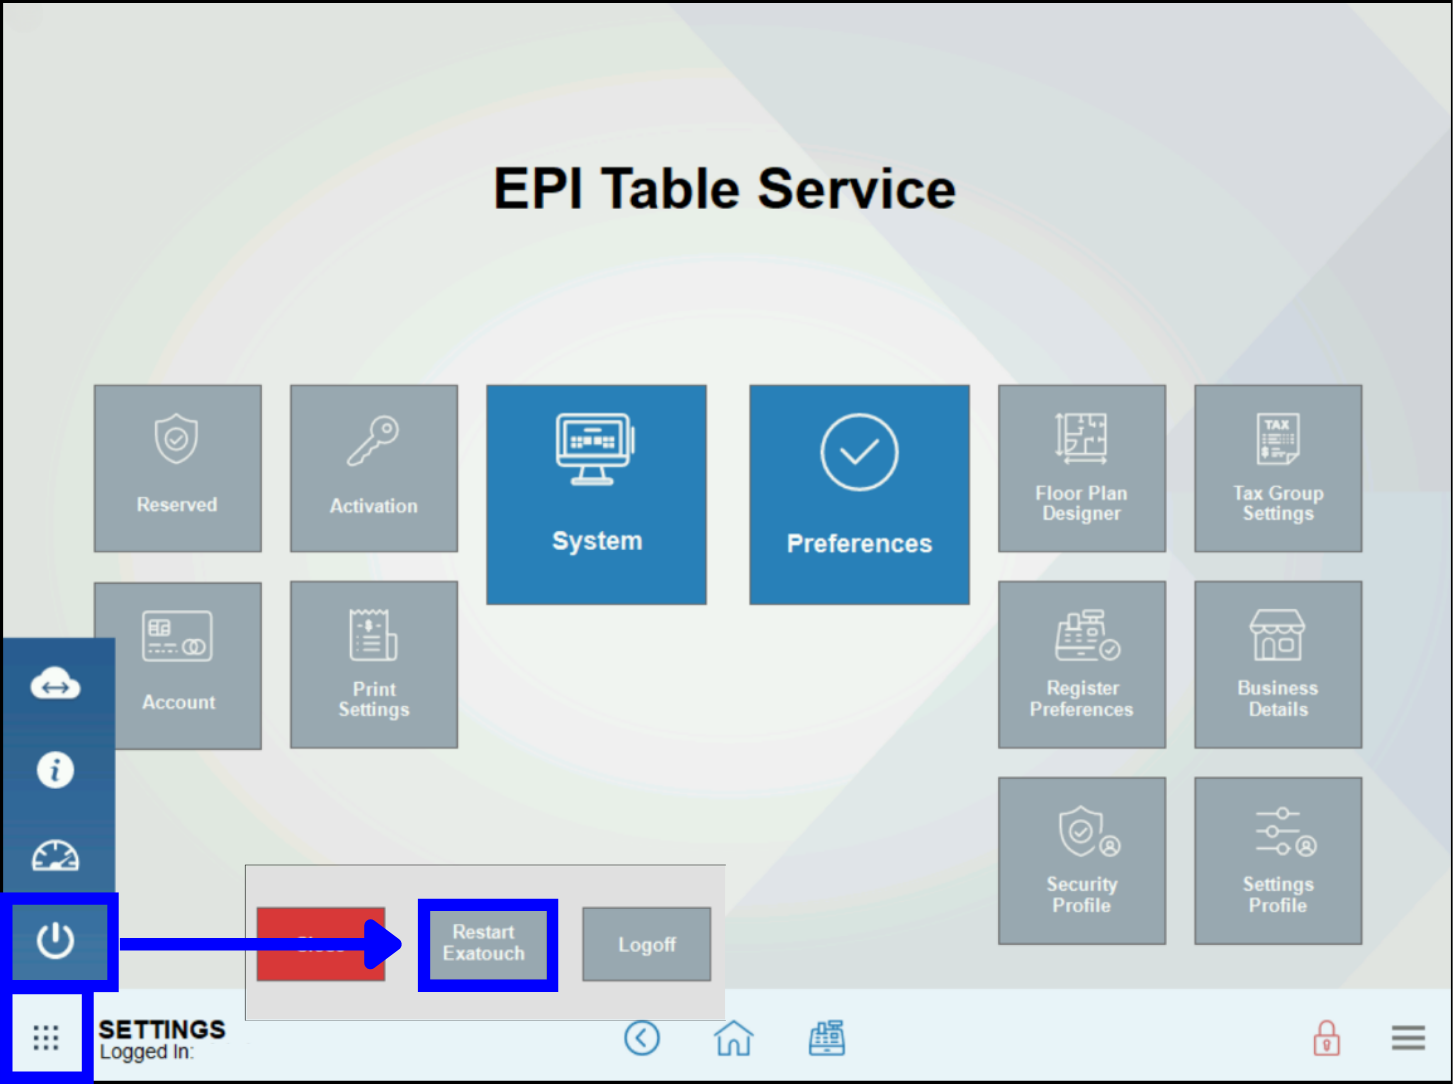
- After Exatouch restarts, go back to the Floor Plan Designer and verify the Floor Plan elements have increased in size.
Merchants can further customize the Floor Plan Designer by adding a background image.
- Tip! Optimal background image size for Floor Plan view is 1040 x 776 pixels and a minimum of 96 dpi.
- Add background images in jpeg (.jpg) or png (.png) format onto an external USB drive.
- Insert the drive into one of the USB ports, located on the Exatouch monitor.
- Go to Home > Settings > Floor Plan Designer..
- From the Floor Plan Setup screen, tap Change Bg (Change Background).
- Select a .jpg or .png file.
- Preview the image, then tap Use. Tap the Reset button to clear the background and select another image.
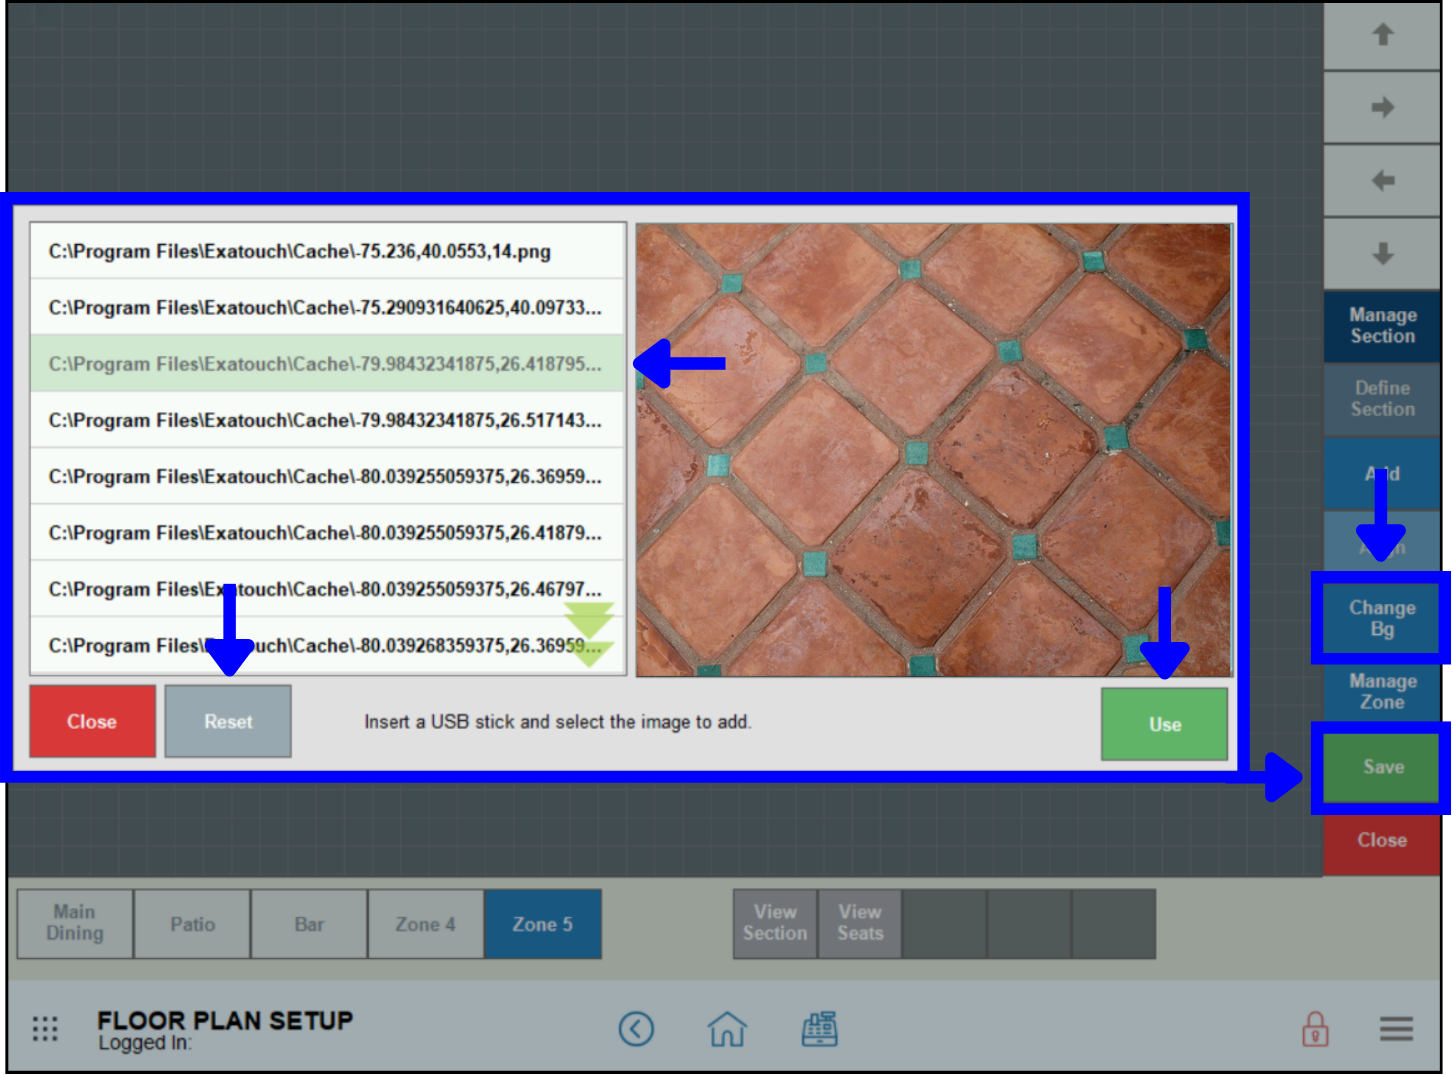
- View the background on the Floor Plan Setup screen, then tap Save.
How can we improve this information for you?
Registered internal users can comment. Merchants, have a suggestion? Tell us more.