Accounts Receivable helps merchants build loyalty by extending unsecured credit to repeat customers and allowing them to pay off balances either in installments or in full over a predetermined period. This saves time and increases flexibility by not requiring customers to pay immediately with cash, thereby helping merchants to increase total sales.
- Important: Contact the Exatouch Technical Support Team at (800) 966-5520 – Option 3 to activate Accounts Receivable settings.
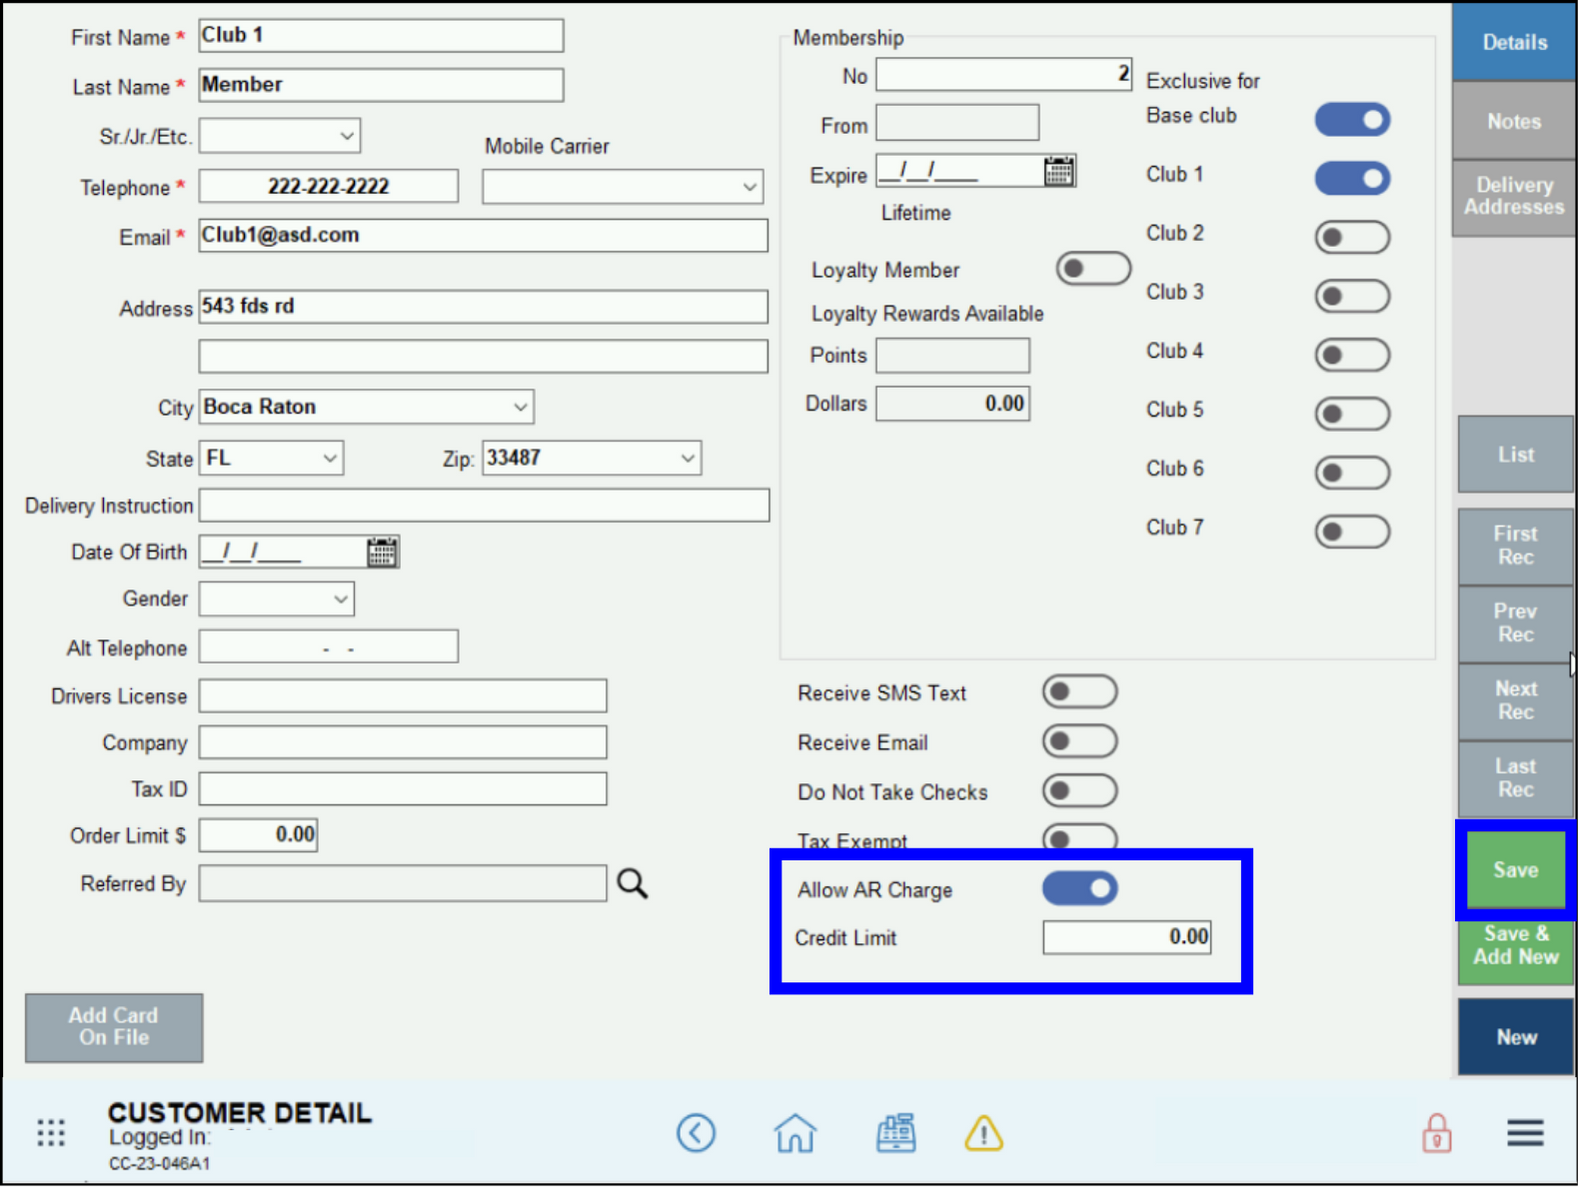
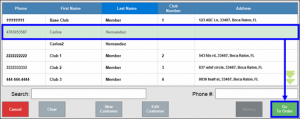
Merchants can activate or deactivate Accounts Receivable charges and set customer credit limits via the Customer Detail module.
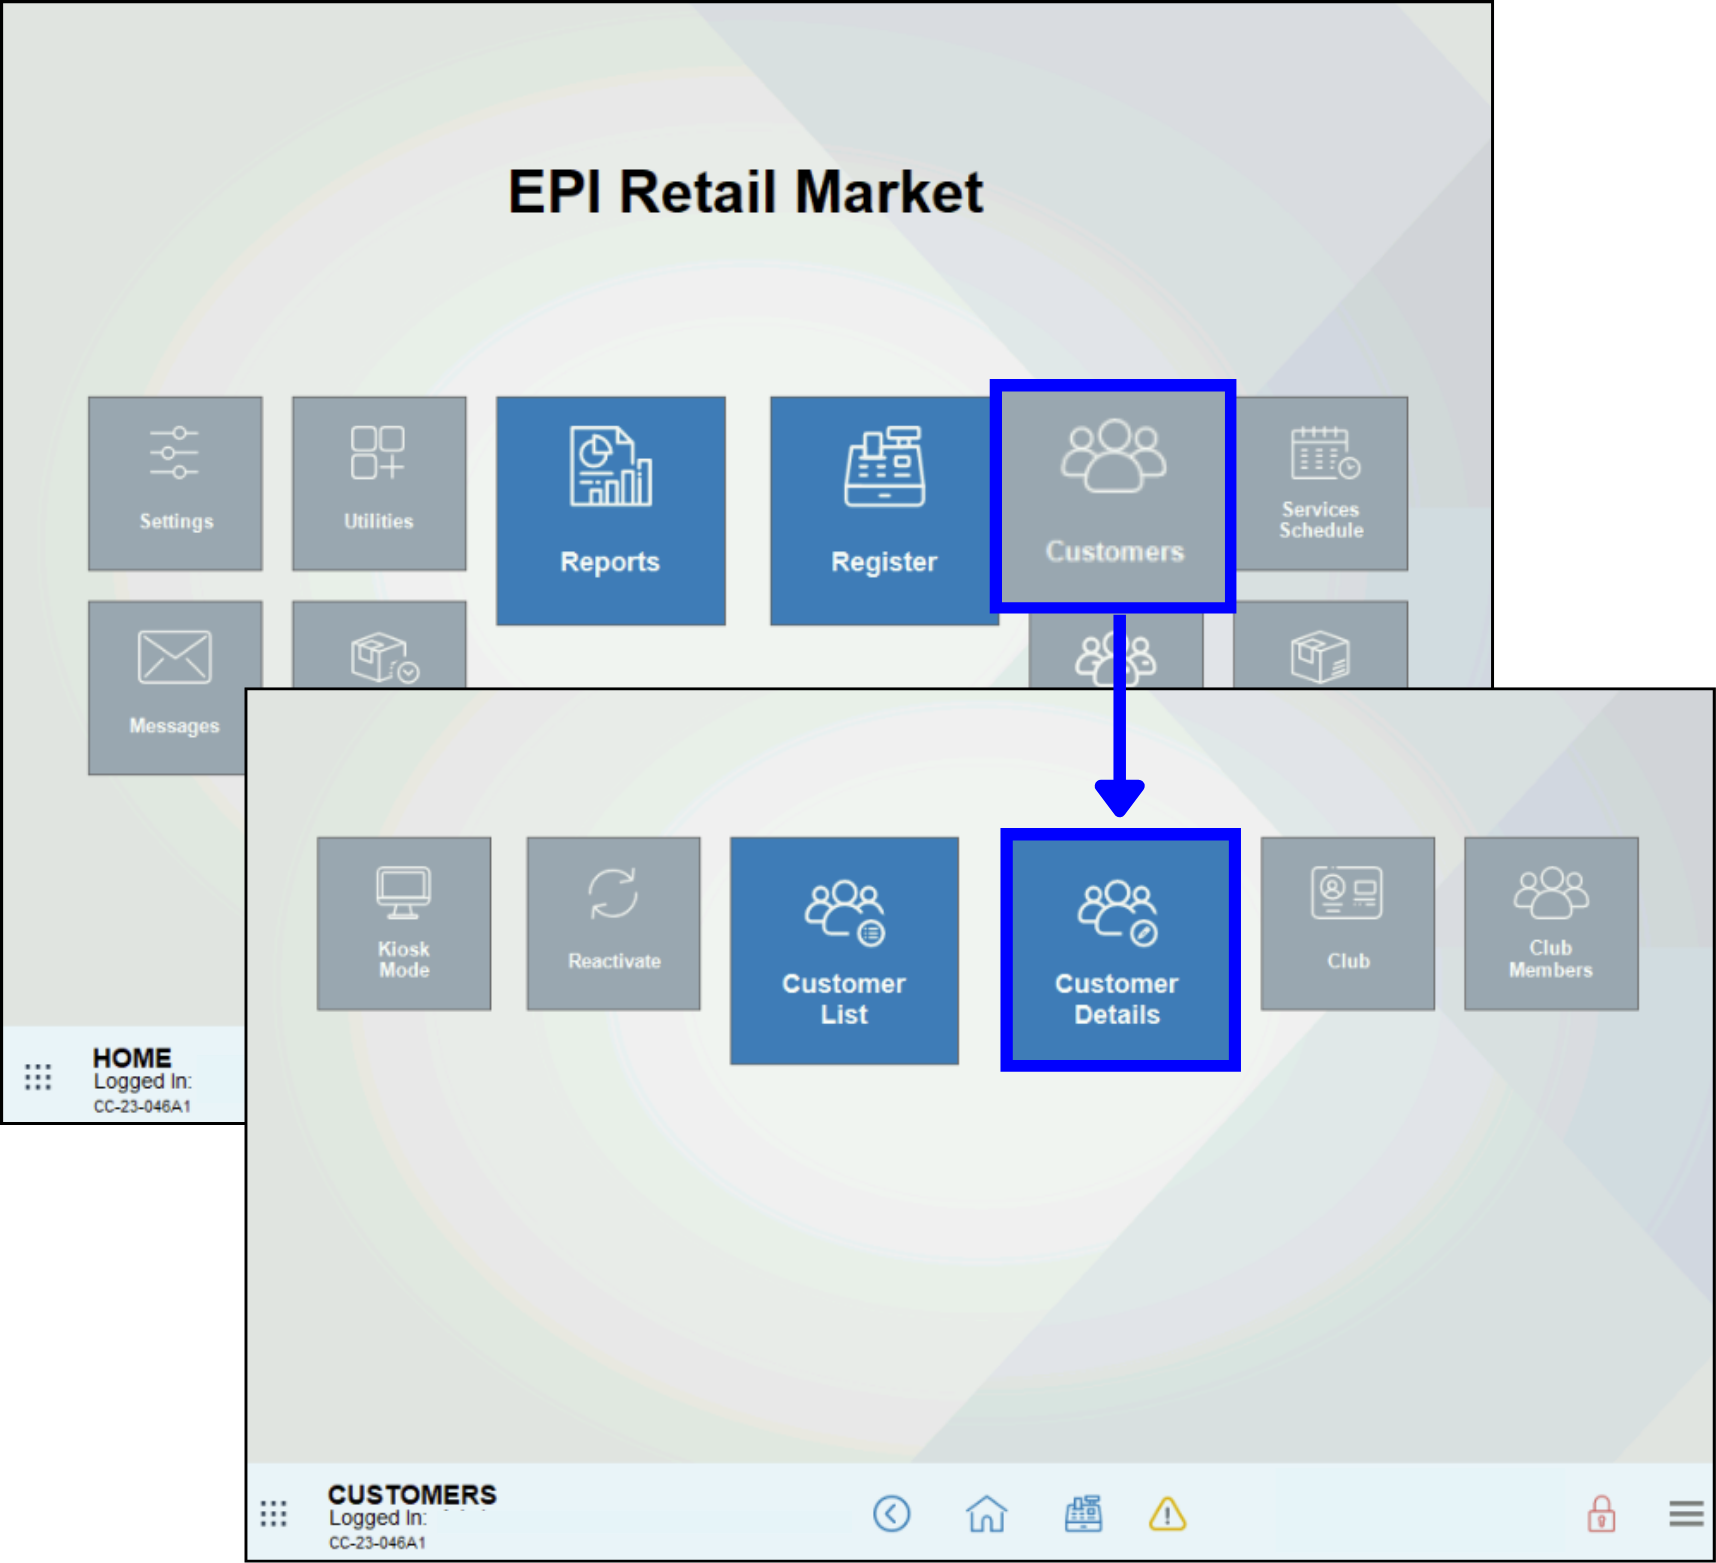
- Go to Home > Customers > Customer Detail.
- Activate the Allow AR Charge slider.
- Enter a Credit Limit, as applicable.
- Tap Save.
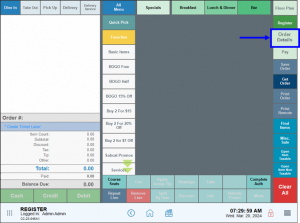
Process Accounts Receivable transactions in Exatouch by performing the following:
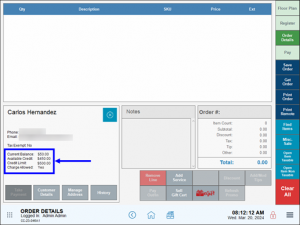
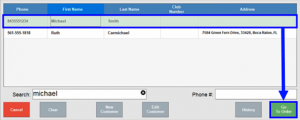
- From the Register, tap Order Details.
- Select the search icon.
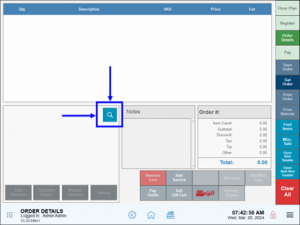
- Select the customer from the list that displays, then tap Go To Order.
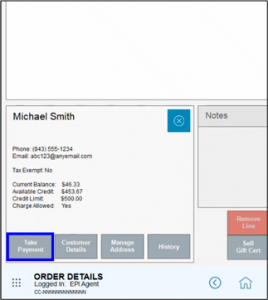
- The customer’s profile displays along with the following additional fields:
- Current Balance – The customer’s unpaid balance.
- Available Credit – The customer’s available credit.
- Credit Limit – The customer’s maximum credit limit.
- Charge Allowed – Whether or not Accounts Receivable is enabled for this customer.
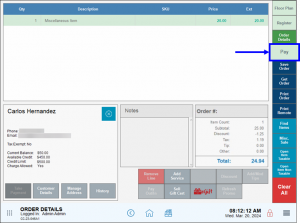
- Add additional items to the order, if desired.
- Tap Pay.
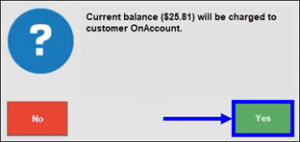
- On the Pay screen, tap On Account to apply charges to the customer’s account.
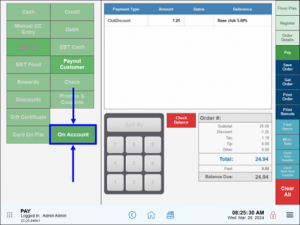
- Tap Yes. A receipt prints with the On Account amount printed at the bottom of the receipt.
- On the Order Details screen, the Current Balance and Available Credit values adjust to reflect charges to the customer’s account.

Customers can pay off their balances at the end of a transaction after their customer profile is applied to the order.
- From the Register, tap Order Details.
- Select the search icon.
- Select the customer from the list that displays, then tap Go To Order.
- Below the customer’s profile, tap Take Payment.
- Select the outstanding balance(s), and then select Partial Pay or Pay In Full.
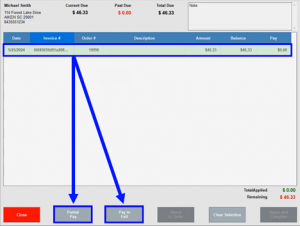
- If Partial Pay is selected, then enter the payment amount in the window that displays, and then tap Apply.
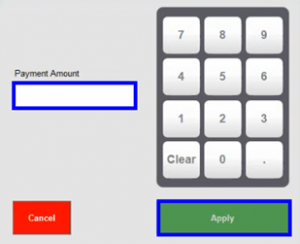
- If Partial Pay is selected, then enter the payment amount in the window that displays, and then tap Apply.
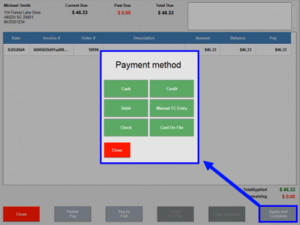
- Tap Apply and Complete, and then select the applicable payment method.
- If the customer is paying in cash, then select a generated payout amount or enter the exact amount and tap Pay. The payment will be processed as a normal transaction.
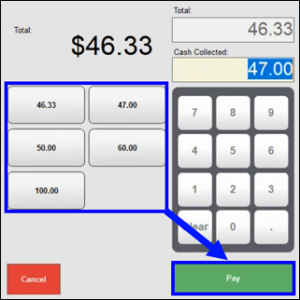
- If the customer is paying in cash, then select a generated payout amount or enter the exact amount and tap Pay. The payment will be processed as a normal transaction.
- Note: All payments made have a Due Date that is invisible and not shown anywhere 30 days after the order is created.
- Amount = the original order amount
- Balance = how much the customer still owes the merchant
- CurrentDue = value composed of all open credit transactions that have a created date of less than or equal to 30 days
- PastDue = when the order has a date that is greater than 30 days
- TotalDue = CurrentDue + PastDue
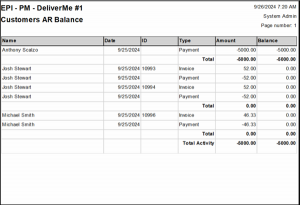
Merchants can generate reports with information about each invoice and payment that is made to an Accounts Receivable balance.
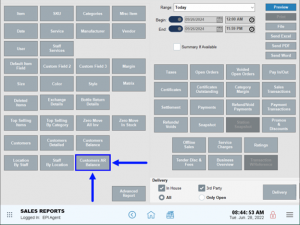
- From Home, navigate to Reports > Sales to display the Sales work area.
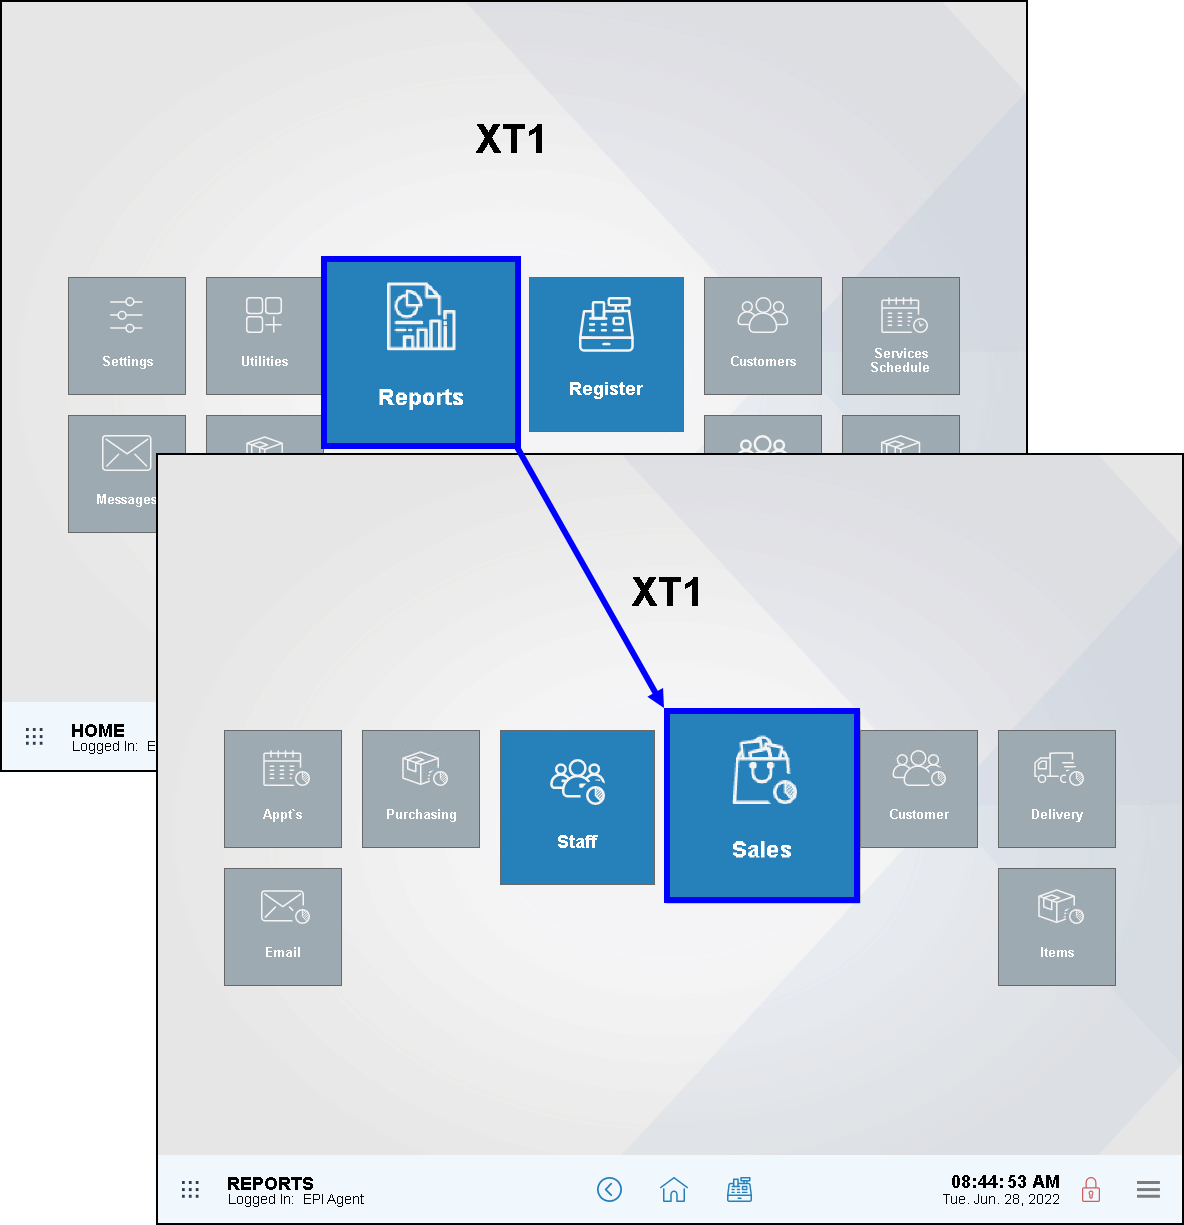
- Tap Customer AR Balance.
- The customer’s balance appears with related information, such as the Name, Date, ID, Type, and Amount.
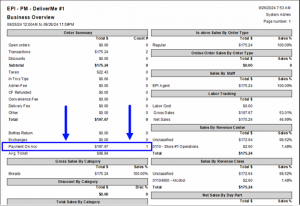
- Note: The Business Overview report will show all payments received between the set timeframe in the Payment On Acc line. This report will not show current invoices. For more information about how to run and interpret these reports, see Business Overview Reports.
How can we improve this information for you?
Registered internal users can comment. Merchants, have a suggestion? Tell us more.