The Inventory Matrix feature enables merchants to assign a single group SKU number to a collection of similar items with a product group (such as t-shirts or soft drinks). Within that group SKU number, each individual item can have unique identifying information such as size, color, or flavor. This allows for individual item as well as group inventory and sales data tracking.
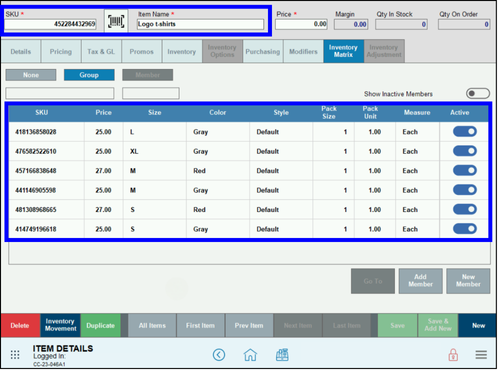
An Inventory Matrix is broken down into Groups and Members. A Group refers to the type of product being sold, such as Clothing or Soft Drinks, while Members refer to items within the Group differentiated by size, style, color, etc. (e.g., Large and X-Large t-shirts, or 6-packs of soda in various flavors).
- Important: Remember that effective inventory management depends on Member inventory, not Group inventory.
- Go to Home > Items > Item Details.
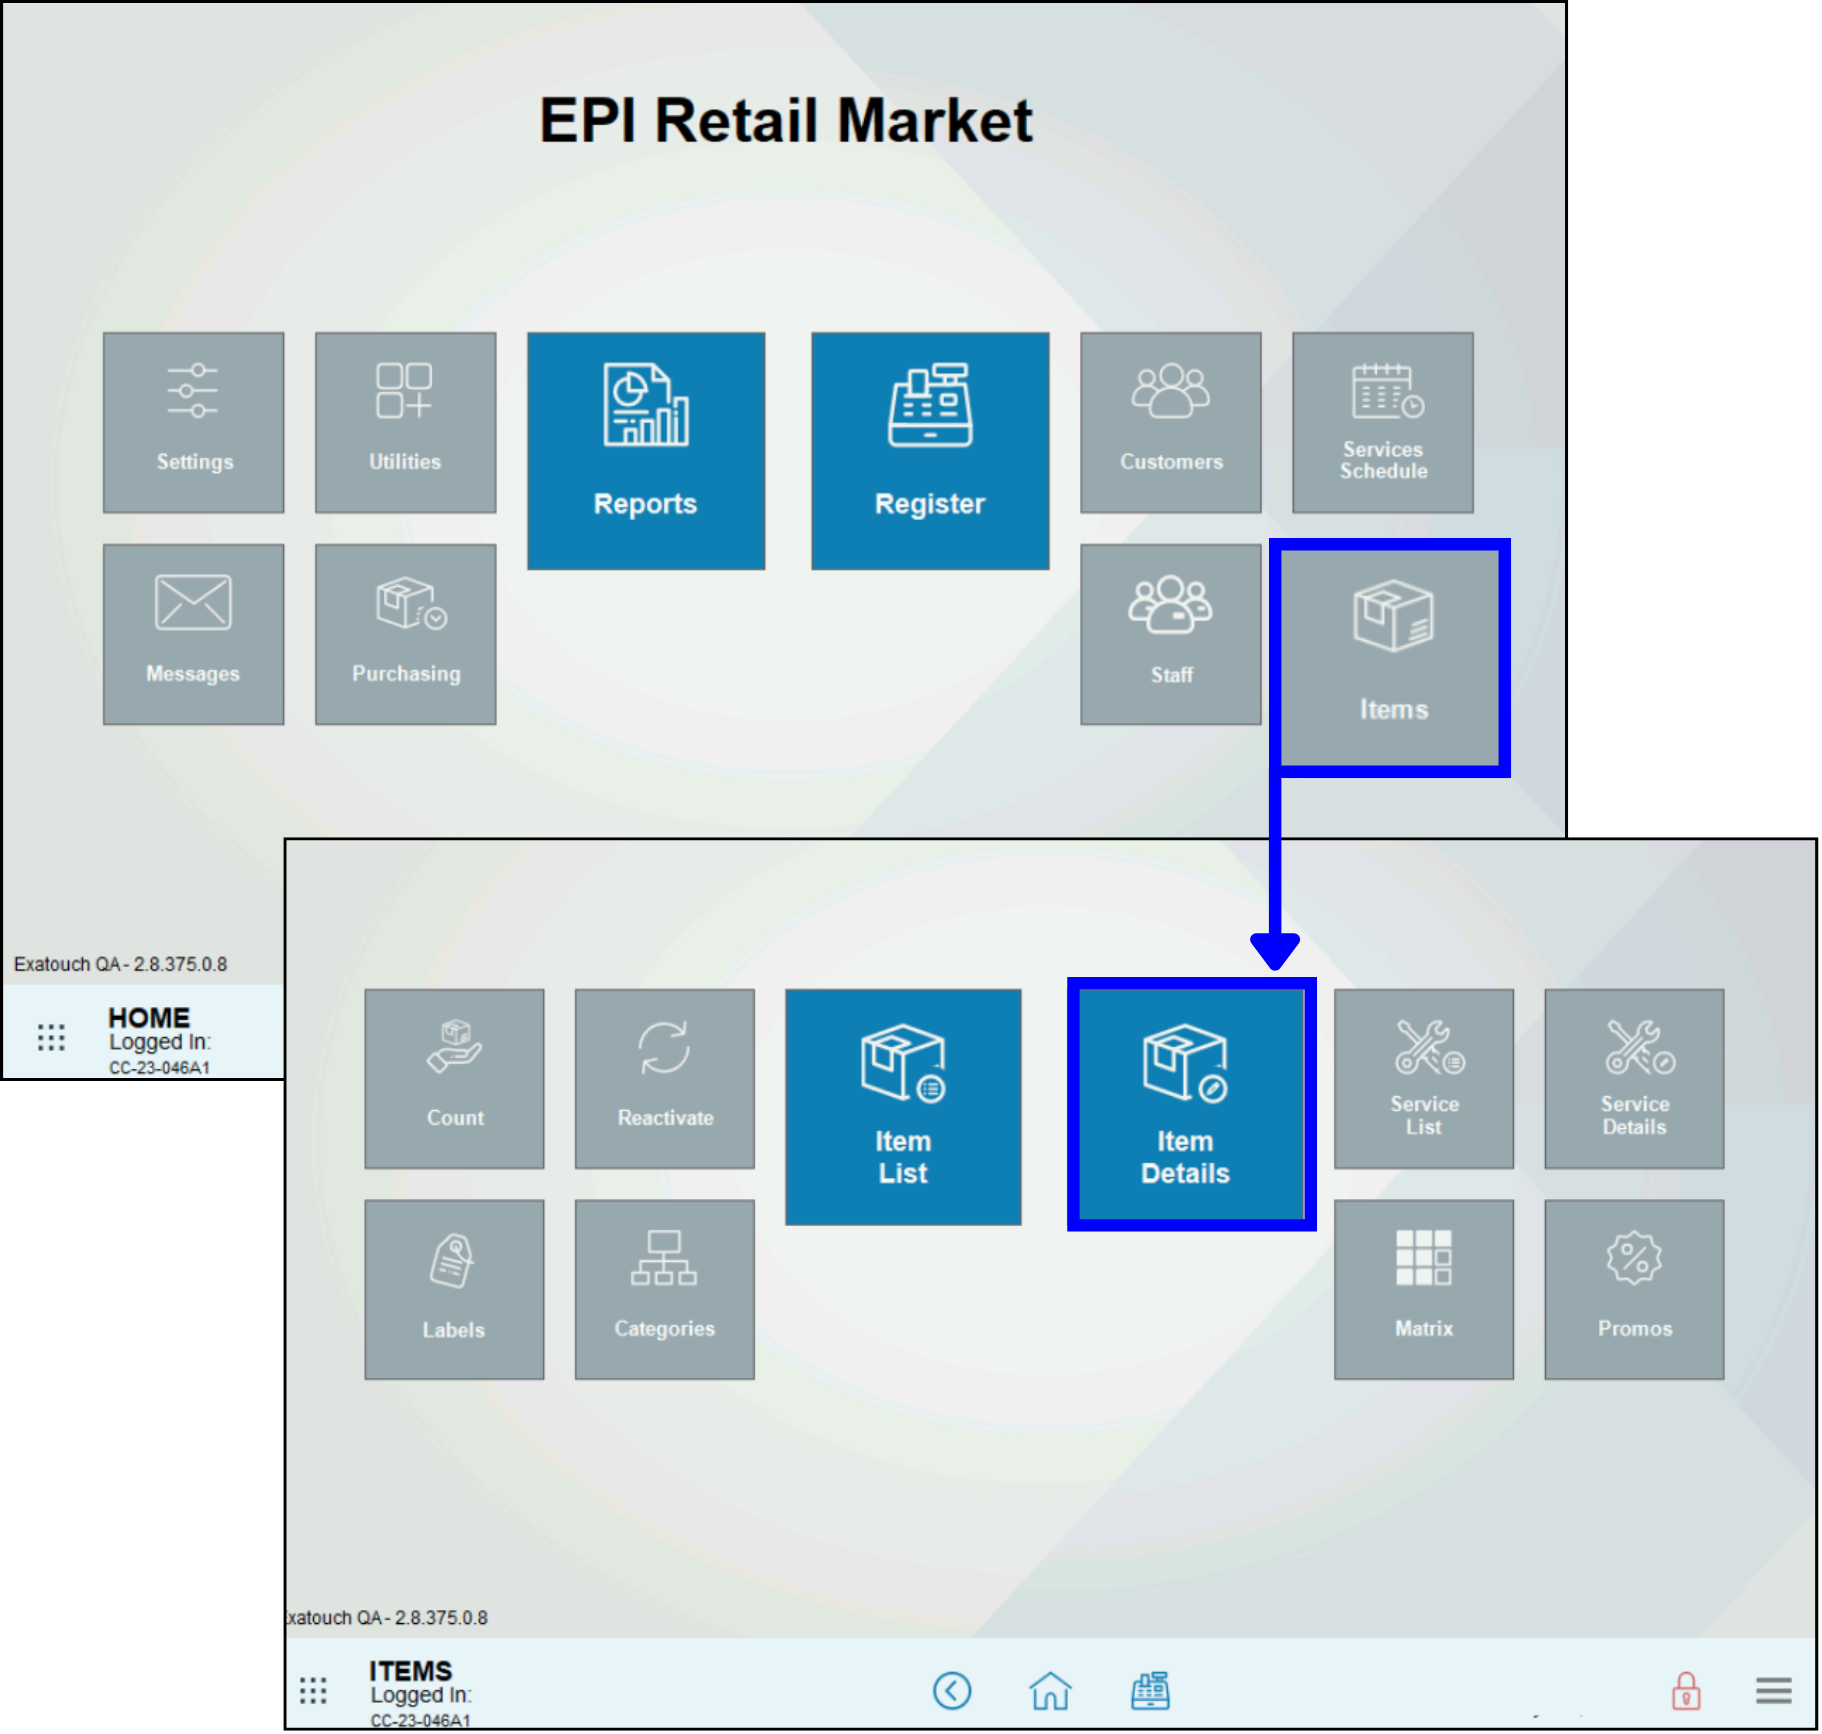
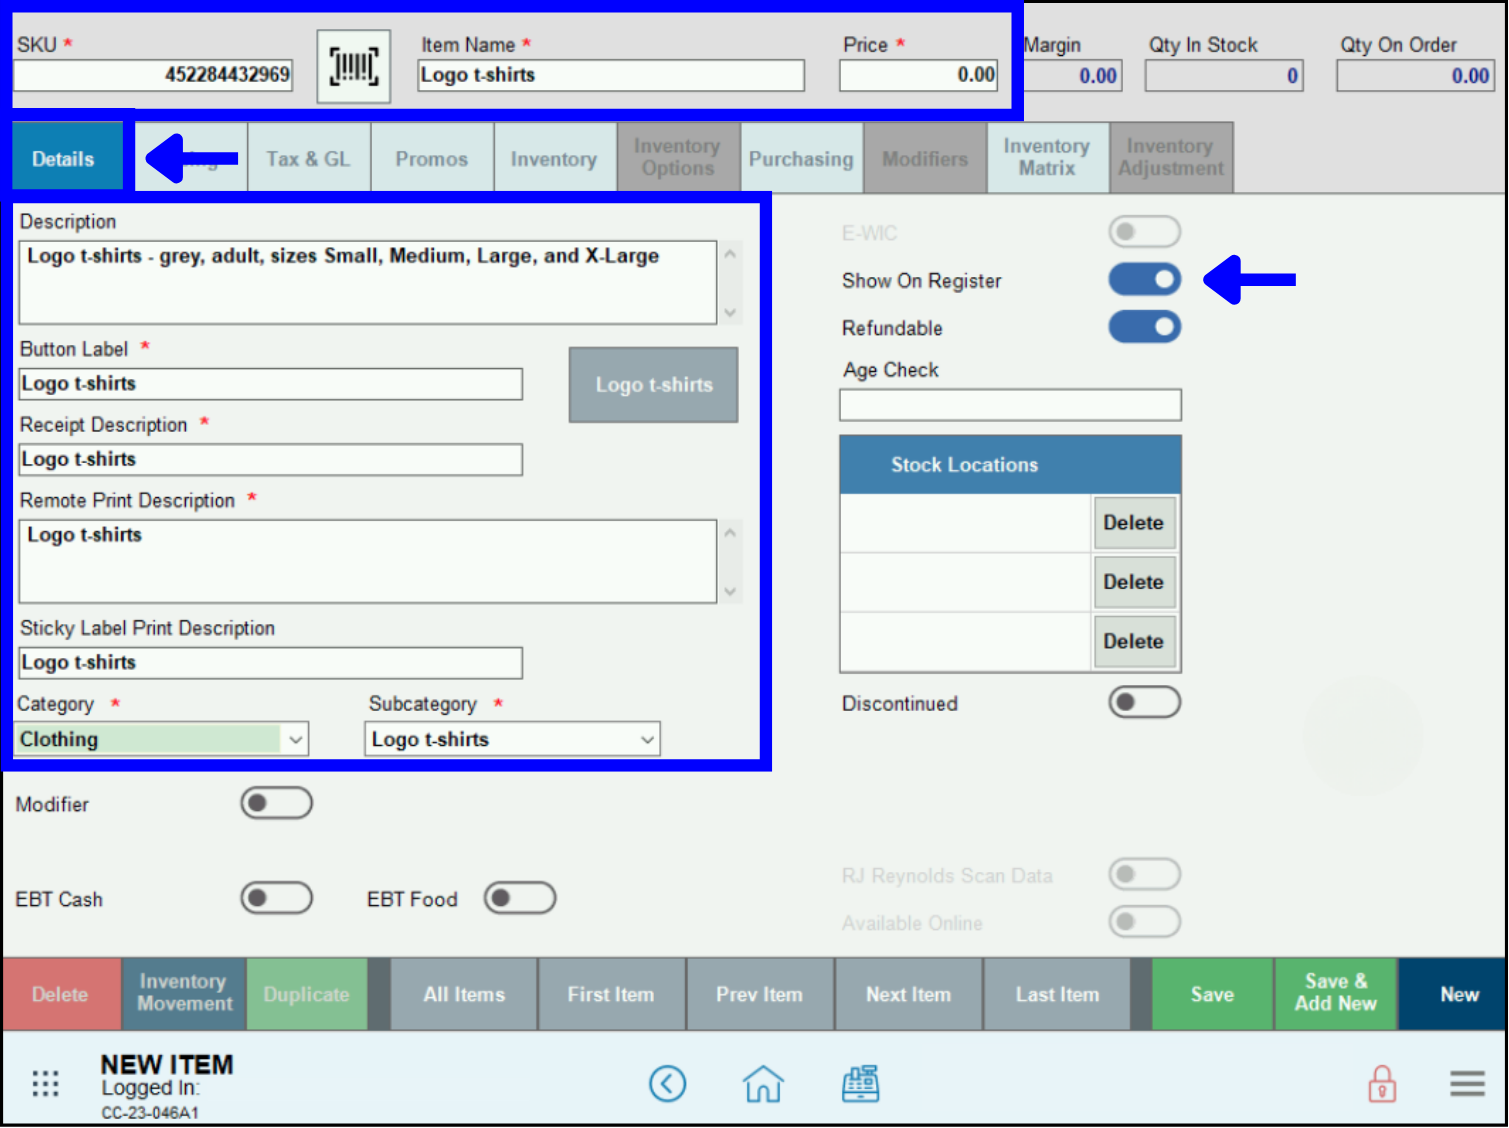
- Tap the Details tab. Here is where you will create the Matrix Group Item to which all other Items (Members) will be added.
- To create a new Matrix Group Item:
- Scan or type in the item’s SKU.
- Add an Item Name.
- Select a Category and Subcategory.
- Leave the Price field set at 0.00 (an item that is later designated as a Group does not need a price).
- Ensure that the Show on Register toggle is activated.
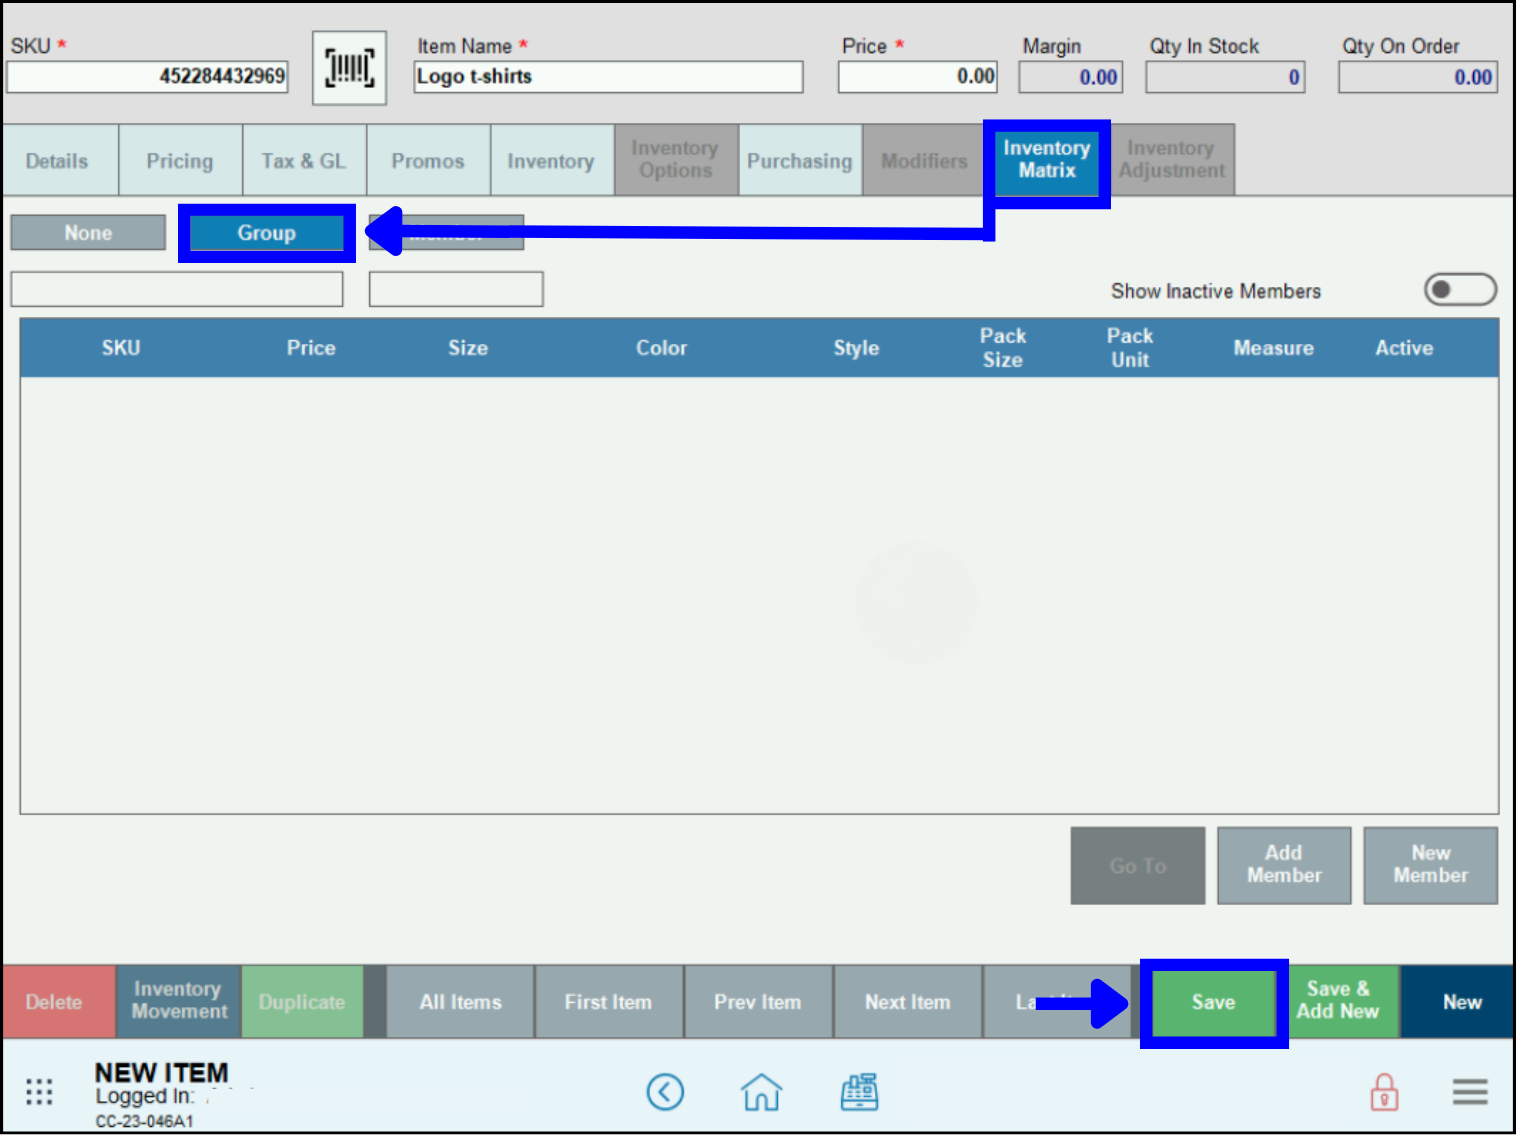
- Tap the Inventory Matrix tab, then select Group. The Inventory Matrix work area displays.
- 5. Tap Save. The new Item has now been saved as a Group.
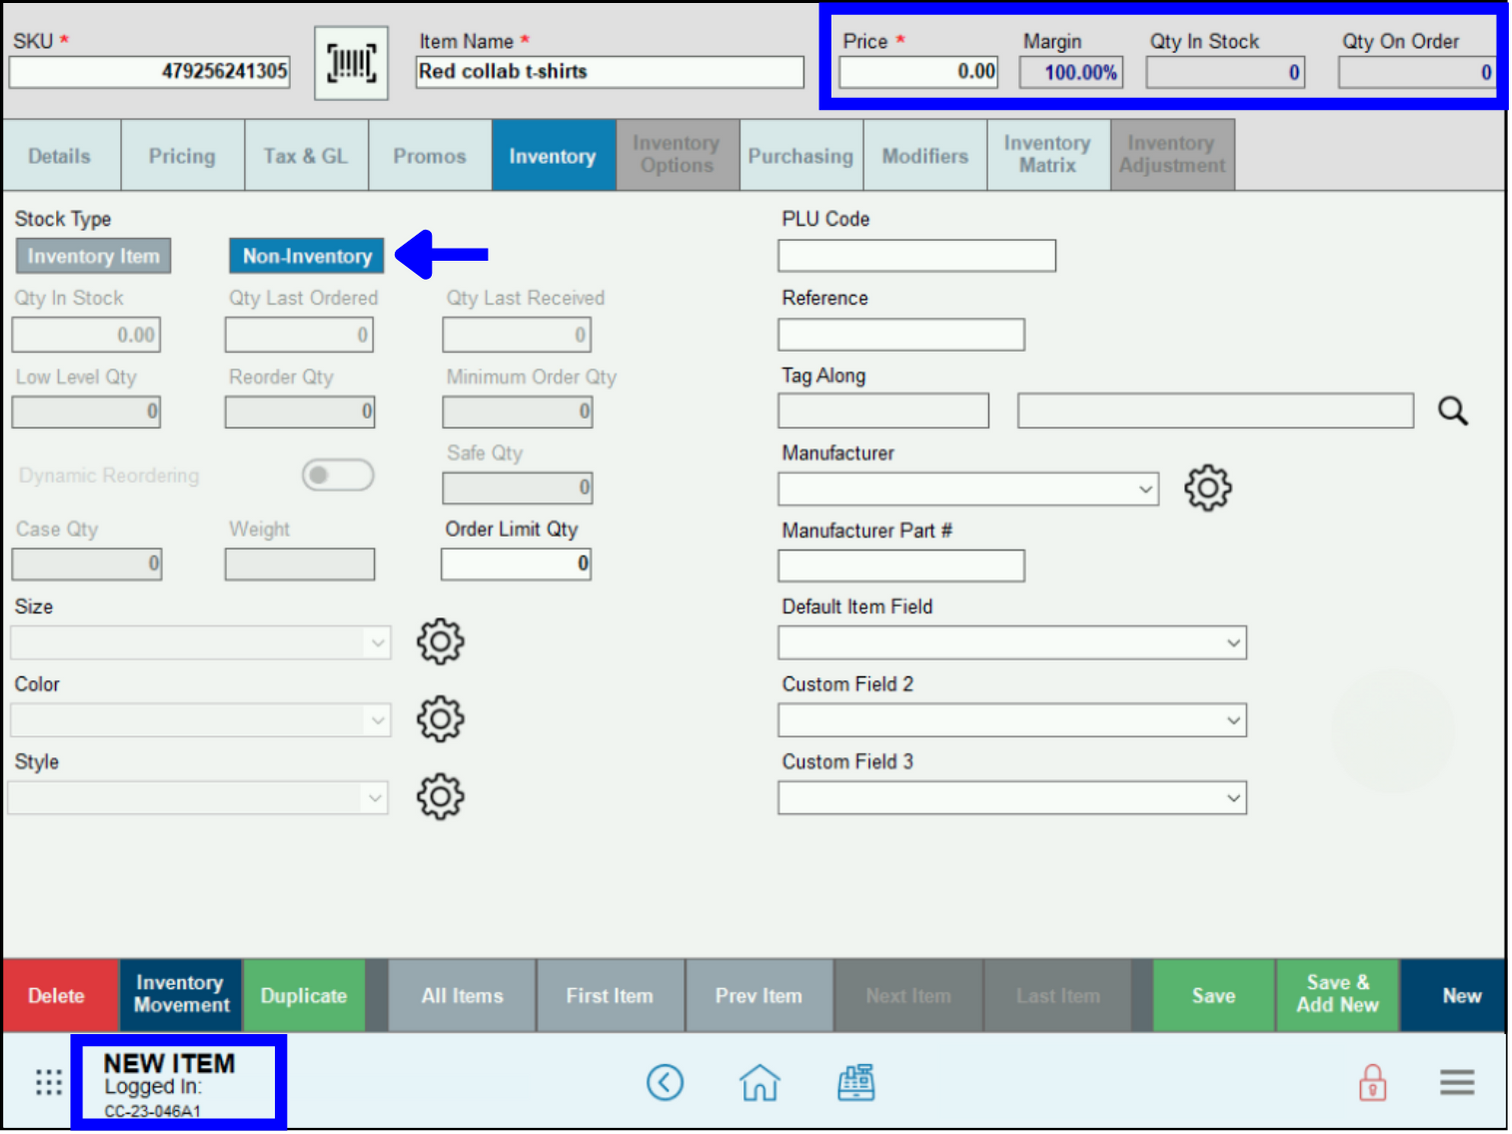
- Note: The new item being designated as the Inventory Matrix Group (e.g., Red collab t-shirts) should be set to Non-Inventory, with the Price, Qty in Stock, and Qty on Order set to zero. The separate Members (Items) within the Group can have the usual inventory and pricing information set from the Item Details page. (See the Add New Members to a Group section, below, for more information.)
To edit an existing Matrix Group:
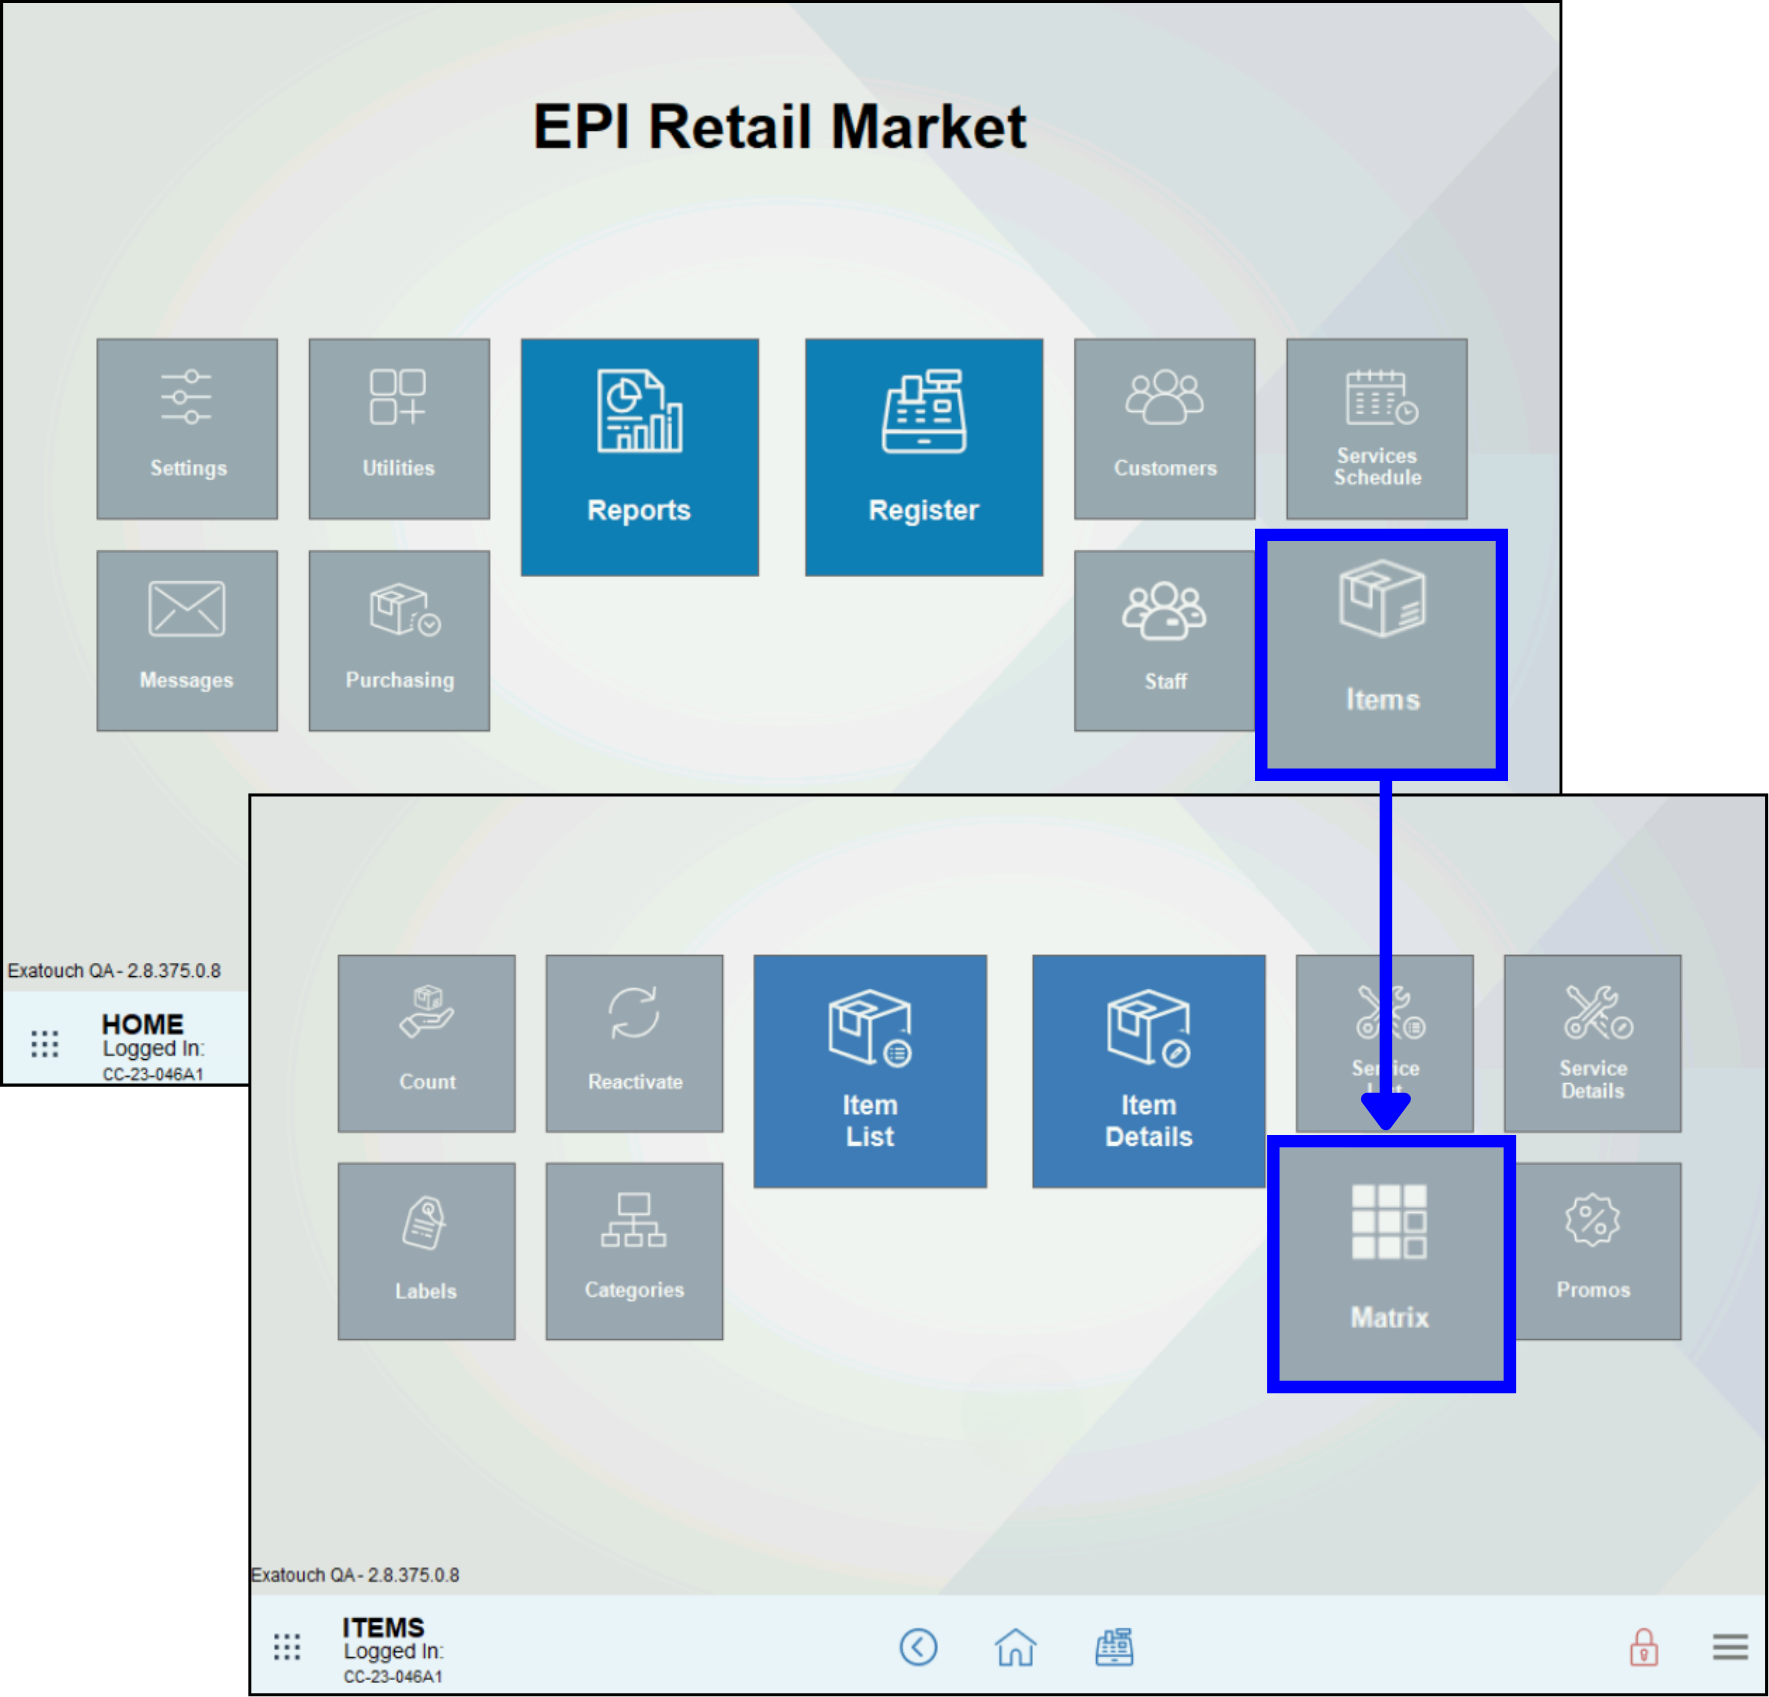
- Go to Home > Items > Matrix.
- Select the desired Group from the Matrix List.
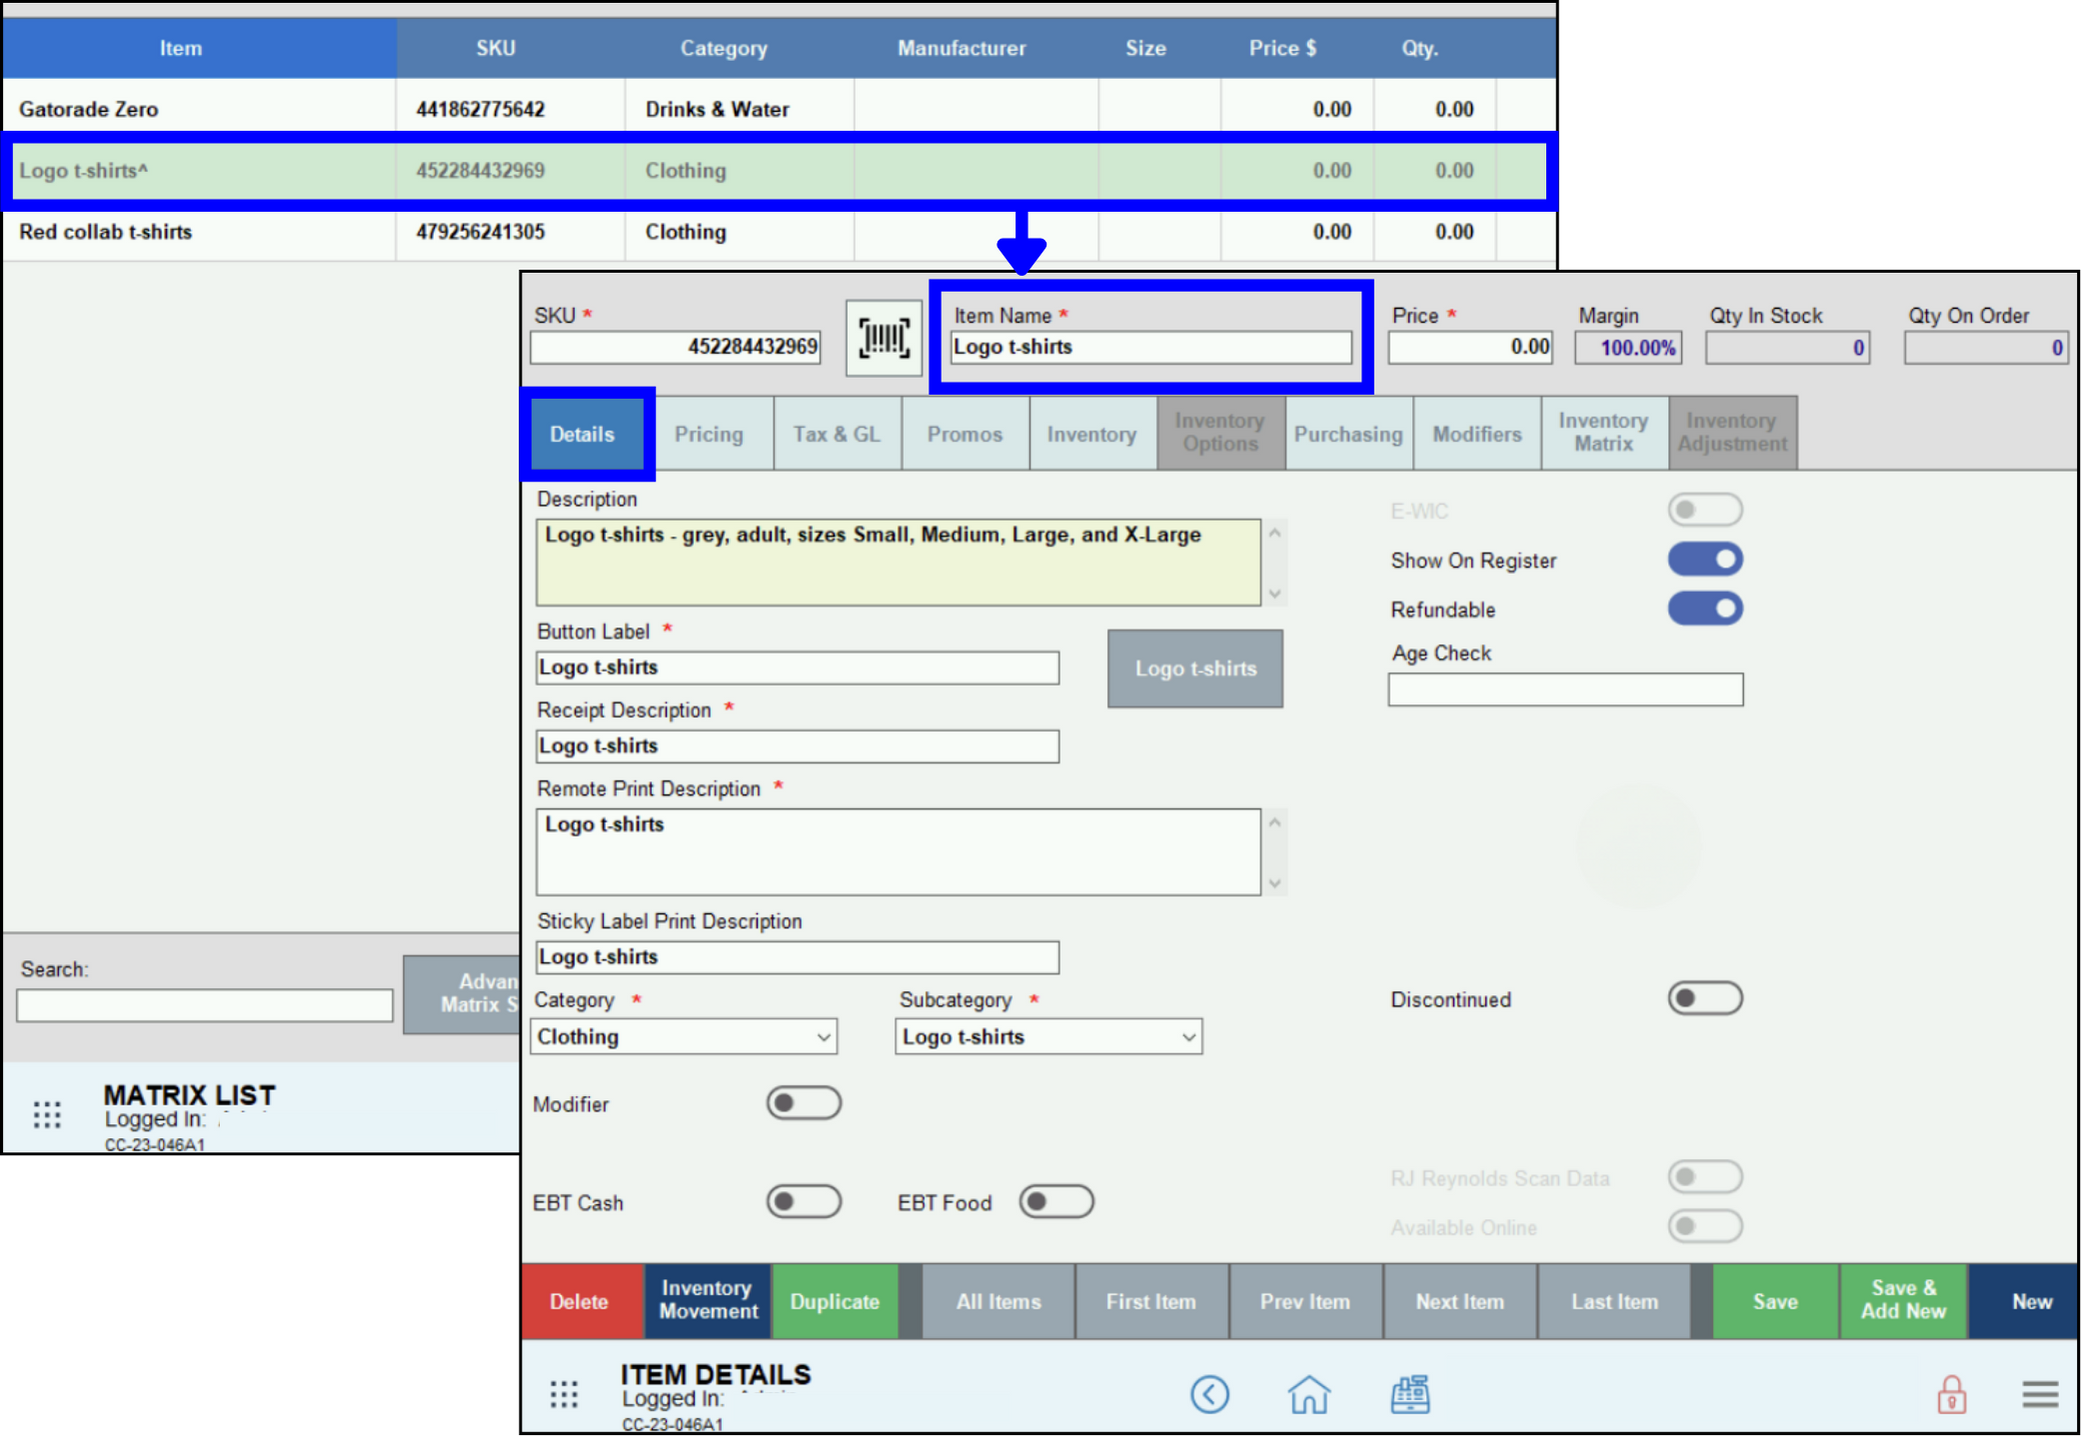
- Select the Details tab and make changes as needed.
- Click Save.
- Note: Because this is a Group rather than an Item, do not edit the SKU or Price fields.
Assign Existing Items to a Group
After creating the Group, merchants can assign already-existing inventory items as new Members of the Group. This is particularly useful for importing new items from an XML file. Converting items allows merchants to run more detailed reports with information such as item promos and inventory tracking ( which is especially helpful after an inventory import).
- Go to Home > Items > Matrix.
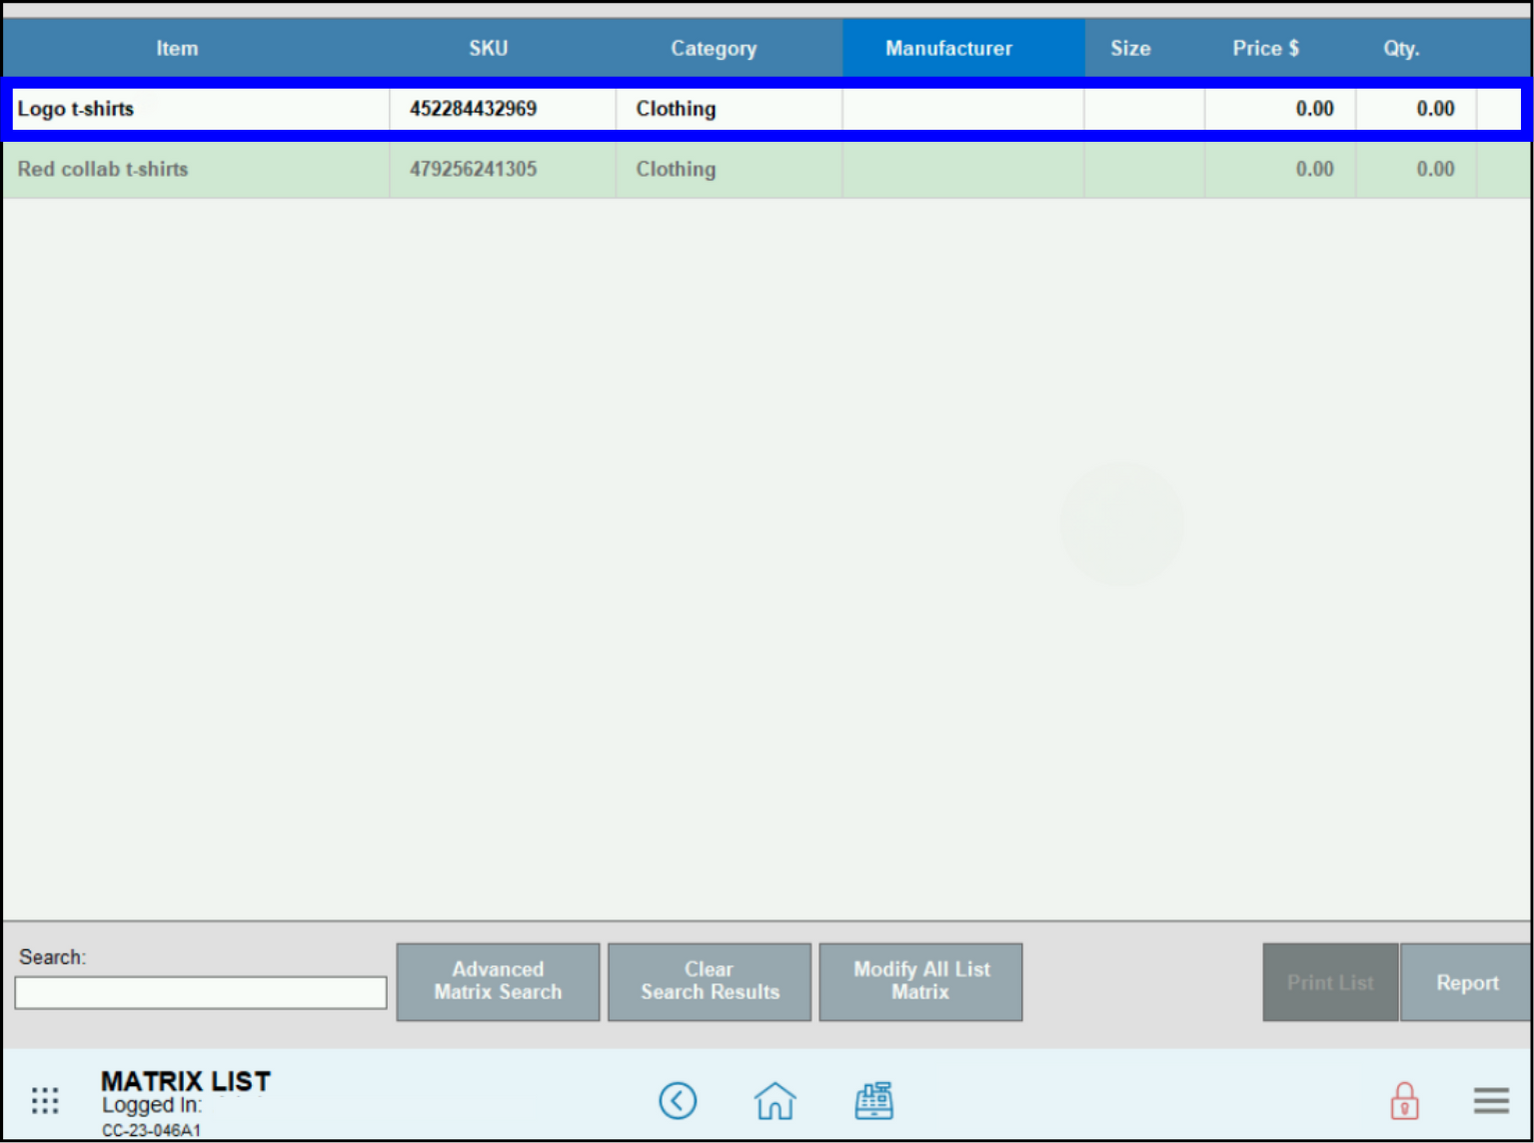
- On the Matrix List screen, select the desired Group.
- Click the Inventory Matrix tab.
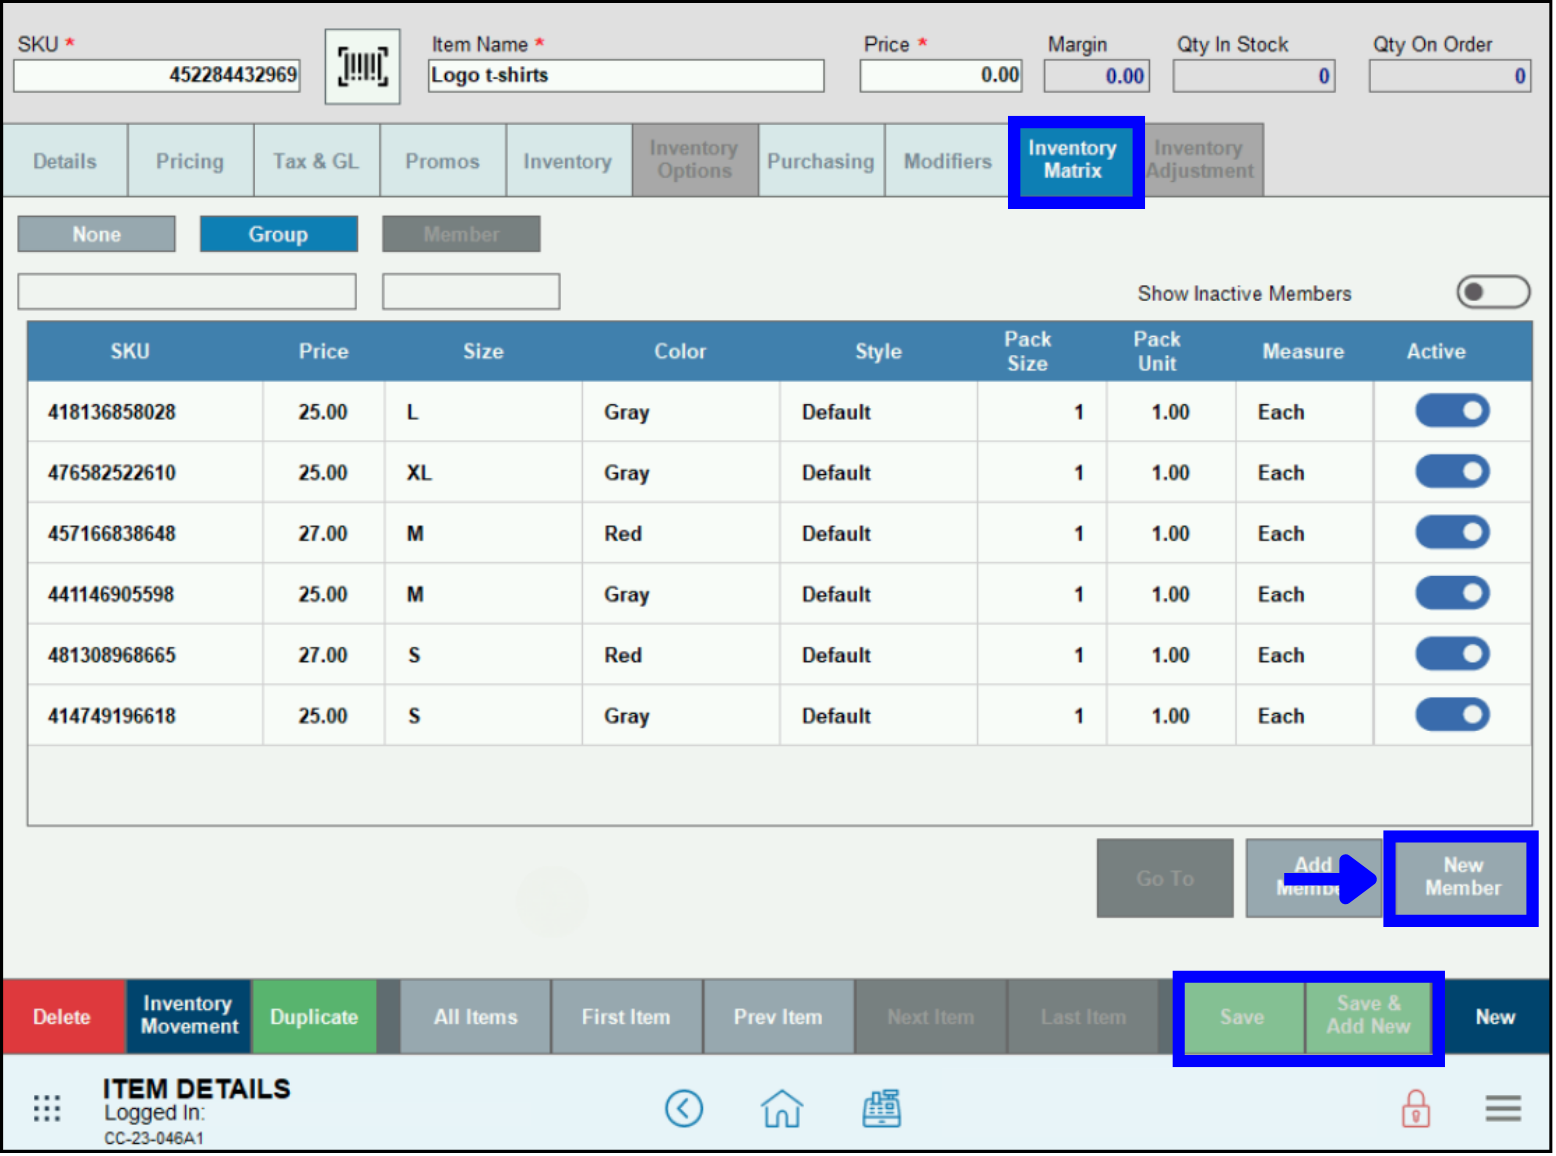
- Tap Add Member.
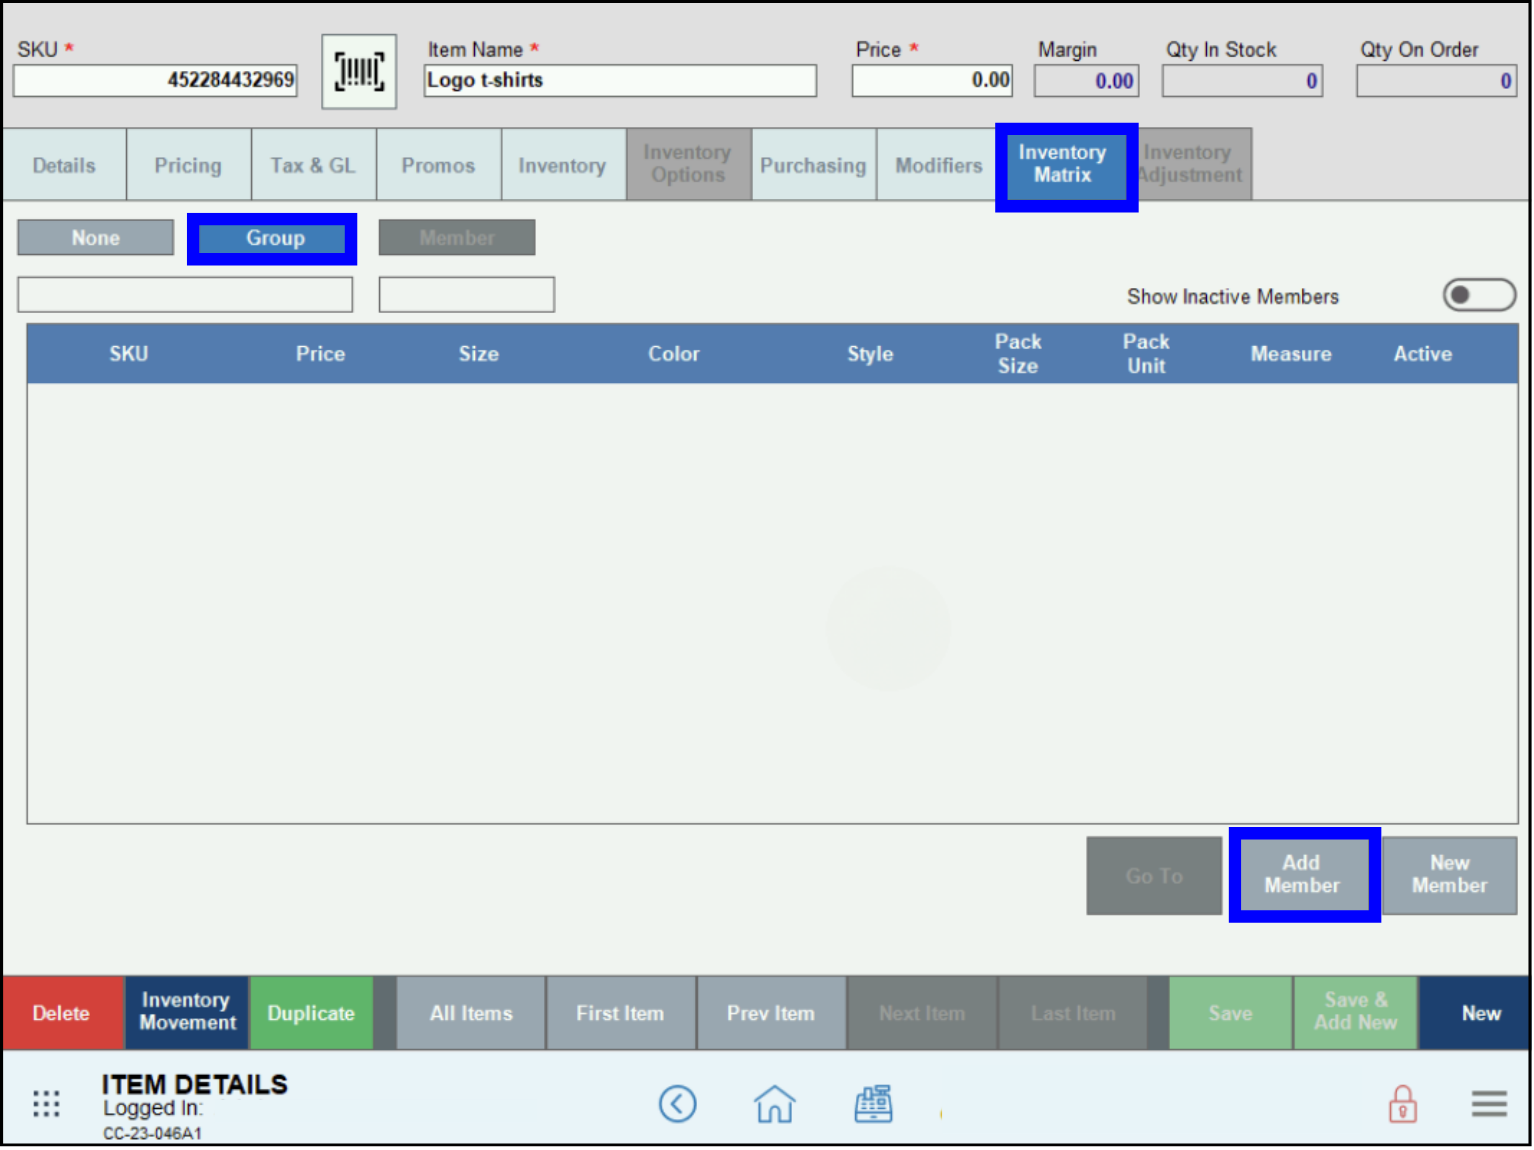
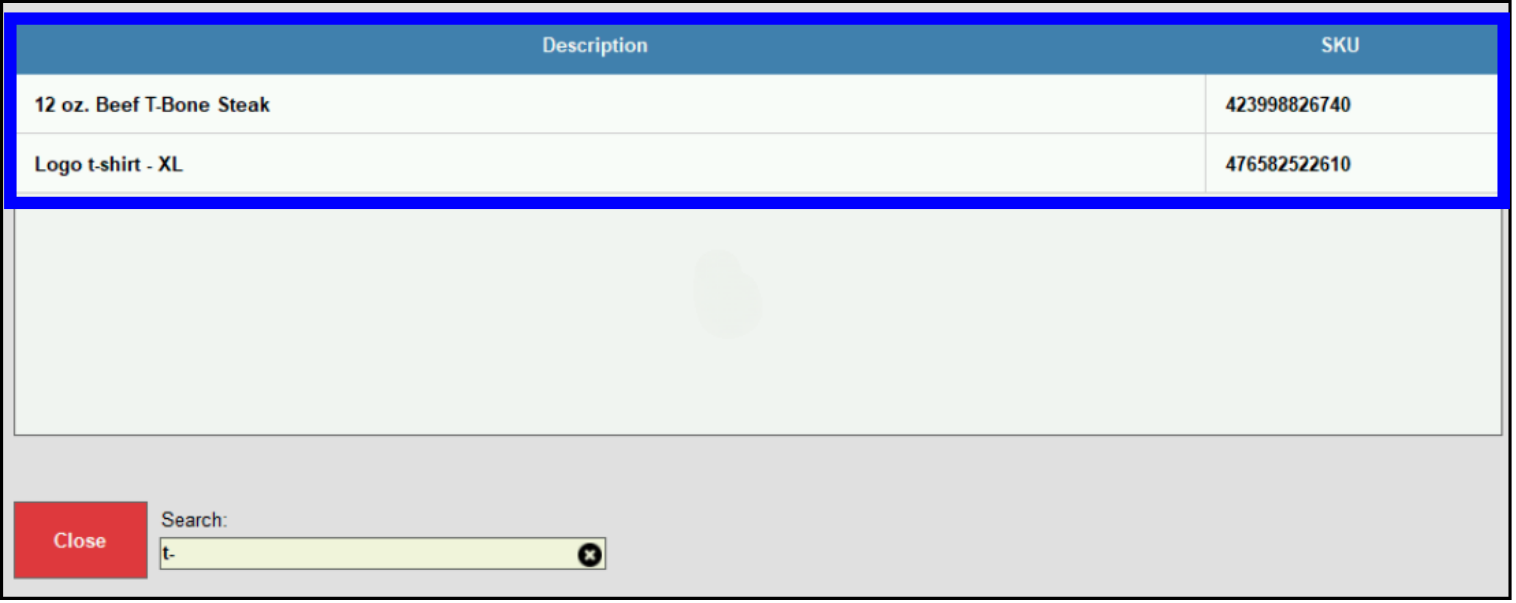
- Search the existing Items List for the Member(s) to add to the Group.
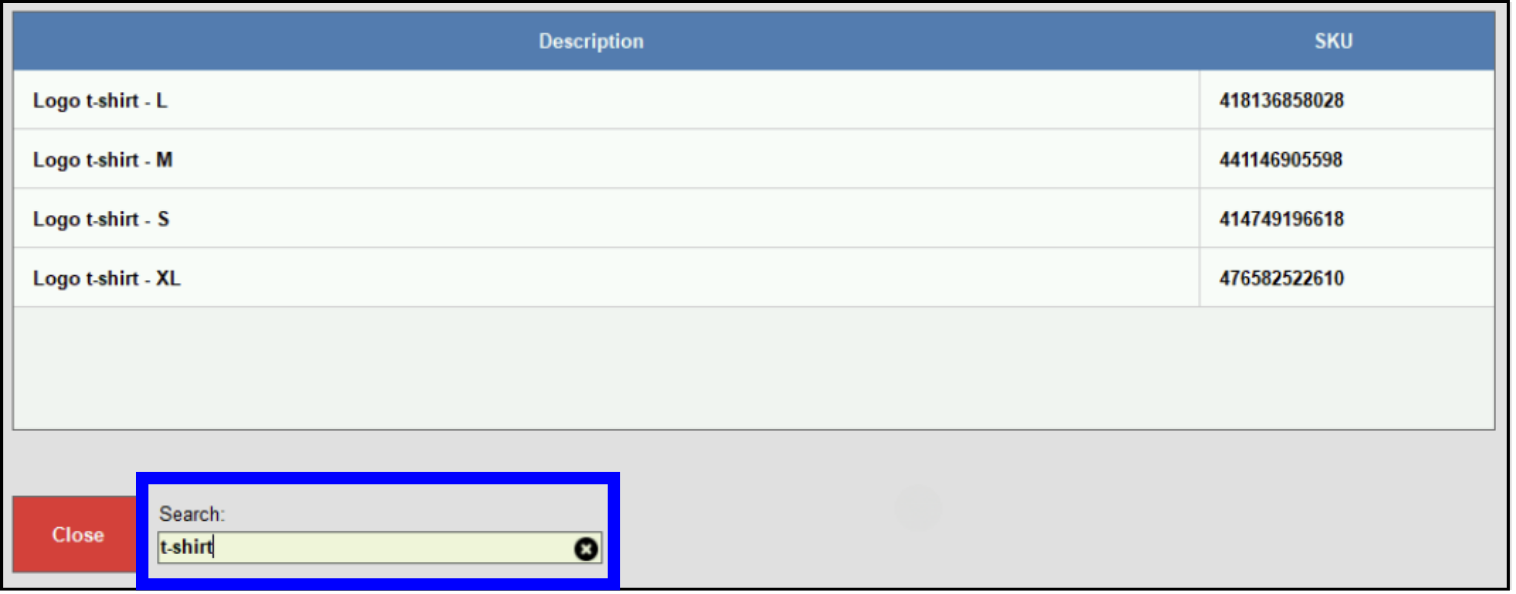
- Click on an Item. The SKU field will automatically populate with the Member’s SKU.
- Enter or verify the attributes:
- Price: The desired price
- Pack Size: The pack size
- Pack Unit: The unit size
- Size: The item size
- Color: The item color
- Style: The item style
- Tap Save.
To see Member details, select an Item and tap the Go To button. 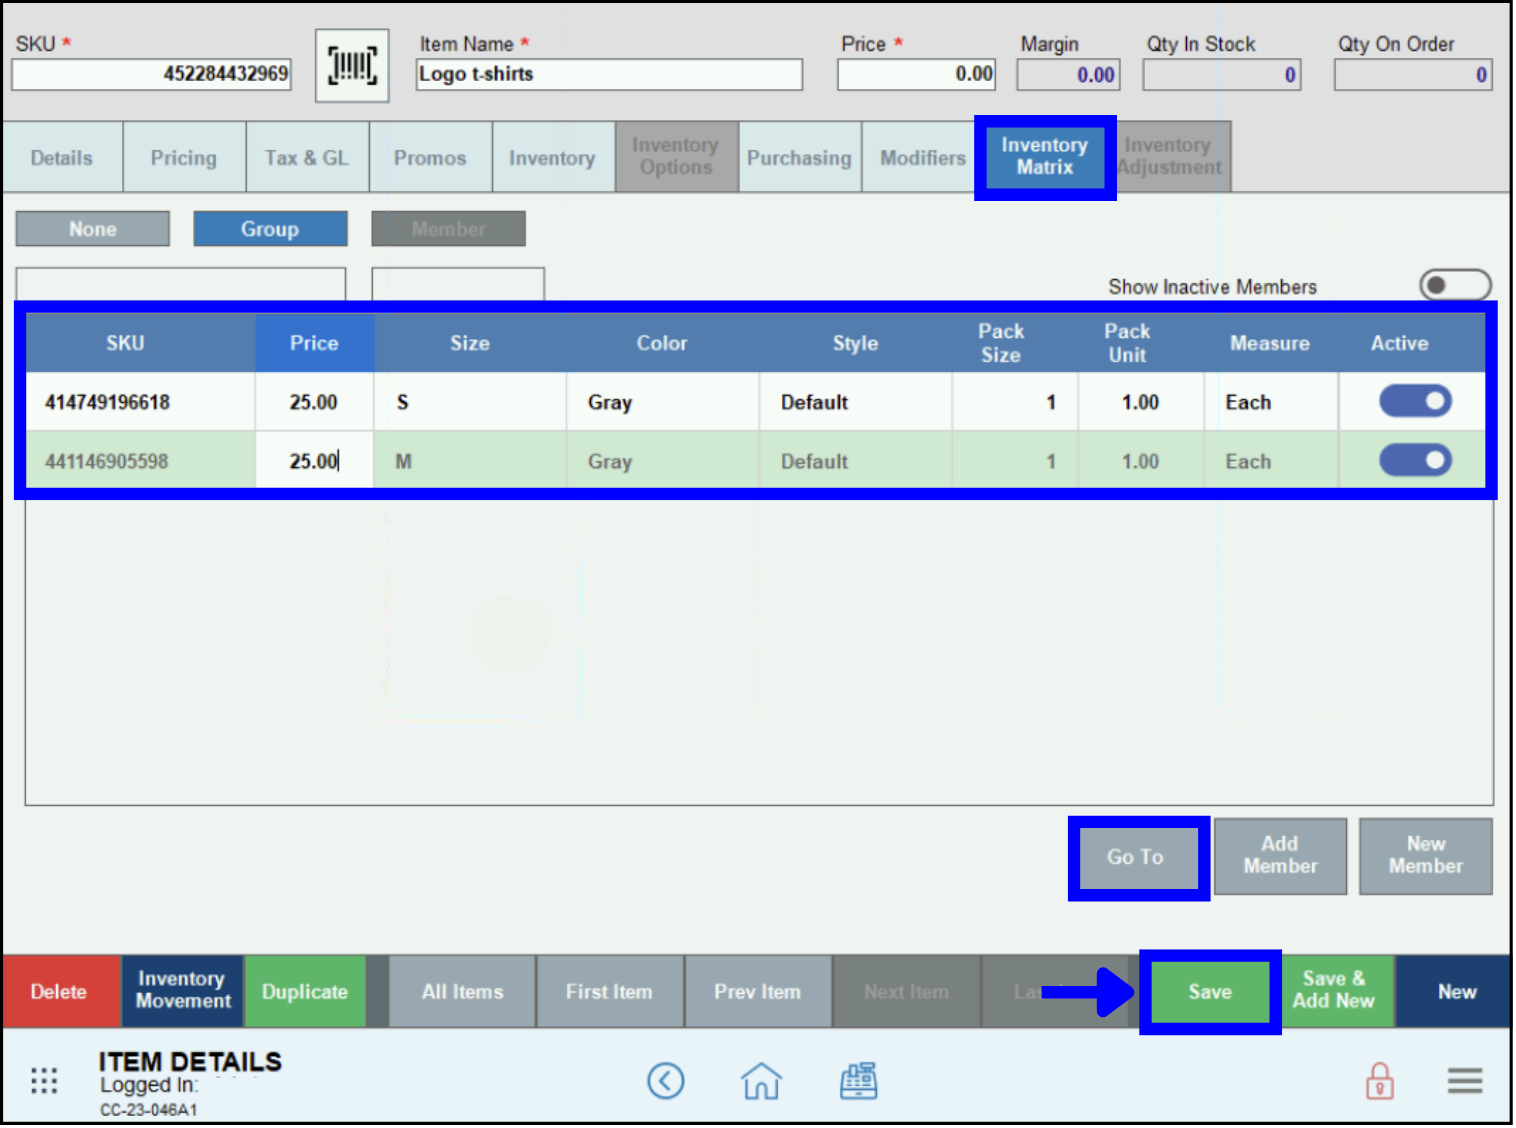
- Note: As you add new Members from existing items in the Inventory, that item will disappear from the main inventory list because it has been added to a discrete Group.
Create New Members (Items) of a Group
To add a new Member (that is not already an existing Inventory item) to a Group:
- Go to Home > Items > Matrix.
- Select the Group.
- On the Item Details page, under the Inventory Matrix tab, select New Member.
- Create New items, performing the following for each new item created:
- Price: The desired price
- Pack Size: The pack size
- Pack Unit: The unit size
- Size: The item size
- Color: The item color
- Style: The item style
- Tap Save or Save & Add New (to add another Member).
- Note: As new Members (which are not already existing Items in the inventory) are created, each individual item becomes associated with the Group SKU number. When the new Member is saved, it will also be automatically assigned a new individual SKU number.
To learn more about managing and adjusting inventory counts, see Modify Inventory Levels and Receive Submodule.
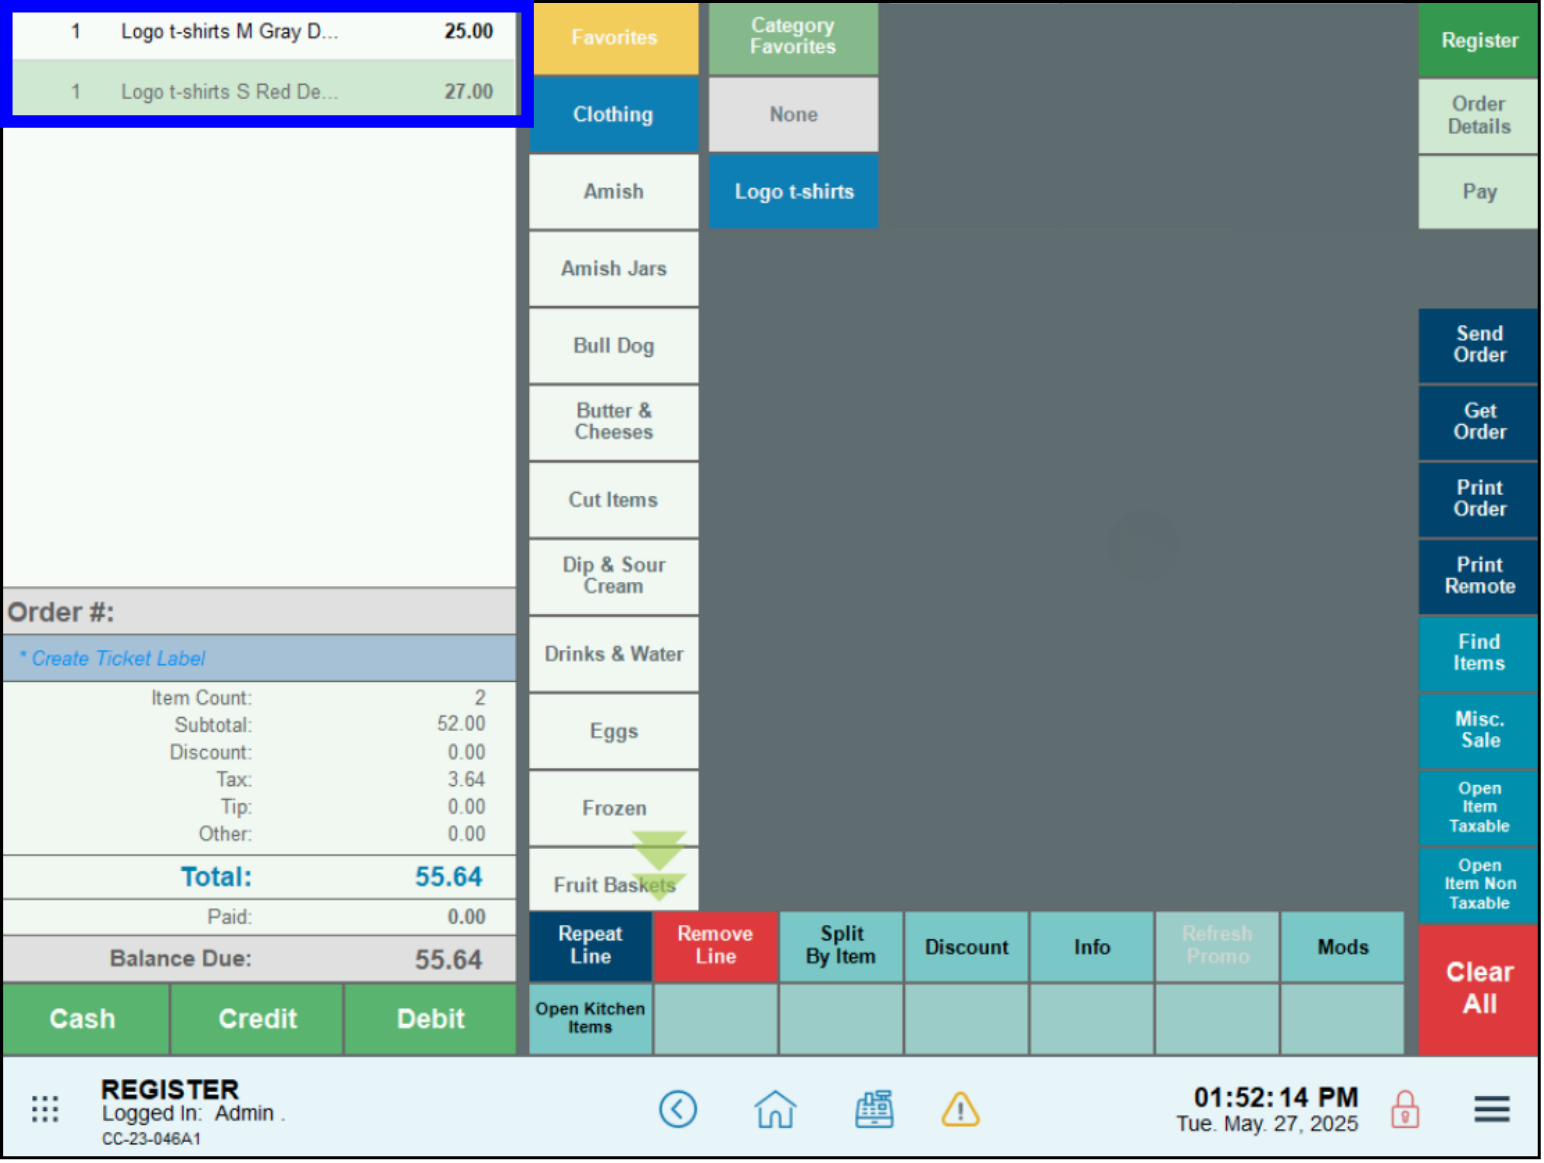
- From the Register, tap Group or scan the Group SKU.

- Select the desired Member (Item) to add them to the order.

- The selected items display on the Register.
Matrix Member Prompt at the Register
The Register Preferences can be set up with a Matrix Member Prompt, to allow either quick selection of a single item at the Register, or to display all of the Member Items within the Group.
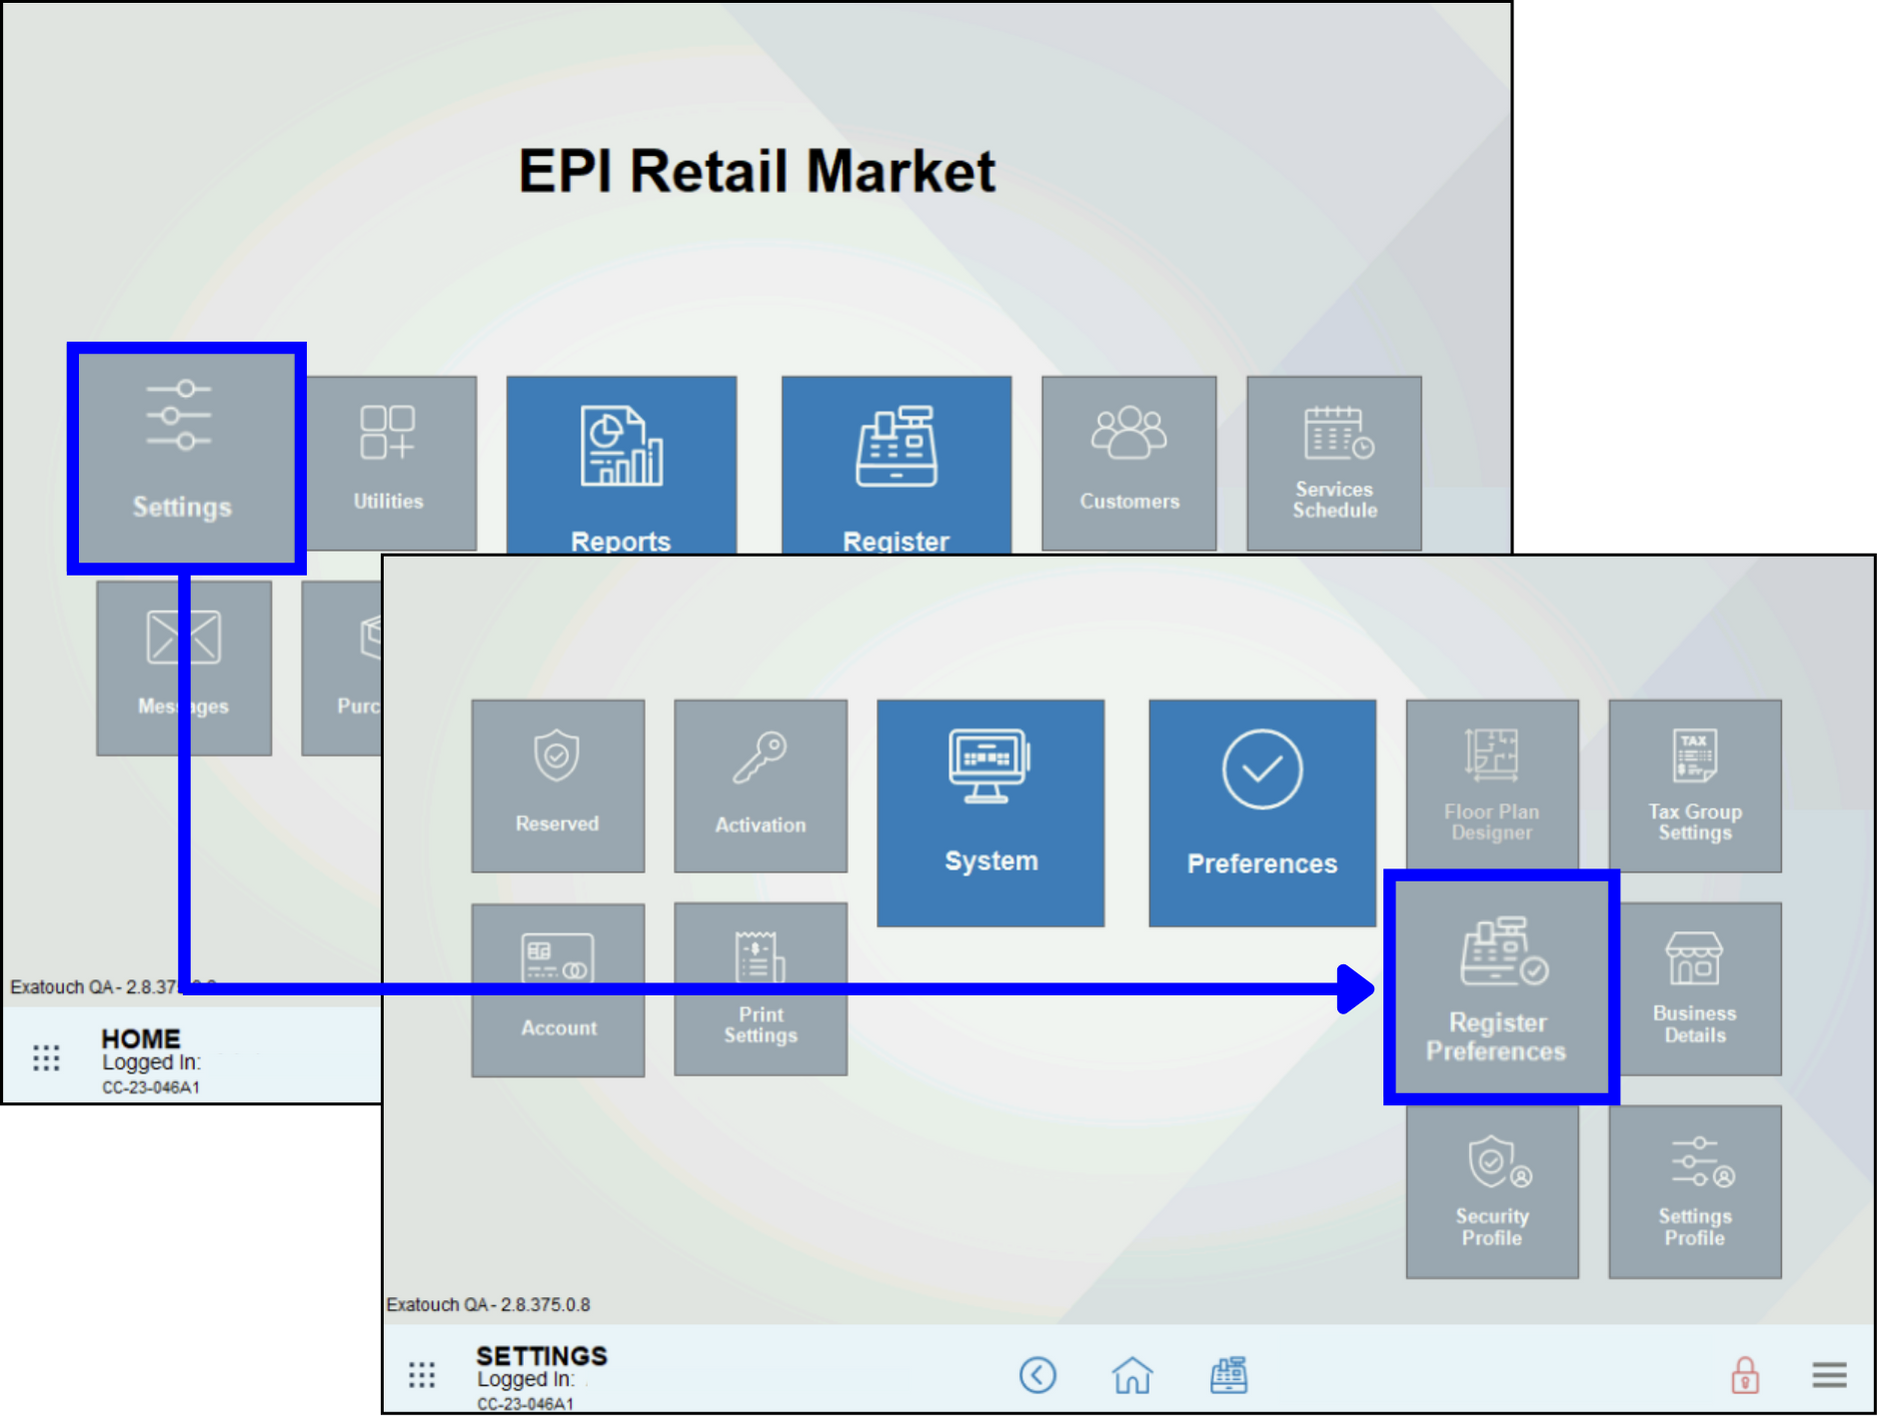
- Go to Home > Settings > Register Preferences.
- On the General tab, go to the Matrix Member Prompt toggle.
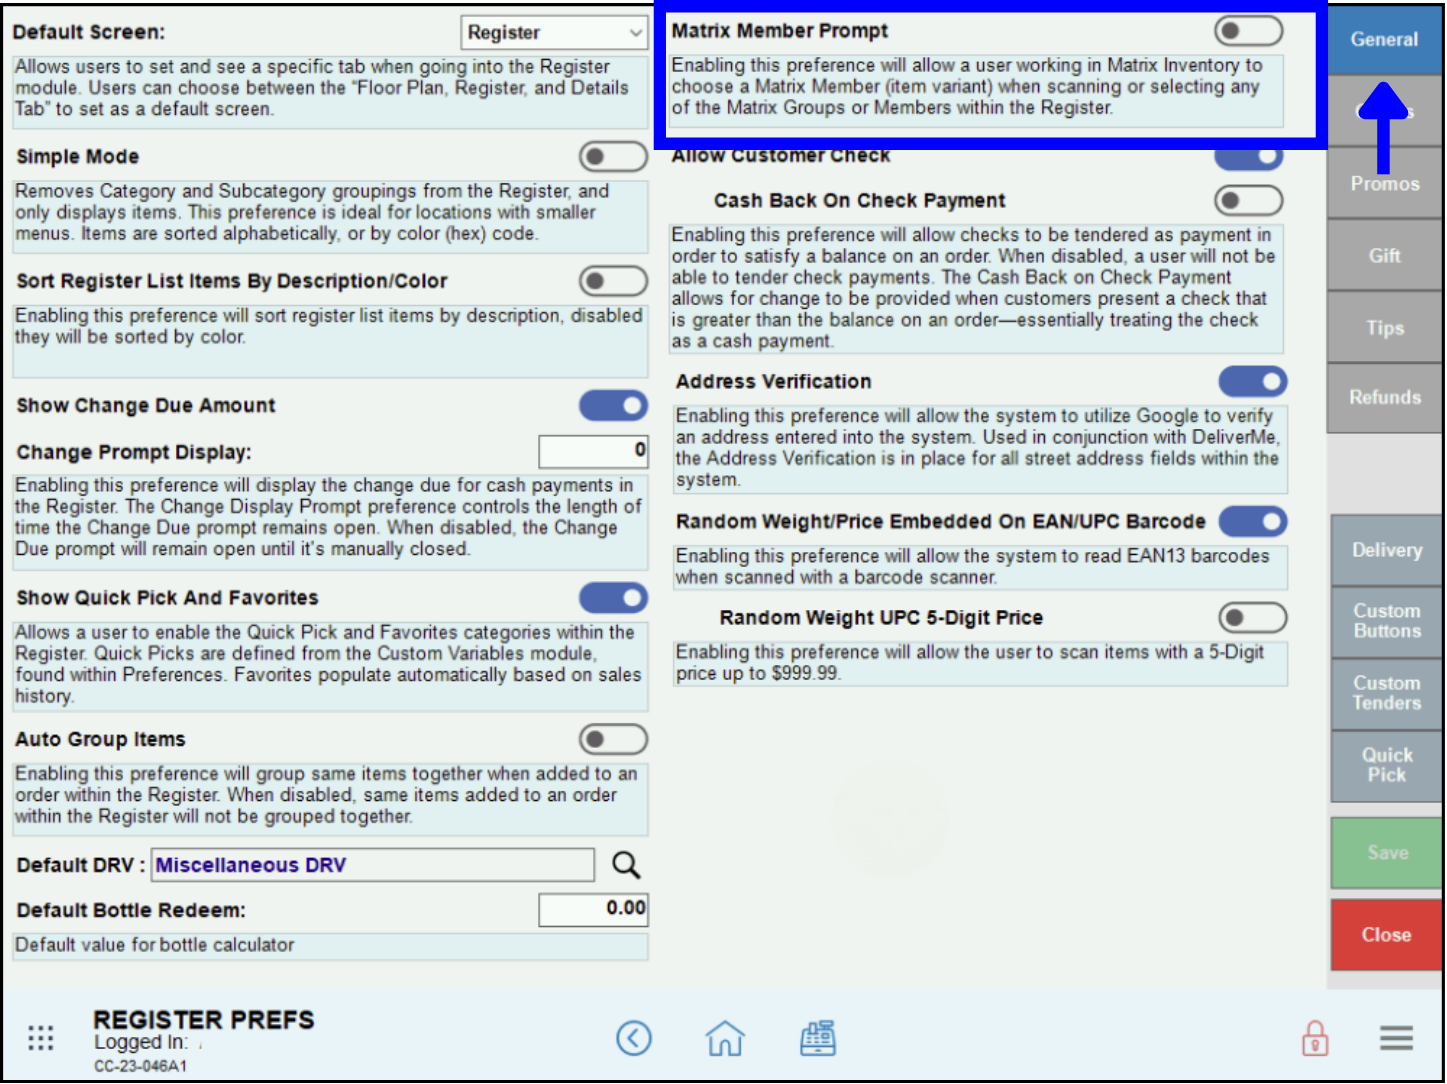
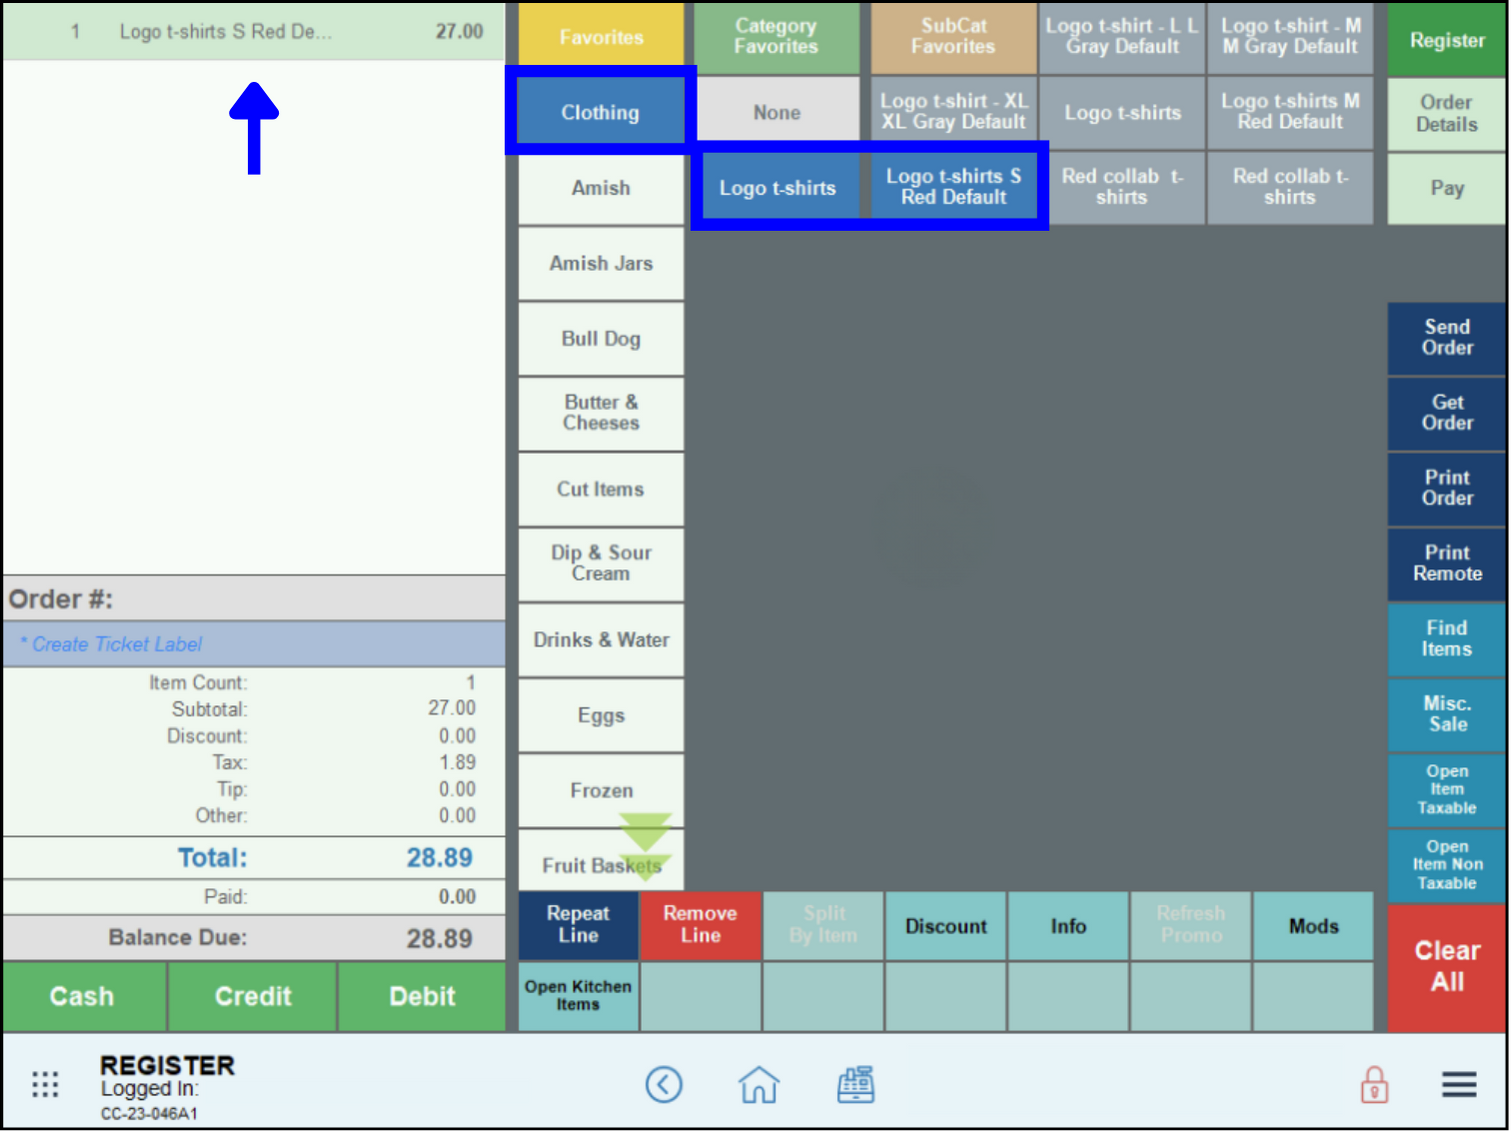
- If the toggle is deactivated, selecting a specific Matrix Item button on the Register will add it directly to the order. Here, Clothing is the Category, Logo t-shirts is the Matrix Group, and Logo t-shirts S Red is the individual Matrix Item.
- If the toggle is activated, selecting any Matrix Item at the Register will bring up the entire Group. If the list is extensive, use the Search field.
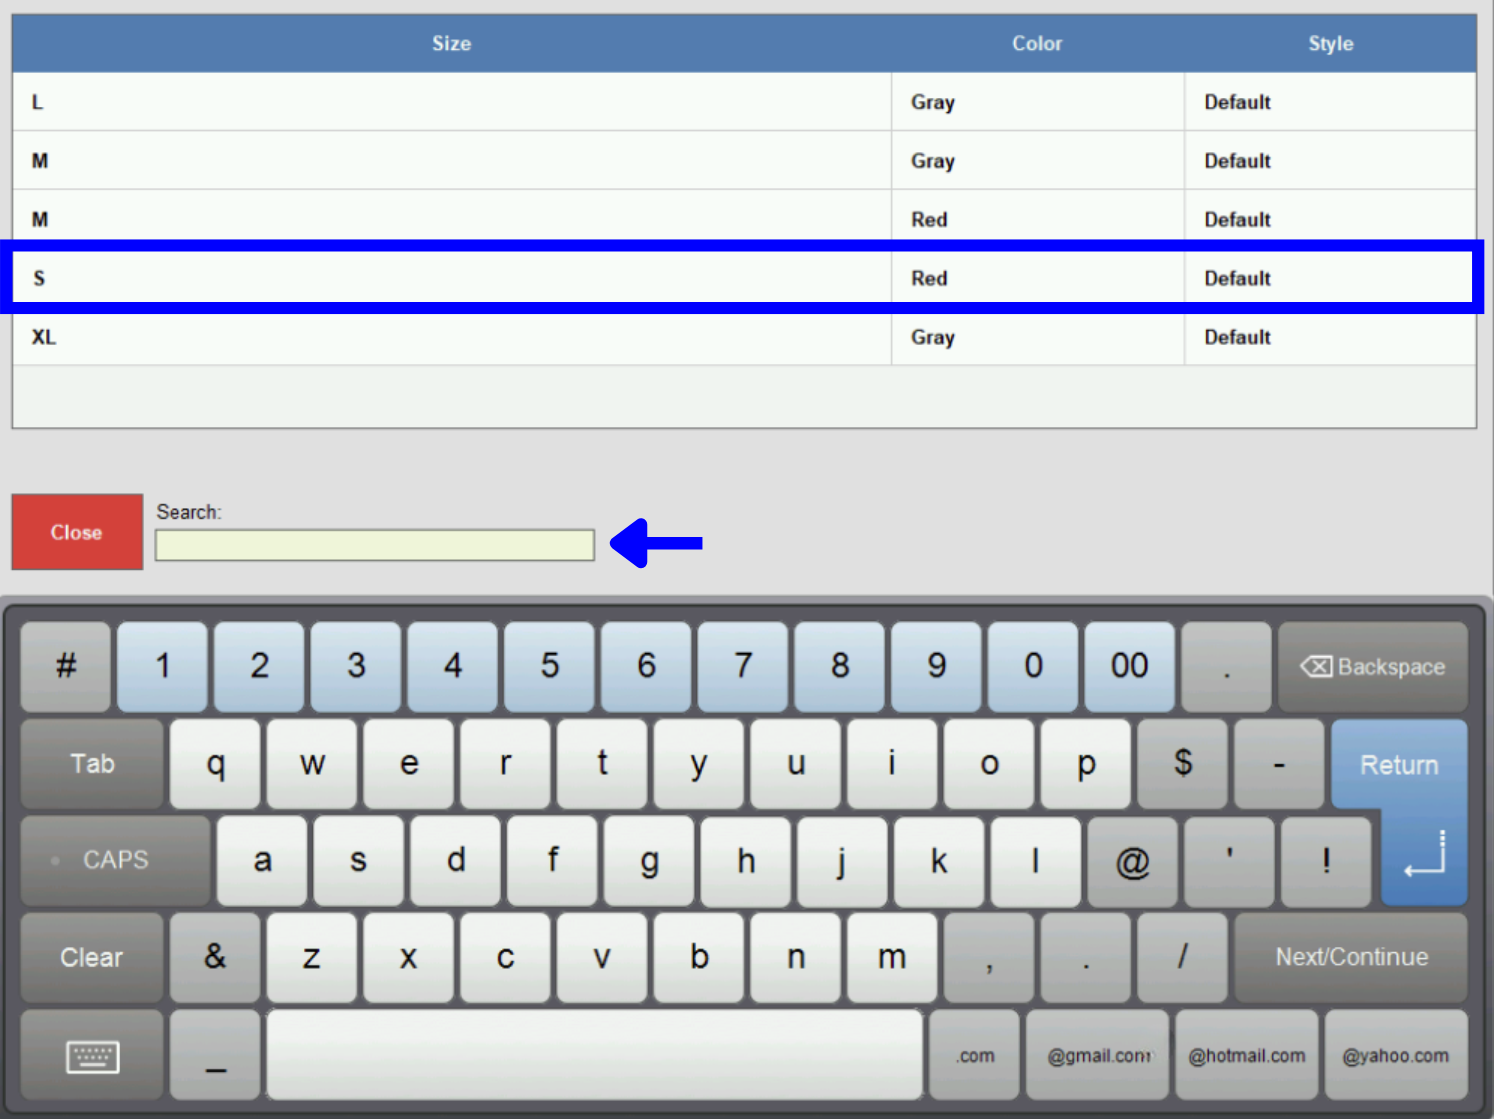
- Select a specific Item from the list to add it to the order.
- Note: The activation/deactivation of the Matrix Member Prompt toggle is a personal preference of the user. If there are only a few Item options available, it may be faster at checkout to have the toggle deactivated. For Groups with multiple Item options, it may be easier to activate the button so that the entire list can be searched.
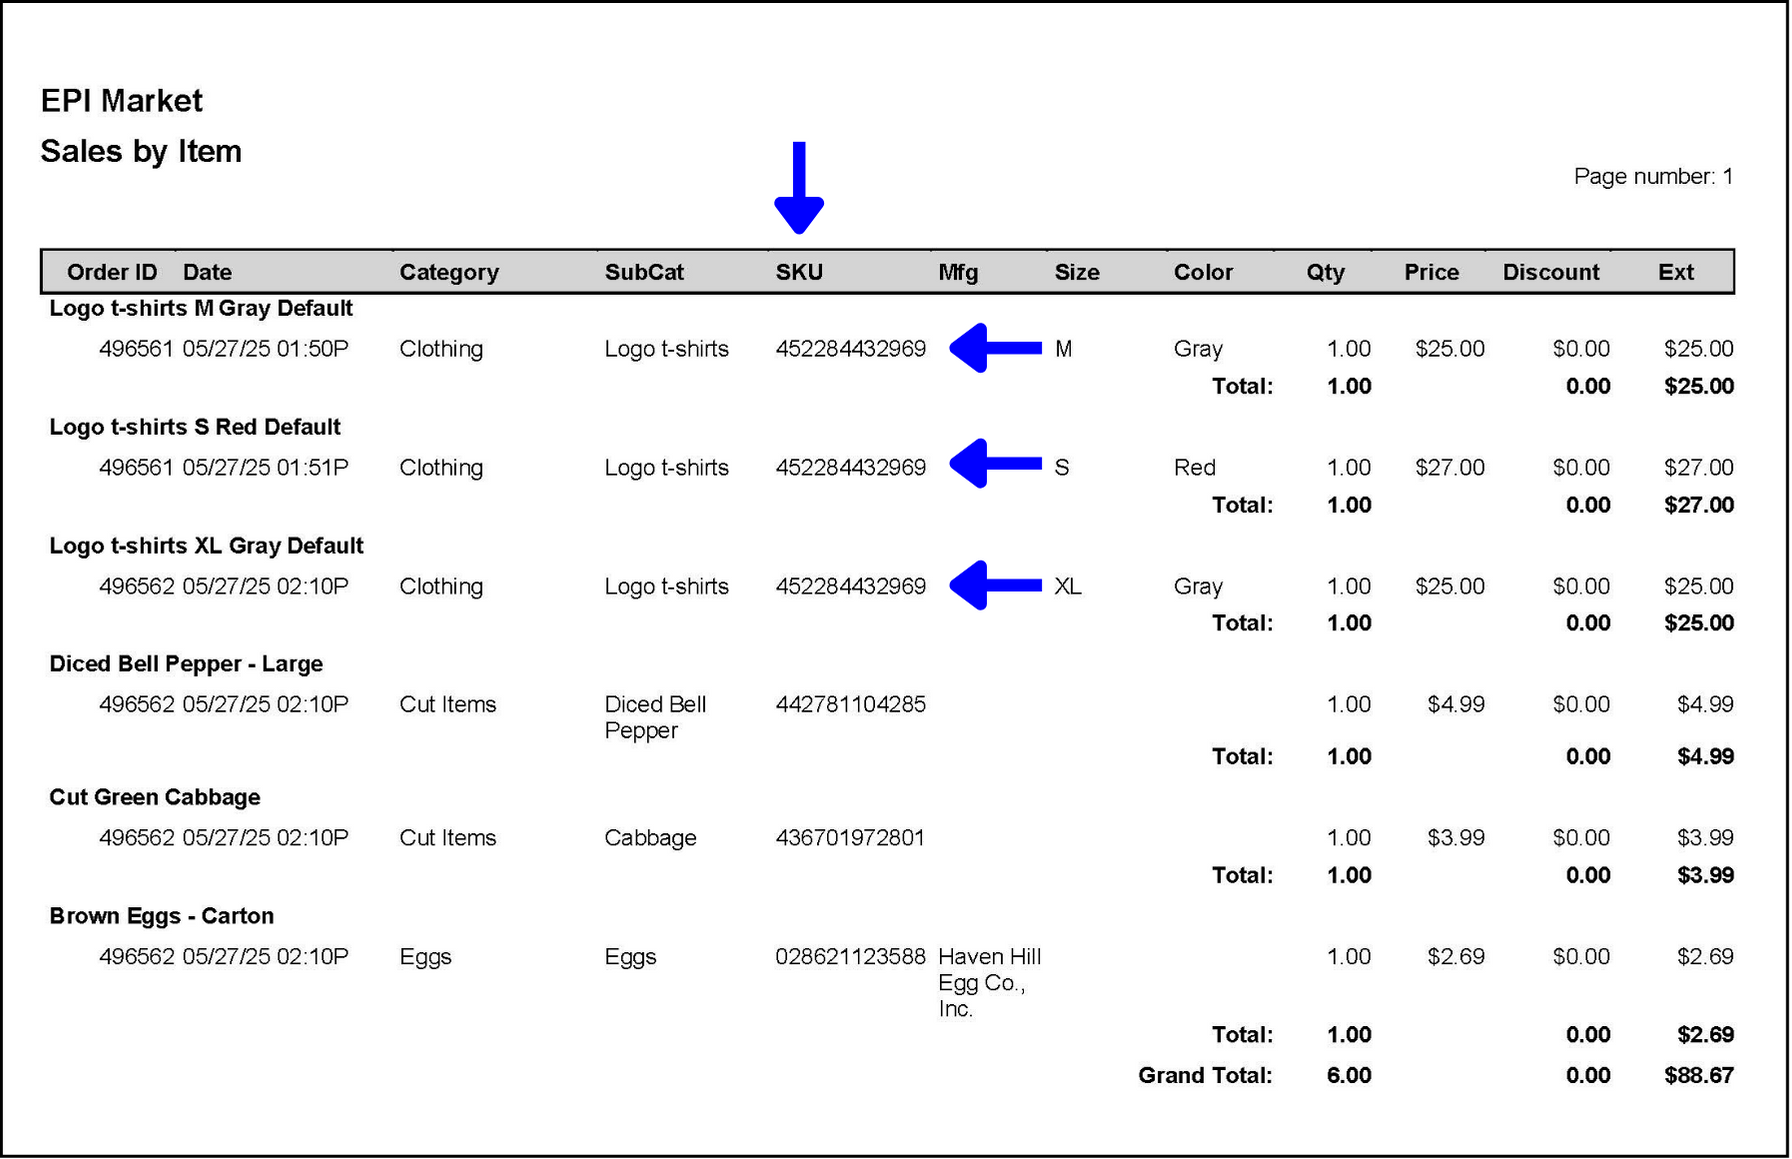
Sales Reports will display the Group SKU rather than the individual Member (Item) SKU. To run a report:
- Go to Home > Reports > Sales.
- Select a report type, such as Item.
- Select the Report parameters.
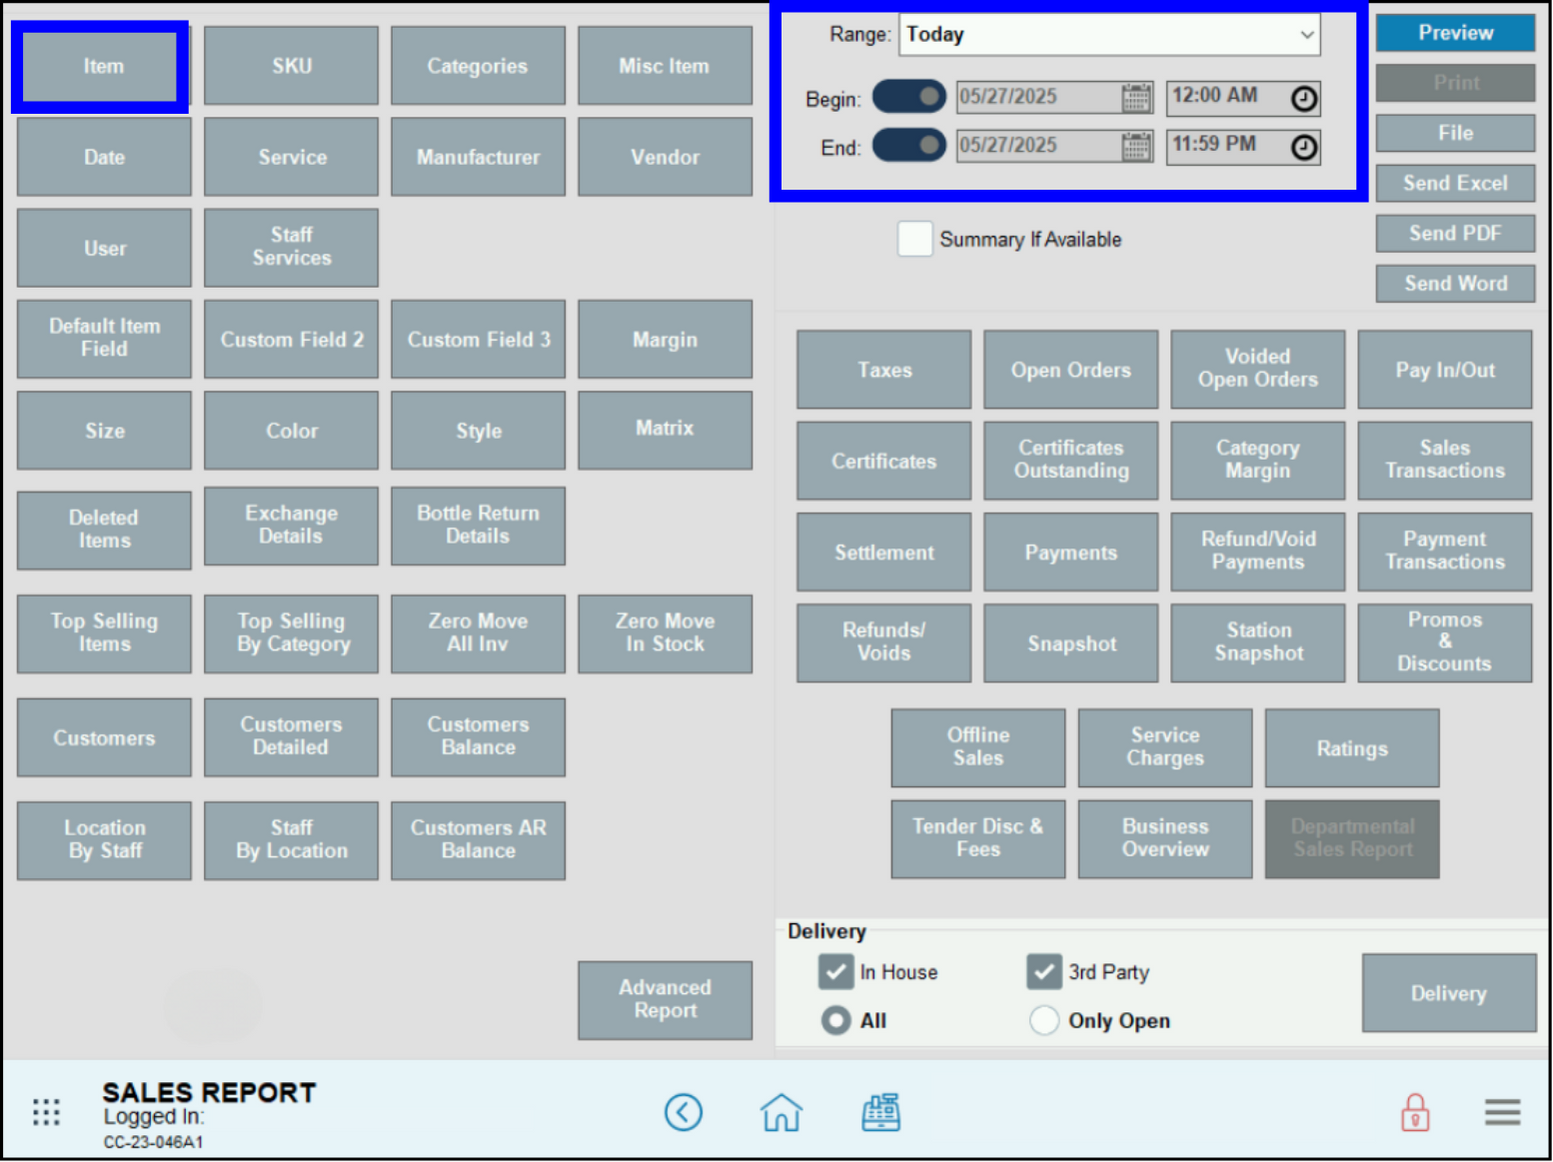
- The report will display the Group SKU for all Members of a Group.
How can we improve this information for you?
Registered internal users can comment. Merchants, have a suggestion? Tell us more.