Create new message campaigns for marketing purposes. Set up new email distribution lists and send email blasts. Distribution lists can be customized for targeted advertising of promos, discounts, and other announcements.
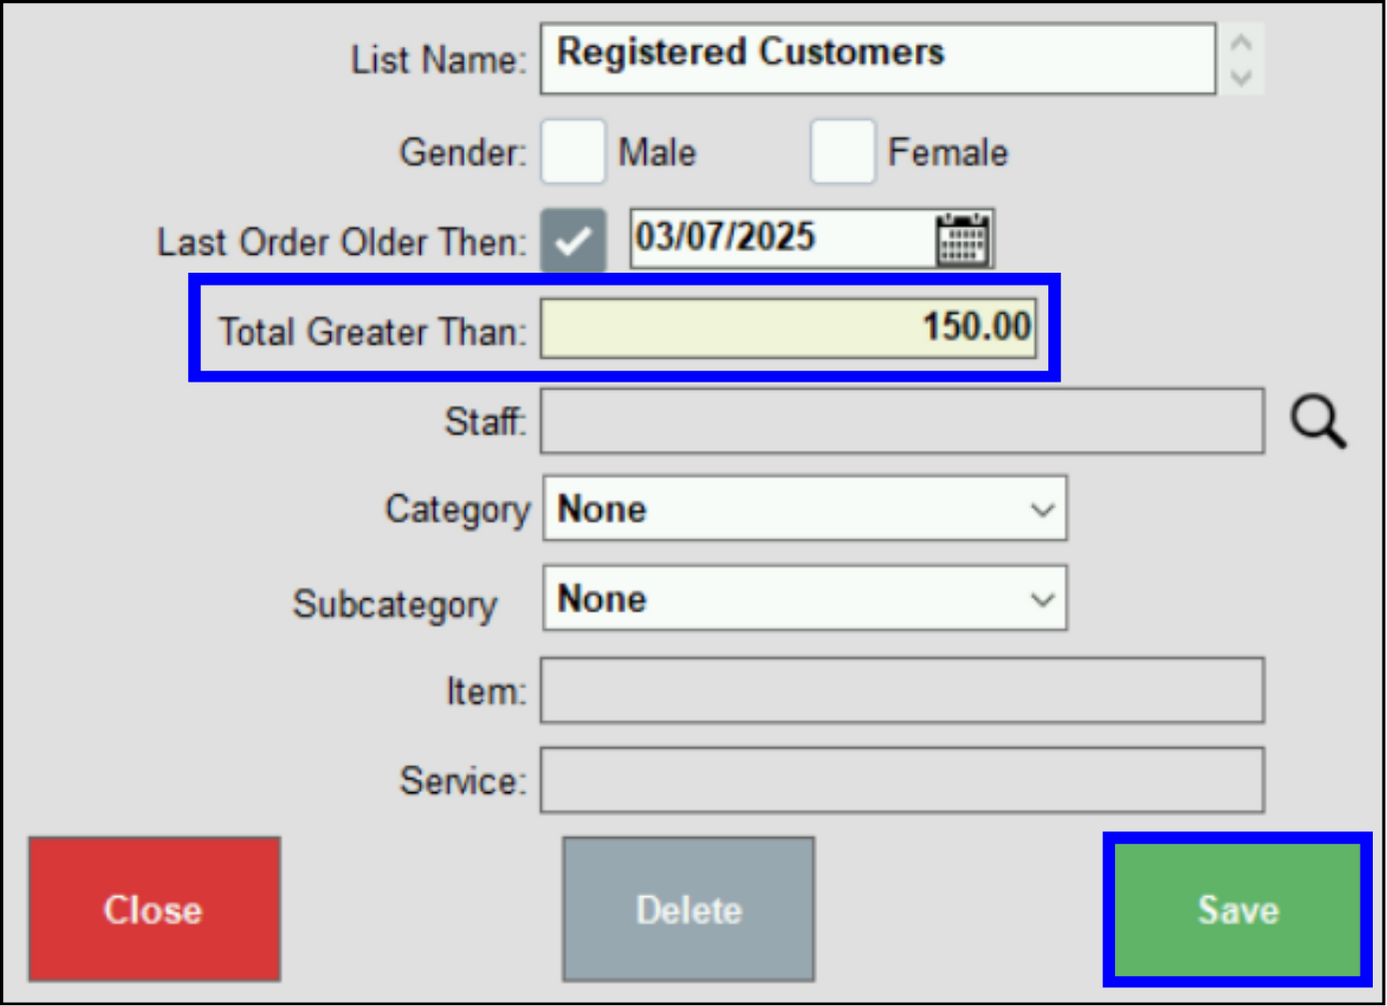
- Example: Salon promotes their monthly special on coloring services for women. Create an email distribution list by using these search filters: Last Visit Older Than: “03/07”, Total Greater Than “$100.00”.
Select filter options to compile a list of client email addresses with shared characteristics relevant to your email campaign.
- From Home, tap Messages > New. The New Message work area displays.
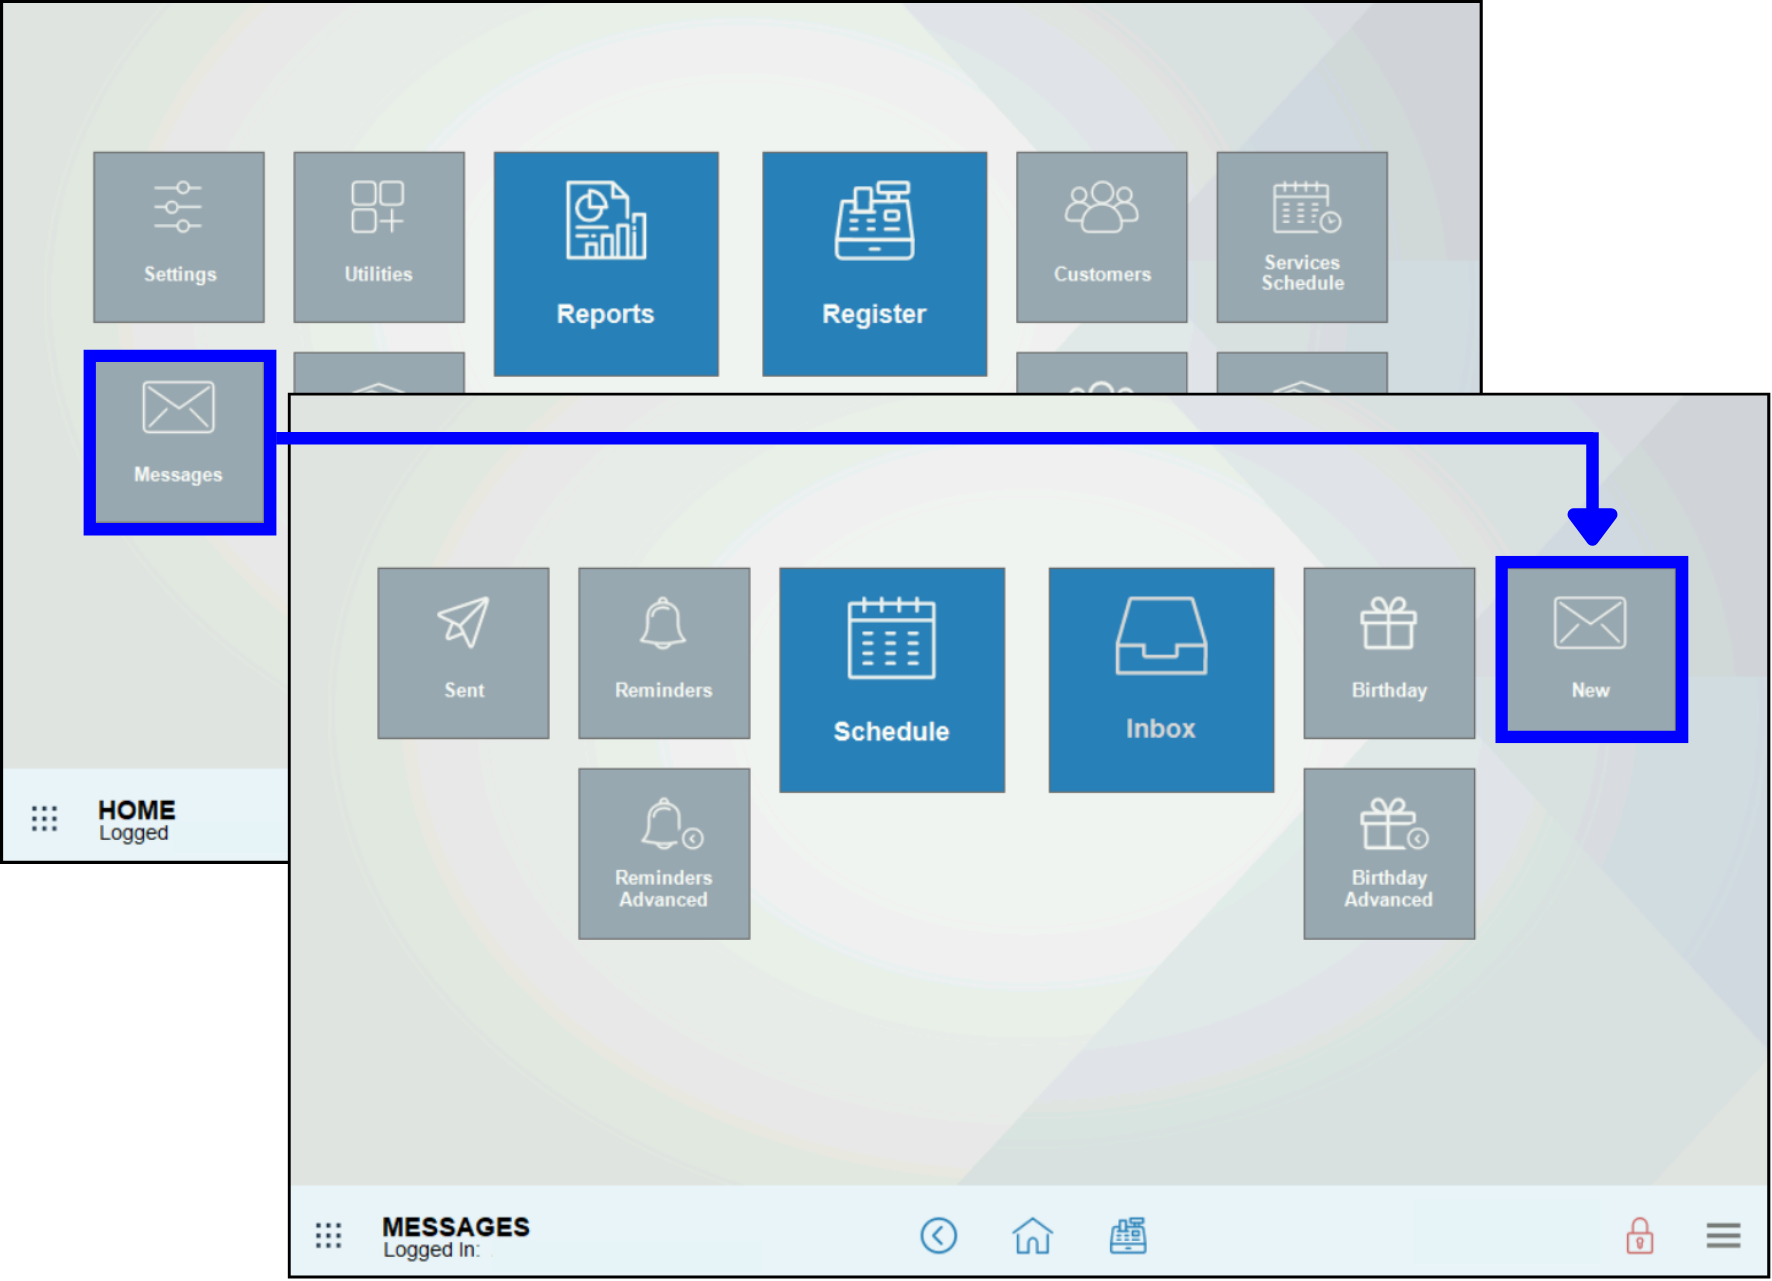
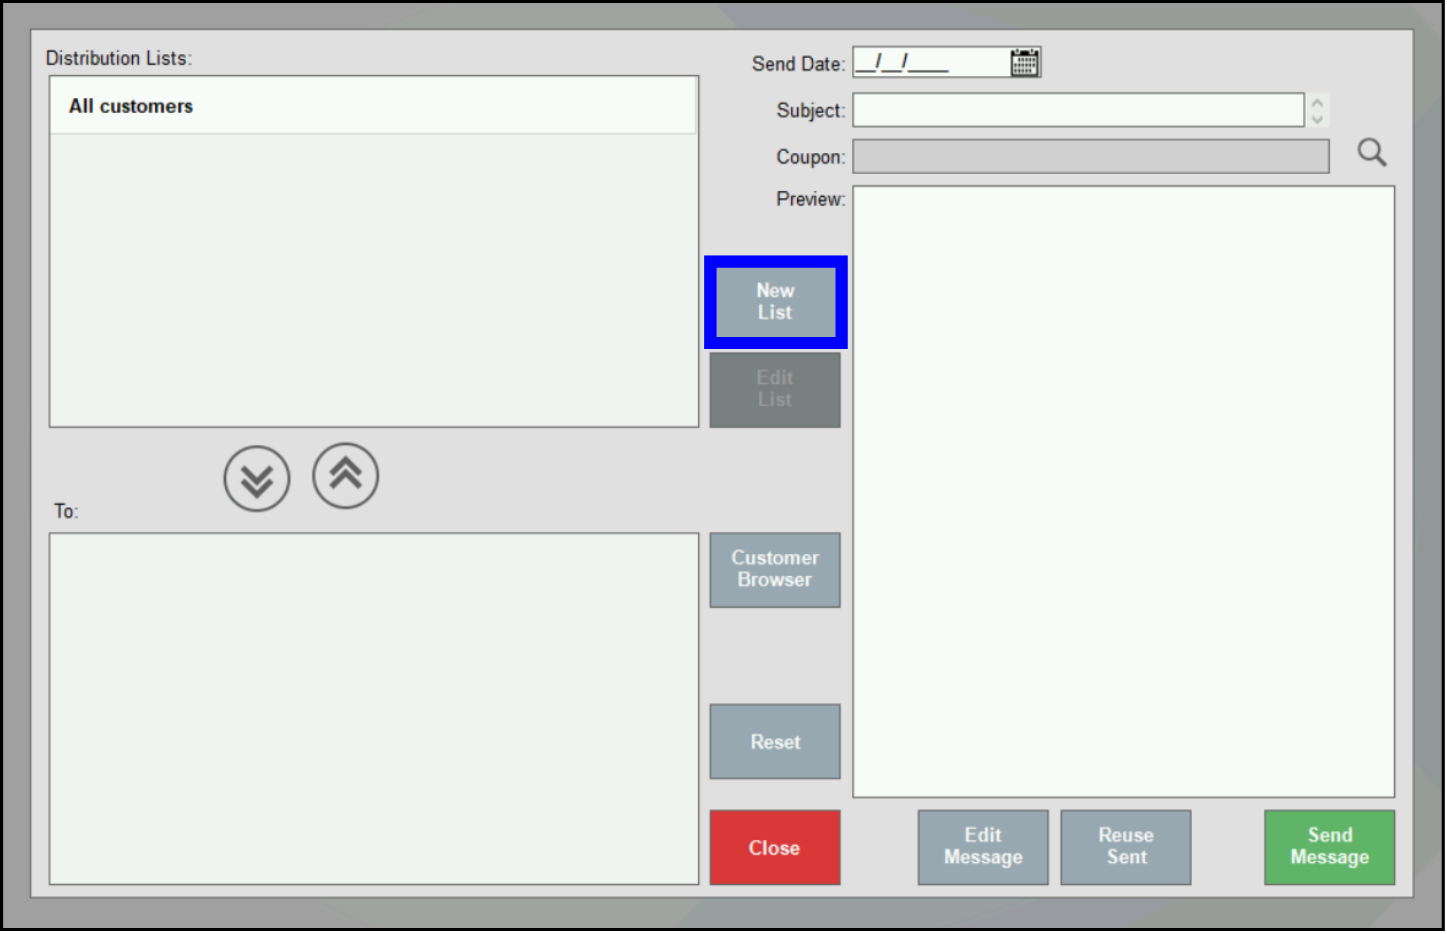
- Tap New List. The Create Distribution List section displays.
- Enter filter options in these fields:
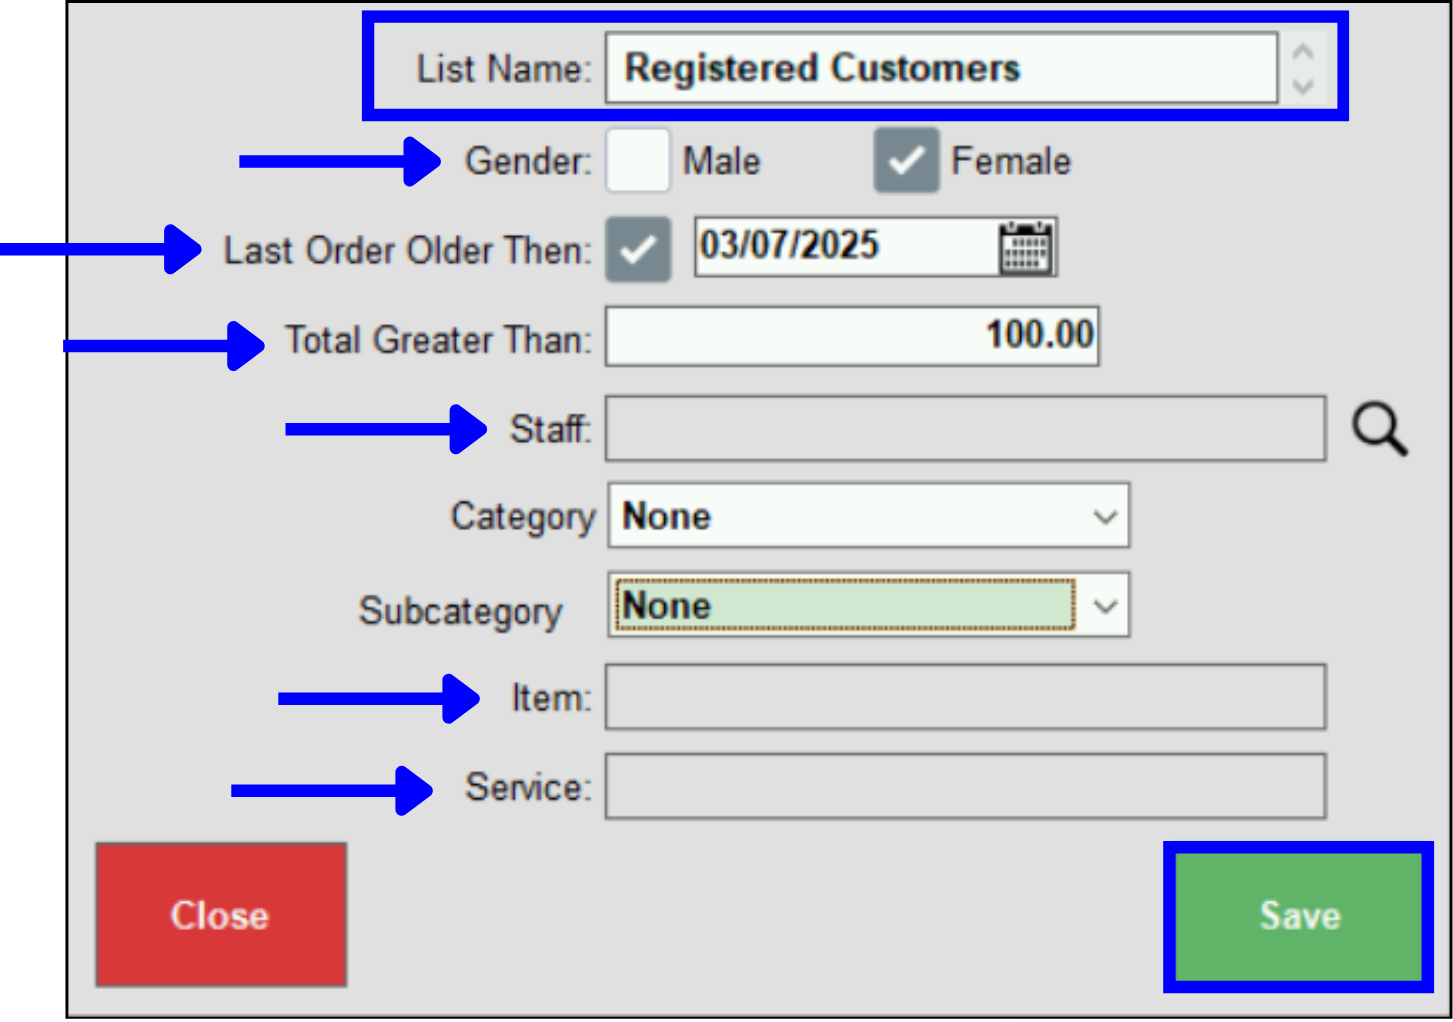
- Gender: Select Male, Female, or both. This field references gender as recorded in Customer Details. To add gender info to a client record see: Update Customer Info.
- Last Order Older Than: Use this field to identify customers whose last visit was before a specified date. For example, identify clients who have not visited for 8 weeks by selecting a date 8 weeks prior to today’s date.
- Total Greater Than: Identify customers who have made purchases greater than a specified dollar amount.
- Staff: Locate people who work with a specific staff member. For example, identify customers who have patronized one particular stylist.
- Item: Parse for customers who have bought a particular item. For example, use this field to identify customers who have purchased “Sparkling Champagne”.
- Service: Parse for customers who have bought a particular service. For example, use this field to identify customers who have purchased a “Long Hair Highlights.”
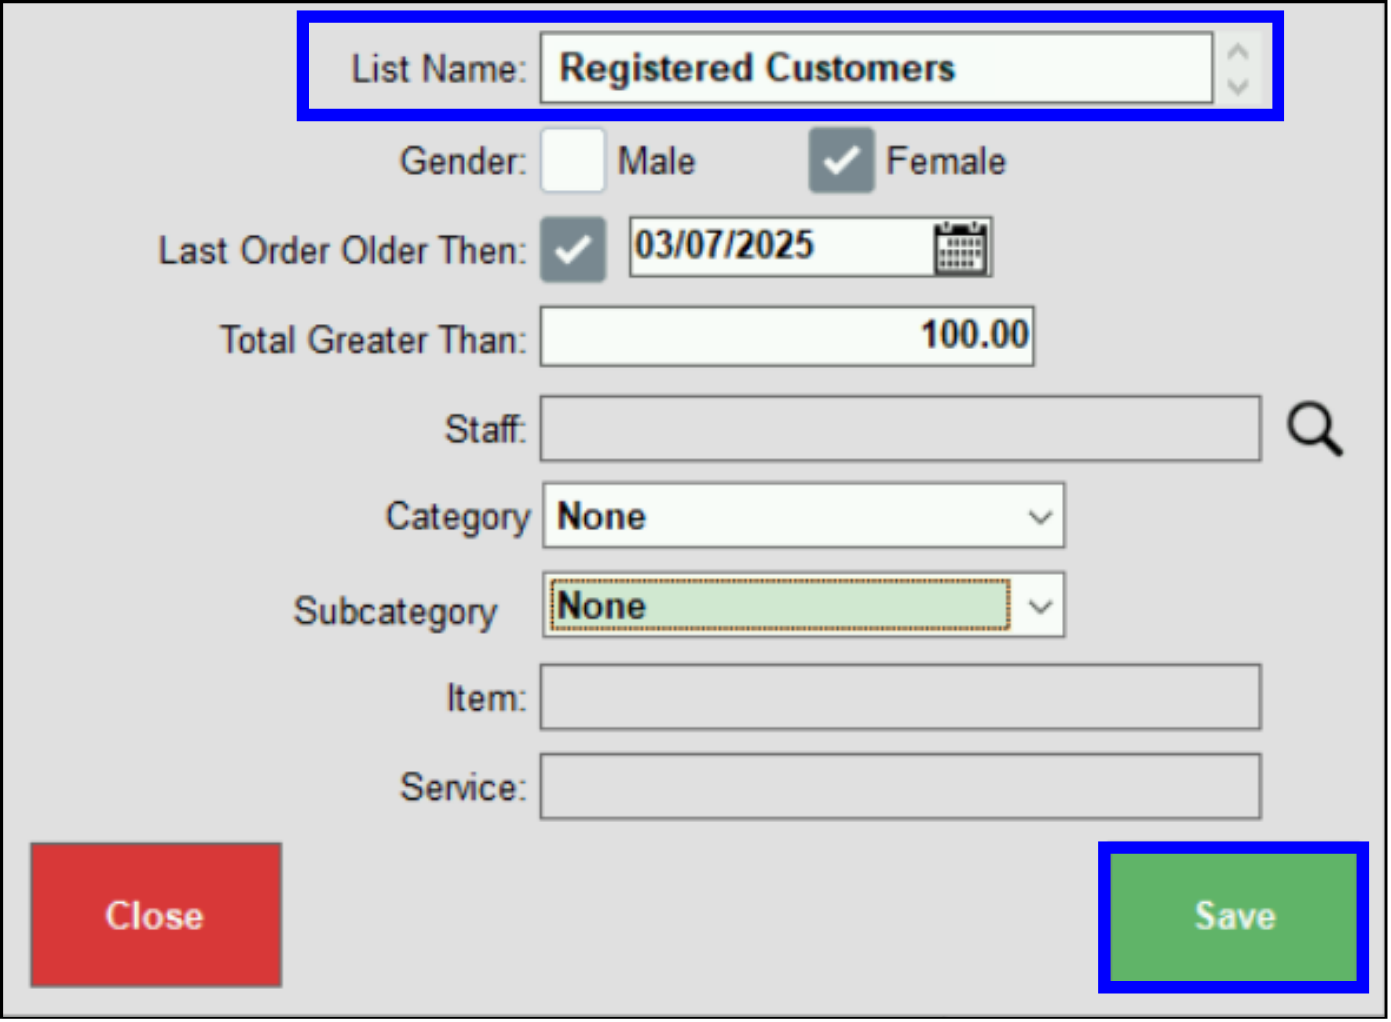
- Enter a name for the distribution list in the List Name field.
- Tap Save.
- Verify the new list displays in the Distribution Lists pane.
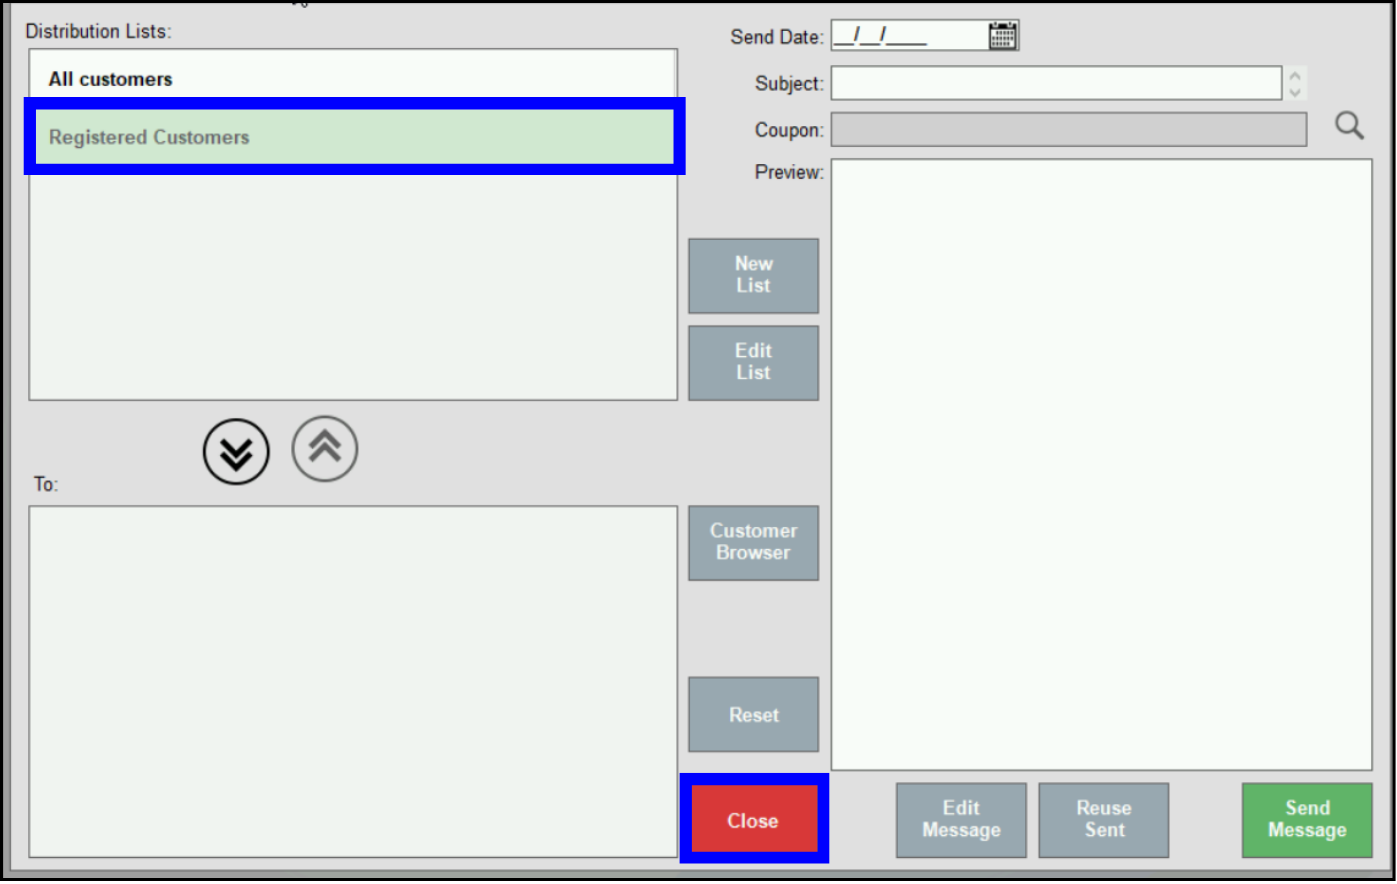
- Repeat the process to create additional lists. Once finished, tap Close.
Distribution lists can be edited. This allows you to refine or re-purpose an existing email list as promos or customer preferences change.
- From Home, navigate to Messages › New.
- In the Distribution Lists section, select an existing distribution list and tap Edit List.

- Tip! To add a single client email address to a distribution list, tap Customer Browser and highlight the name of an individual customer. Customer Browser can be used repeatedly to add individual emails manually to the send list.
- View list details in the Create Distribution List pop-up.
- Modify filter details as desired.
- Tap Save.
Create a message advertising a promo, discount, or announcement. Pair your message with one or more related distribution lists to create an email blast customized for your client base.
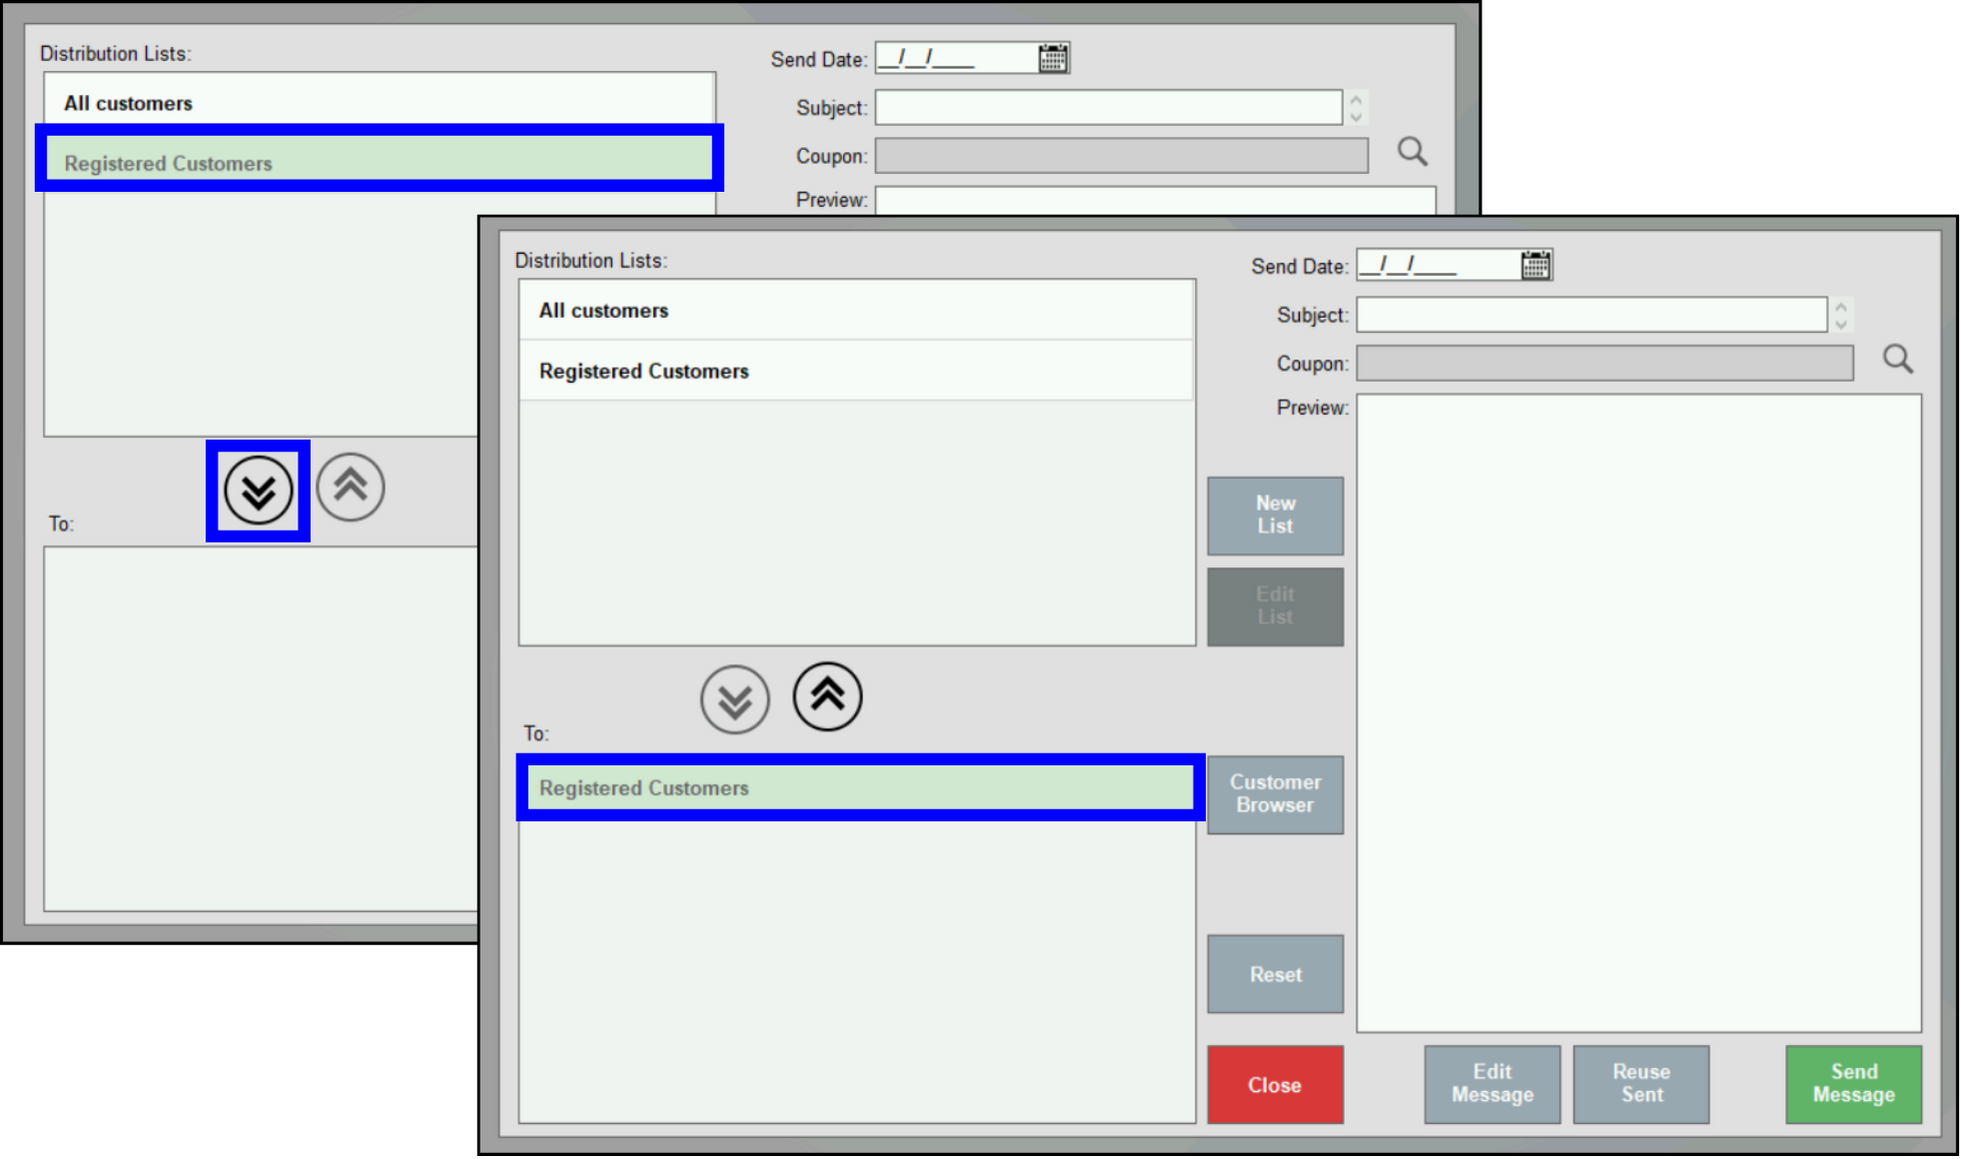
- Tap the name of a distribution list.
- Tip! To add a single client email address to the send list, tap Customer Browser and select a customer. Use Customer Browser repeatedly to select and add multiple emails.
- Tap the down arrow button to transfer the highlighted list to the To: section.
- Tip! Add a single client email address to the send list, tap Customer Browser and select a customer. Use Customer Browser repeatedly to select and add multiple emails.
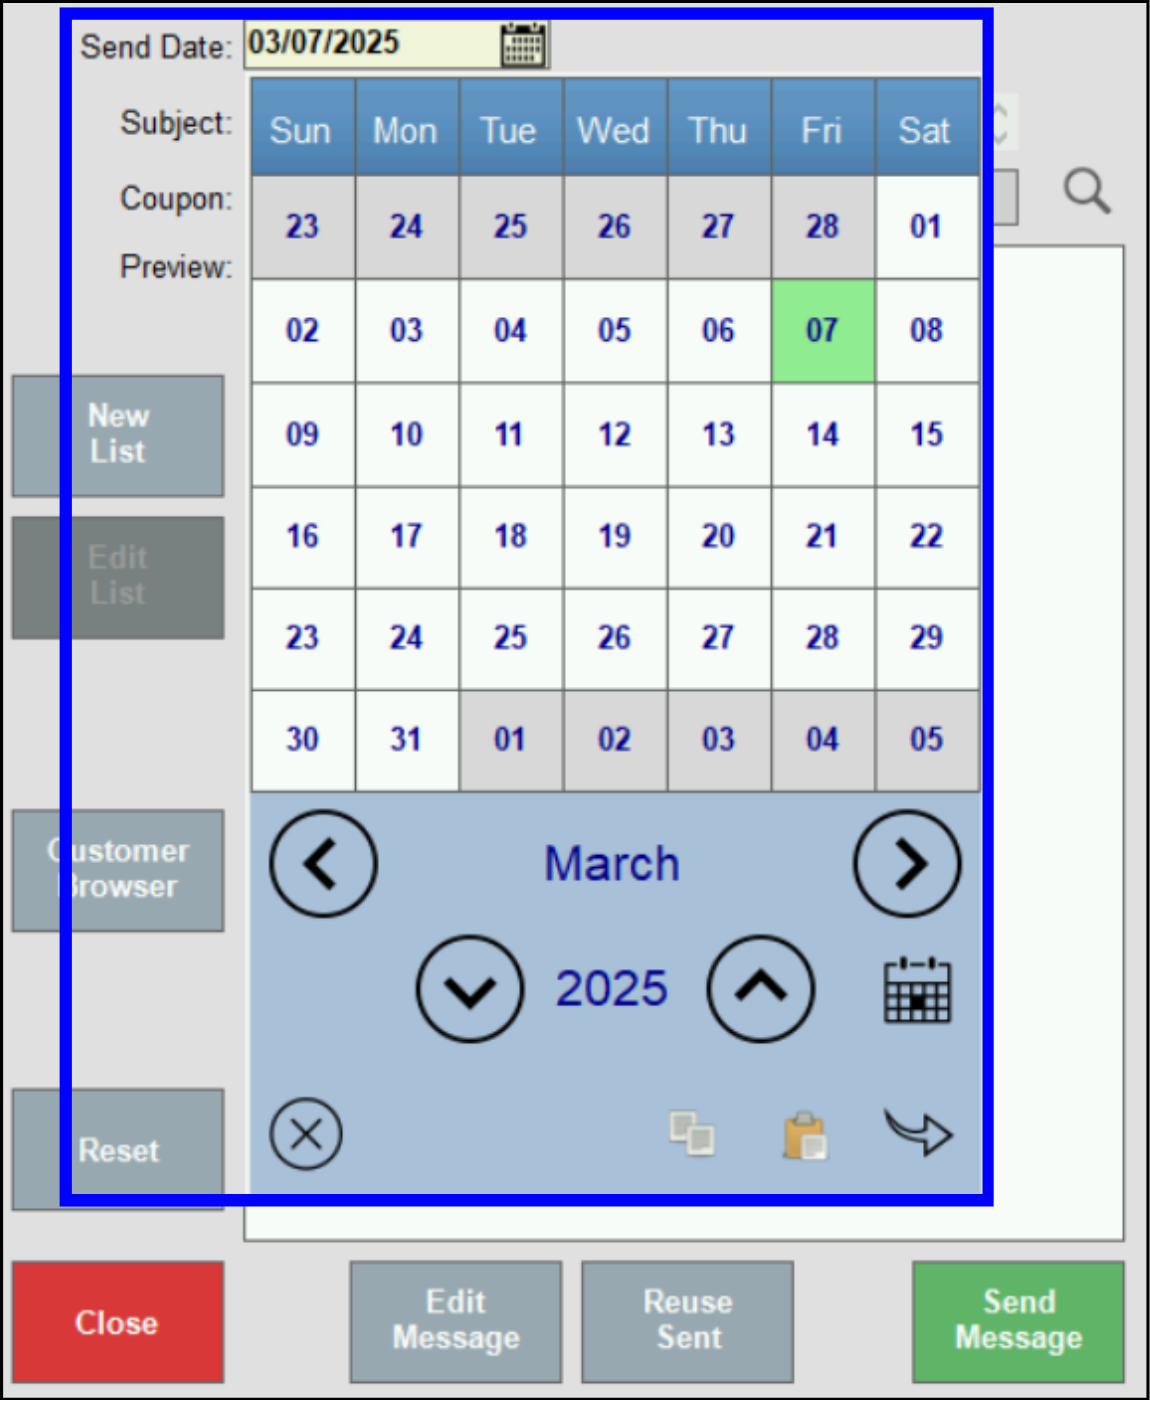
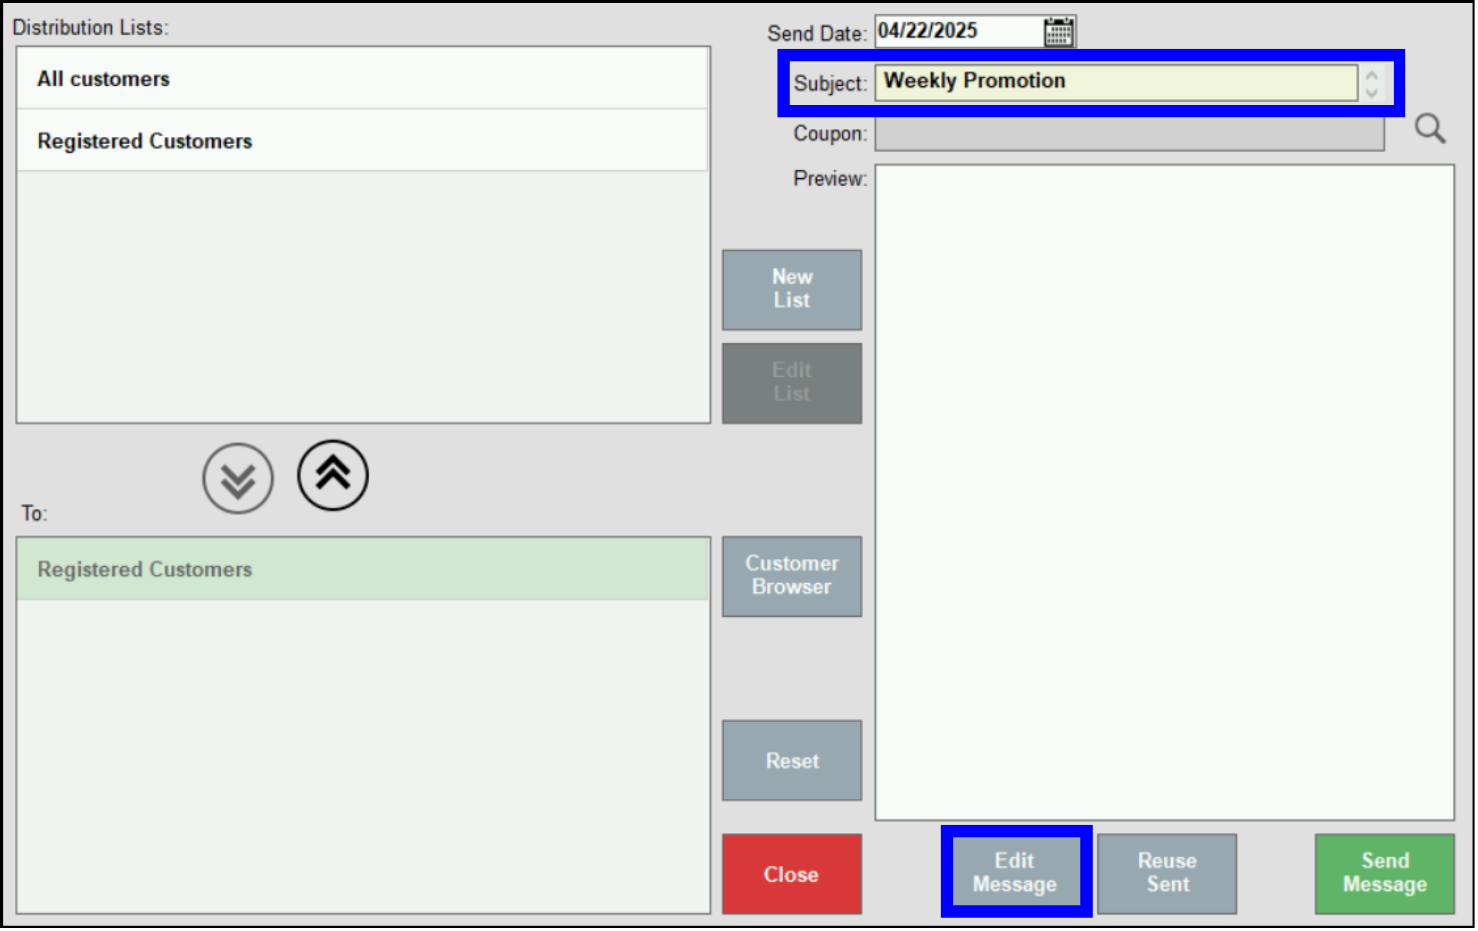
- From the Send Date field, select a date to send the message.
- Enter a message in the Subject field, then tap Edit Message.
- Compose a message using the formatting tools provided.
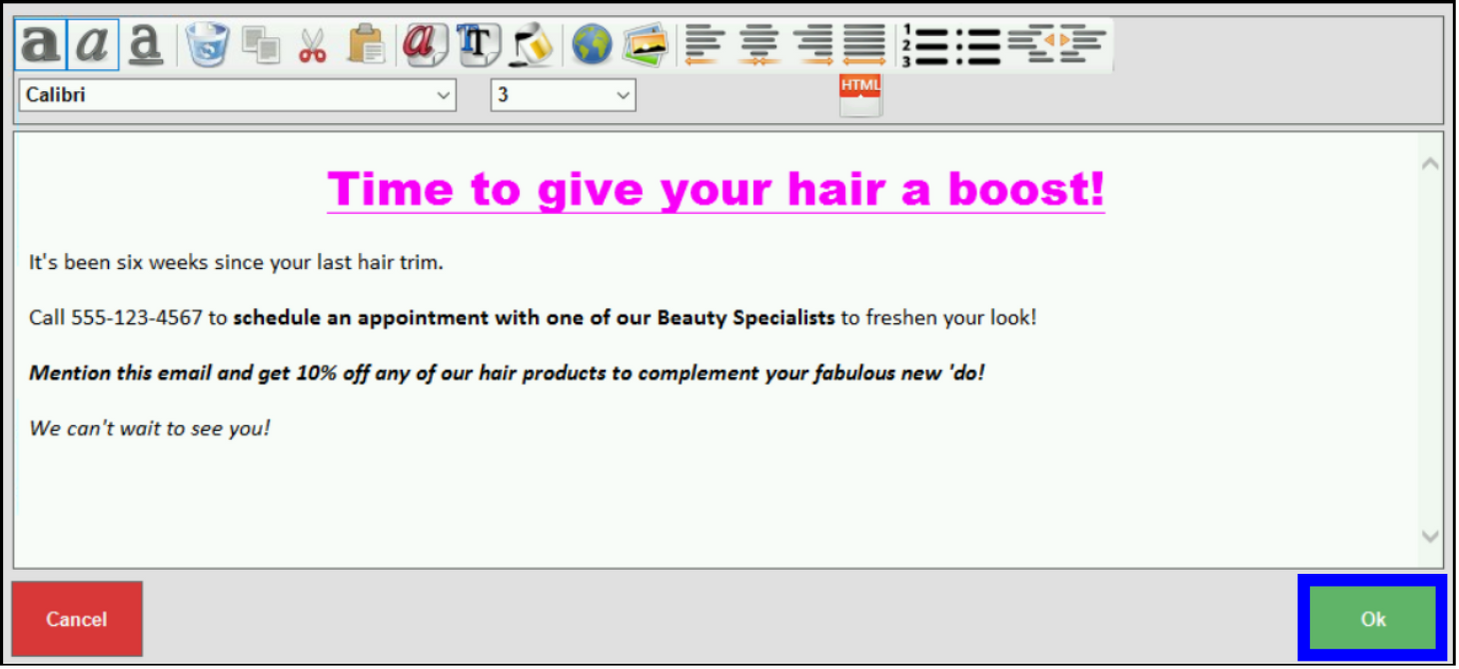
- Note: Message formatting is WYSIWYG (what you see is what you get) so you can easily determine what the message will look like once it’s delivered.
- Tap OK.
- Review message details, then tap Send Message.
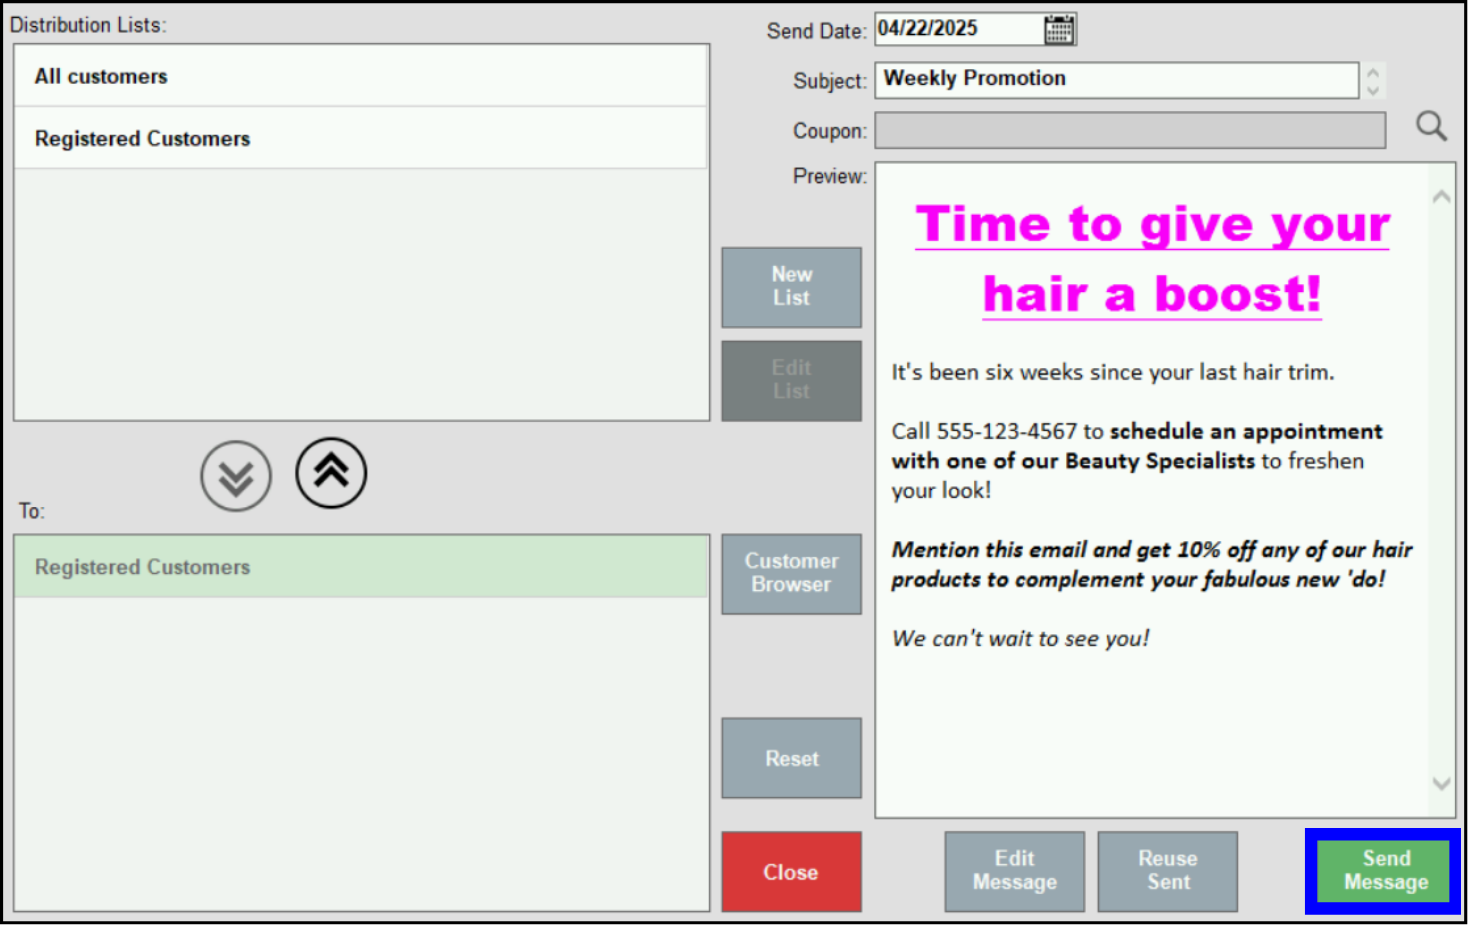
- Tip! Messages can be scheduled in advance by selecting Send Date. Choose a date, then tap Send Message to add the message to the scheduled message queue.
How can we improve this information for you?
Registered internal users can comment. Merchants, have a suggestion? Tell us more.