Receipt details, report printing, and remote printer options are all modified in Print Settings. The print module is tabbed so you can easily modify printer and receipt settings.
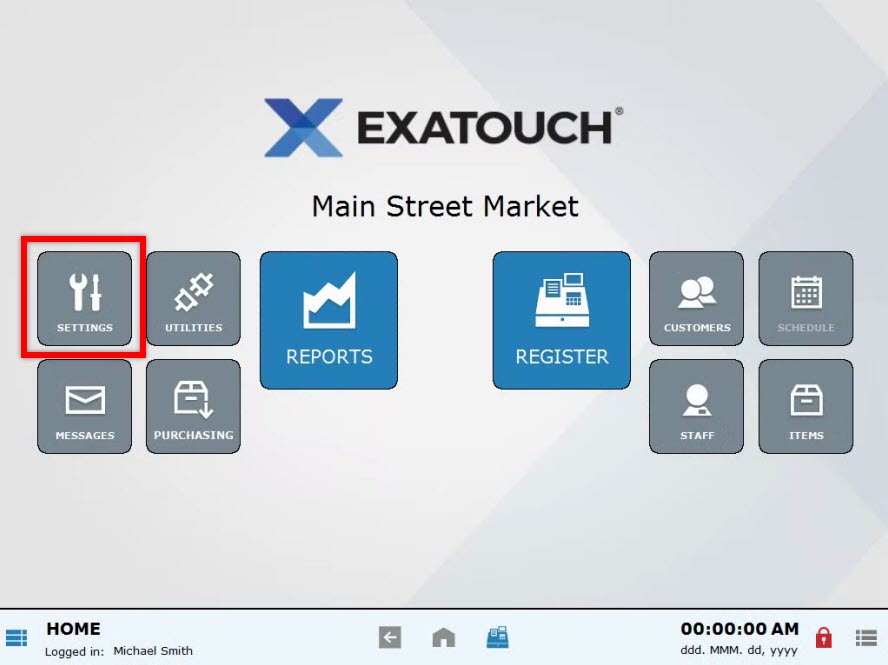
- From Home, tap Settings.
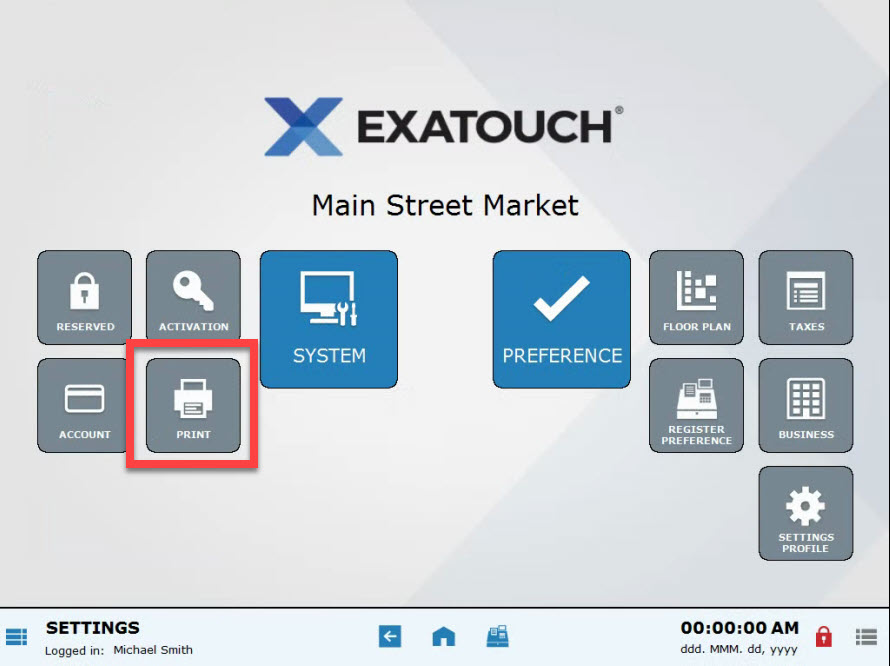
- Choose Print.
- Tap one of these tabs: Receipt options, Remote options, Receipt message, Snapshot, Staff Snapshot, and Printers.
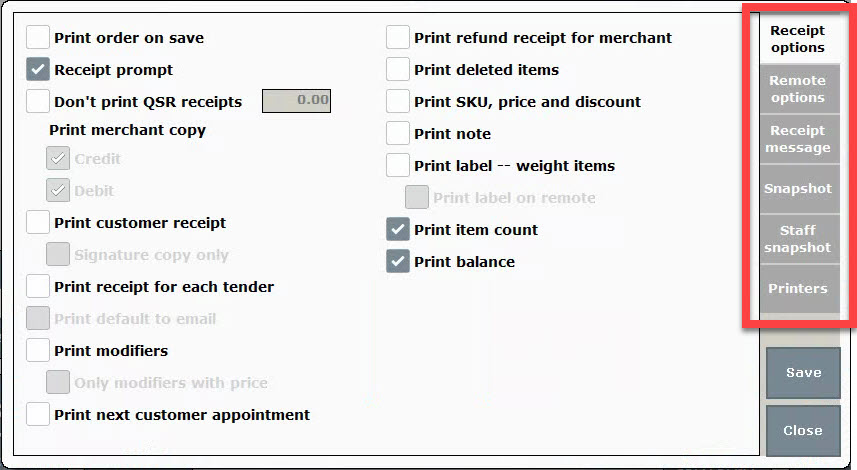
Print Settings are conveniently accessed via the following tabs:
Receipt Options allow you to customize customer receipts.
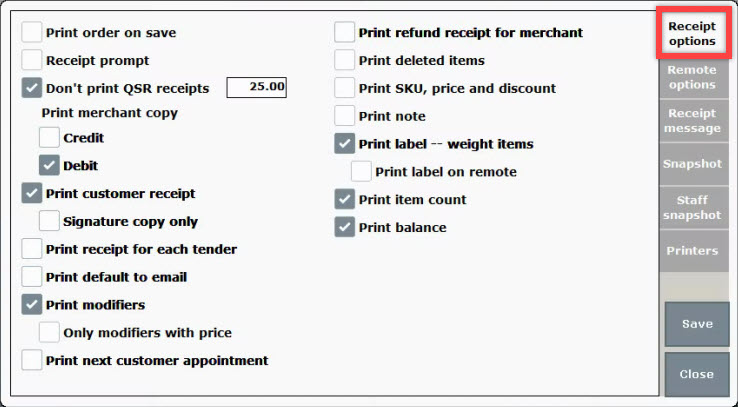
Notable Fields:
- Print Customer Receipt > Signature Copy Only: Select this option to ensure that only merchant signature copies are printed. Select “Print customer receipt” and then “Signature copy only”.
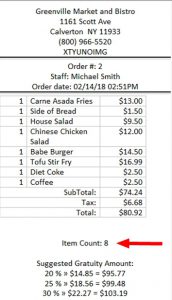
- Print item count: Select this option to include a total item count on customer receipts. Item count will appear under customer total on the bottom of the receipt. Wholesalers and retail establishments who monitor customer purchases store will benefit from checking item counts on receipts when customers exit their store.
- See: Reprint Receipts
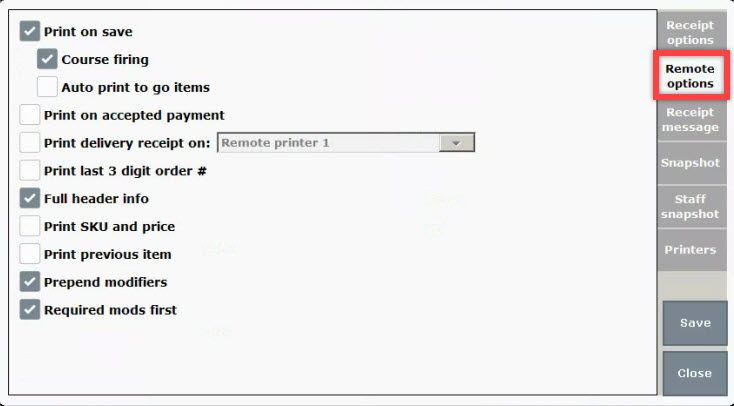
The Remote Options tab has settings for assigning remote printers and customizing receipts printed on remote printers. Customize your workflow by choosing between Print on save (default) or Print on accepted payment. Customize your receipts by choosing Print Last 3 digit order # and/or Full header info (default).
Notable Fields:
- Print on save: Businesses such as full-service restaurants with course-seating can send each customer selection directly to the remote kitchen printer after saving by selecting Print on save.
- Print on accepted payment: Businesses such as pizza delivery establishments send their orders to the kitchen after payment is received by using the Print on accepted payment option.
- Print delivery receipt on: Enable the checkbox, and then select a printer from the drop-down menu. Some pizzerias send their delivery receipts directly to their delivery staff’s remote printer by using the Print delivery receipt option.
- Print Last 3 digit order #: simplify receipt content by printing only the last 3 digits of an order number. Restaurants and retailers who have hundreds or thousands of previous orders simplify their receipts and save printer ink by printing only the last 3 digits of the order number.
- Full Header Info: Select this option to include full business information on the customer receipt including business name, address and phone number.
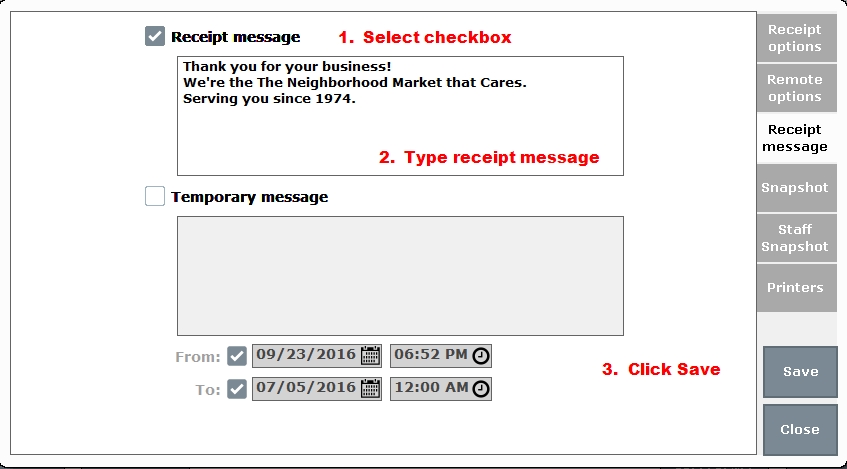
Customize messages on customer receipts in Receipt Message settings.
Notable Fields:
- Receipt message: Text recorded in this section will appear on all customer receipts. Businesses can include their brand tagline, a pleasant greeting, or a catchy slogan at the bottom of each customer receipt.
- Select the Receipt message checkbox.
- Type the message.
- Click Save.
- Temporary message: Include a timely message on customer receipts by setting a time frame for a temporary message to be displayed. Businesses can include Season’s Greetings on their receipts during the holiday season, or remind customers about special savings during their anniversary month.
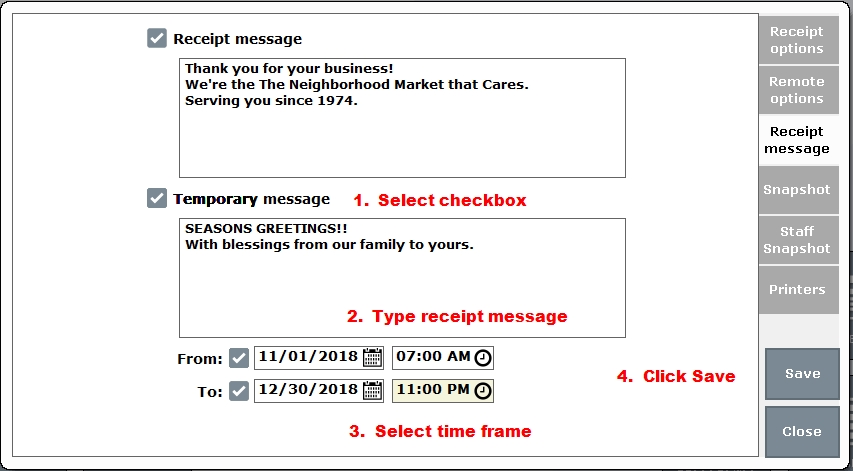
- Select the Temporary message checkbox.
- Type the message.
- Set the time frame by using the From: and To: fields.
- Click Save.
Customize what is printed on the Snapshot Report.
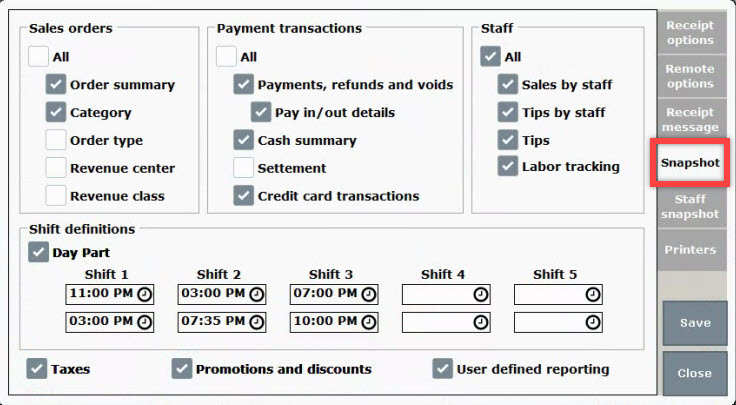
Notable Fields:
- Sales Orders, Payment Transactions, and Staff options: Customize what is displayed on the Snapshot Report by selecting from each of these options.
- Assign Shift Definitions to customize what is viewed on the Snapshot Report at different shift times. For example, enter lunch shift and dinner shift times to compare how much revenue is generated during each shift. Information gathered using shift definitions help managers make better business decisions regarding staffing and business hours.
- Select Taxes and Promotions and Discounts to display relevant info.
- Select User Defined Reporting to print data related to user-defined fields.
Customize what is printed on the Staff Snapshot Report.
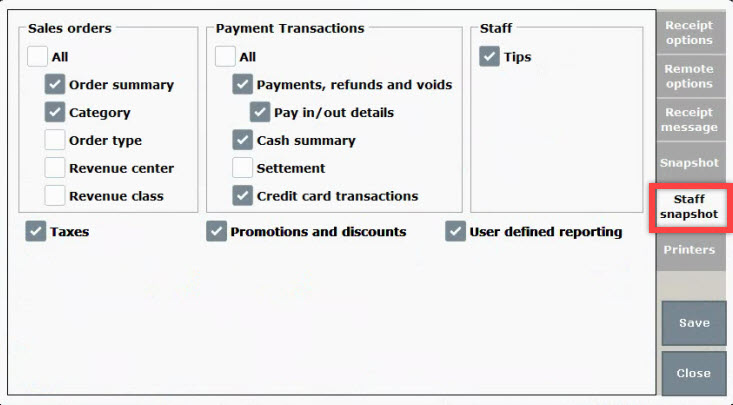
Notable Fields:
- Sales Orders, Payment Transactions, and Staff options can be checked to customize what is displayed on the Staff Snapshot Report.
- Select Taxes and Promotions and Discounts to display relevant info.
- Select User Defined Reporting to print data related to user-defined fields.
Designate your network’s printers in the Printers section.
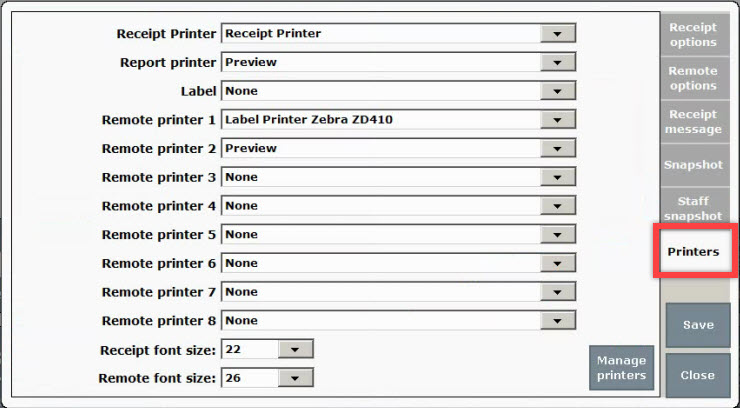
- Example: A Retailer may designate a receipt printer for customer receipts, a label printer to create labels for stock items, and a remote printer for backroom staff.
Notable Fields:
- Receipt Printers: Select a receipt printer from the drop-down menu.
- Label Printers: Select a label printer from the drop-down menu.
- Remote printers: Select a remote printer from the drop-down menus. Multiple remote printers can be designated by selecting printers on separate lines.
- Receipt font size: Specify font size on customer receipts by choosing a font size from the drop-down menu.
- Note: Drop-down printer options include None and Preview. When a printer is set to None tickets will print or appear as a preview. When a printer is set to Preview tickets will appear as a preview on screen.
- Remote font size: Specify font size on remote printers. Restaurants can use a larger font size so kitchen staff can more easily identify order details.
- Manage Printers:
 Opens the Print Manager where you can troubleshoot printer and device issues by viewing a list of printers and their statuses, print a test page and clear print jobs. See: Print Manager
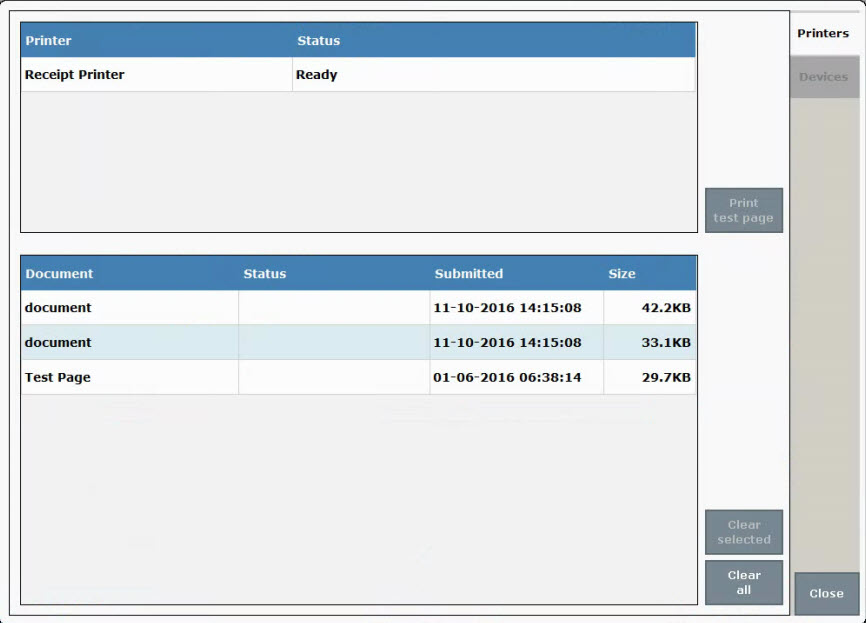
- Tip! Rename your printers! Printer names can be re-labeled within Printer Settings by clicking on a printer name and typing a new name into the field. For example, “Remote printer 1” can be renamed “Kitchen Printer”.

How can we improve this information for you?
Registered internal users can comment. Merchants, have a suggestion? Tell us more.