Inventory levels for your items are maintained by Exatouch: every sale, return, inventory count, and shipment acceptance affects your on-hand stock. Adjust quantity levels for single items outside of these workflows in Item Details.
Edit an item record directly to add or remove inventory outside of the usual retail workflows of selling, buying, and inventory maintenance.
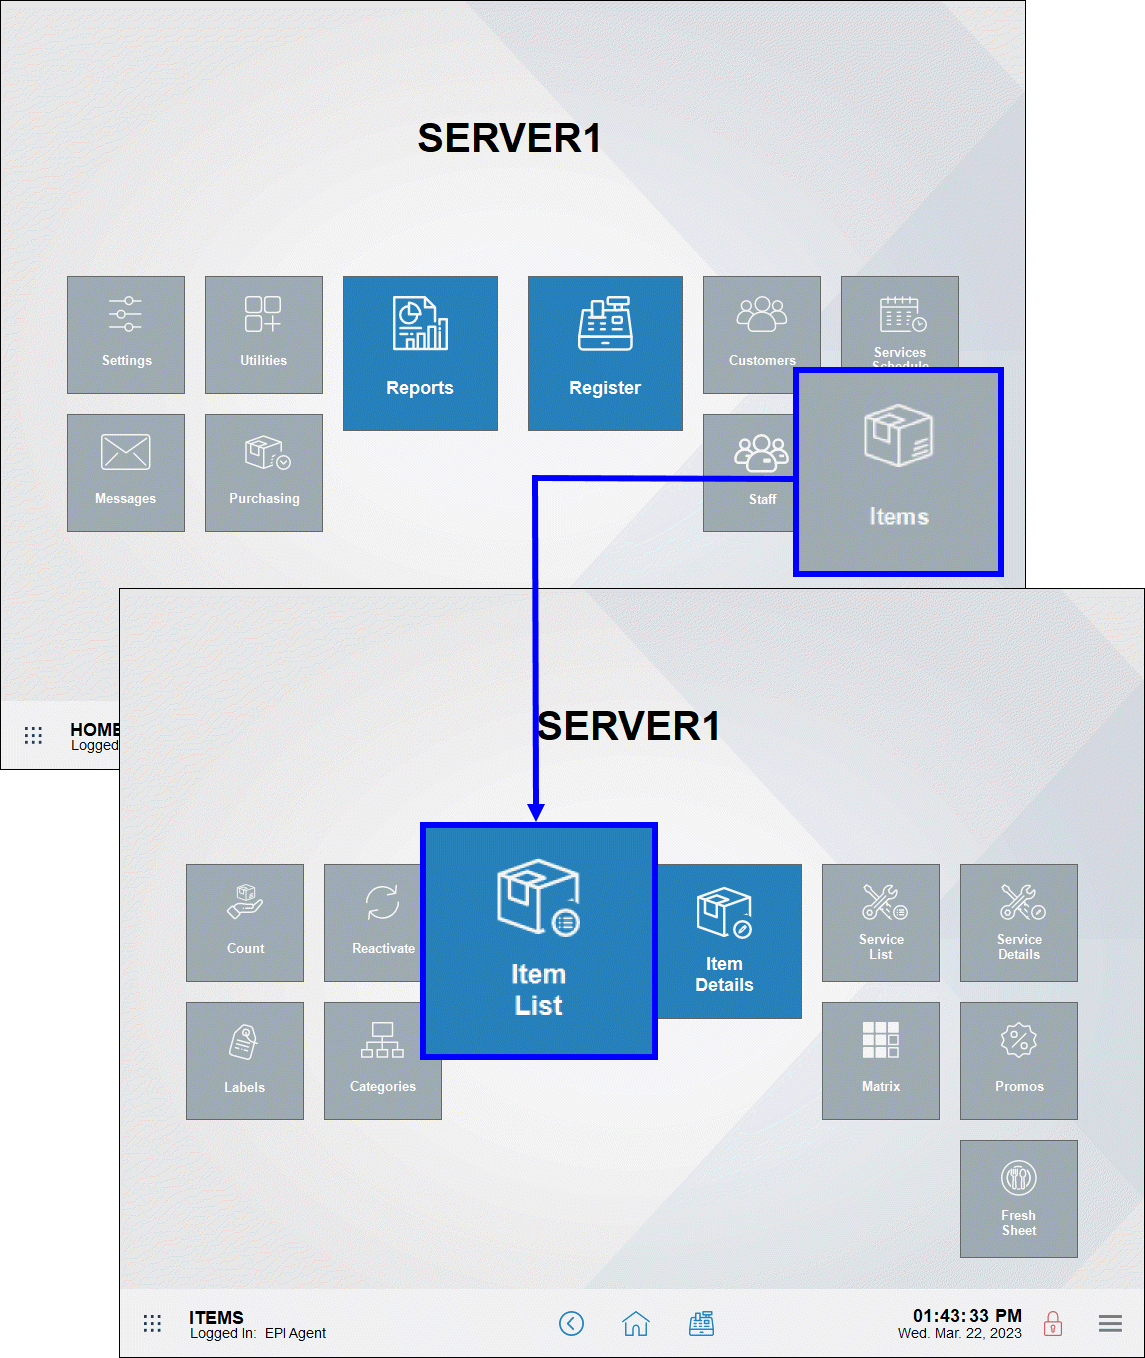
- From Home, navigate to Items > Item List.
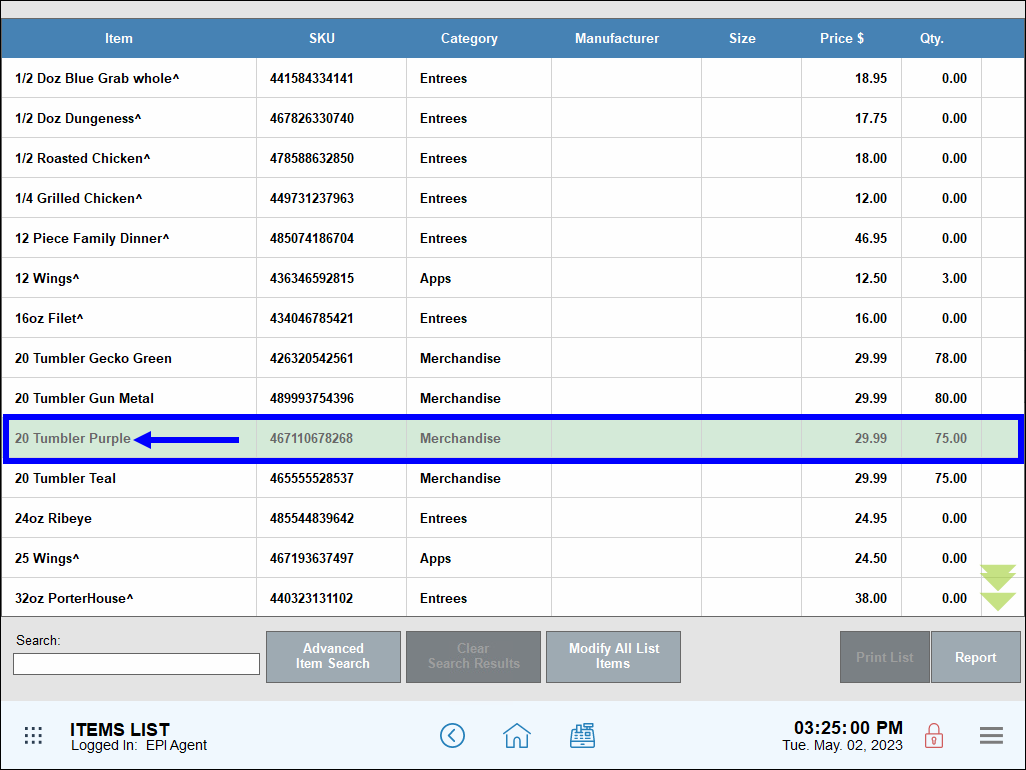
- Select an item. The Item Details screen displays.
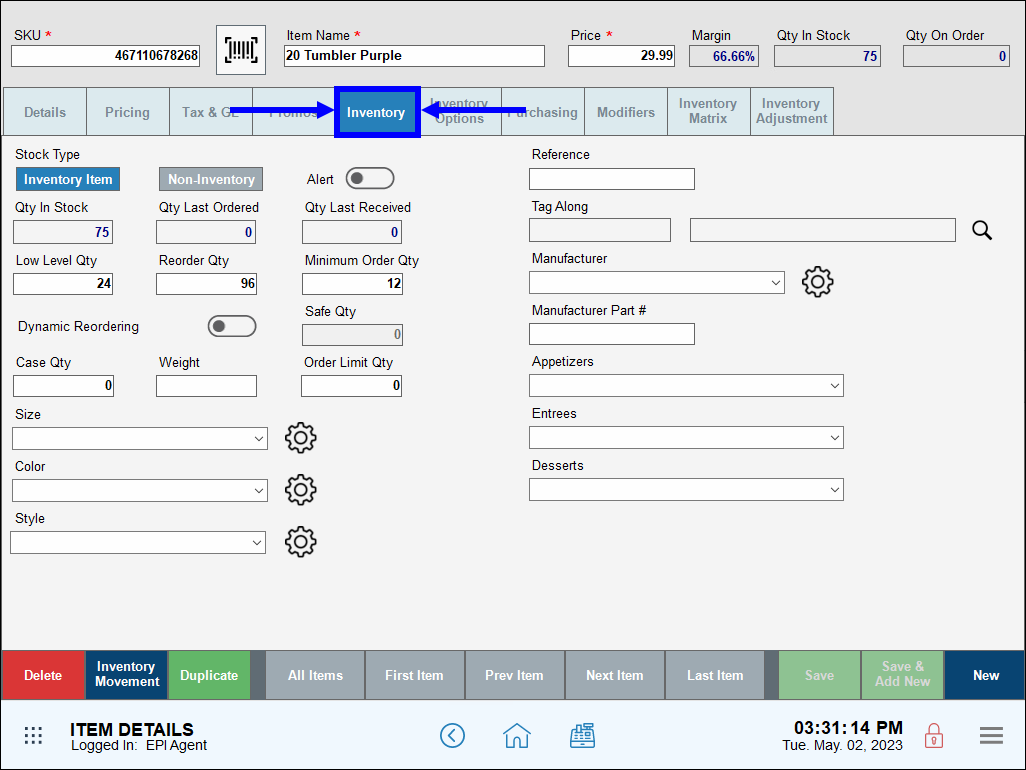
- Tap the Inventory tab.
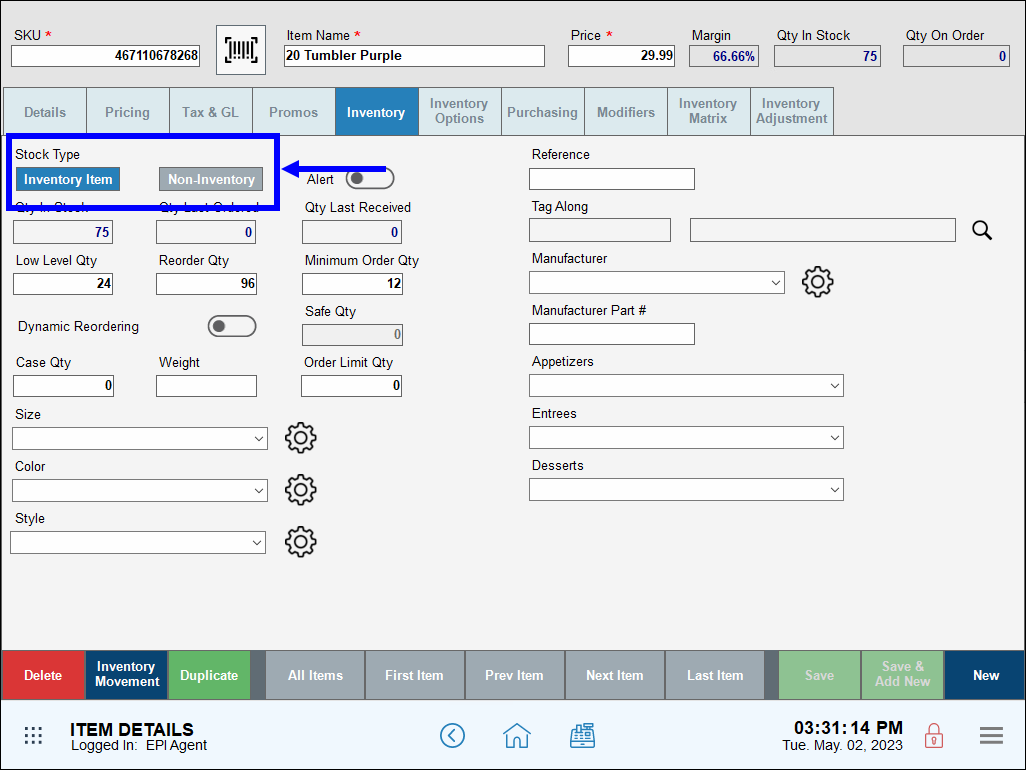
- In the Stock Type section, perform one of the following:
- Inventory Item: Tap to enable inventory tracking.
- Non-Inventory: Tap to disable inventory tracking.
- Tap Save.
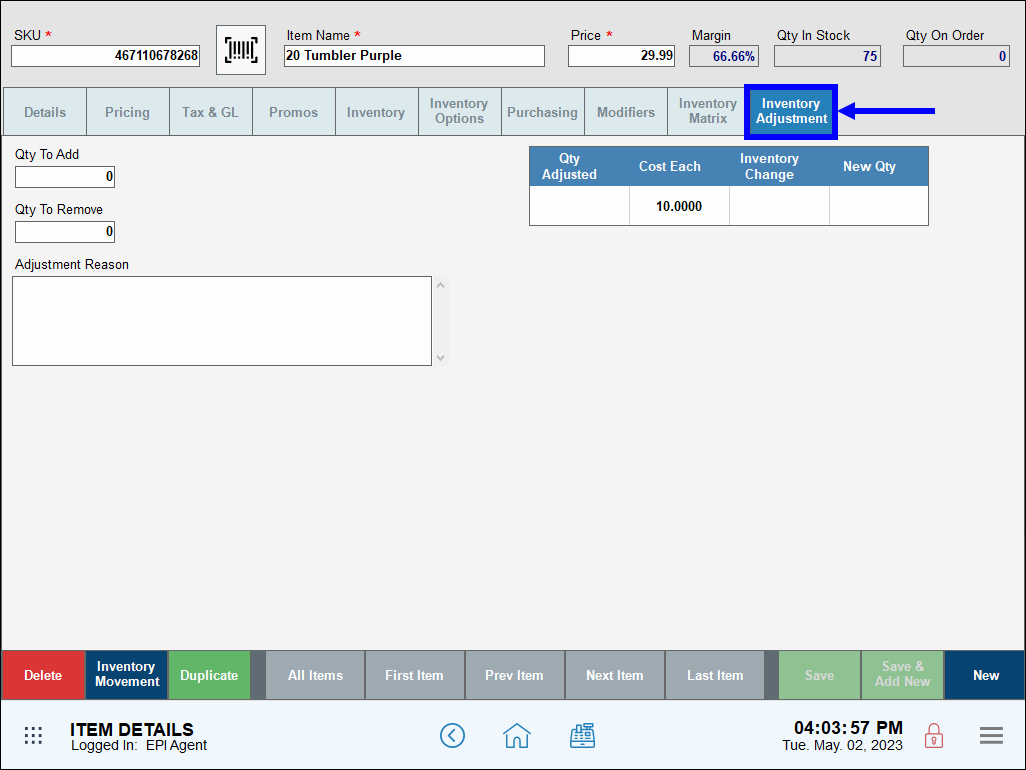
Merchants can adjust inventory either under the Inventory Adjustment tab or within the Items Count submodule.
Inventory Adjustment Tab Method
- From the Item Details screen, tap the Inventory Adjustment tab.
- To increase item quantity, perform the following:
- In the Qty To Add field, enter the number of items to add.
- Enter an Adjustment Reason in the workspace (e.g., Received a new shipment).
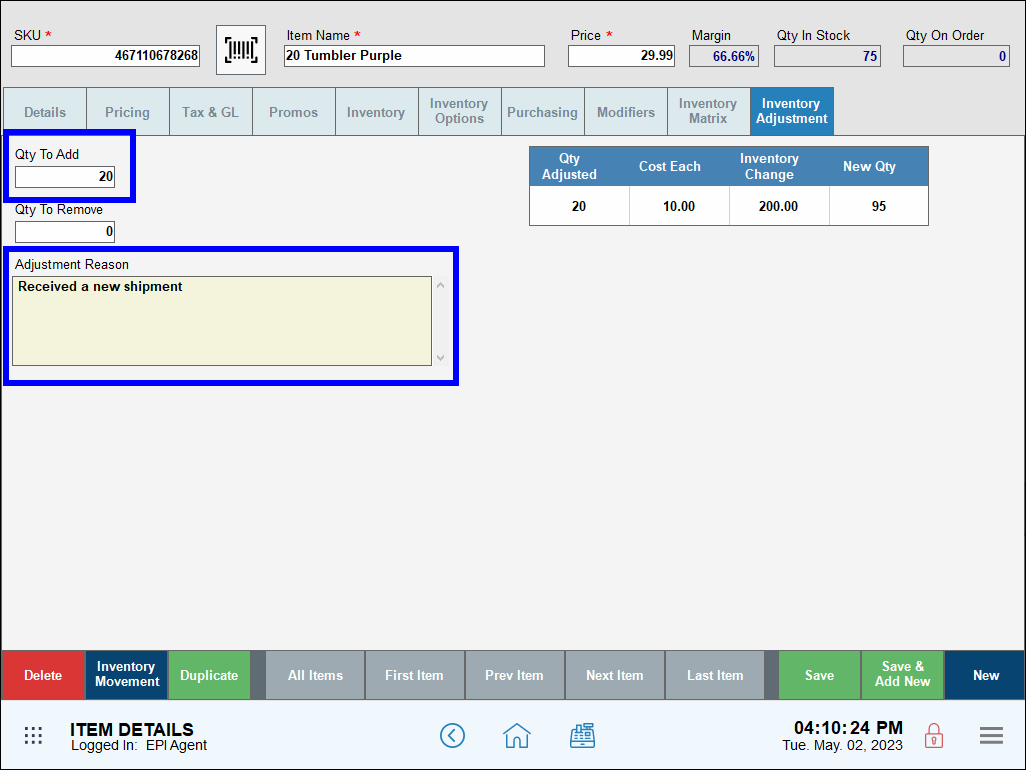
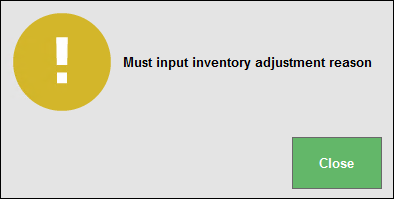
- Note: If you do enter an Adjustment Reason, Exatouch prompts you to do so. The reason for an inventory change displays in inventory reports.
- Tap Save.
- To decrease item quantity, perform the following:
- In the Qty To Remove field, enter the number of items to remove.
- Enter an Adjustment Reason in the workspace (e.g., Returned a surplus).
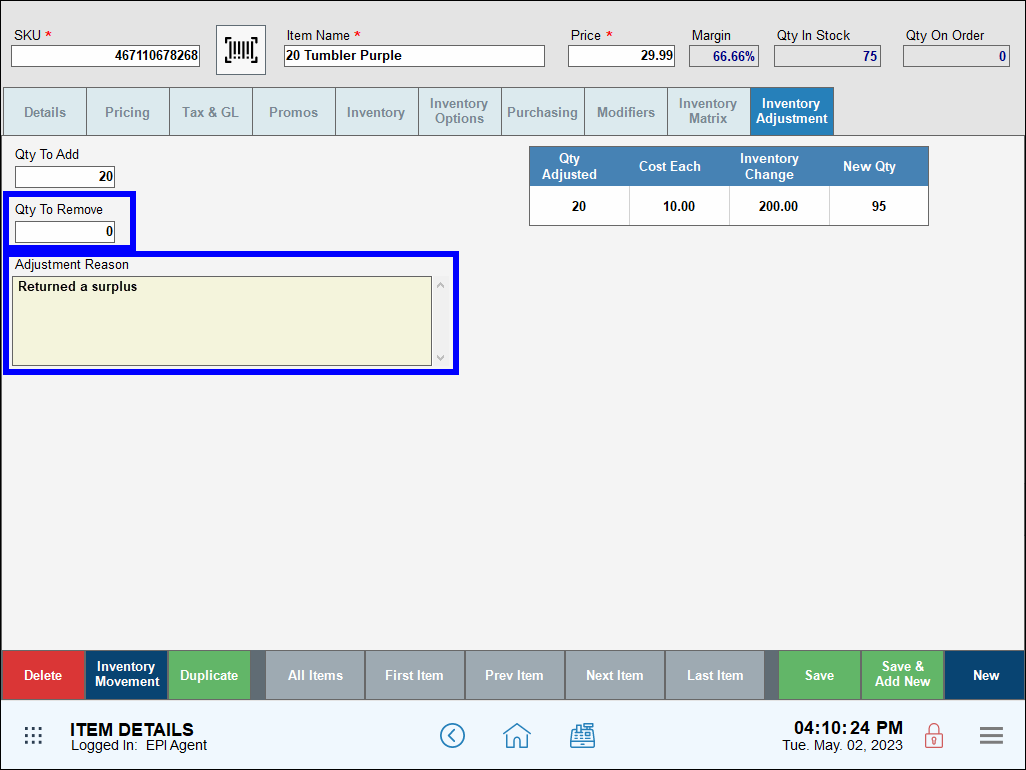
- Tap Save.
Items Count Submodule Method
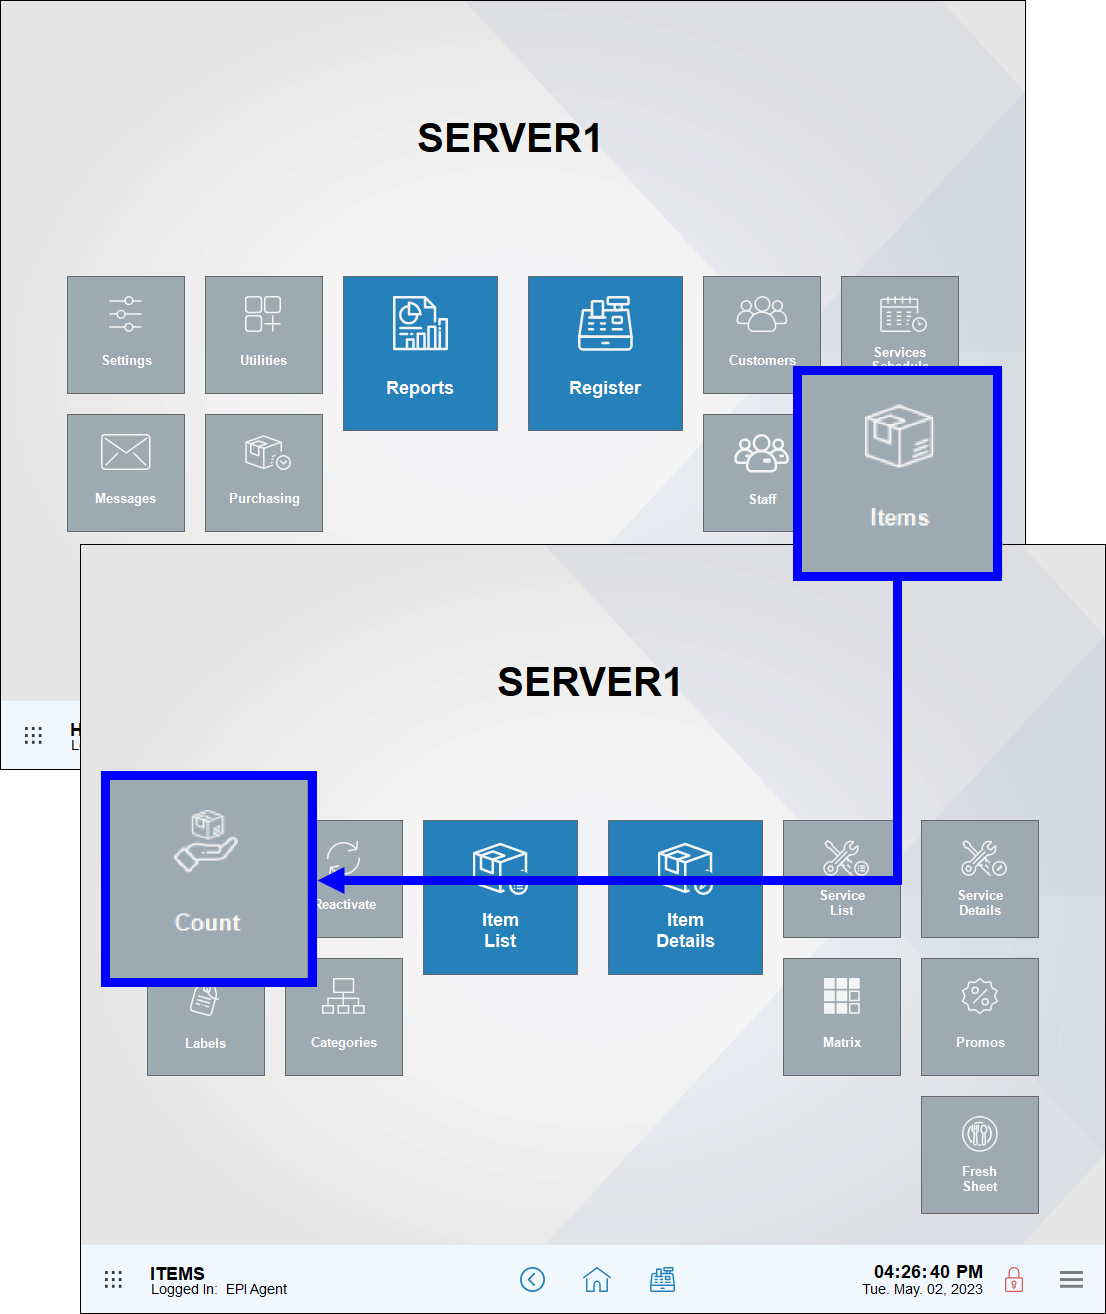
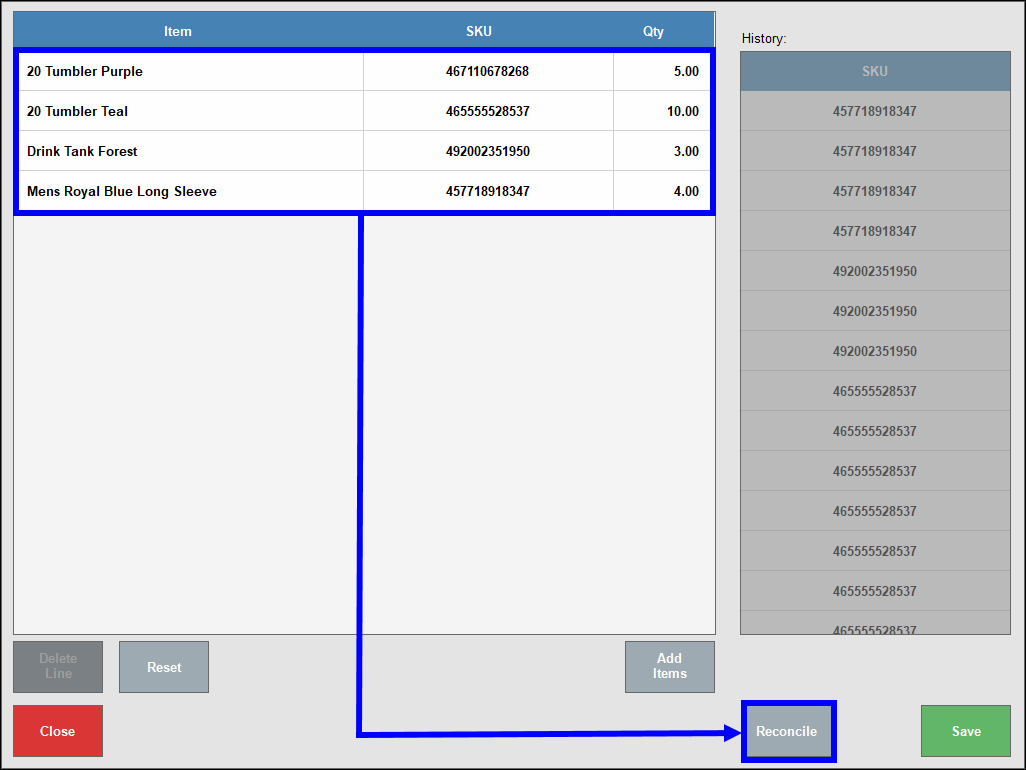
- From Home, navigate to Items > Count.
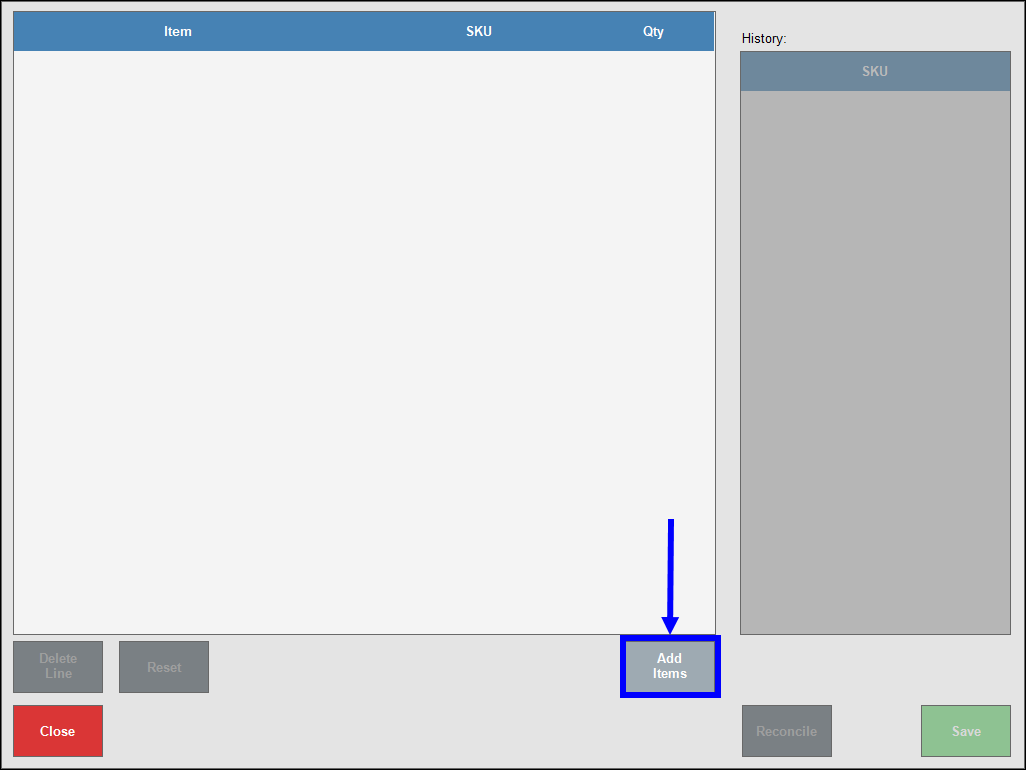
- On the Items Count screen, tap Add Items. The Item List screen displays.
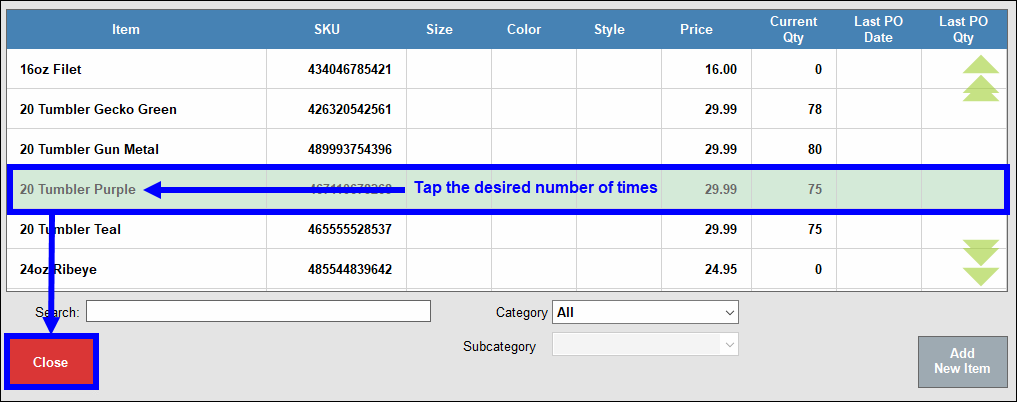
- Scan the item(s) or on the Item List screen, or tap the item the desired number of times, then tap Close. For example, tap the item five times to add five items.
- Note: Users can also manually enter items.
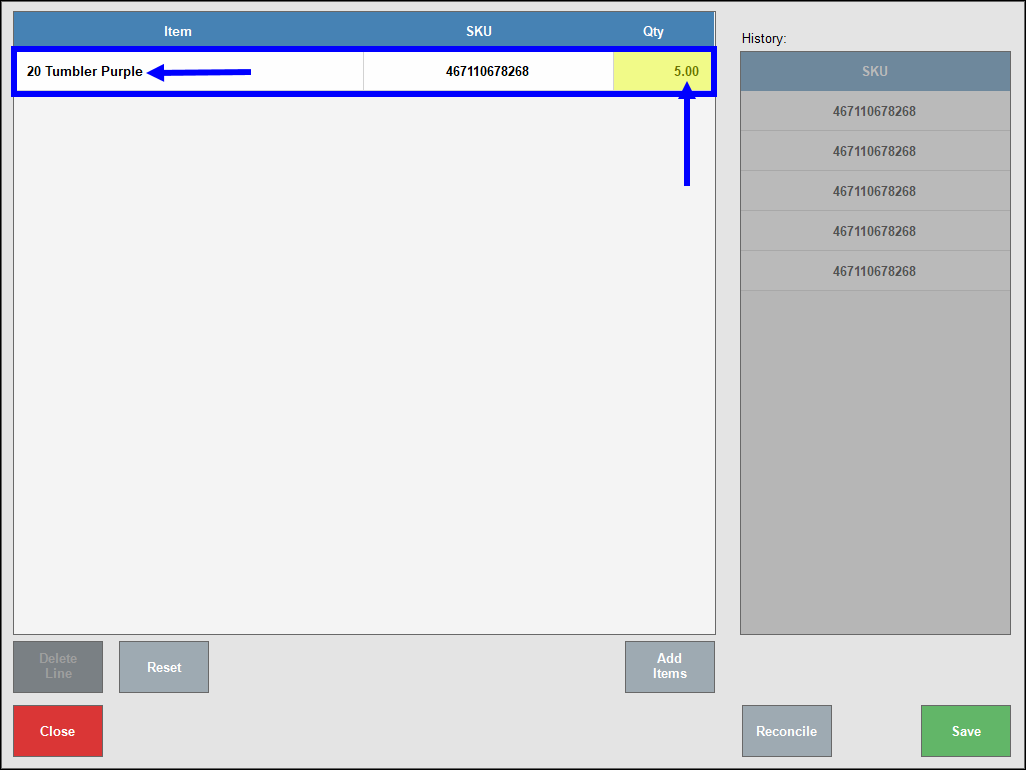
- The item displays on the Item Count screen, and the quantity added displays in the Qty column.
- Tap Save to save your progress.
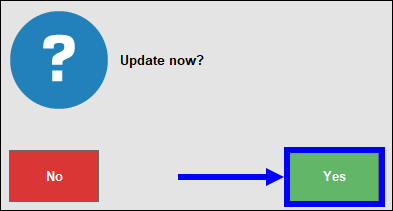
- Repeat steps 2-5 as desired. When finished, tap Reconcile.
- Tap Yes to confirm. The Reconciled Items screen displays.
- Tip! On the Reconciled Items screen, users can remove an item after it’s been reconciled by performing the following:
- After reconciling an item, the Reconciled Items screen displays.

- Deselect an item’s checkbox in the Selected column.
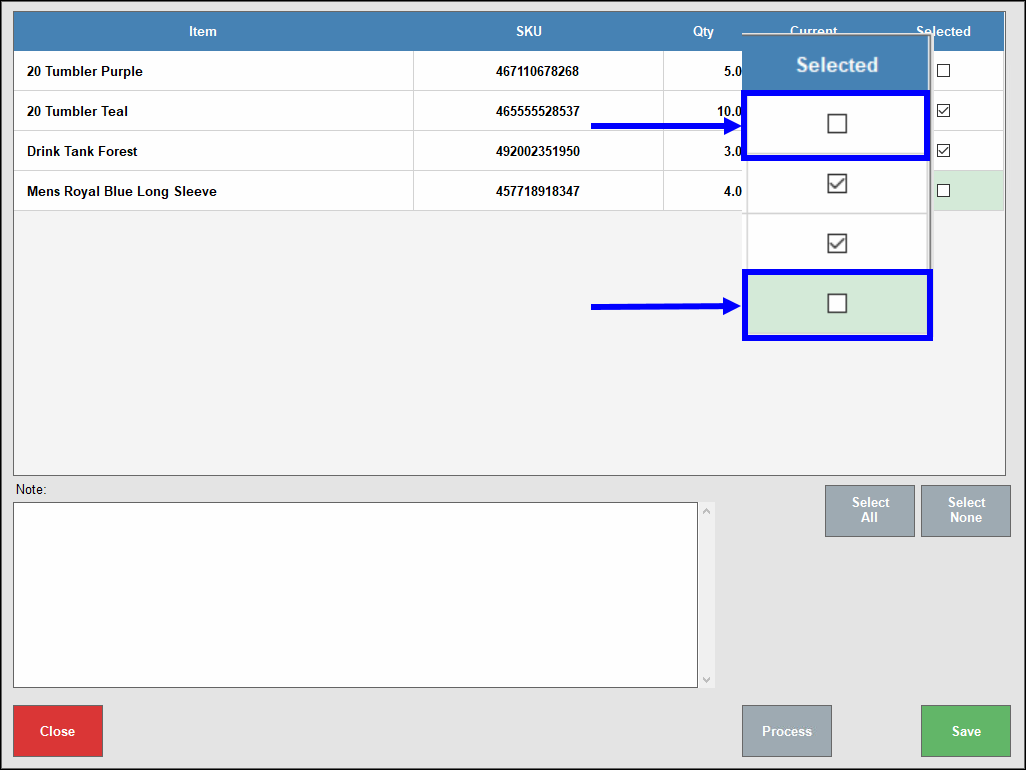
- Enter a reason for reversing the item reconciliation in the Note field.

- Tap Process.
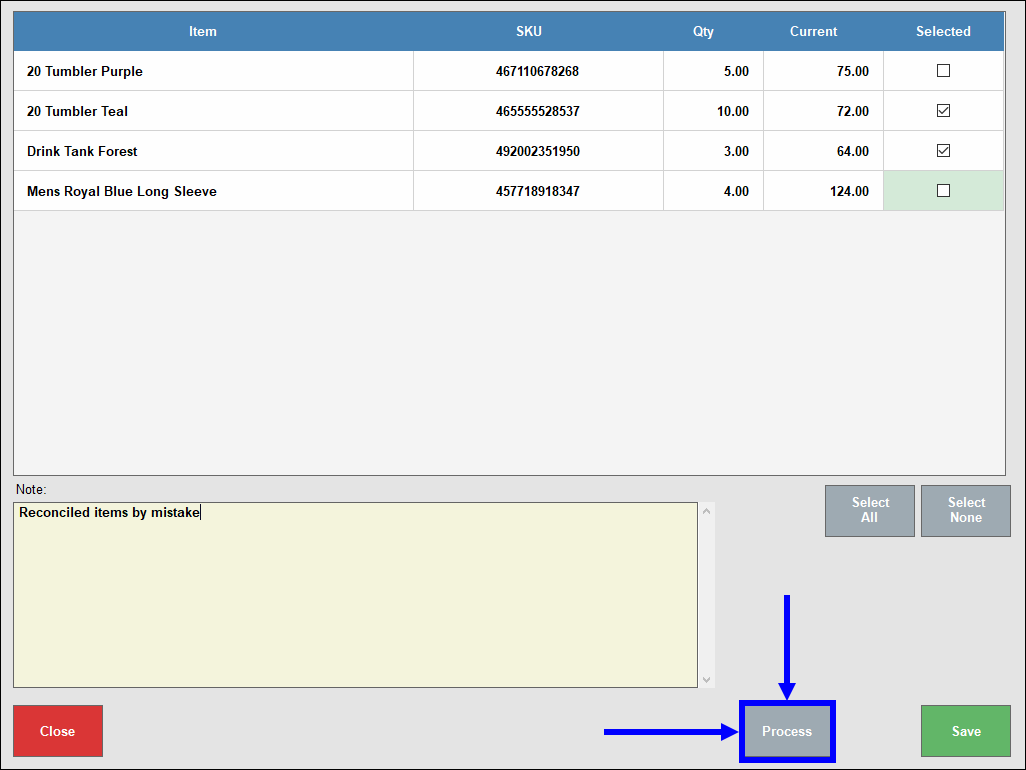
- Tap Yes to confirm.
- After reconciling an item, the Reconciled Items screen displays.
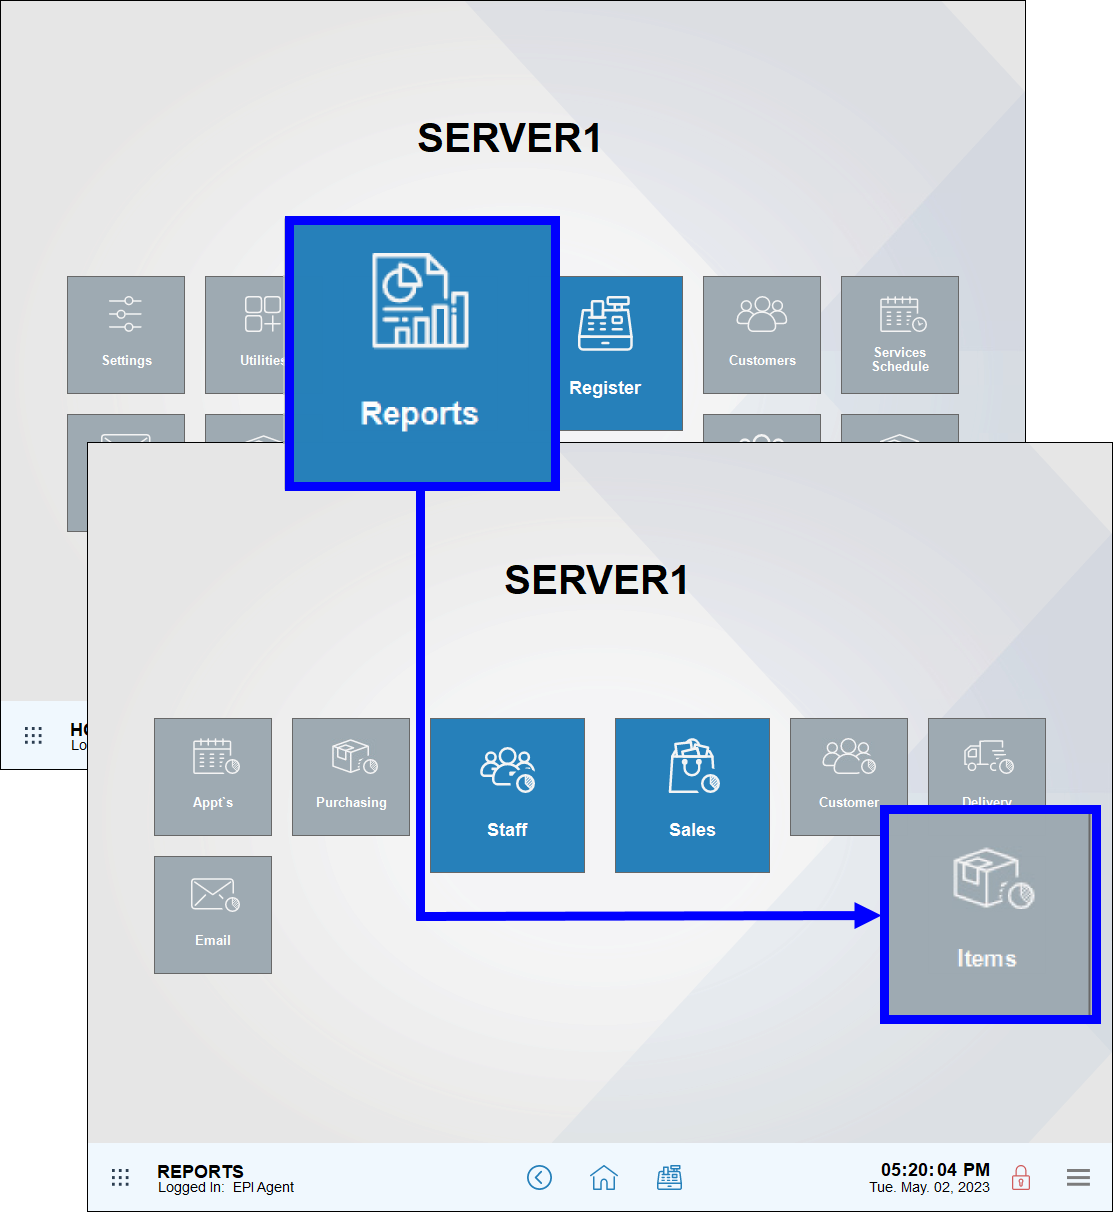
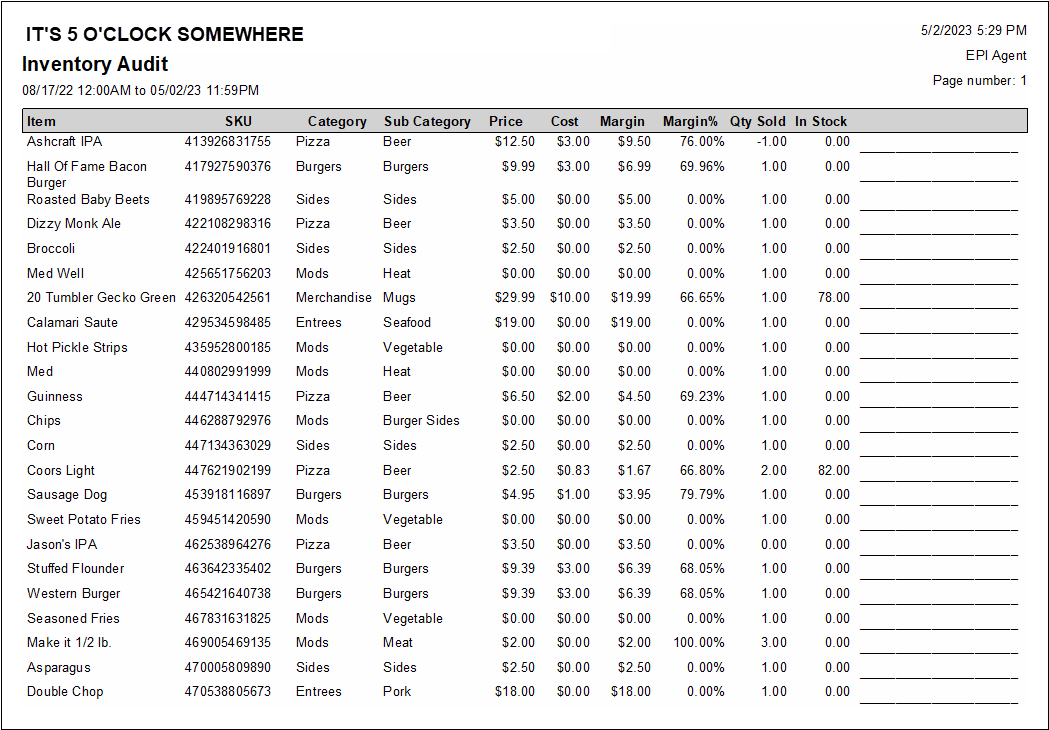
Merchants can track inventory trends over time by reviewing the Inventory Audit and Inventory Movement reports.
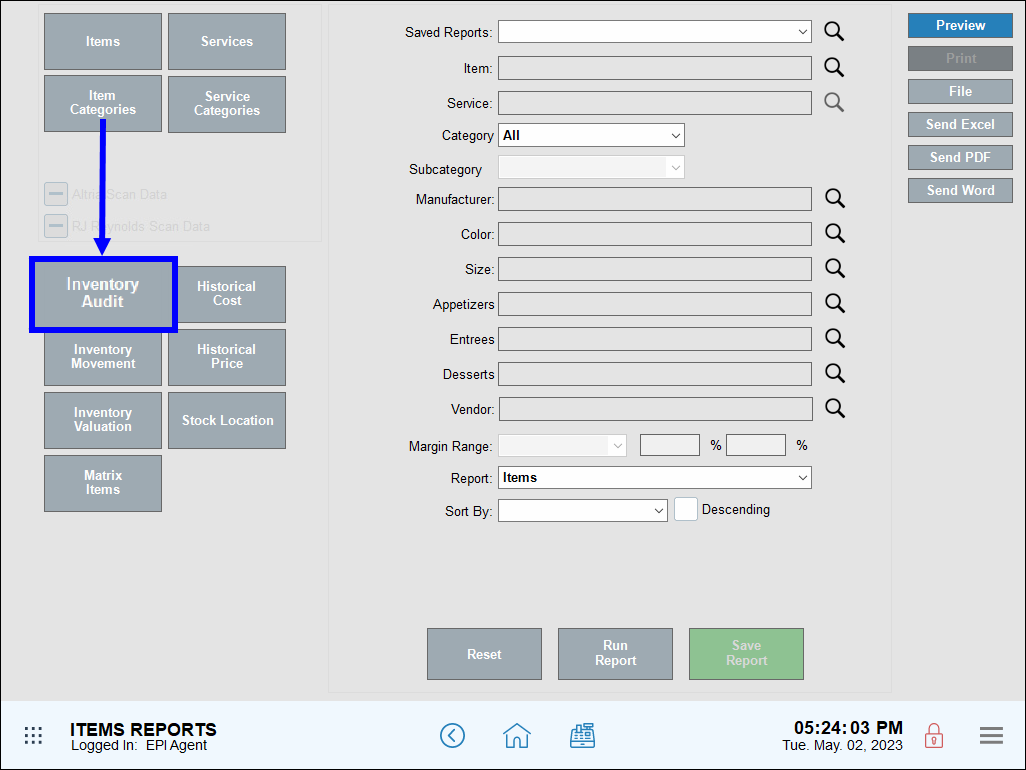
Inventory Audit Report
- From Home, navigate to Reports > Items.
- Tap Inventory Audit.
- Select a date range from the Range drop-down menu, then tap Run.
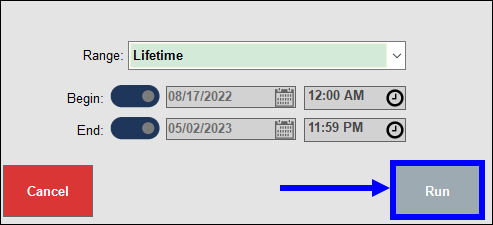
- The Inventory Audit report displays.
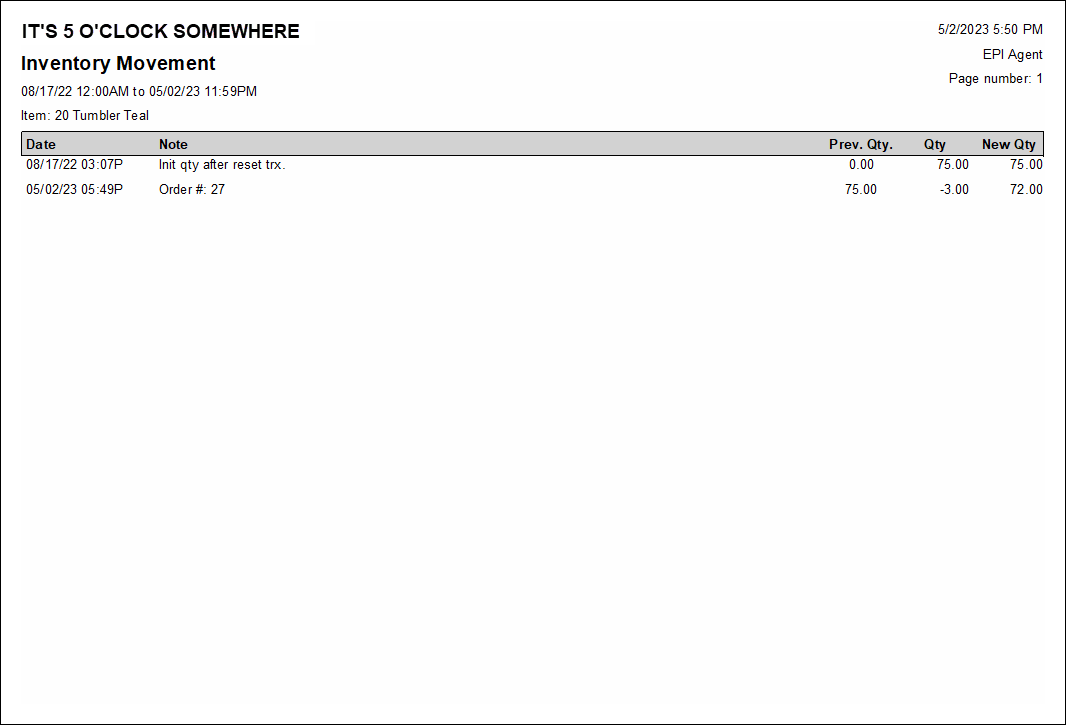
Inventory Movement Report
- From Home, navigate to Reports > Items.
- Tap Inventory Movement.
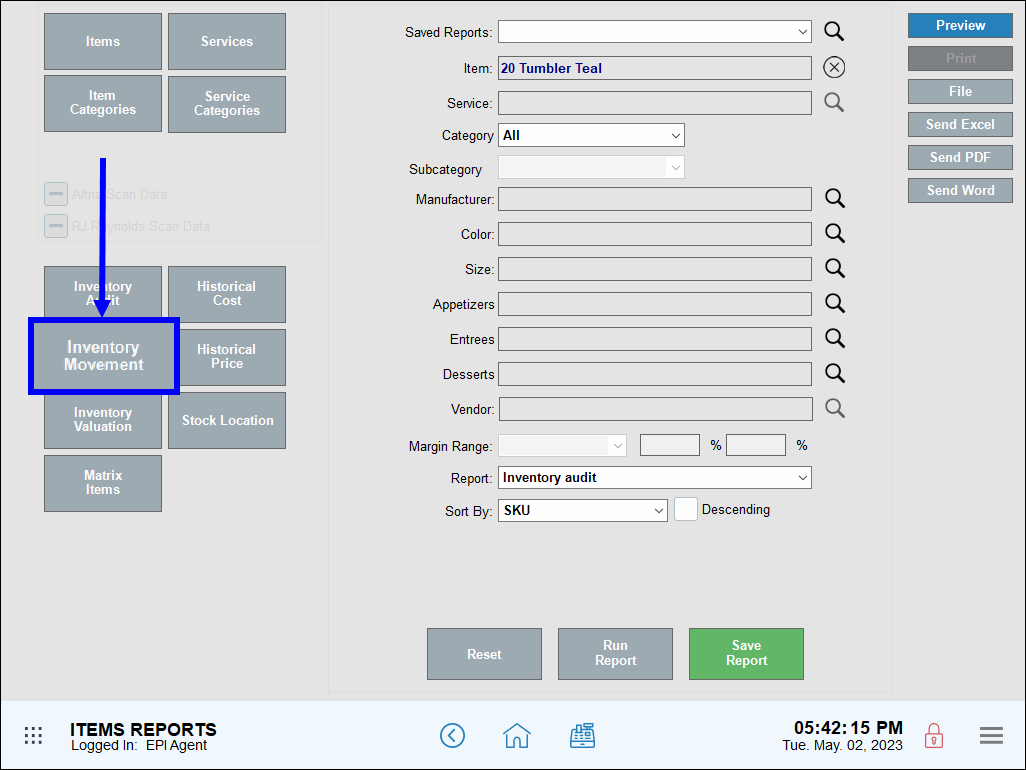
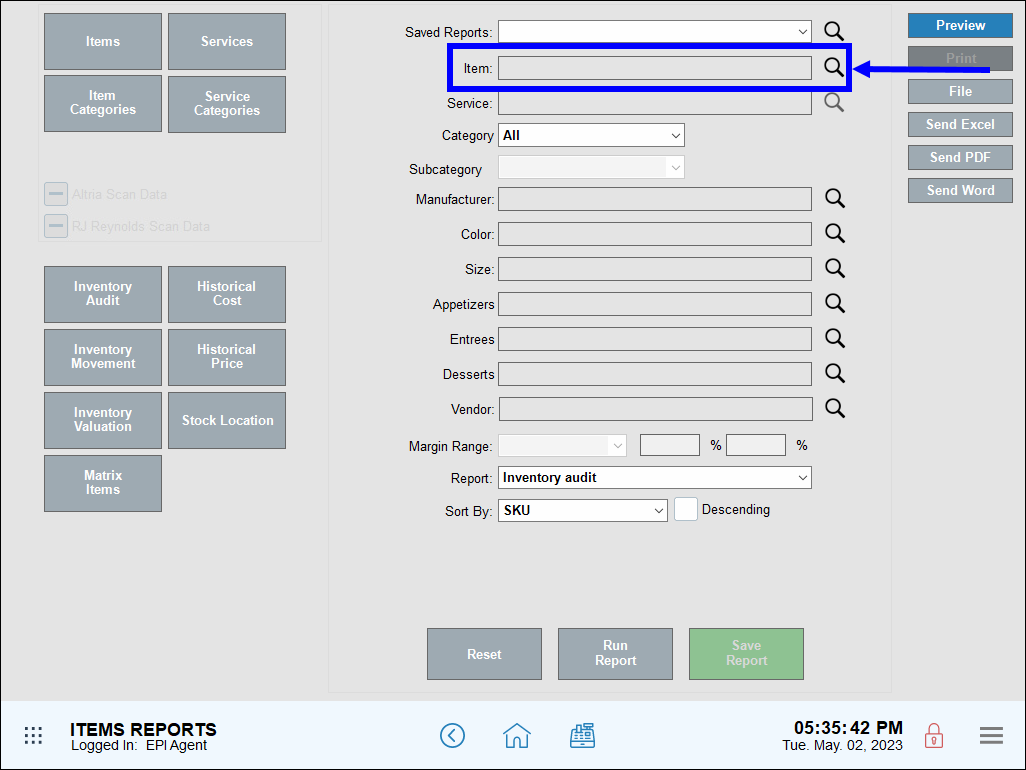
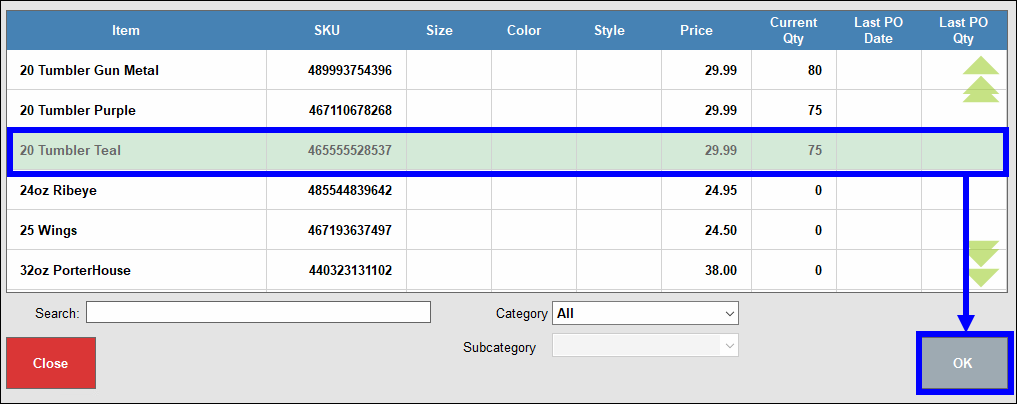
- Tap the magnifying glass icon next to the Item field. The Item List screen displays.
- Select an item to add, then tap OK.
- Select a date range from the Range drop-down menu, then tap Run.
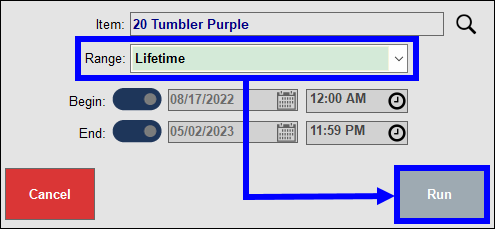
- The Inventory Movement report displays.
How can we improve this information for you?
Registered internal users can comment. Merchants, have a suggestion? Tell us more.