The Exatouch Point of Sale (POS) system allows restaurants to quickly build menus to maximize efficiency when processing sales.
To download a PDF copy of this information, click here.
Perform the following to build menus in Exatouch:
Items Module
Menu building takes place within the Items module, which is located on the Home screen. Navigate to the Home screen by tapping the Home button at the bottom of most Exatouch screens.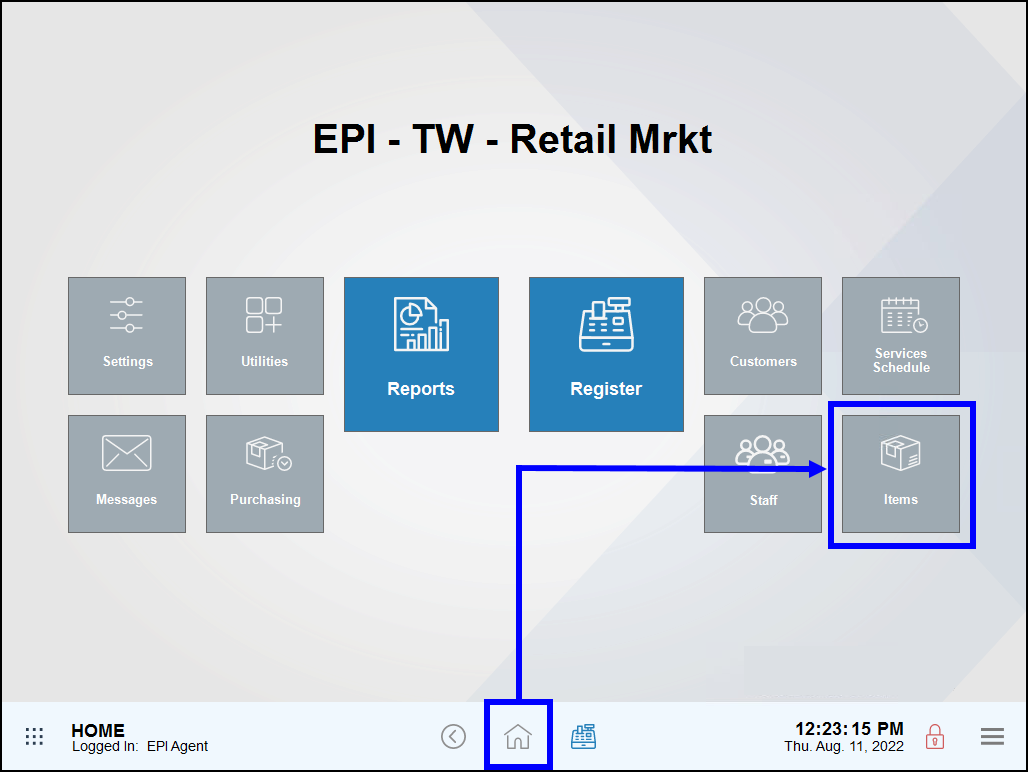
Item List Module
Tapping the Item List module displays all items and modifiers added into the Exatouch POS. From Home, navigate to Items > Item List.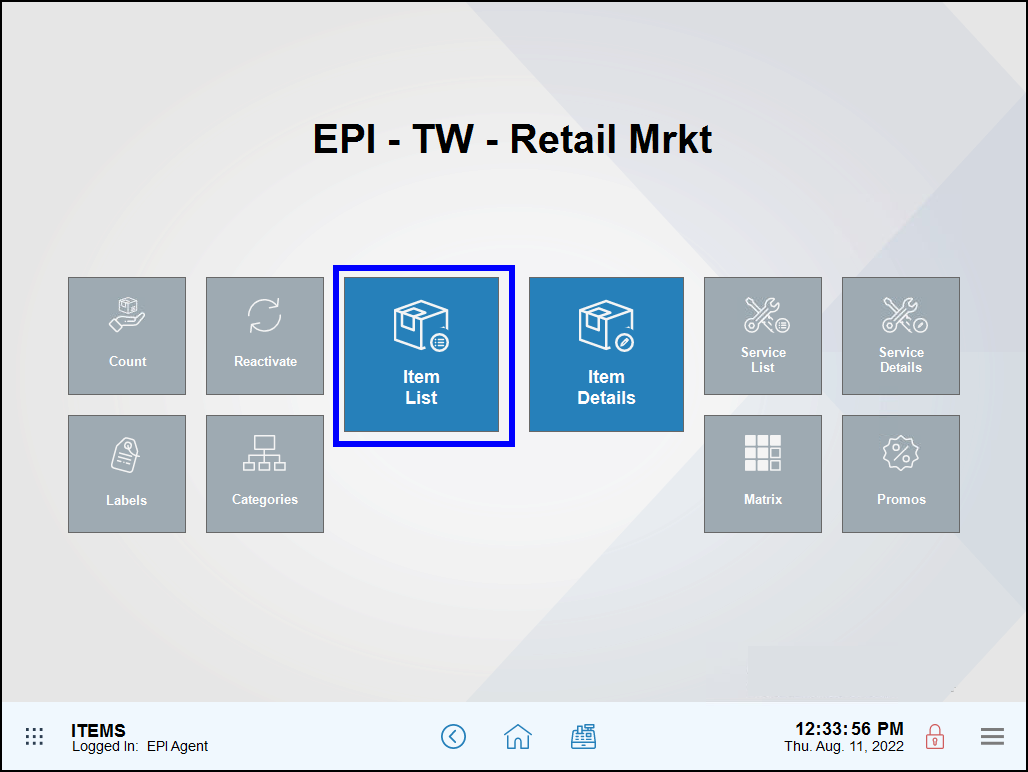
Item Details Module
Tapping the Item Details module displays the Item Details page, where users can create items, add categories and subcategories, assign modifiers, and perform other item functions. From Home, navigate to Items > Item Details.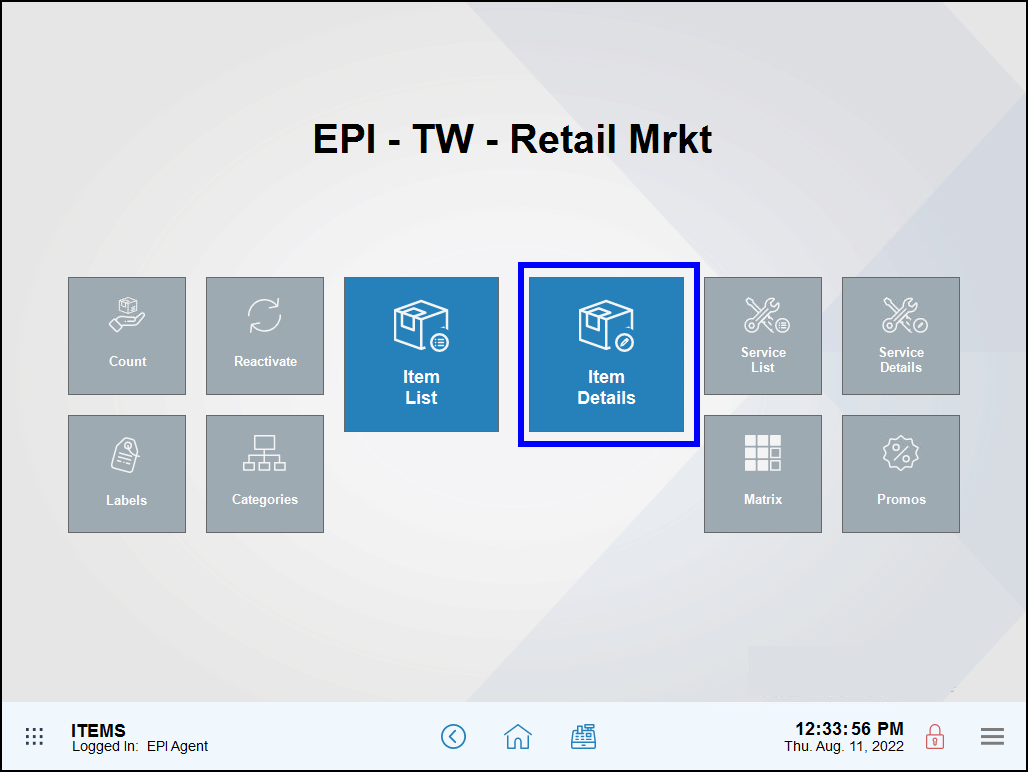
Categories Module
Tapping the Categories module displays Categories work area, where users can create categories and subcategories. From Home, navigate to Items > Categories.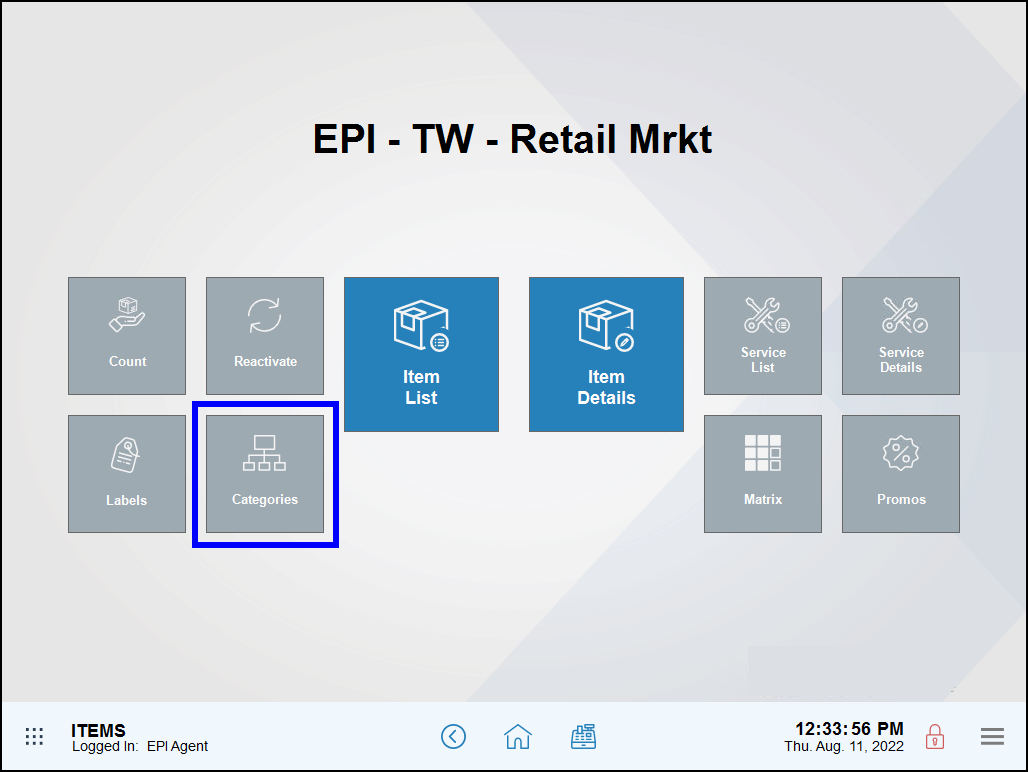
Begin building a menu by first organizing items and services into categories and subcategories. Categories and subcategories help merchants find items more easily in the Register app.
Create a Category
- From Home, navigate to Items > Categories.
- Tap New Category to start a new category.
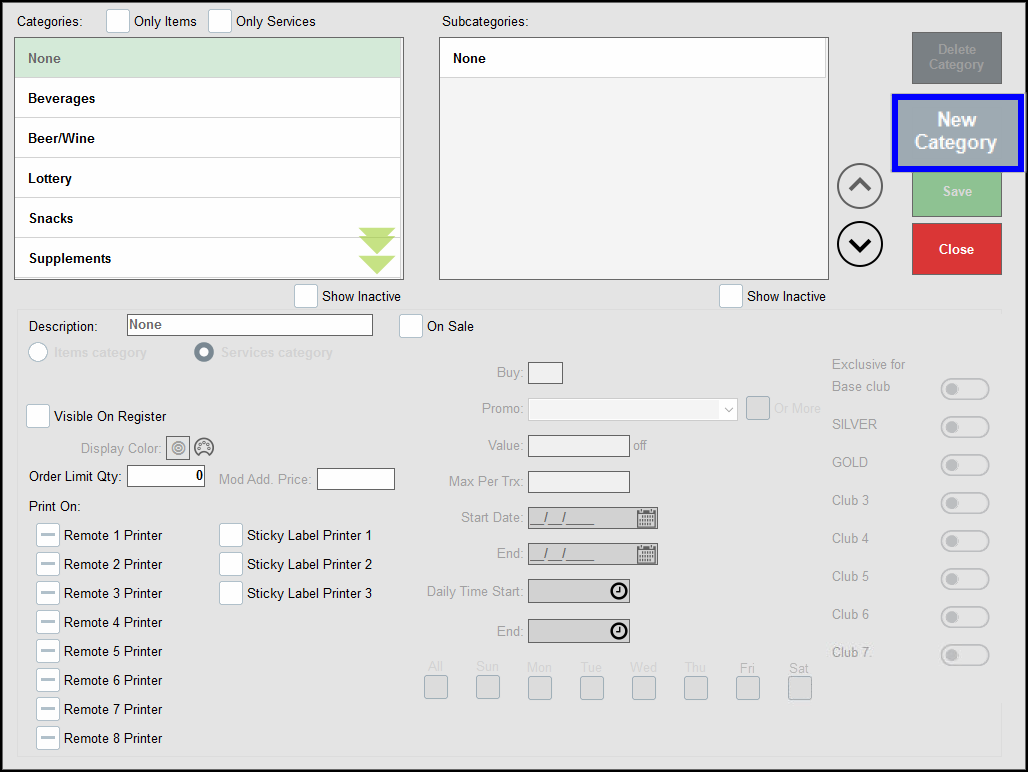
- Enter a Description, and then select a category type: Items category or Services category.
- Select the Visible on Register checkbox.
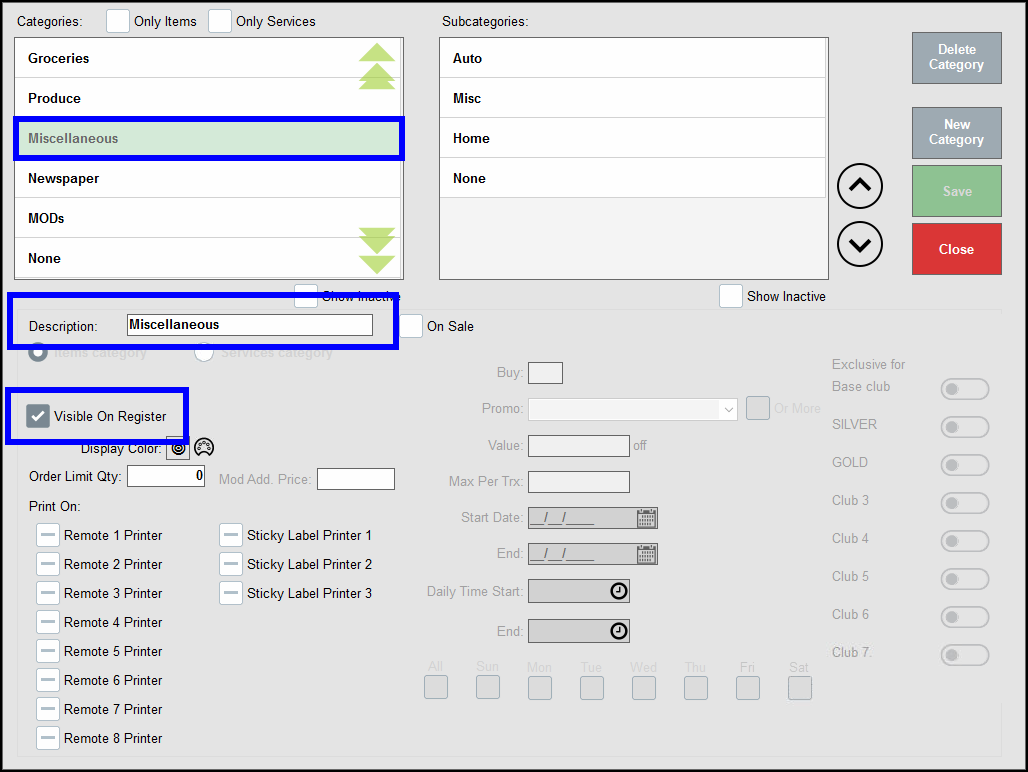
- Tap Save.
- Repeat as needed to create additional categories.
Create a Subcategory
- From Home, navigate to Items > Categories.
- Select a category, tap None in the Subcategories work area, and then tap New subcat to start a new subcategory.
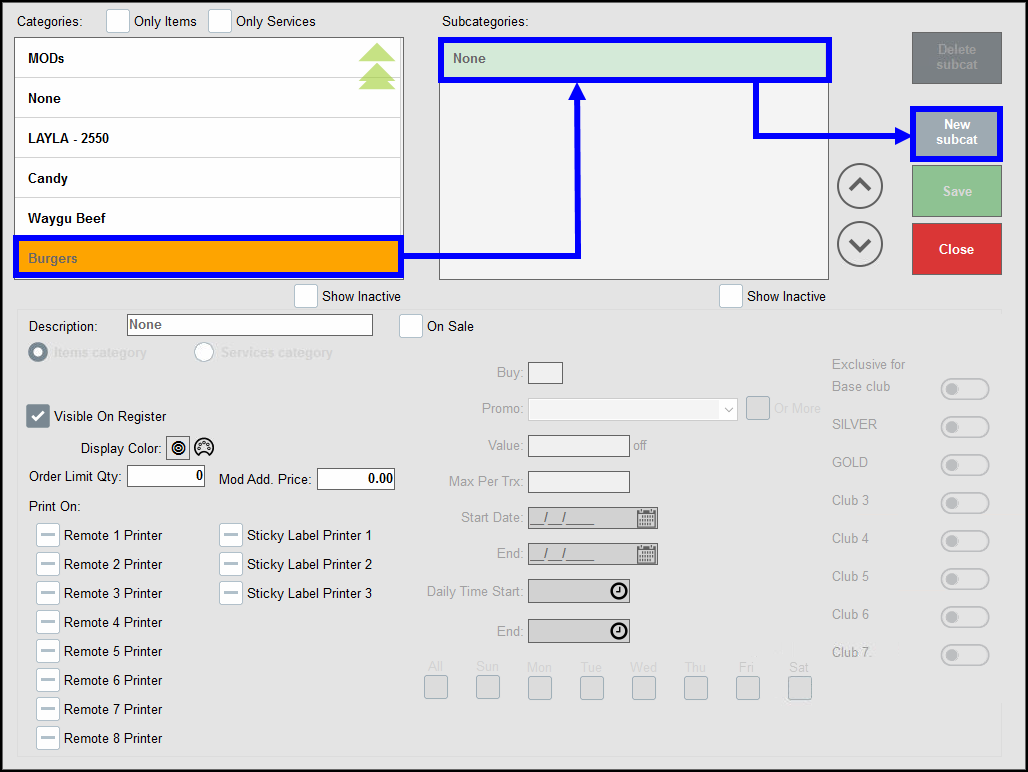
- Enter a Description name.
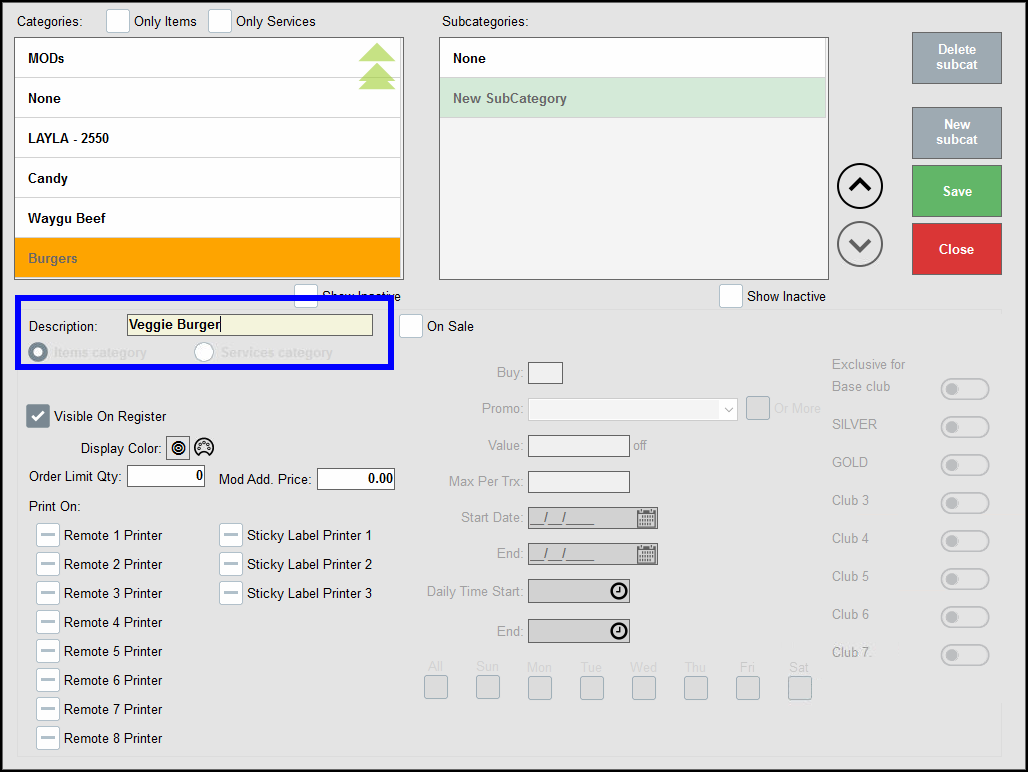
- Tap Save to save the subcategory.
- Repeat as needed to create additional subcategories.
- Note: Saving a subcategory returns users to the Items screen. Tap the Categories module to continue adding subcategories.
After creating categories and subcategories, add root items to associate with categories and subcategories.
Add an Item
- From Home, navigate to Items > Item Details.
- Tap the Details tab.
- Enter a SKU number in the SKU field or tap the SKU icon to auto-generate a SKU. In Exatouch, random SKU numbers are assigned to newly created items for identification purposes.
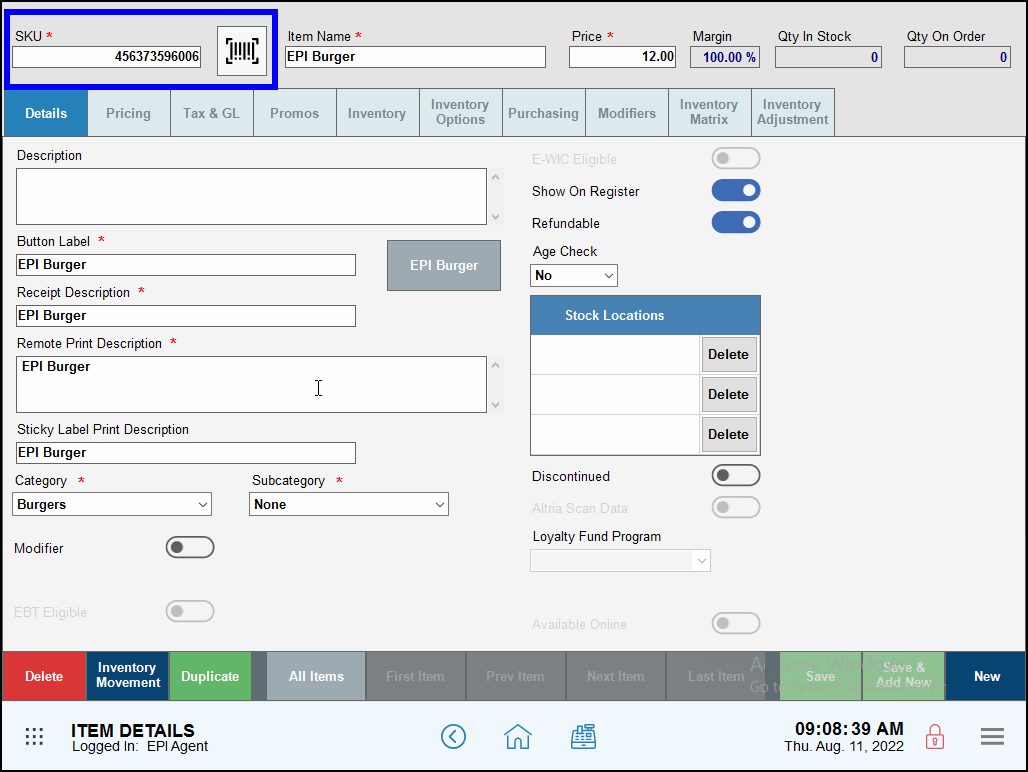
- In the Item Name field, enter a name for the item. The item name populates in several fields below.
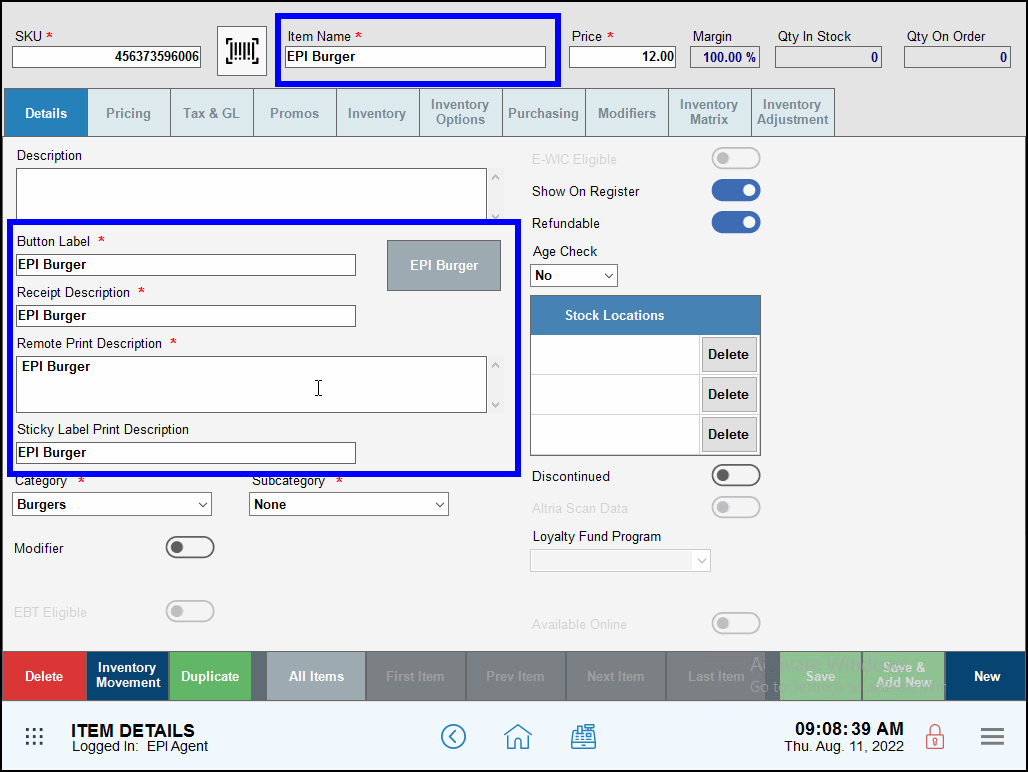
- Enter a price in the Price field.
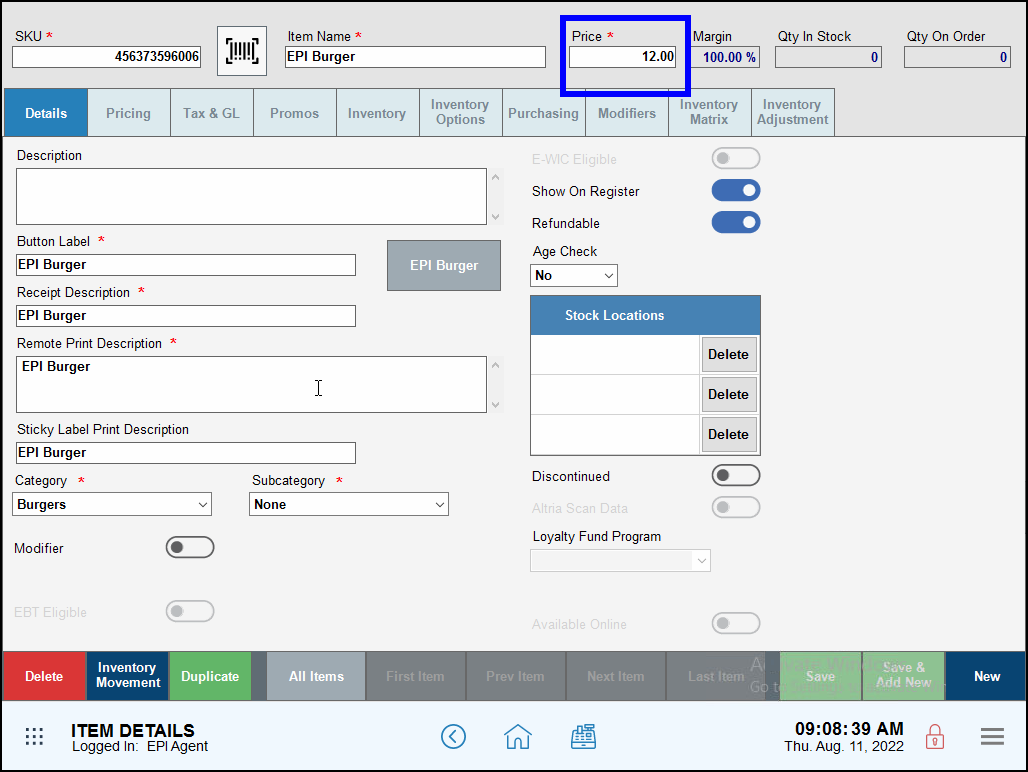
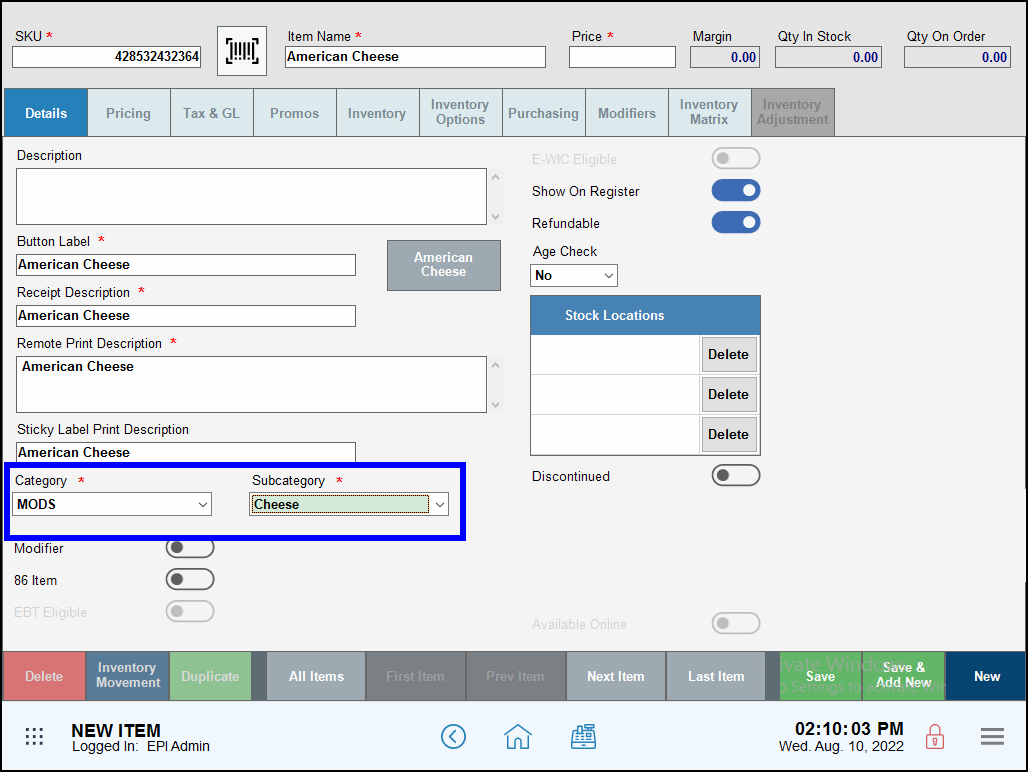
- Select a Category and Subcategory (if applicable) for the item.

- Tap Save.
Set Tax Rates for Individual Items
Merchants should also verify that proper tax rates are enabled.
- On the Item Details screen, tap the Tax & GL tab.
- In the Tax Groups section, adjust the sliders to enable or disable desired tax settings.
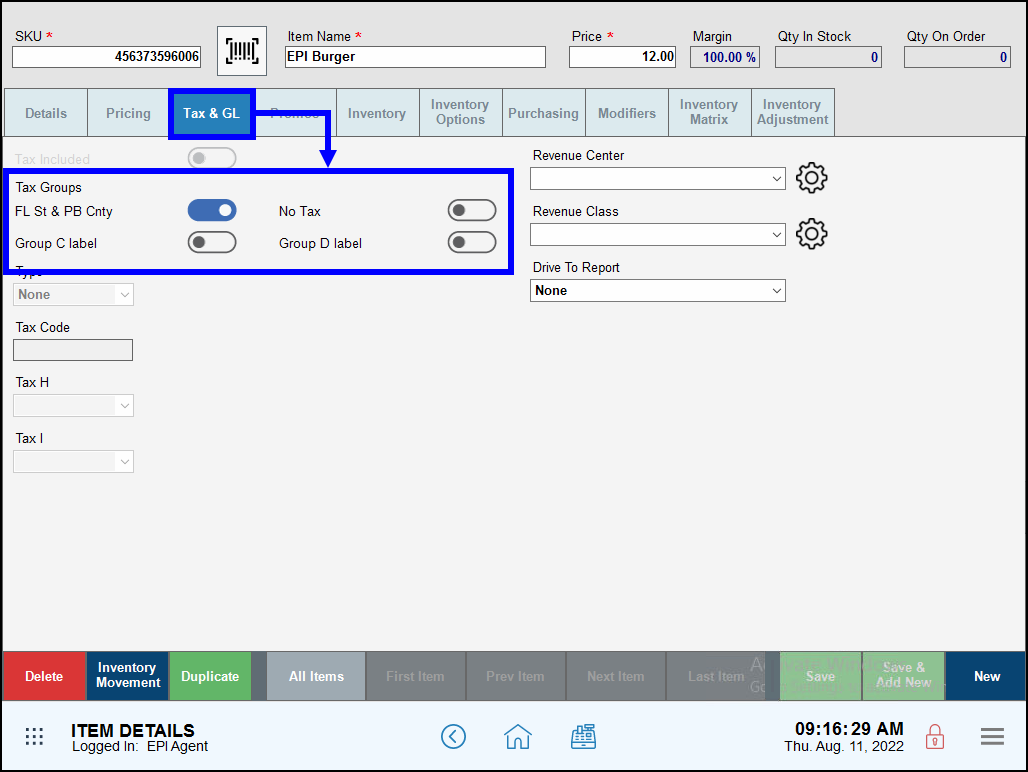
- Tip! For detailed tax group configuration, see Set General Tax Rates.
- Tap Save.
A modifier is an item which further describes or amends a customer’s order. Modifier creation follows the same process as creating a root item.
Add a Modifier
- From Home, navigate to Items > Item Details.
- Tap New, then create a SKU number.
- Enter a modifier name in the Item Name field.
- Select the Category and Subcategory from the dropdowns.
- Enter a price in the Price field. If there is no charge, enter 0.00.
- Toggle the Modifier slider to enable the modifier.
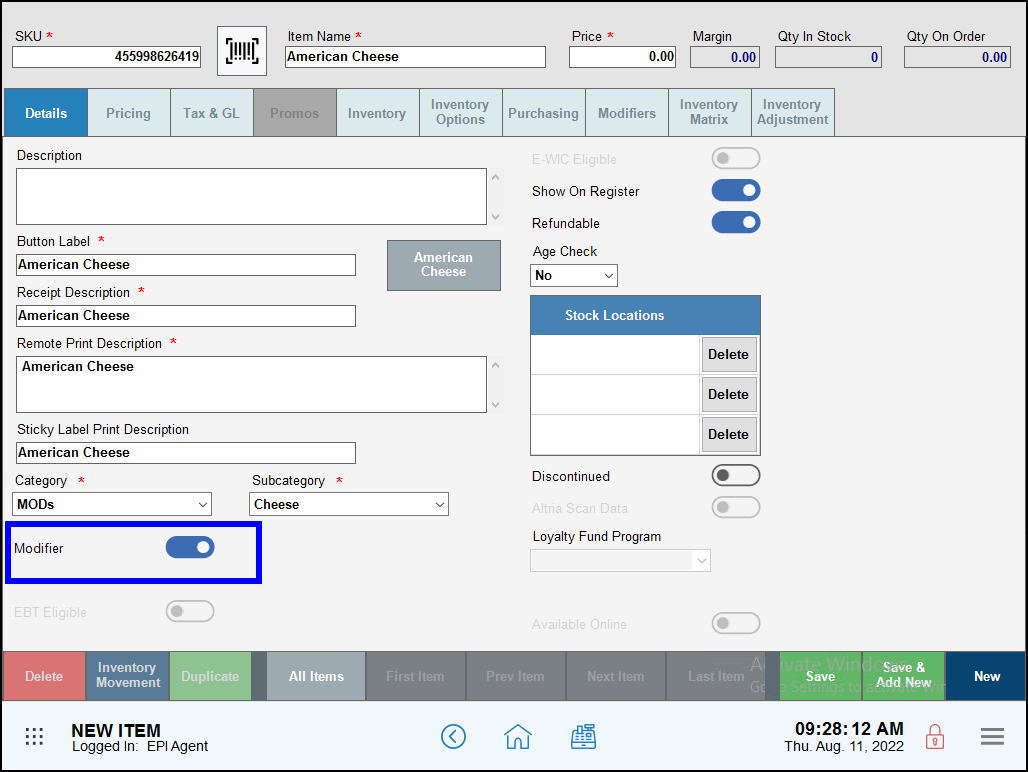
- Tap Save.
Add Cost to a Modifier
Merchants can also assign a cost to modifiers, such as adding extra cheese or bacon to a hamburger.
- From Home, navigate to Items > Item Details.
- Create a modifier.
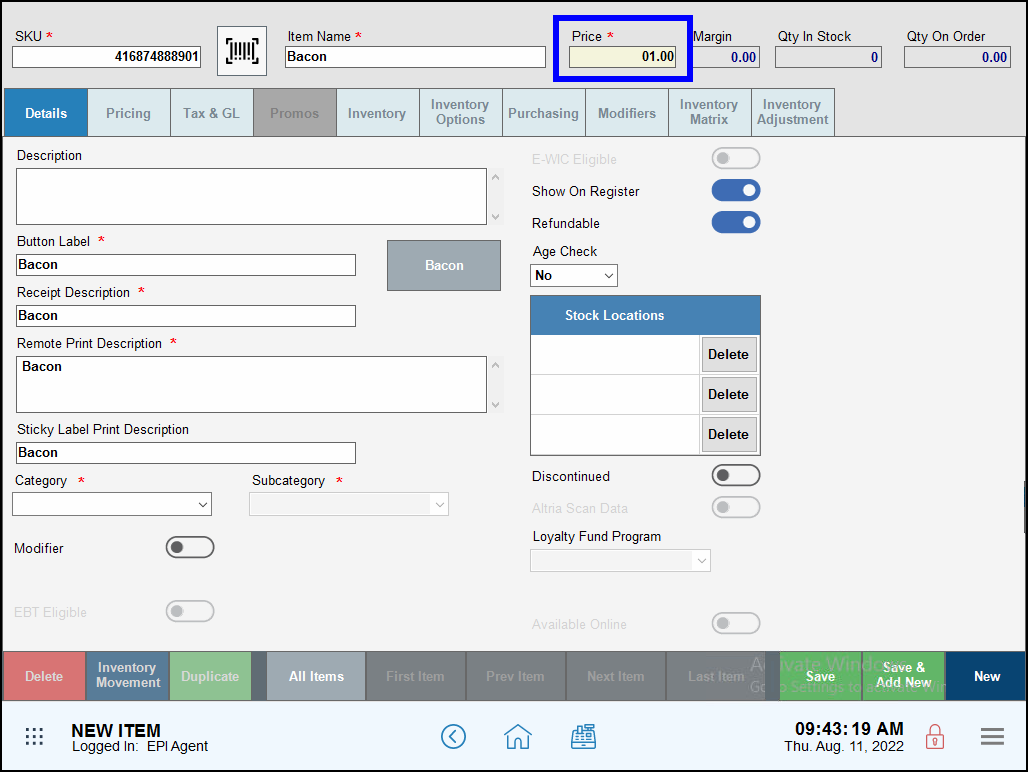
- Enter a Price for the modifier.
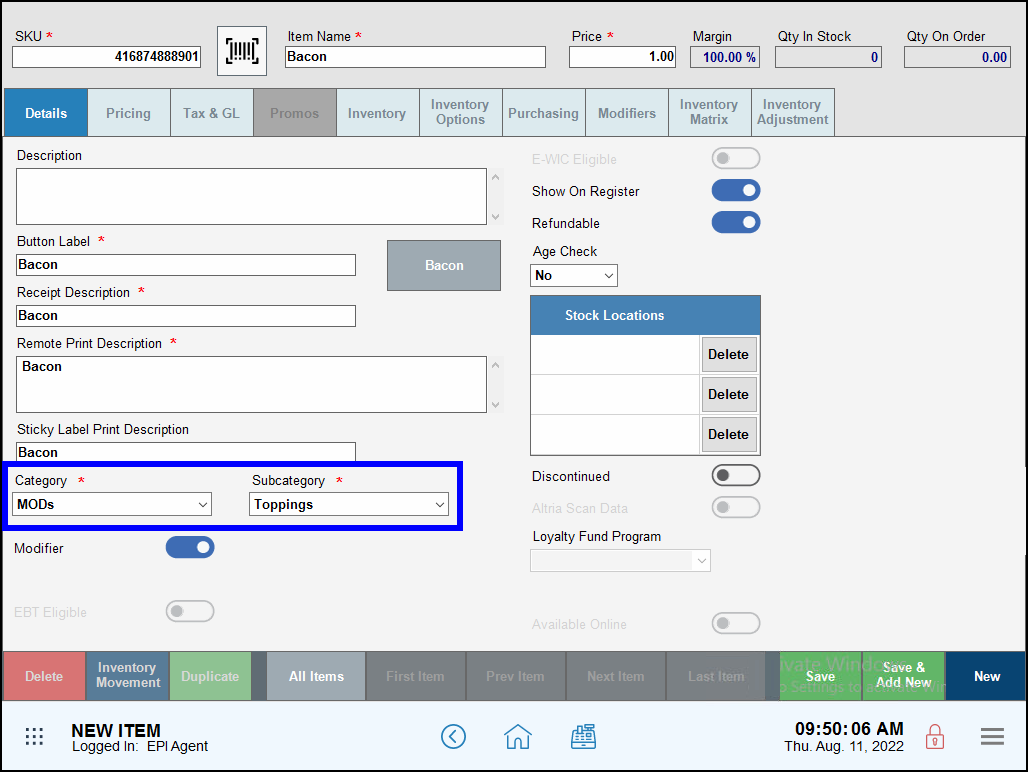
- Select the Category and Subcategory.
- Tap the Modifiers tab.
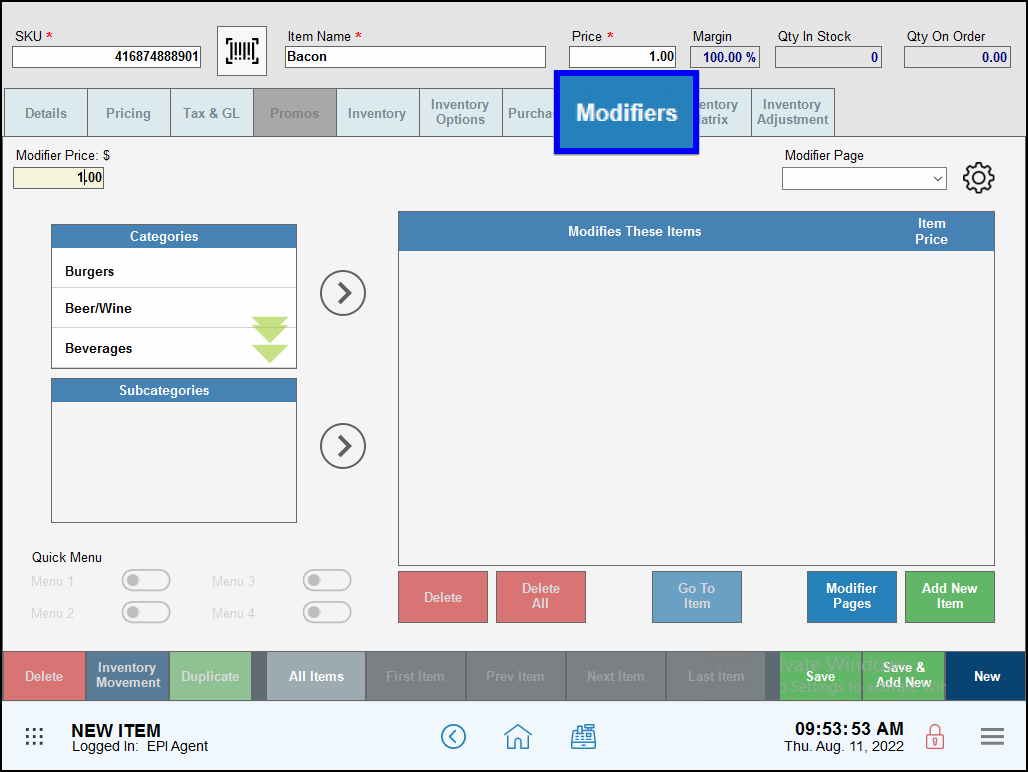
- Enter the item price in the Price and Modifier Price: $ fields.
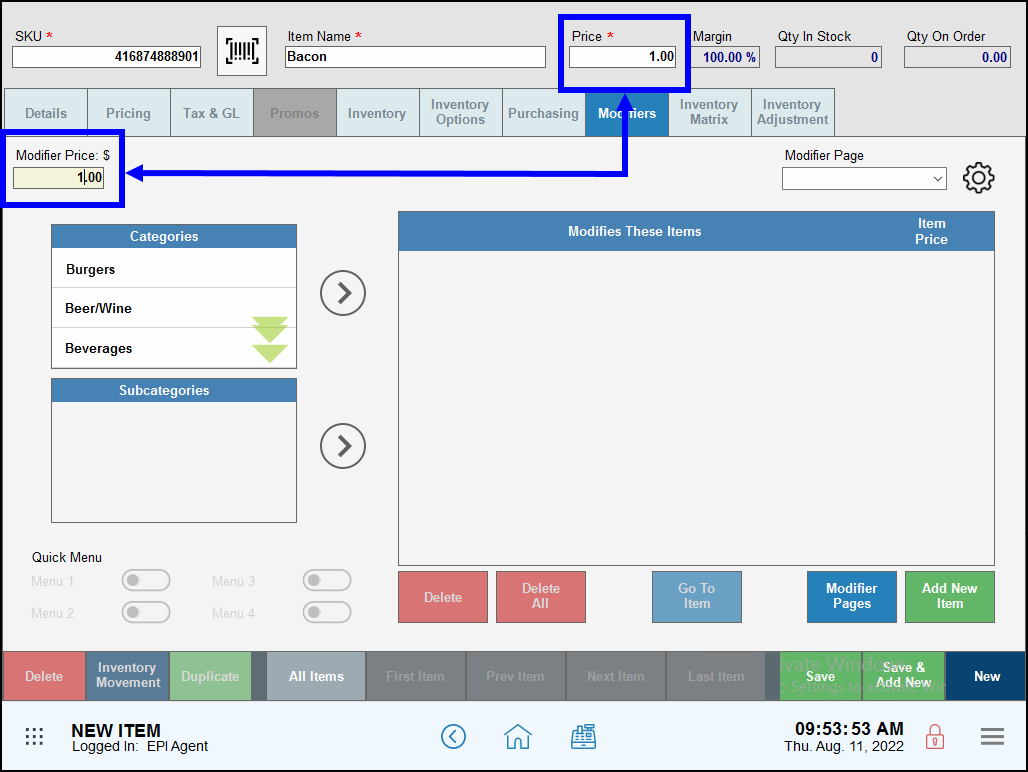
- Note: Modifier Price is the amount charged to the customer in the Register. The Price field represents the dollar value that displays in the Price $ column of the Items List page. This helps merchants to differentiate items in inventory.
- Tap Save.
Merchants can attach modifiers either individually to an item or in groups via subcategories.
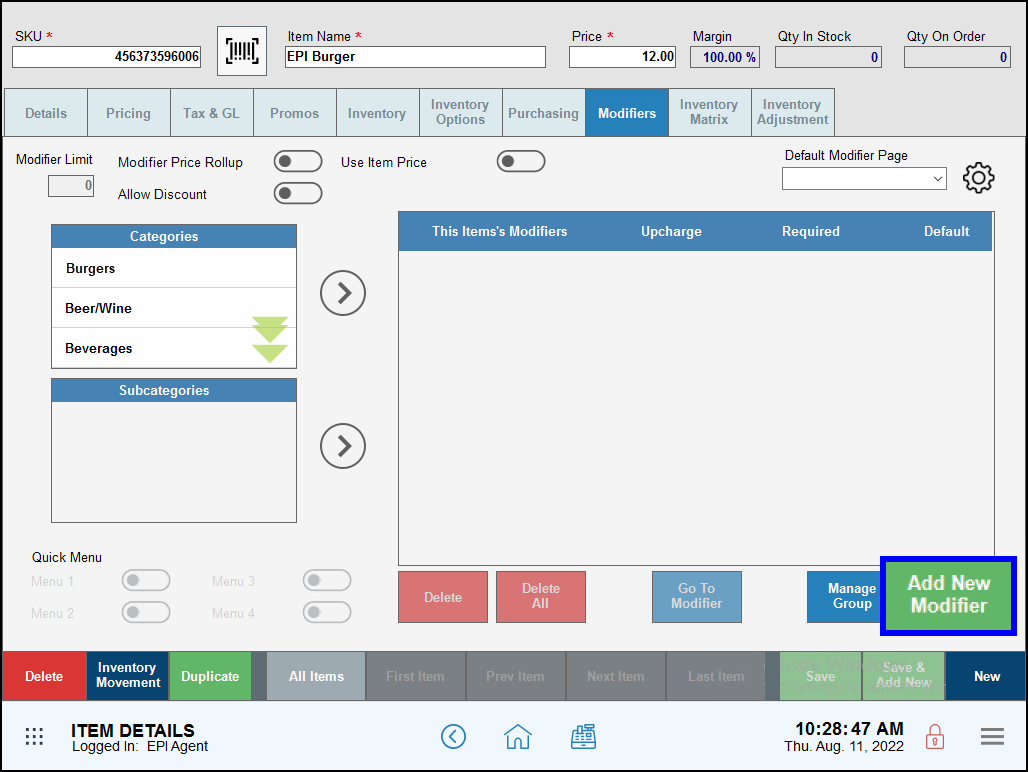
Attaching an Individual Modifier
Attach modifiers to root items selected from the Items List screen. This method is more suited to smaller, less complex menus.
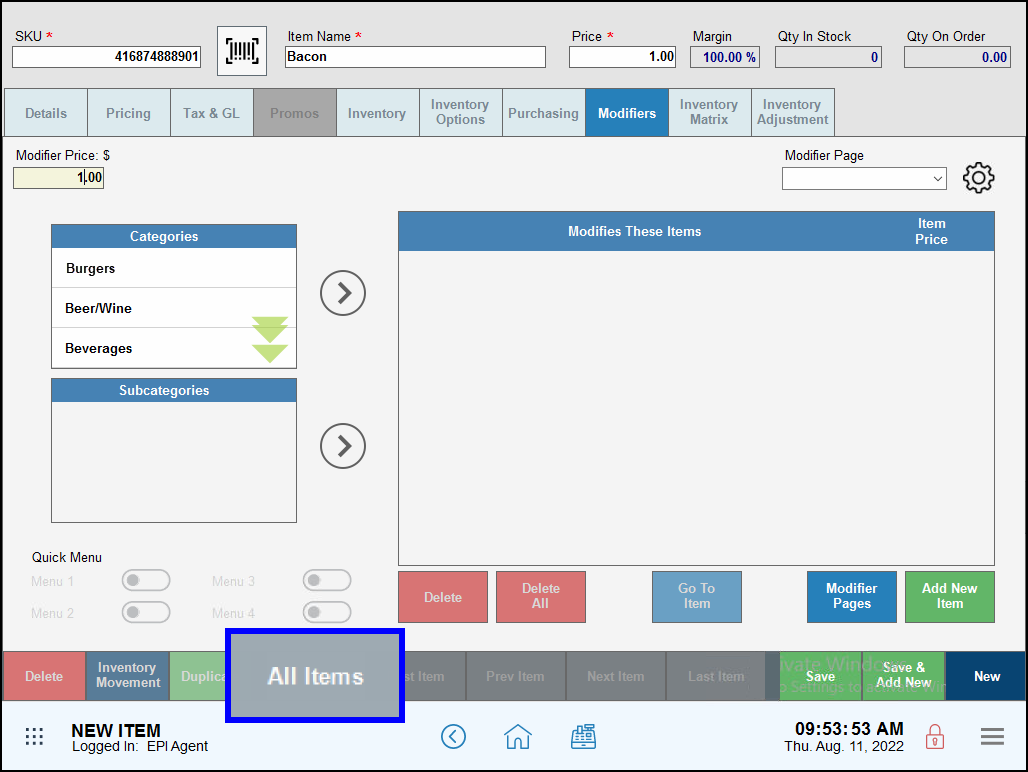
- From the Item Details screen, tap All Items. The Items List screen displays.
- Note: You can also access the Items List from the Home screen, and then navigating to Items > Items List.
- Select a root item from the Items List screen. The Item Details screen displays.
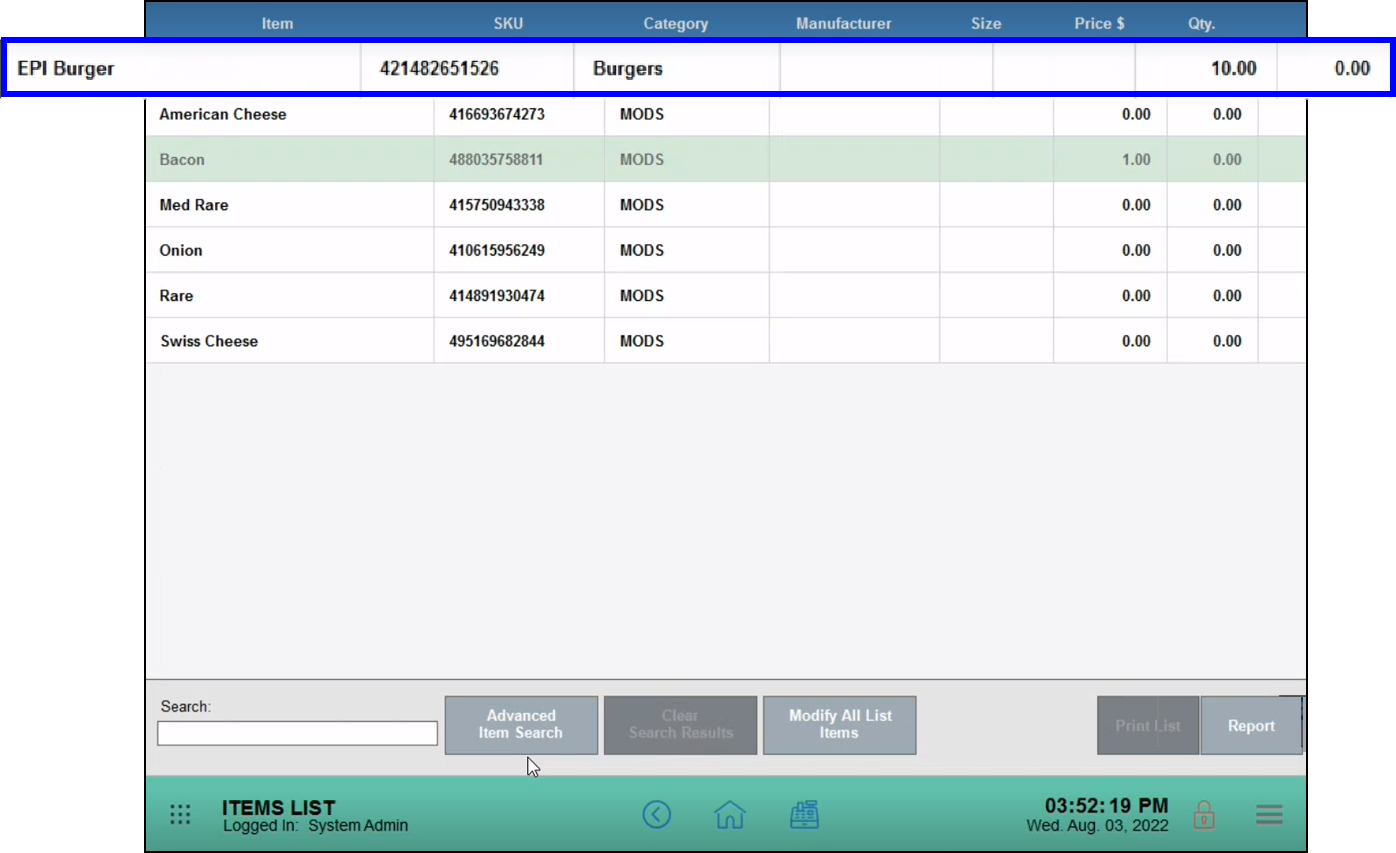
- Tap the Modifiers tab.
- Tap Add New Modifier.
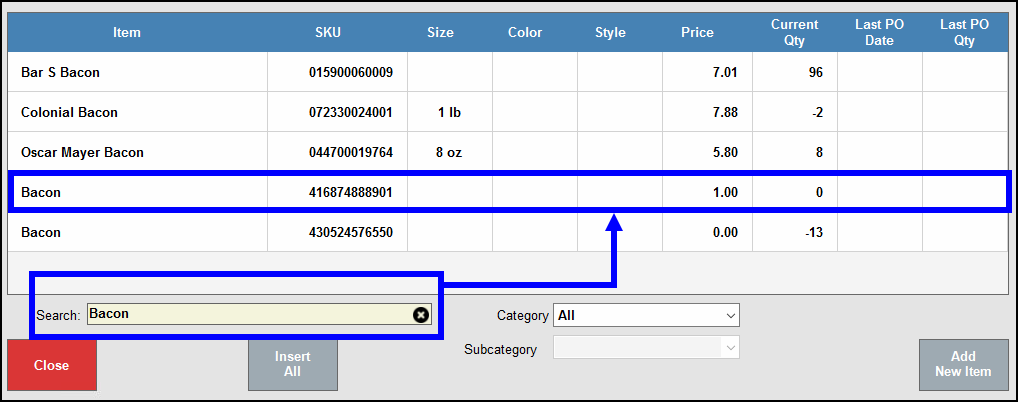
- Select a modifier to attach.
- Tip! Use the Search field to narrow the list of available modifiers.
- Tap Close. The modifier displays as attached to the root item.
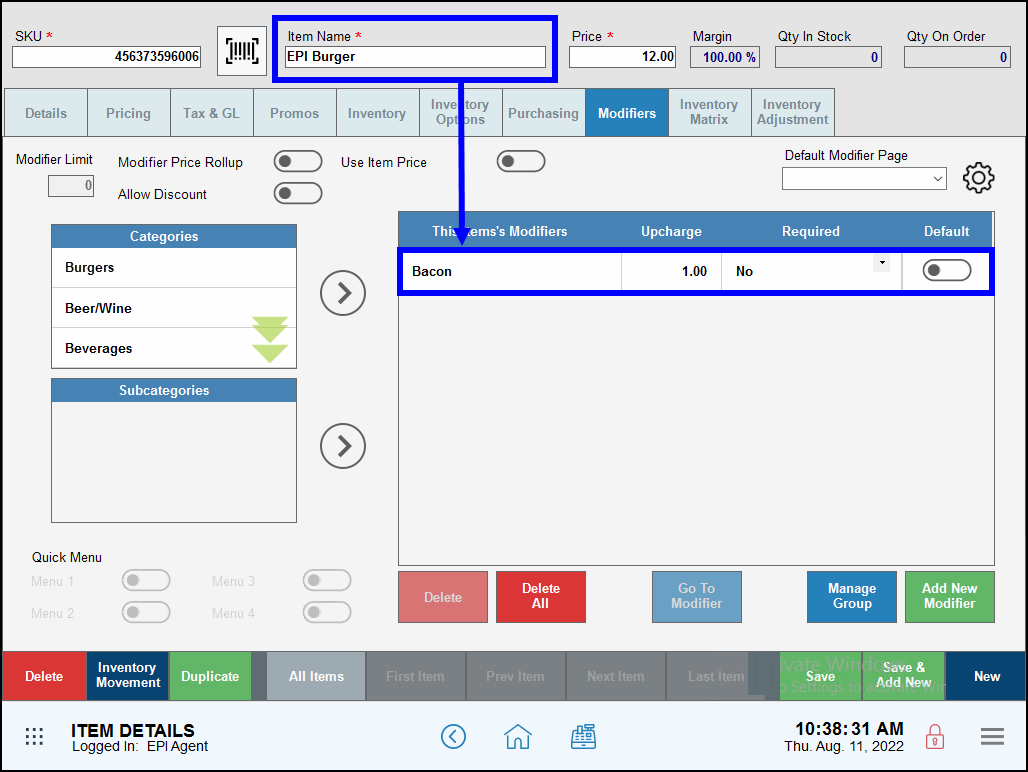
- Tap Save.
- Repeat as necessary to attach more modifiers.
Attach Modifiers by Subcategory
Attaching modifiers by subcategories allows users to build larger menus more quickly and efficiently than attaching a single modifier to a single item.
- On the Item Details page, tap Modifiers.
- Select a category from the Categories work area.
- Select a subcategory from the Subcategories work area.
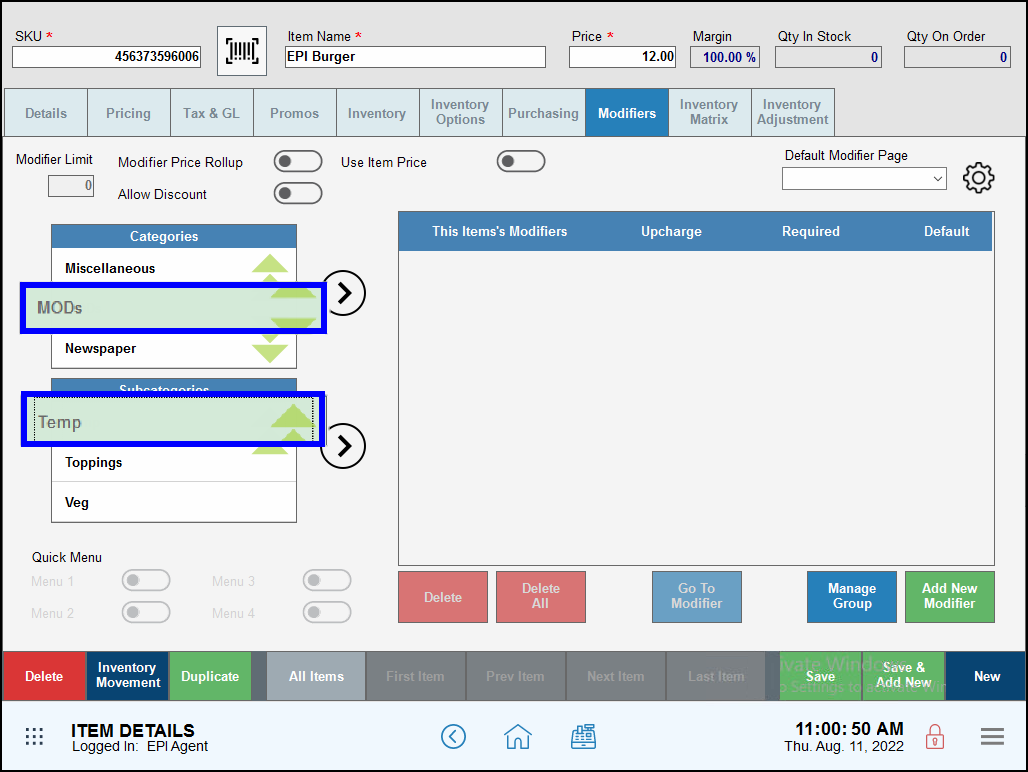
- Tap the Subcategory arrow. Modifiers associated with the subcategory attach to the item.
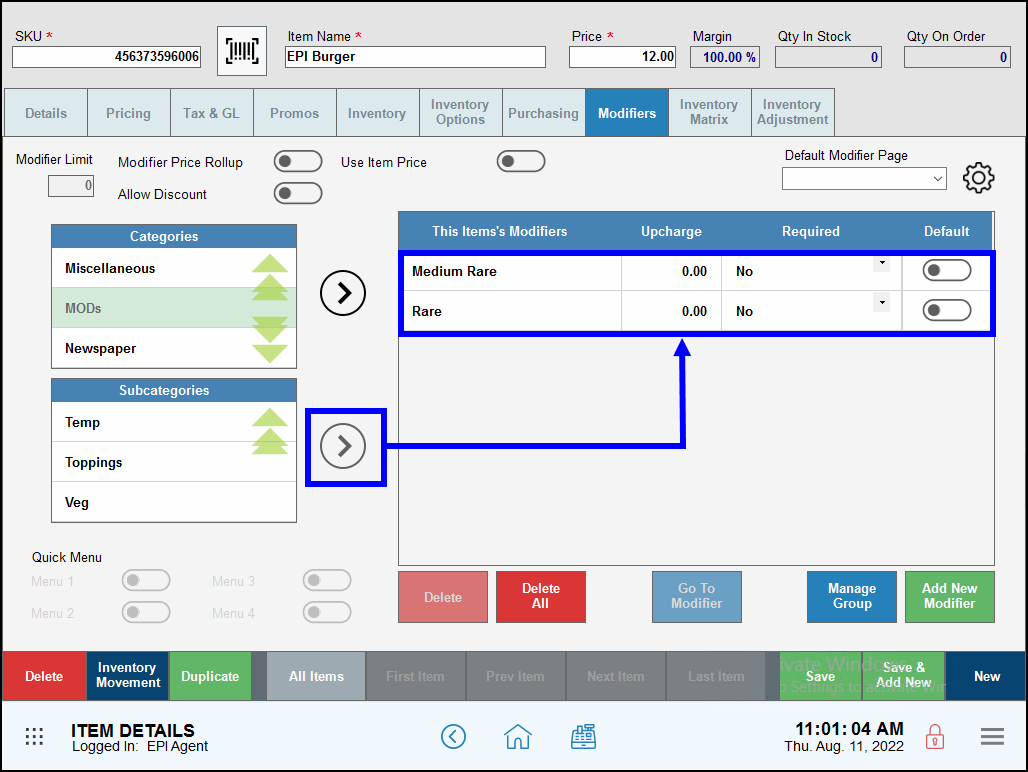
- Tap Save.
- Repeat as necessary to add more modifiers.
Grouping Modifiers
Merchants can further organize modifiers in the Register by assigning them to groups.
- Select an item.
- Tap Modifiers.
- In the Required column of the modifier work area, select a group name from the dropdown to assign to a modifier.
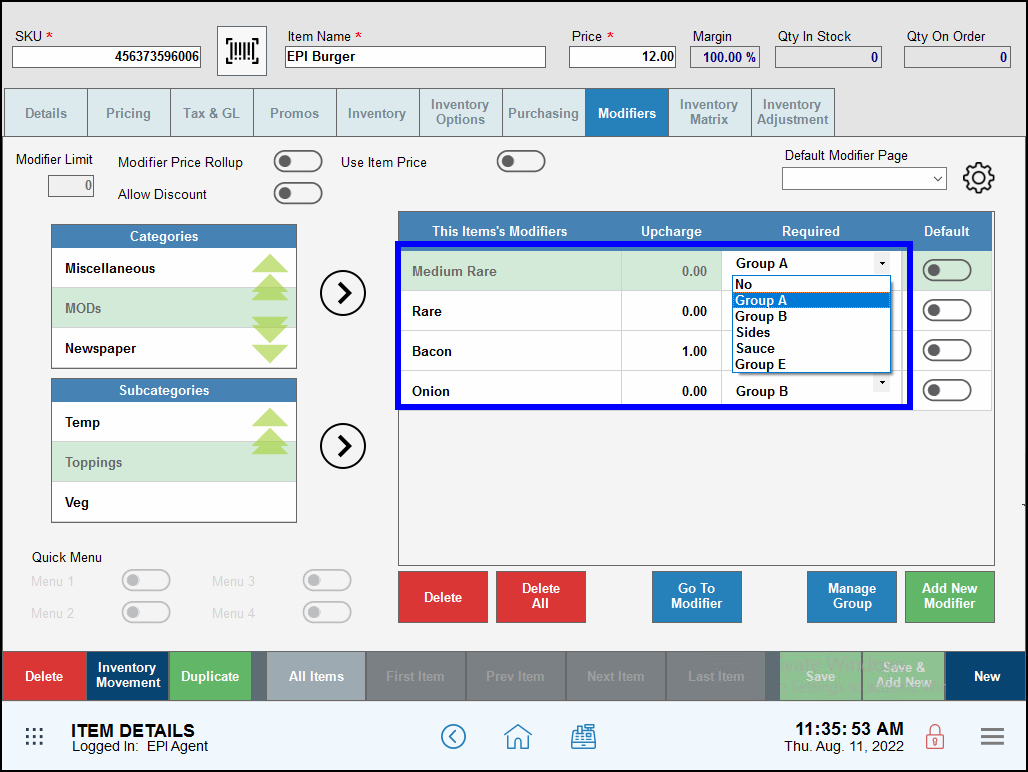
- Assign the same group name to other modifiers in the same subcategory. For example, select Group A for all Temp modifiers.
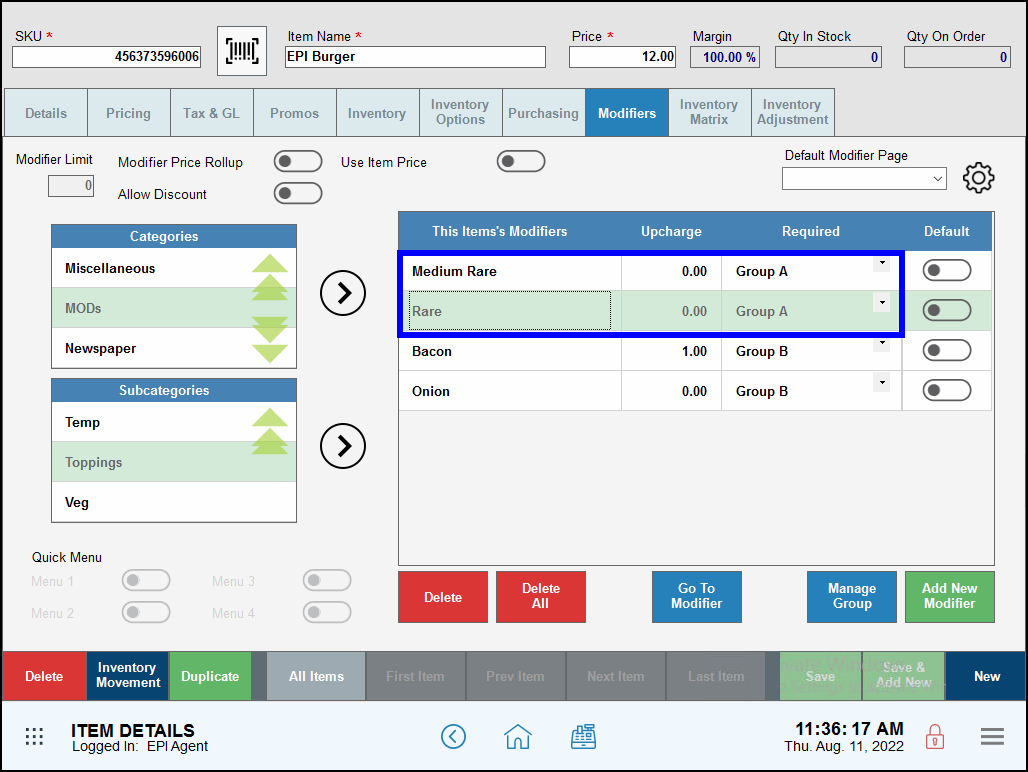
- Tap Save.
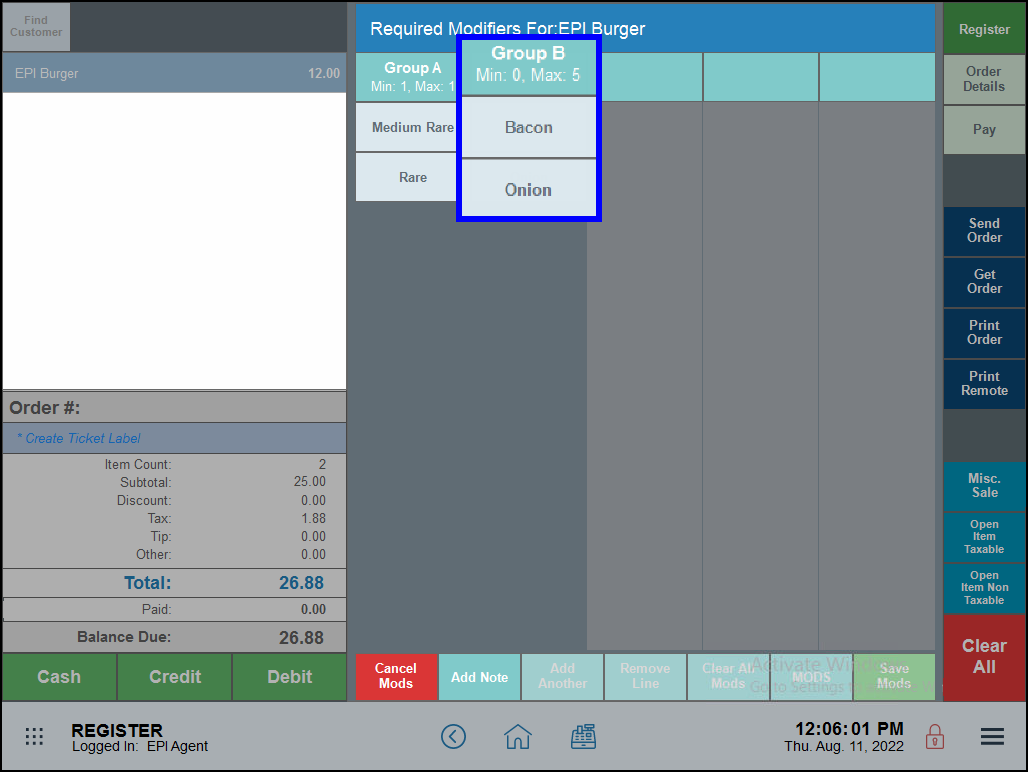
Managing Modifier Groups
By default, users can select one modifier per modifier group. The Manage Group function allows users to select multiple modifiers for the same group. This gives users more flexibility when ringing up an item.
- From the Item Details screen, tap Manage Group. A popup displays.
- In the Description column, rename group names (if desired).
- In the Minimum column, the minimum number of modifiers to apply. Enter 0 to account for plain orders.
- In the Maximum column, enter the maximum number of modifiers to apply. For example, to allow up to five modifiers, enter 5.
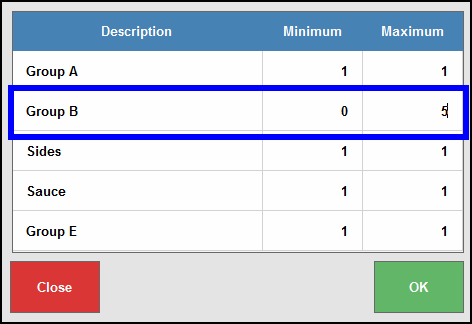
- Tap OK to return to the Item Details page.
- Tap Save.
- Verify Manage Group settings in the Register.
For assistance with menu building, contact our 24/7 Technical Support Team at (800) 966-5520 – Option 3 or email us at support@electronicpayments.com.
How can we improve this information for you?
Registered internal users can comment. Merchants, have a suggestion? Tell us more.