Paid time is recorded when employees clock in and out. Paid breaks are tracked by clocking in and out for breaks. These time entries are recorded in the Staff module.
Time clock records are viewed and managed in the Time Clock submodule.
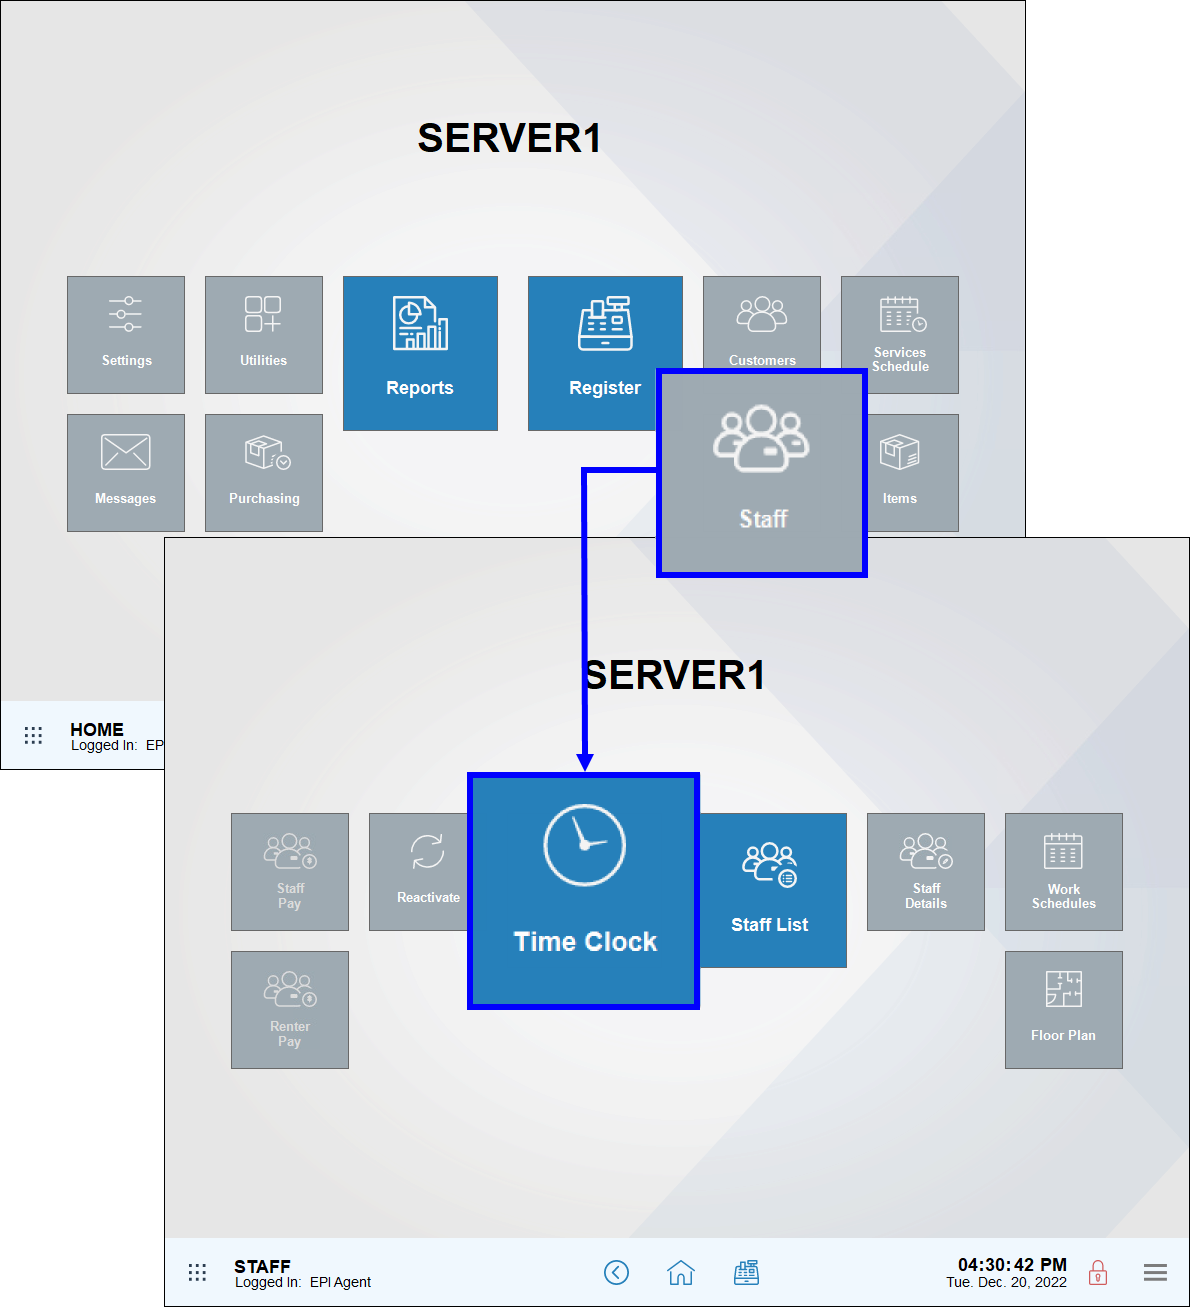
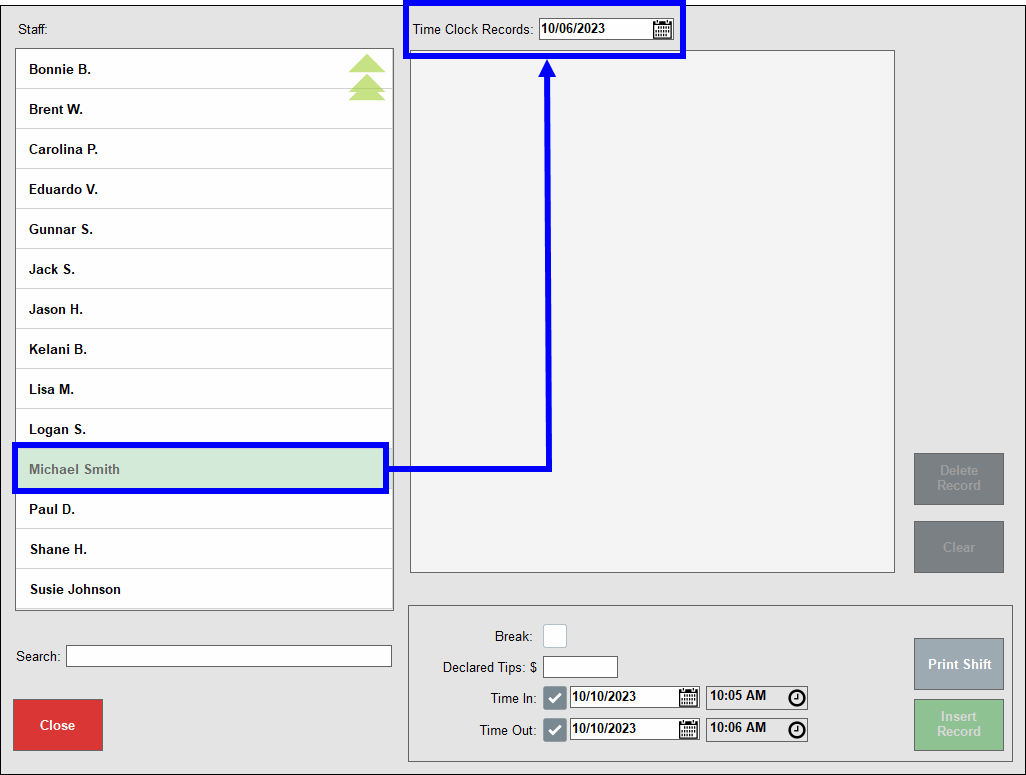
- From Home, navigate to Staff > Time Clock.
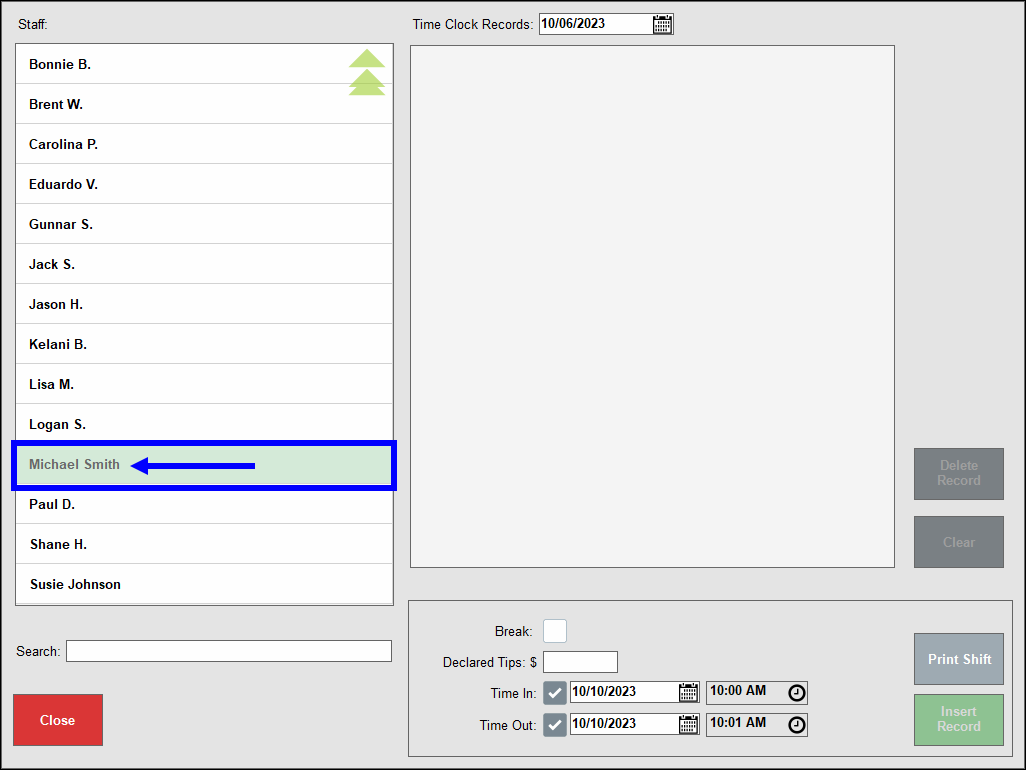
- Select a Staff name.
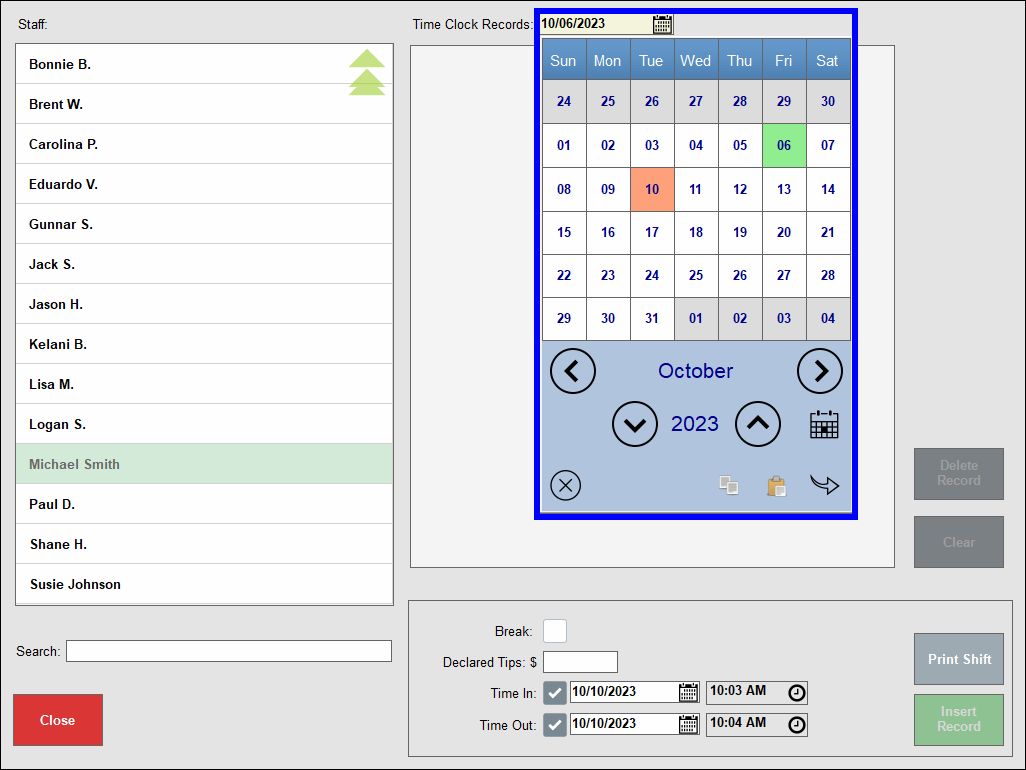
- From the Time Clock Records drop-down, select a date.
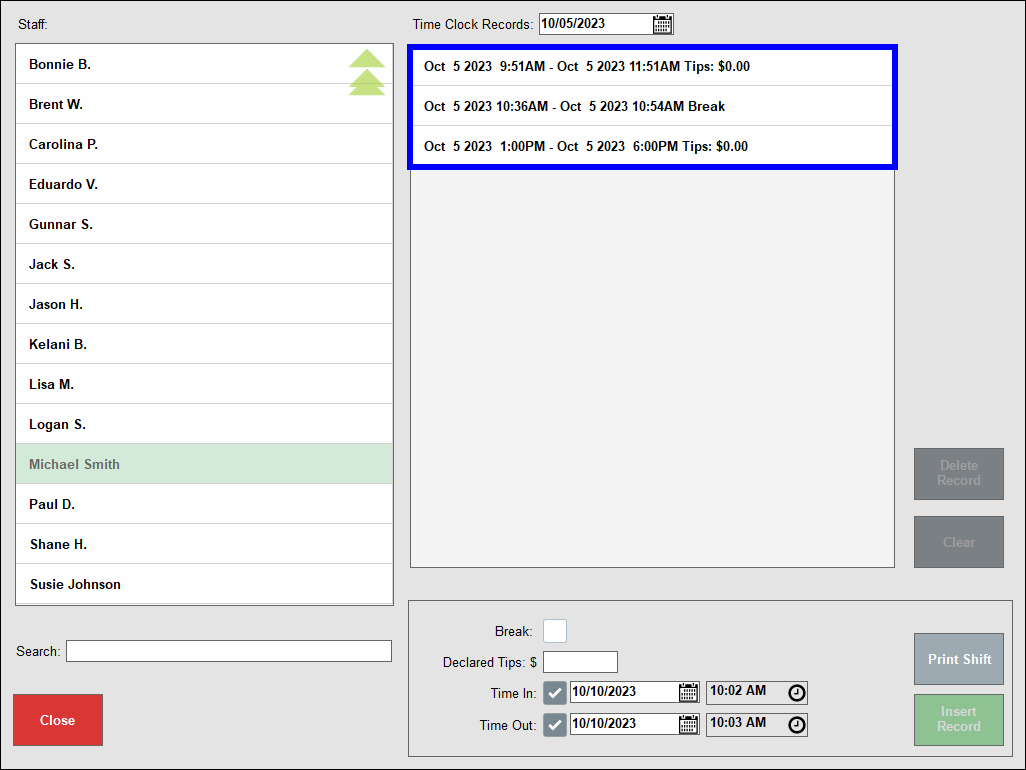
- View all Time Clock Records for the selected date.
Sometimes employees forget to clock in or out on a specific day or may not be able to clock in when there’s an outage. In these cases, merchants can add time clock entries for any prior shift.
- On the Time Clock screen, select an employee and date to modify.
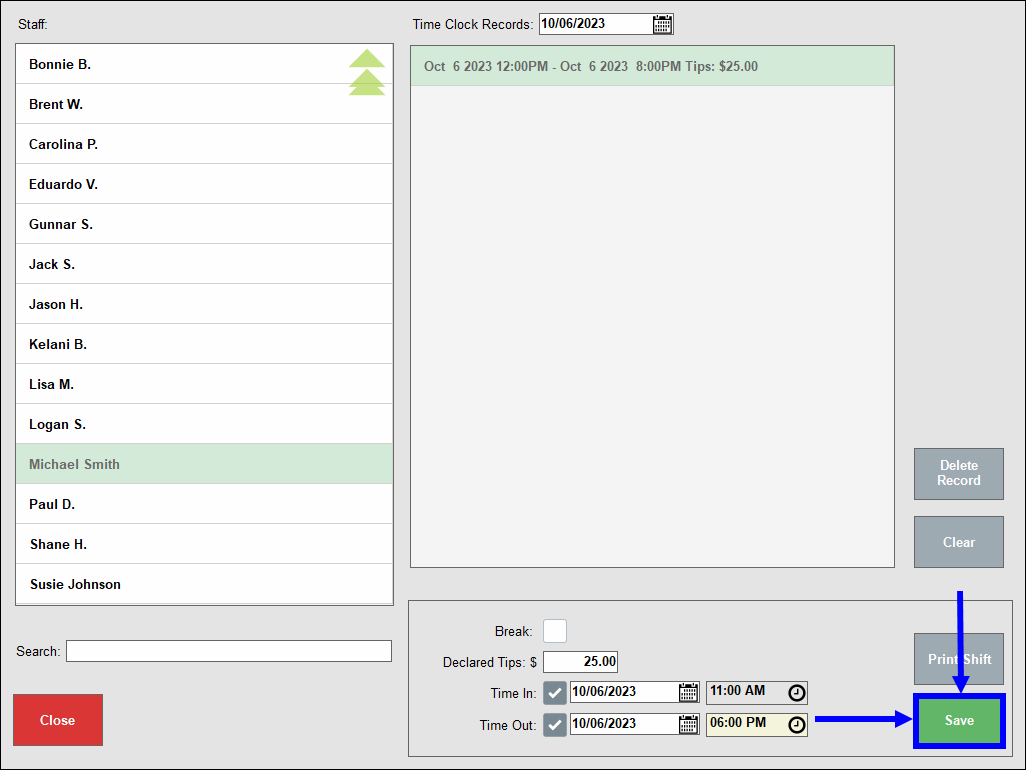
- In the Time Clock Records settings, configure the following:
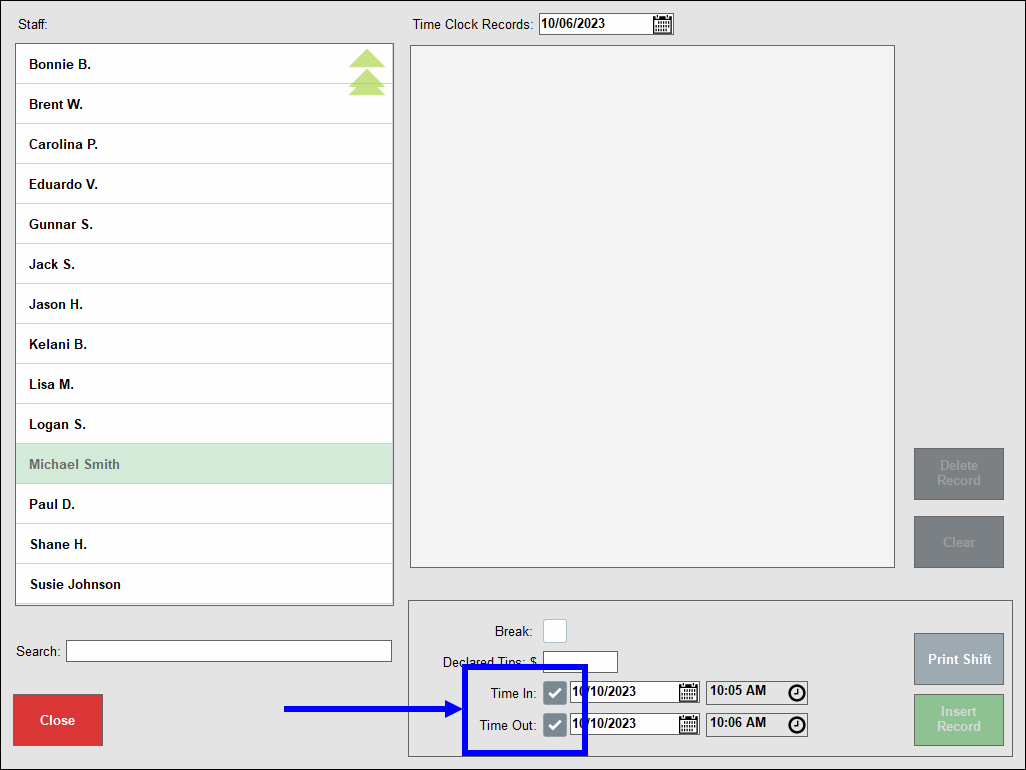
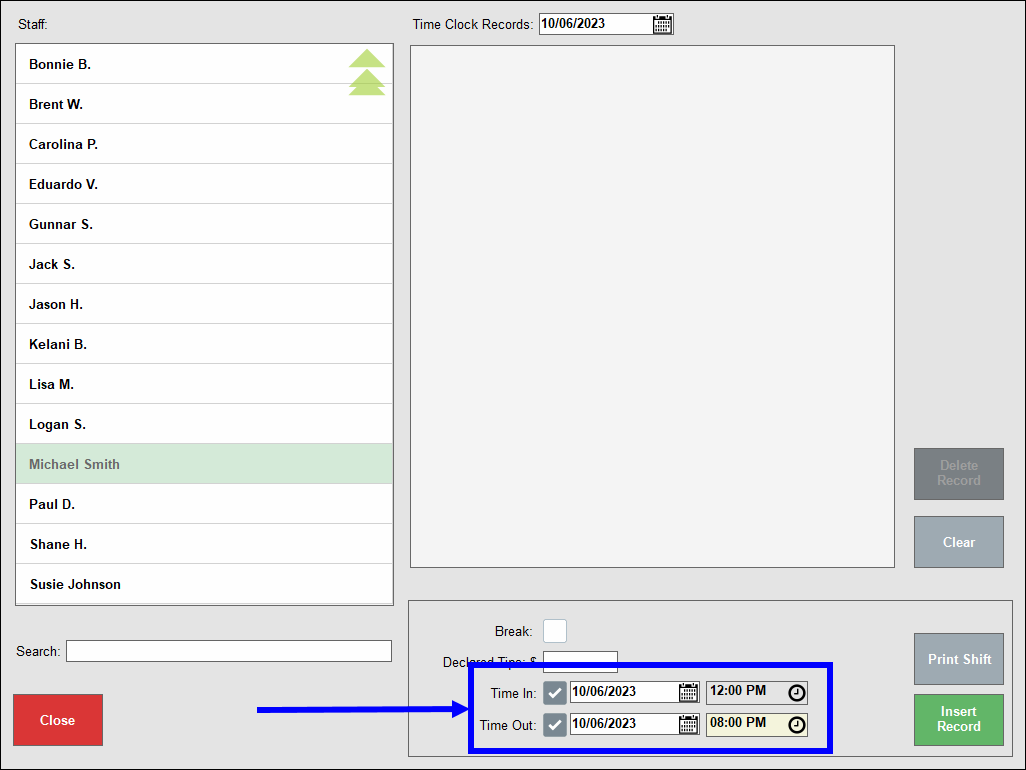
- Select the Time In and Time Out checkboxes.
- Note: The Time In and Time Out checkboxes are enabled by default. Deselect a checkbox if the setting is not in use. For example, if an employee is currently working after forgetting to clock in, select only the Time In checkbox.
- Enter Time In and Time Out values.
- Note: Employee times cannot exceed 24 hours per shift.
- Note: Time In and Time Out values must fall within business hours. See Add Business Details for more on setting business hours.
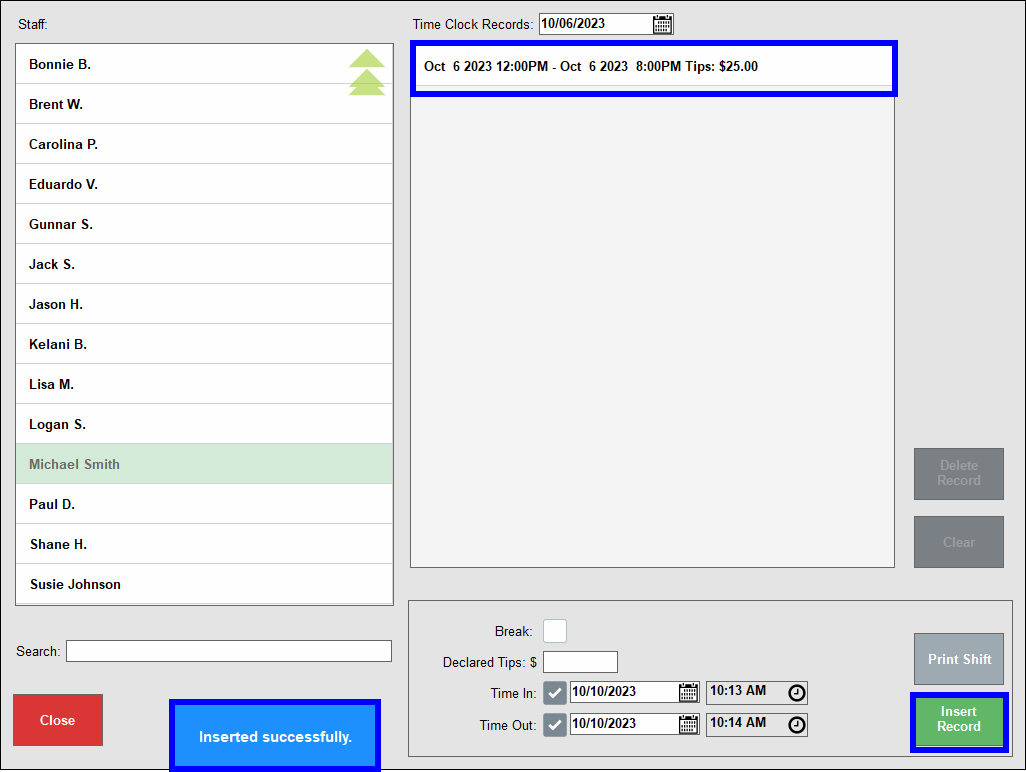
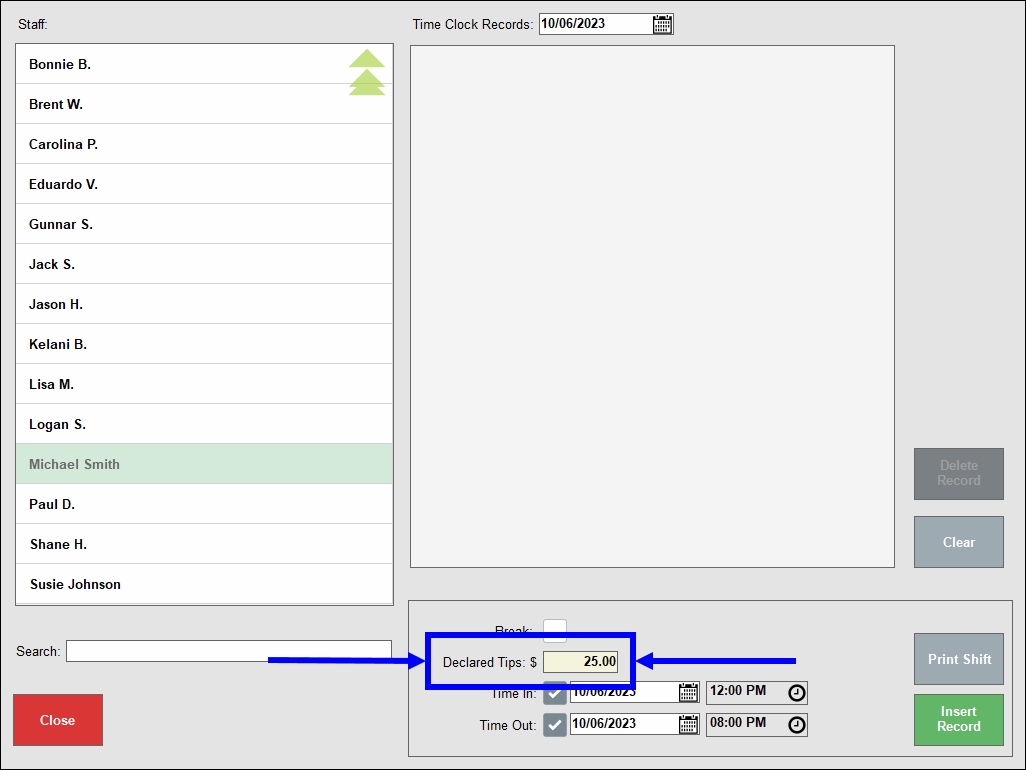
- Enter, in dollars and cents, the amount of Declared Tips.
- Note: This step is required. An error displays if this field is left blank.
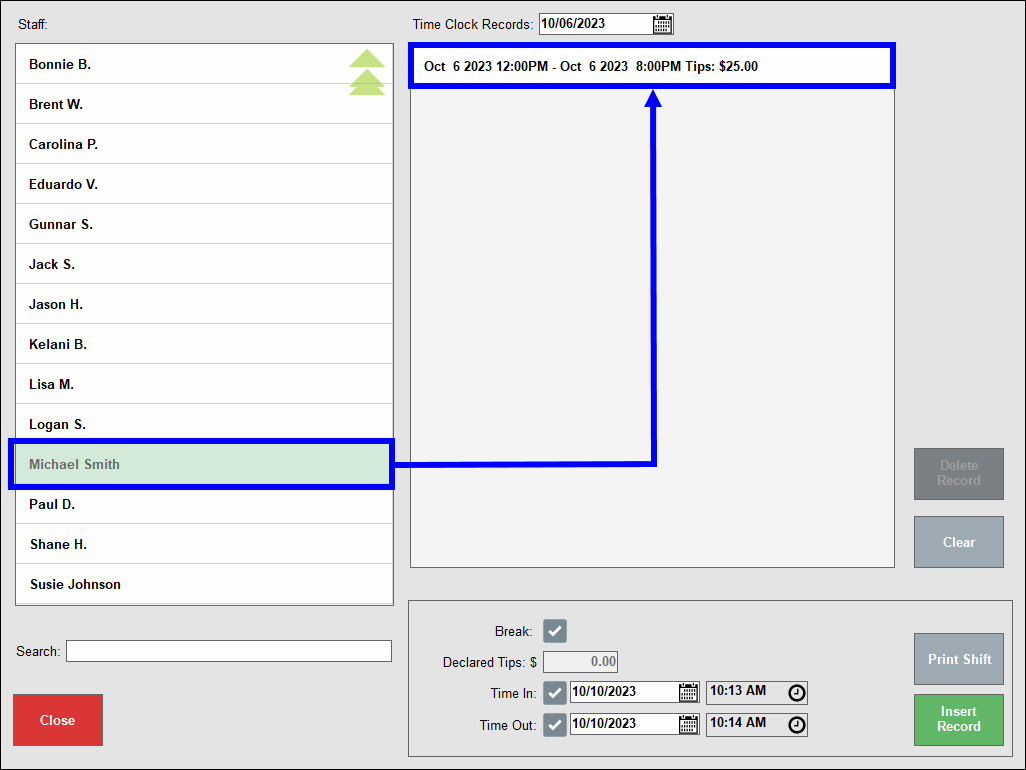
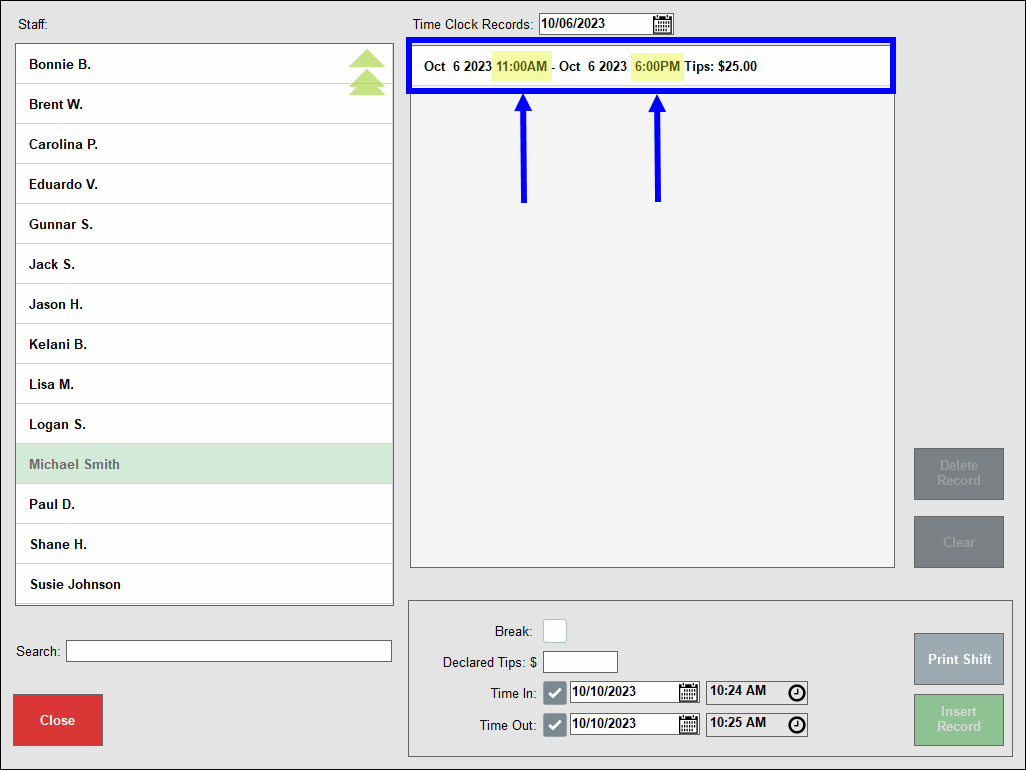
- Tap Insert Record. A success message appears at the bottom left of the screen, and the correct shift displays in the Time Clock Records list.
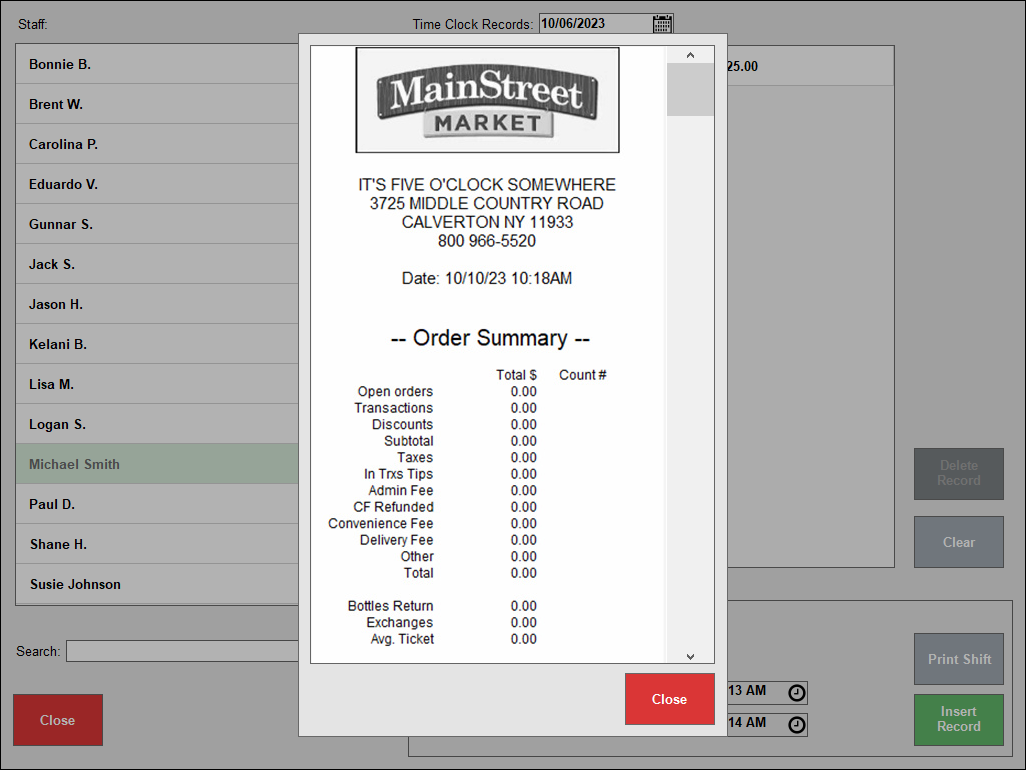
- Tip! Tap Print Shift to generate and print a report of sales and transaction data during the employee’s shift.
- Tap Close.
Sometimes employees may also clock in late or clock out early. Or an employee may have clocked out hours after their shift actually ended. Merchants can modify an existing time clock entry to accurately record an employee’s clock in and clock out times.
- On the Time Clock screen, select an employee and shift to modify.
- Adjust the Time In and Time Out fields for that shift.
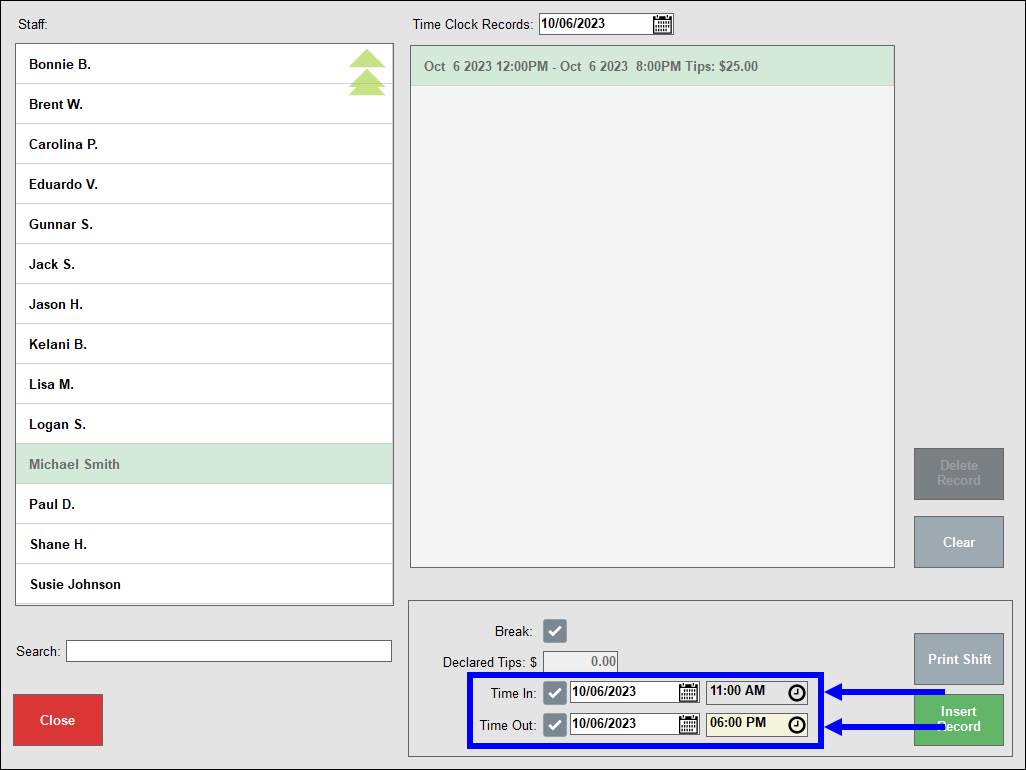
- Note: Employee times cannot exceed 24 hours per shift.
- Note: Time In and Time Out values must fall within business hours. See Add Business Details for more on setting business hours.
- Tap Save. A success message displays.
- View revised Time Clock Records for the selected date.
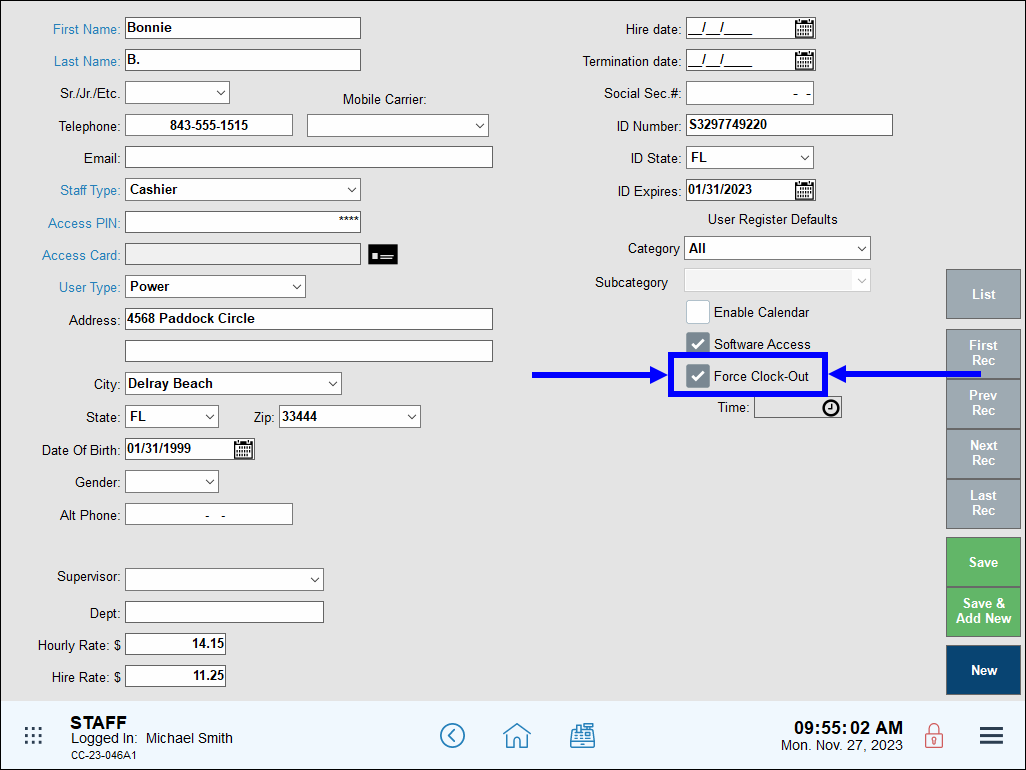
The Force Clock-Out option ensures staff members are clocked out appropriately at the end of the business day, or at a specific time. Disabled by default, users can enable Force Clock-Out under Staff > Staff Details.
Settings Preferences Requirements
Before enabling Force Clock-Out, users must first configure the Clock-In Required and Clock-Out Validation settings on the Settings Preferences screen.
- From Home, navigate to Settings > Preferences.
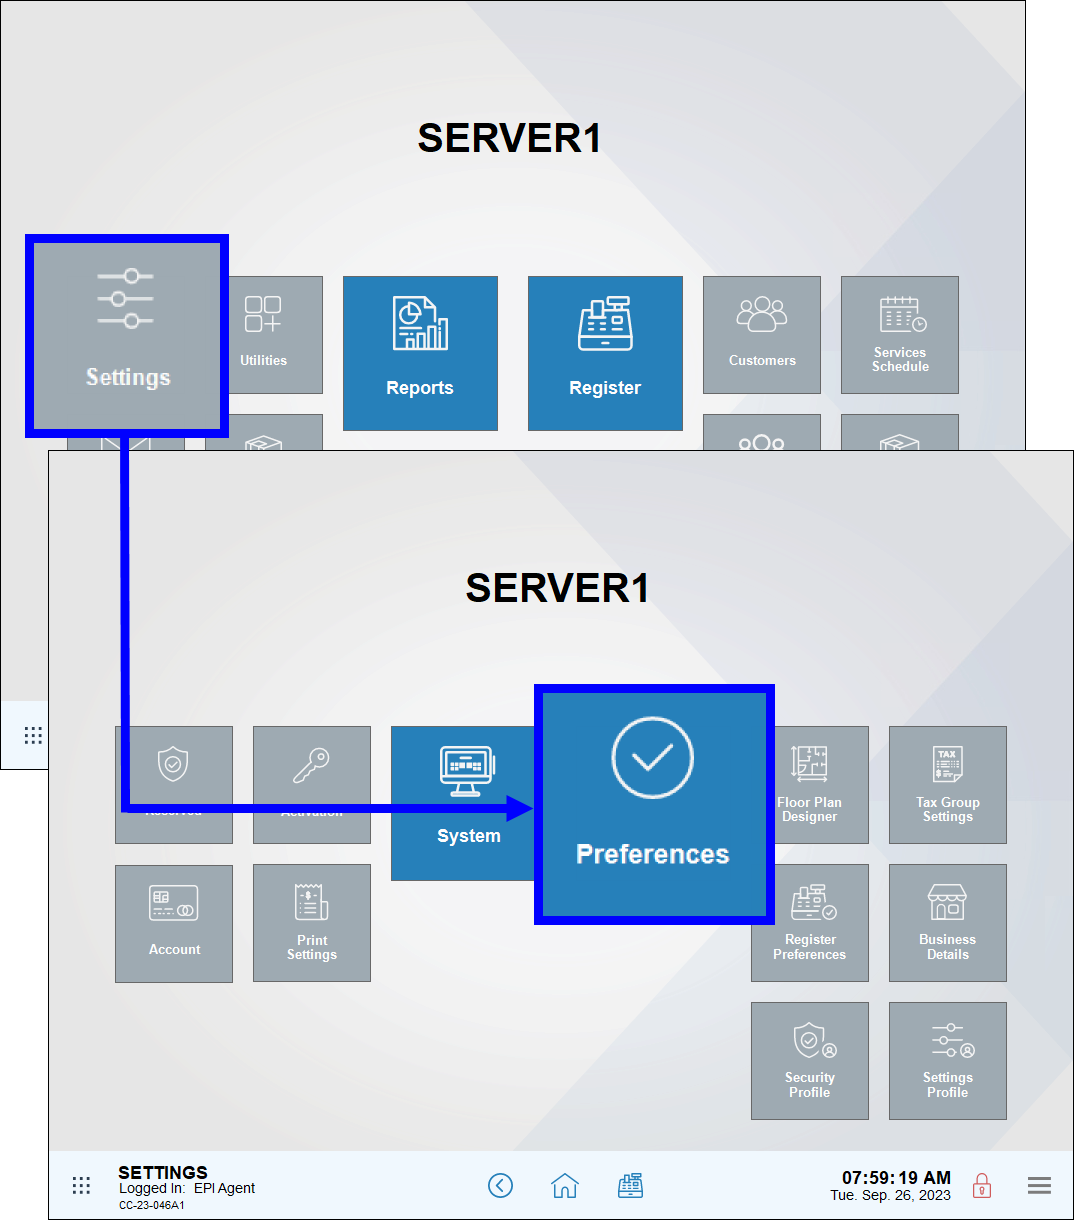
- Tap the Security tab.
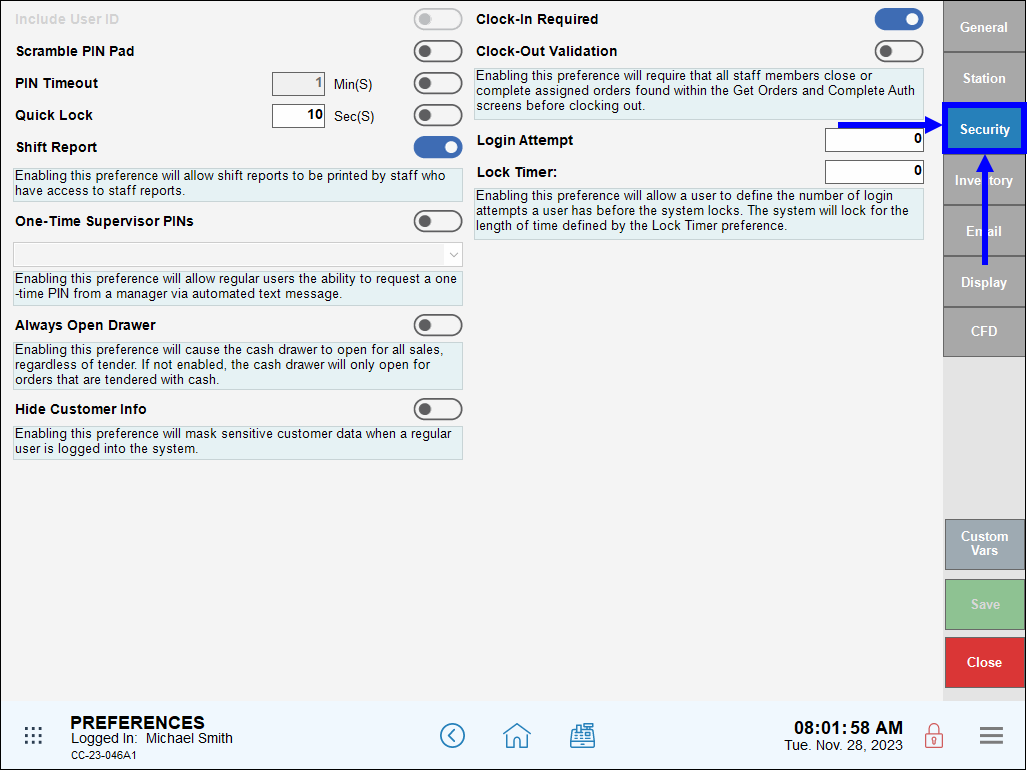
- Enable the Clock-In Required slider.
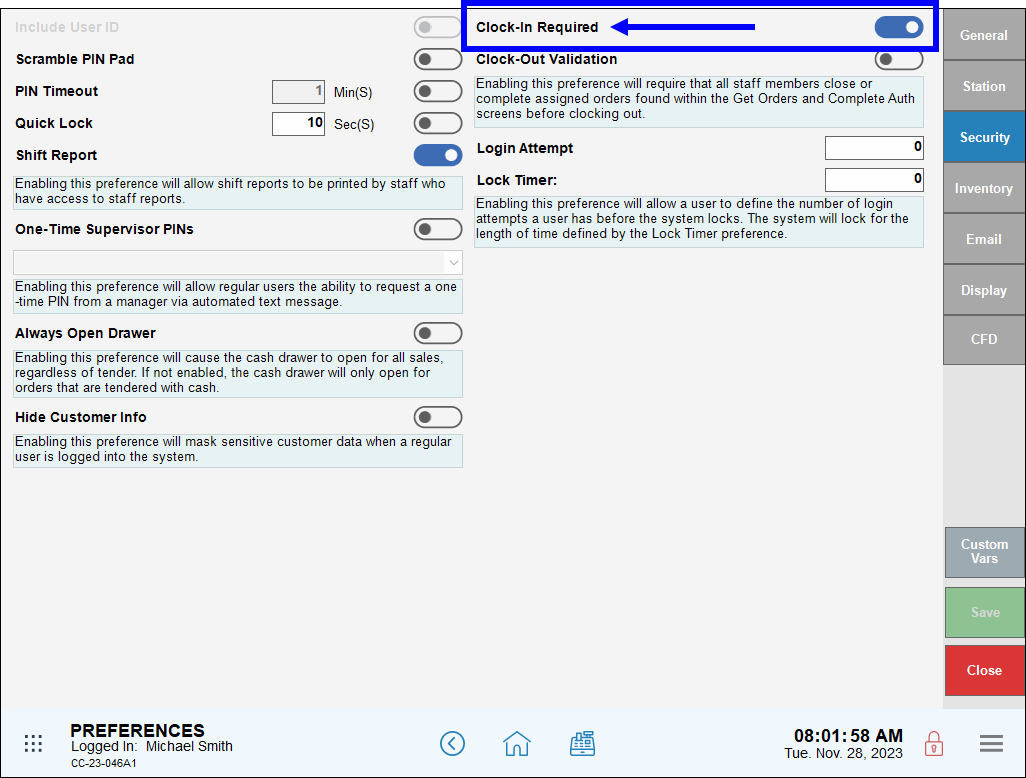
- Disable the Clock-Out Validation slider.
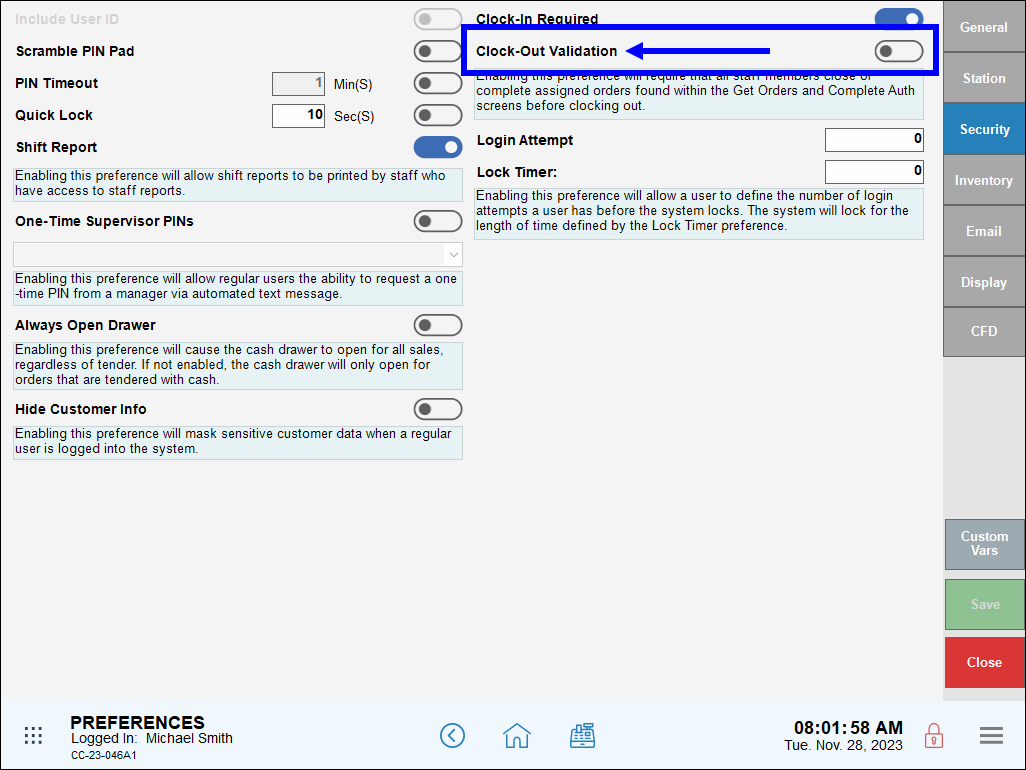
- Tap Save.
Force Clock-Out Settings
When Force Clock-Out is enabled, Exatouch determines whether the user is clocked in, and automatically clocks the user out within five minutes of the close of business or at a defined time, whichever is applicable.
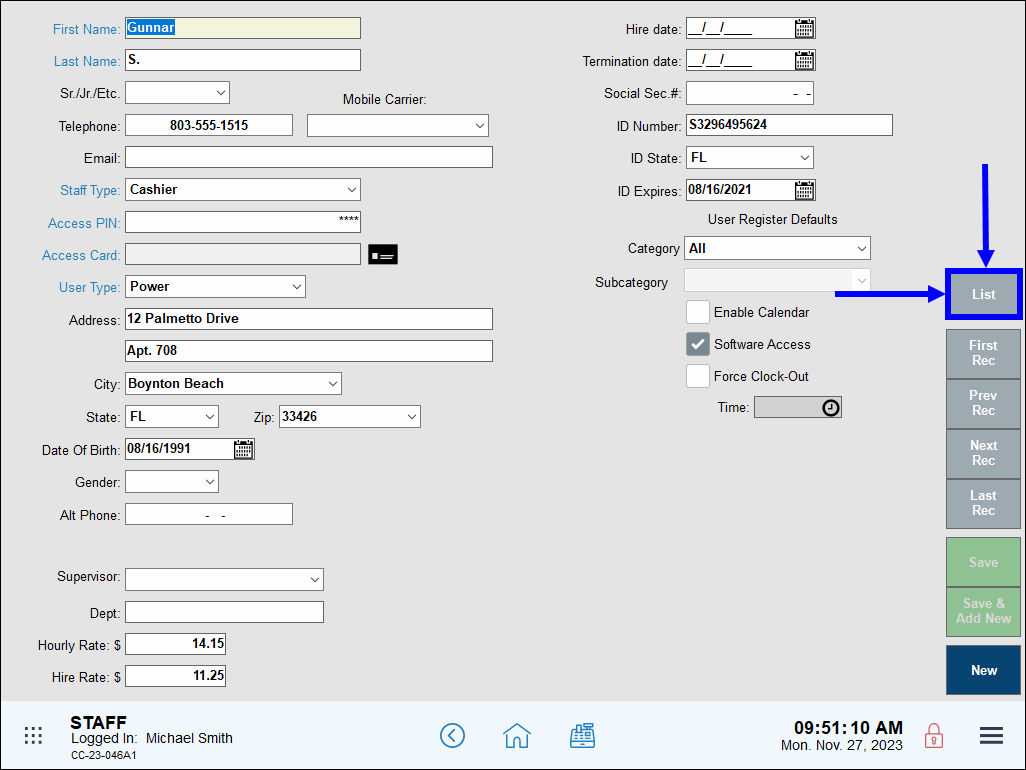
- From Home, navigate to Staff > Staff Details.

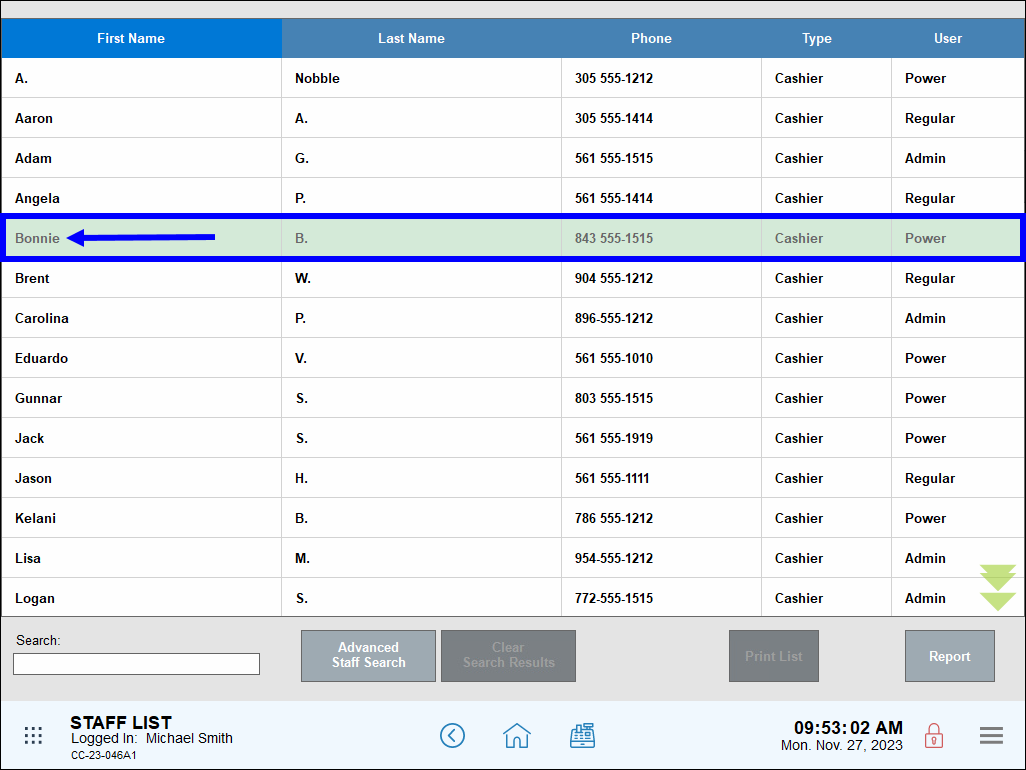
- Tap List to display a list of staff members.
- Select an employee from the Staff List screen.
- Select the Force Clock-Out checkbox for the selected employee.
- In the Time field, perform one of the following:
- Leave the Time field blank to force the selected employee to clock out at the end of the business day.
- Enter a time to force the employee to clock out within five minutes of the specified time.
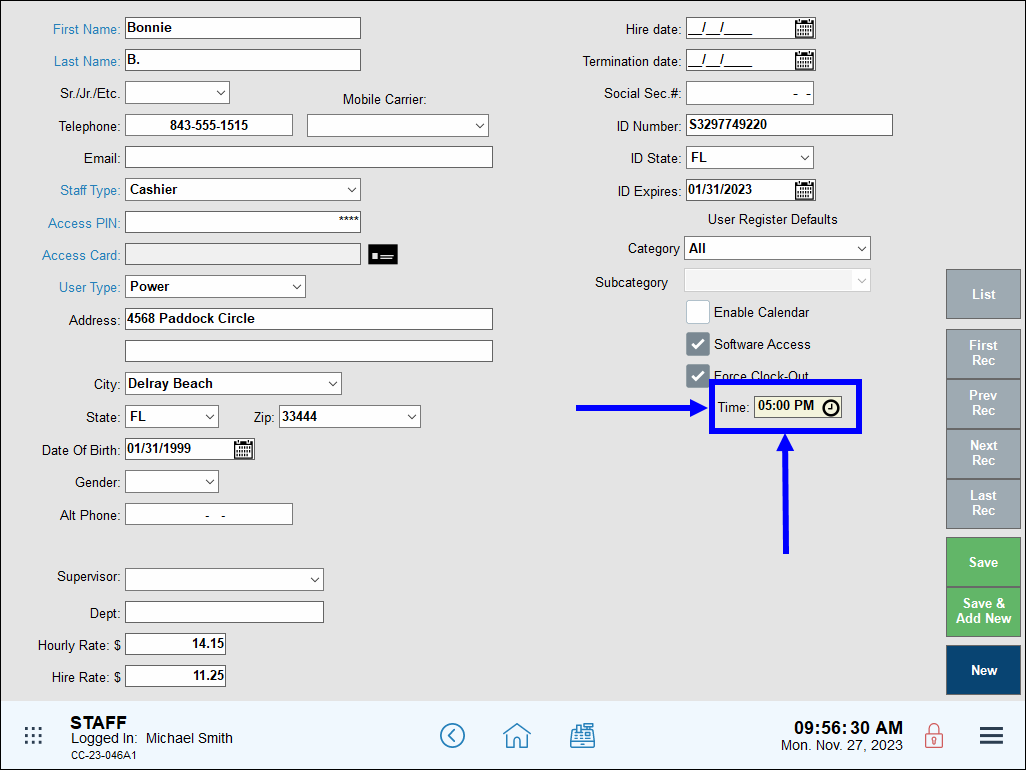
- Tap Save to confirm.
How can we improve this information for you?
Registered internal users can comment. Merchants, have a suggestion? Tell us more.