Merchants can modify Markup settings to calculate profit margins for an item. Including a markup in the purchase price can also help a merchant cover costs, fees, and other expenses.
Pricing Tab Settings
Configure Markup settings under the Pricing Tab on the Item Details screen. Access the Pricing Tab either by selecting an existing item under Items > Item List, or when adding a new item from the Item Details screen. See Add an Item.
- On the Item Details screen, tap the Pricing tab.
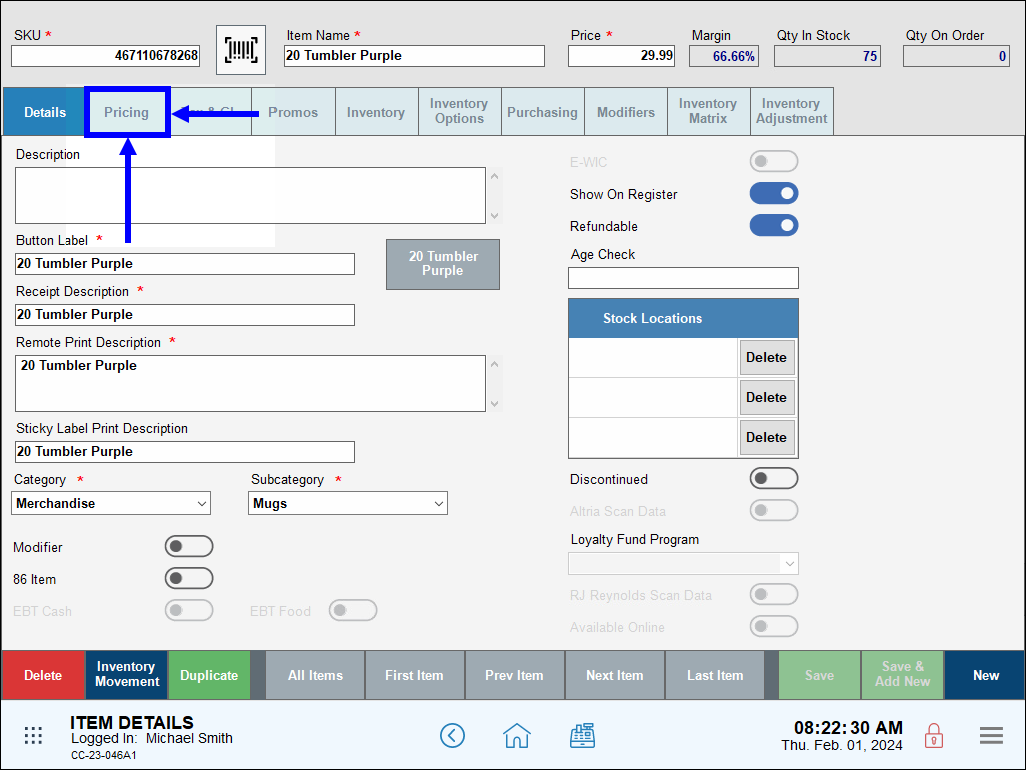
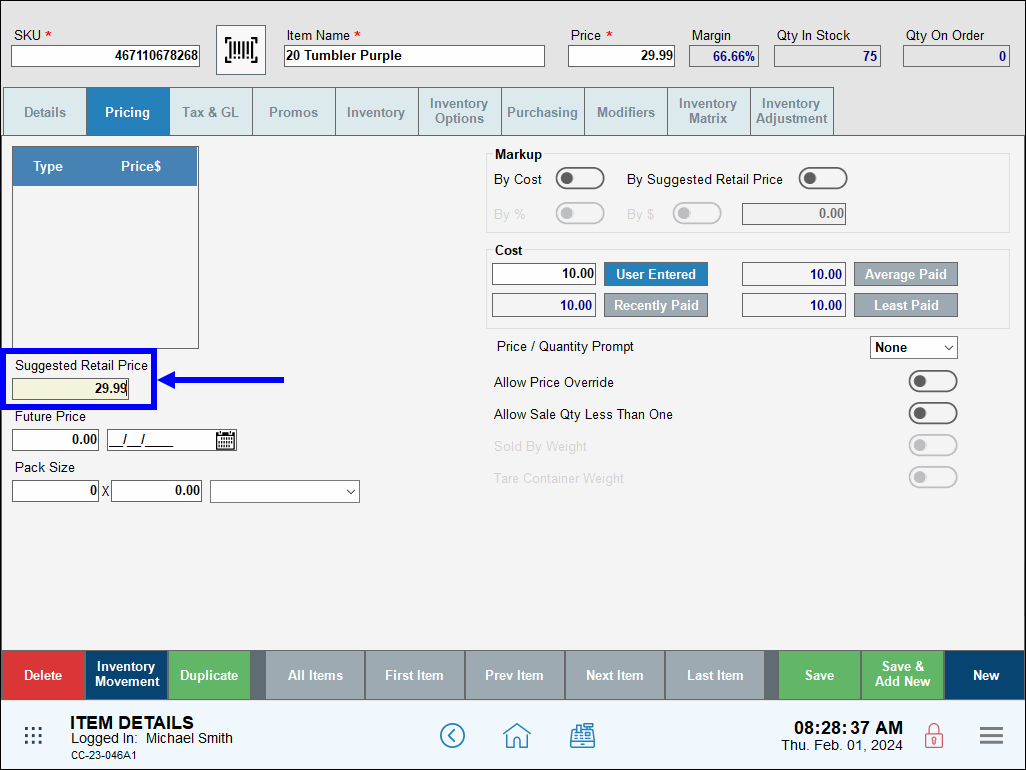
- Enter the Suggested Retail Price. This is the price a vendor recommends that merchants charge for the item.
- In the Cost section, enter the merchant’s cost for the item, then tap User Entered. The Margin value recalculates.
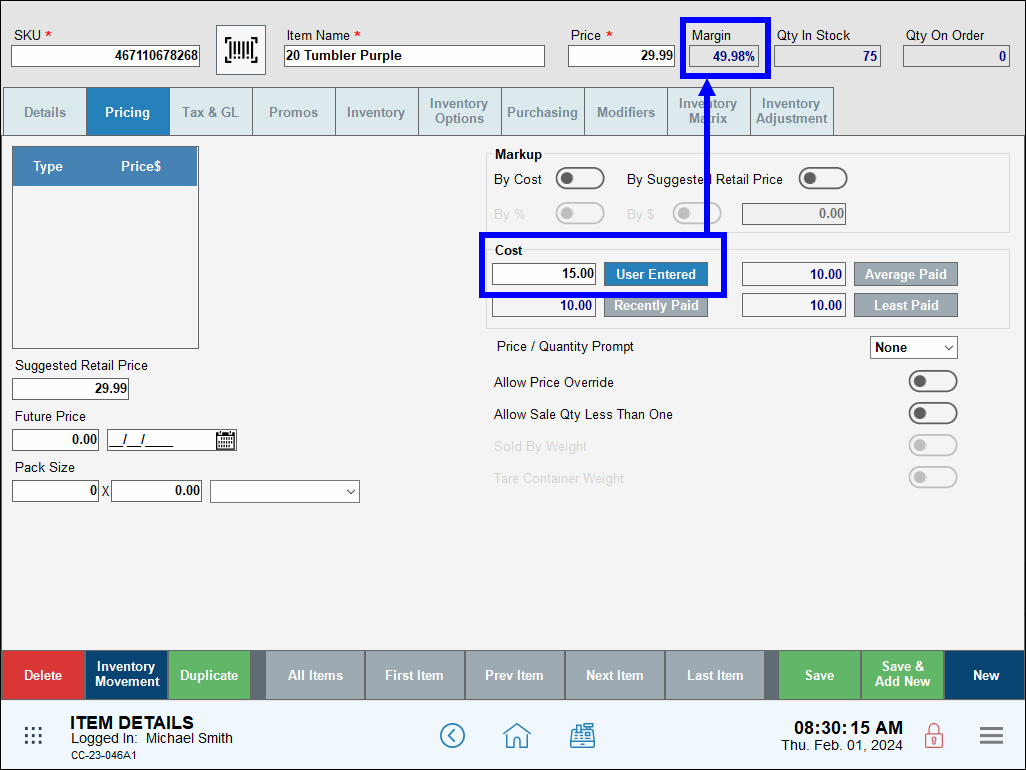
- Note: The Recently Paid, Average Paid, and Least Paid fields are generated when merchants create purchase orders for an item. See Create a Purchase Order.
- In the Markup section, enable one of the following:
- By Cost: Enable to apply a markup to the item’s Cost.
- By Suggested Retail Price: Enable to apply a markup to the item’s Suggested Retail Price.
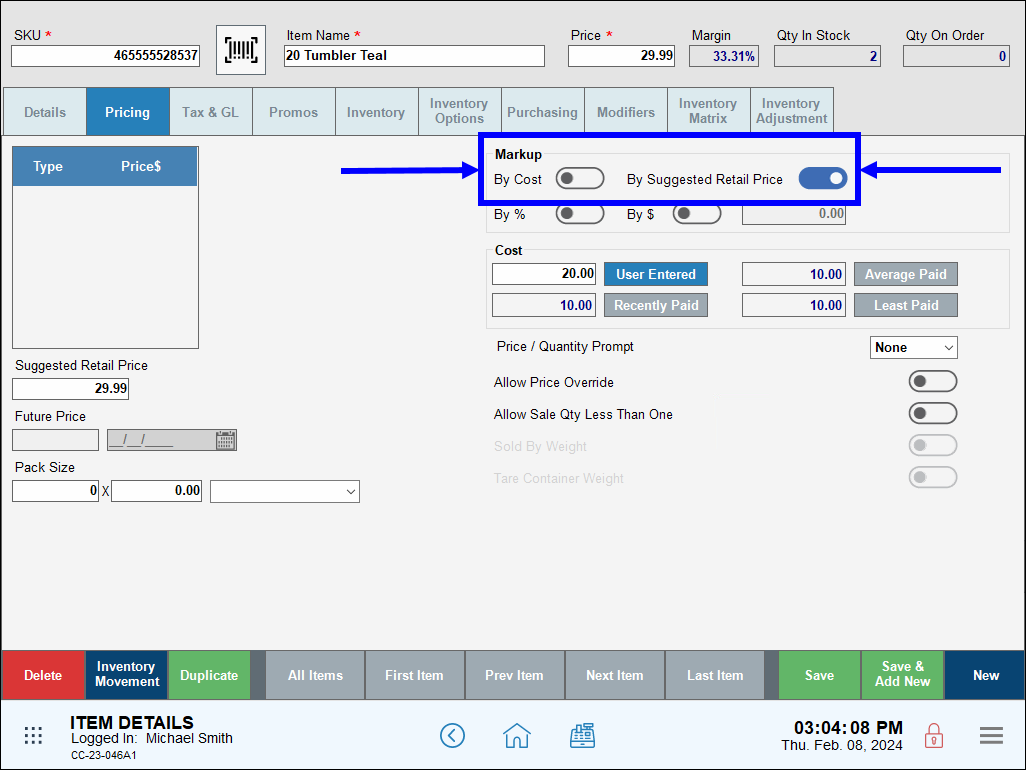
- Additional fields display in the Markup section:
- By %: Select to apply a percentage-based markup
- By $: Select to apply a dollar-based markup.
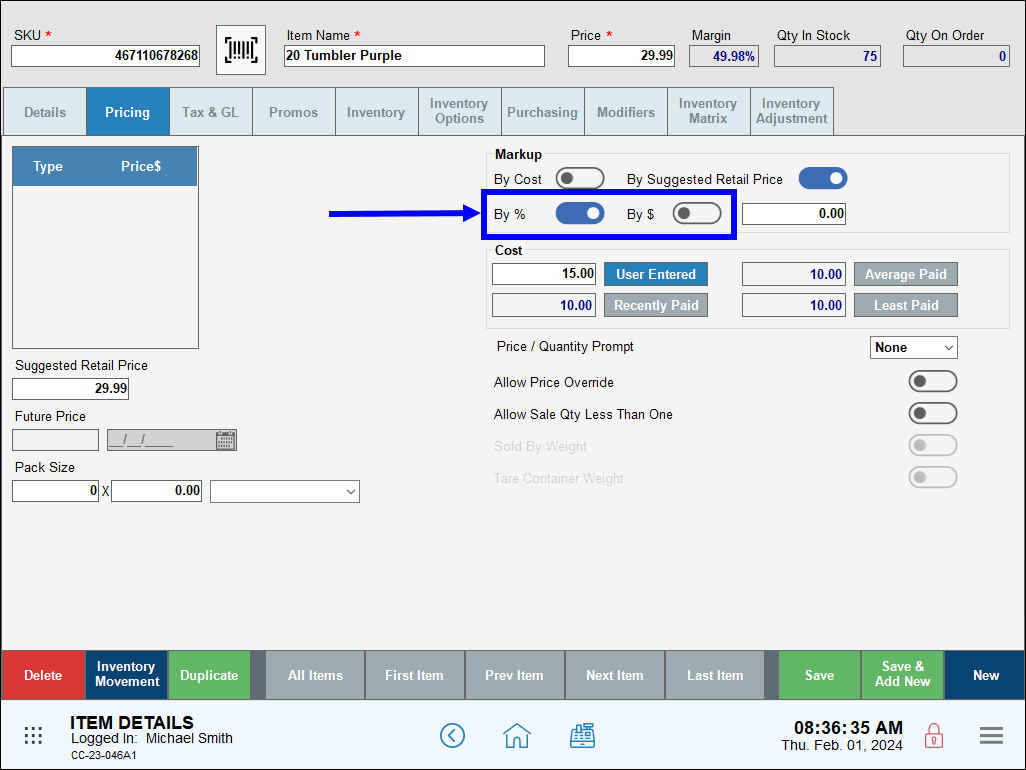
- Enter the markup amount as a percentage or dollar amount.
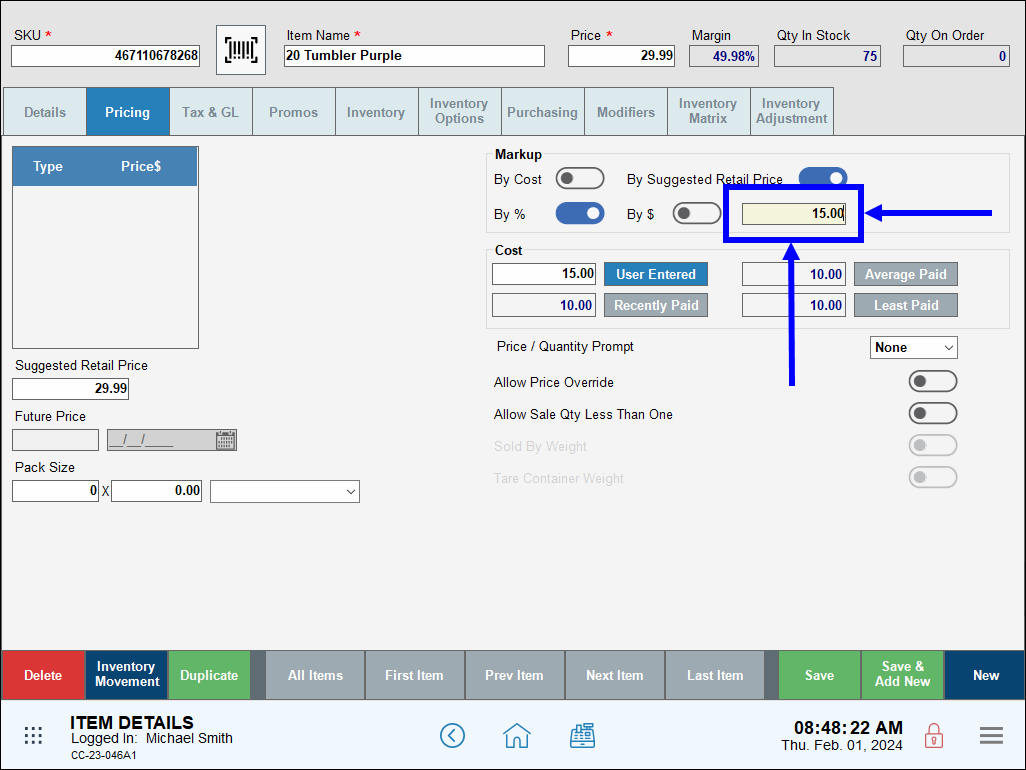
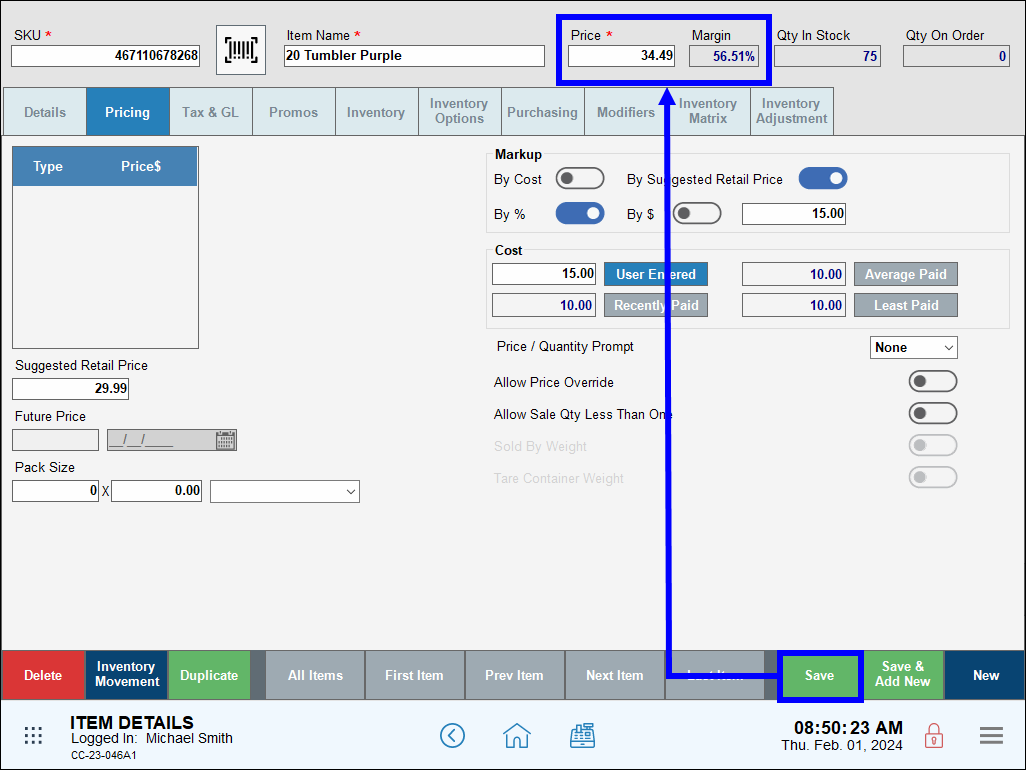
- Tap Save. The Price and Margin fields recalculate.
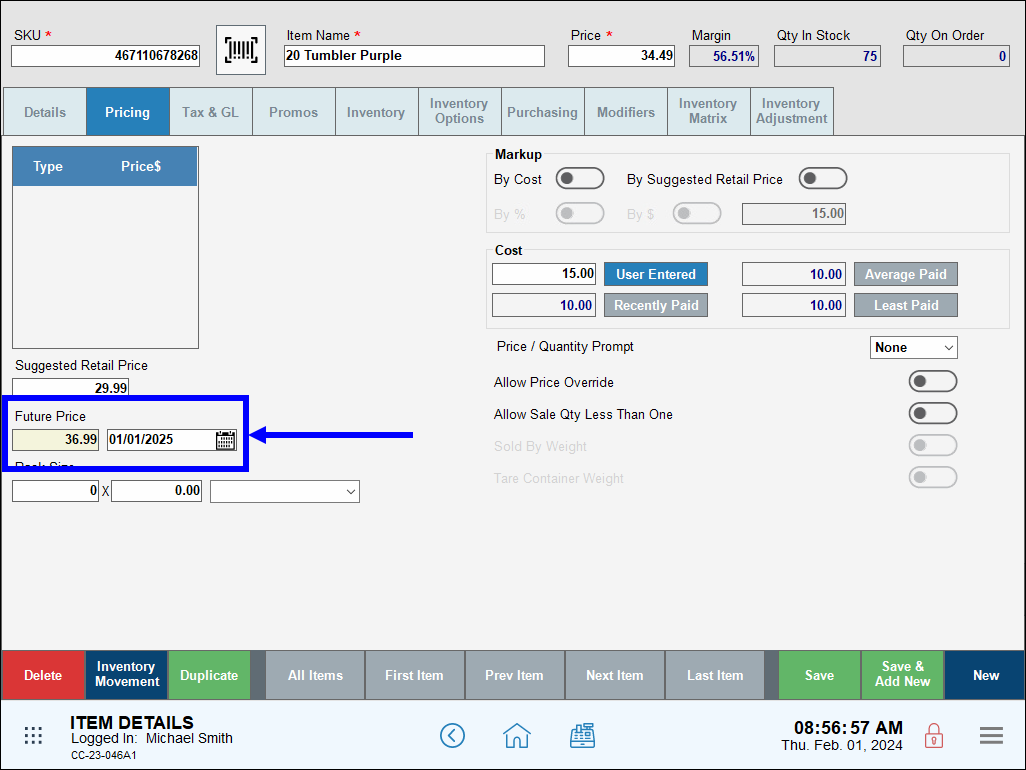
- Optional: Configure a Future Price and date.
- Enter the item’s Future Price.
- Tap the Calendar icon to select a date that the Future Price takes effect.
- Note: All Markup settings must be disabled to enter a Future Price.

How can we improve this information for you?
Registered internal users can comment. Merchants, have a suggestion? Tell us more.