Create additional promos for your restaurant or business using Promo Layers. Build several layers of promos to cover specific days and times to extend specific offers for your customers.
- Note: When Dual Pricing is enabled, it will not change the specified dollar amount promo price (regardless of tender type).
Merchants must first create an Item Level promo before adding Promo layers. See: Create Item Level Promos
Promo Layers allow merchants to create multiple promos during various times of the day, or for different days of the week. Merchants can create up to three promo layers in addition to the original promo. These are designated as Promo 2, Promo 3, and Promo 4.
- Example: For every day in July, a bar offers happy hour specials on pitchers of beer:
- For Bud Light, $5 pitchers between 5 p.m. and 6 p.m. (Promo 2), $6 pitchers between 6 p.m. – 7 p.m. (Promo 3), $7 pitchers between 7 p.m. – 8 p.m. (Promo 4).
- For Yuengling, $7 pitchers between 5 p.m. – 6 p.m. (Promo2), $8 pitchers between 6 p.m. – 7 p.m. (Promo3), $7 pitchers between 7 p.m. – 8 p.m. (Promo4)
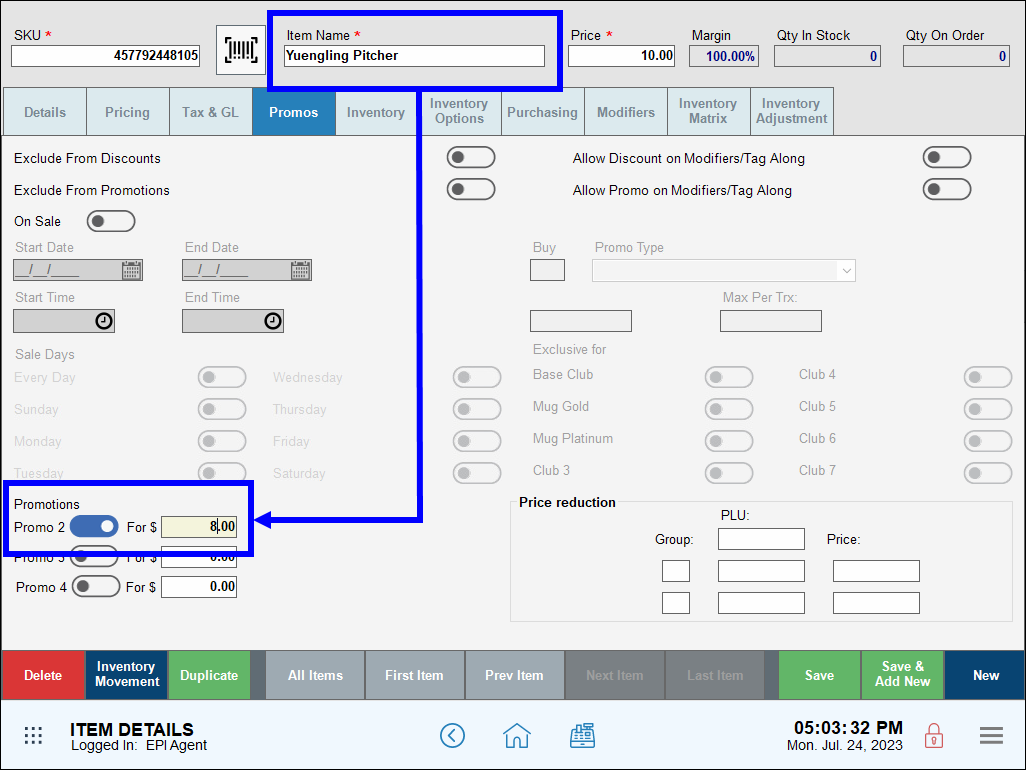
After creating your initial promo, use Promo Layer settings to create Promo 2, Promo 3, and Promo 4.
- In the Promotions section under the Promos tab, enable the Promo 2 slider and enter the Promo 2 sales price in the For $ field.
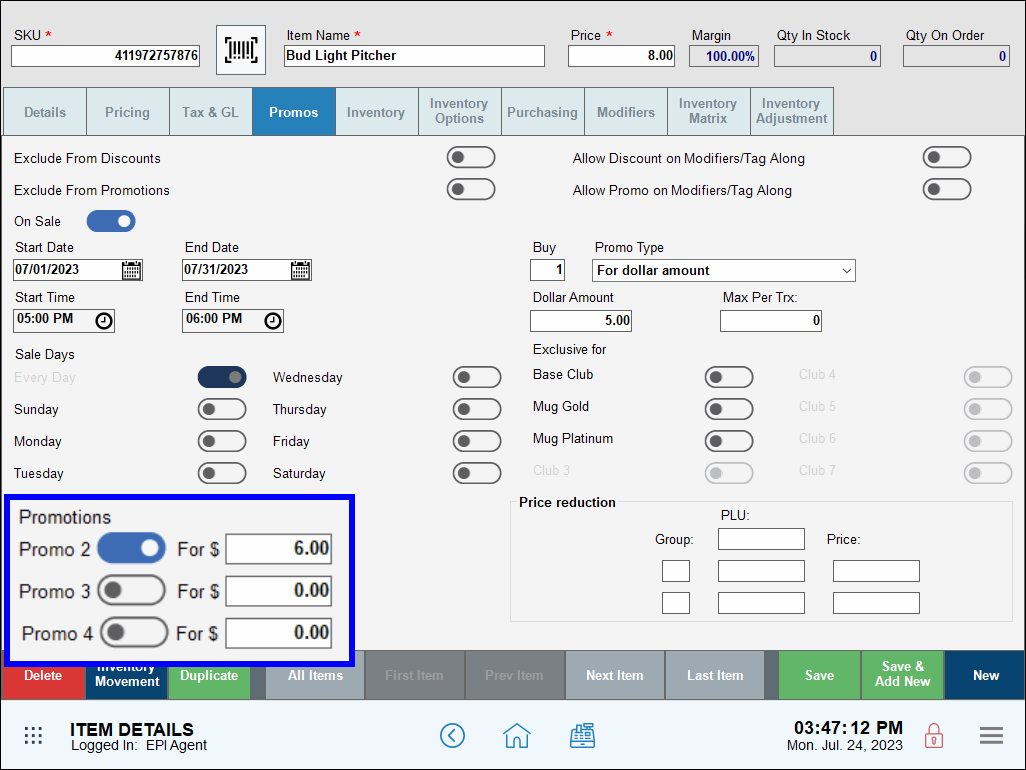
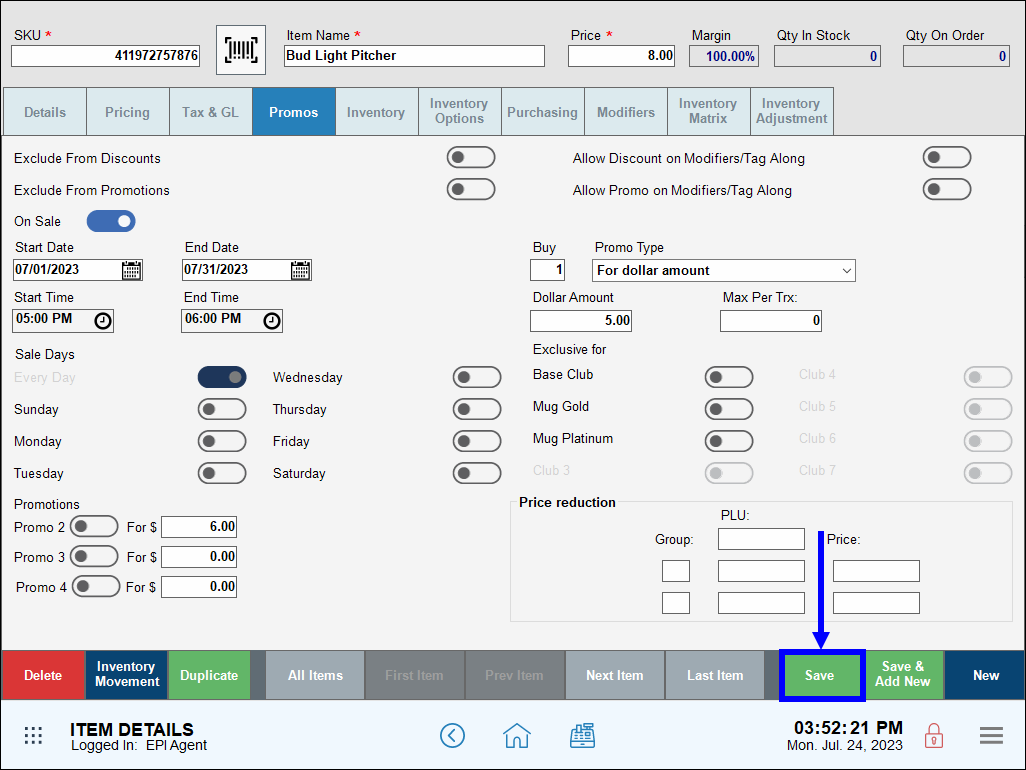
- Tap Save.
- Return Home, then navigate to Items > Promos.
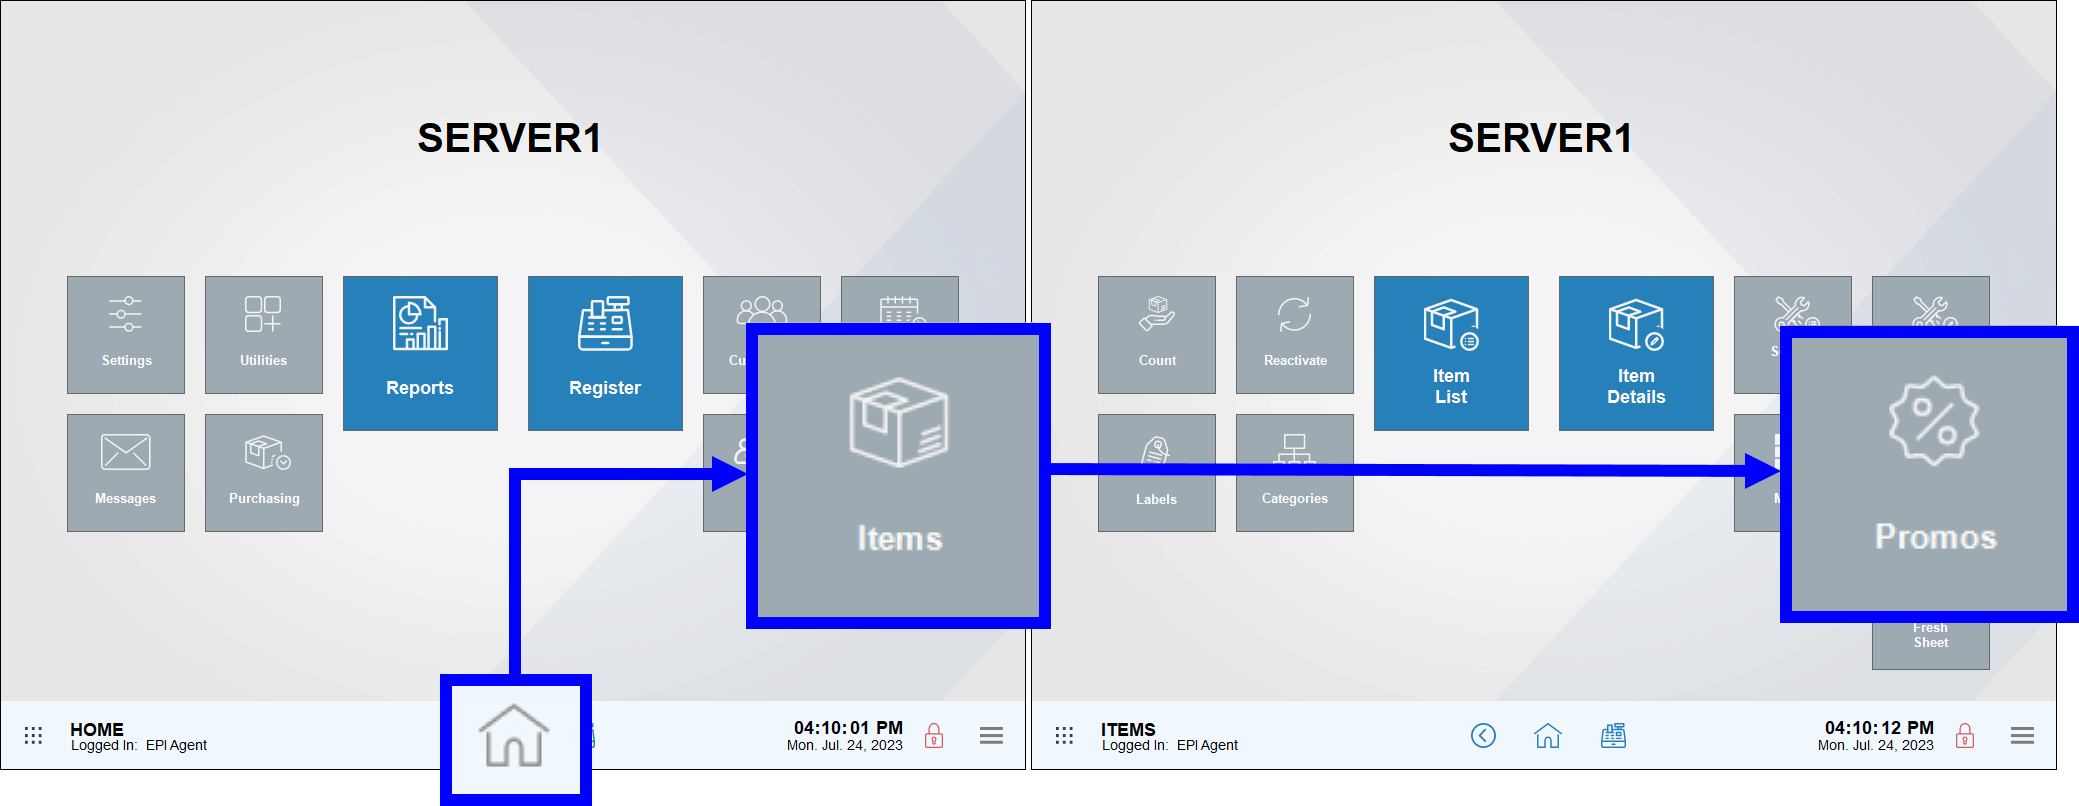
- Tap the Happy Hour tab.
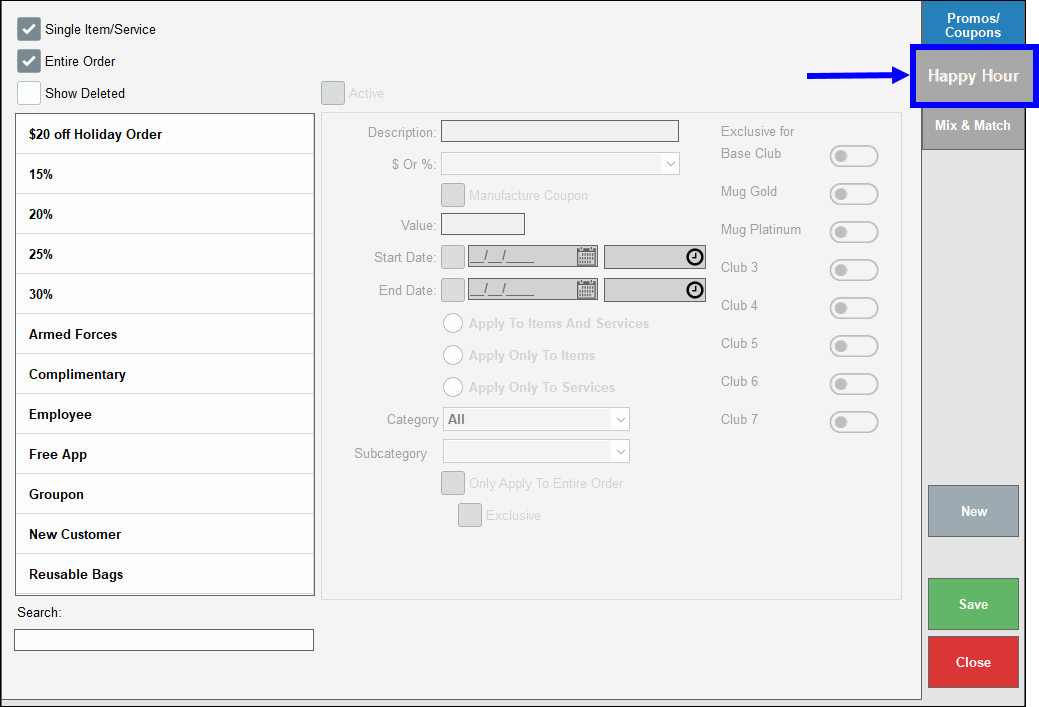
- Select Item Promo 2.
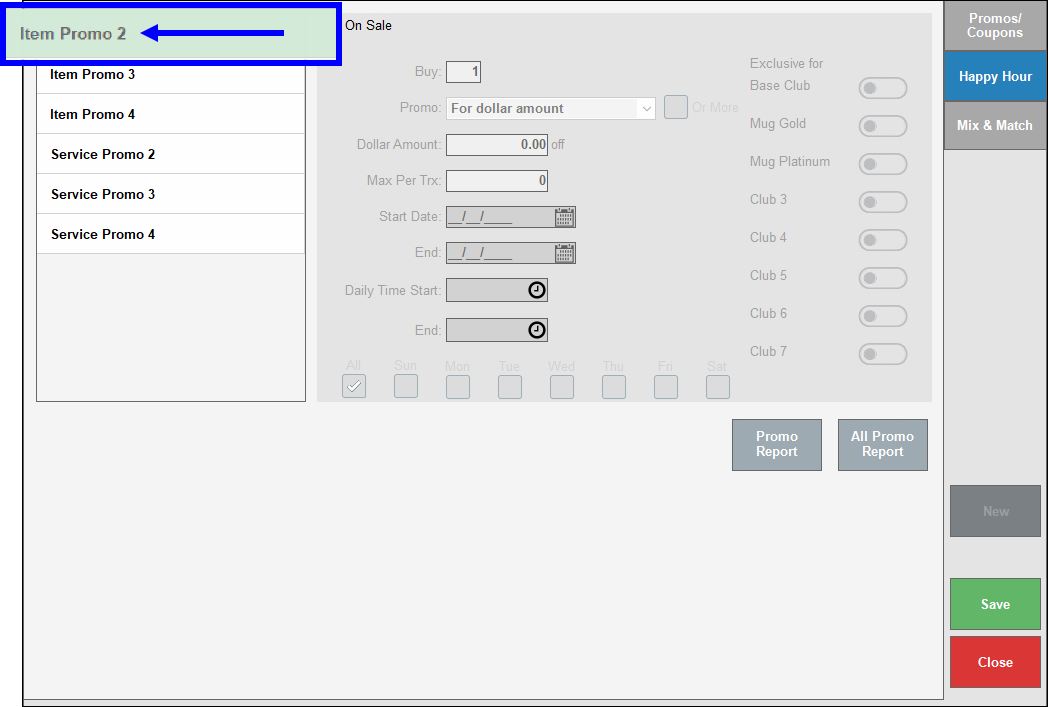
- Note: For service promos, select Service Promo 2 instead. Users can select Item Promos and Service Promos in any desired order.
- Select the On Sale checkbox. The Promo 2 work area fields display as active.
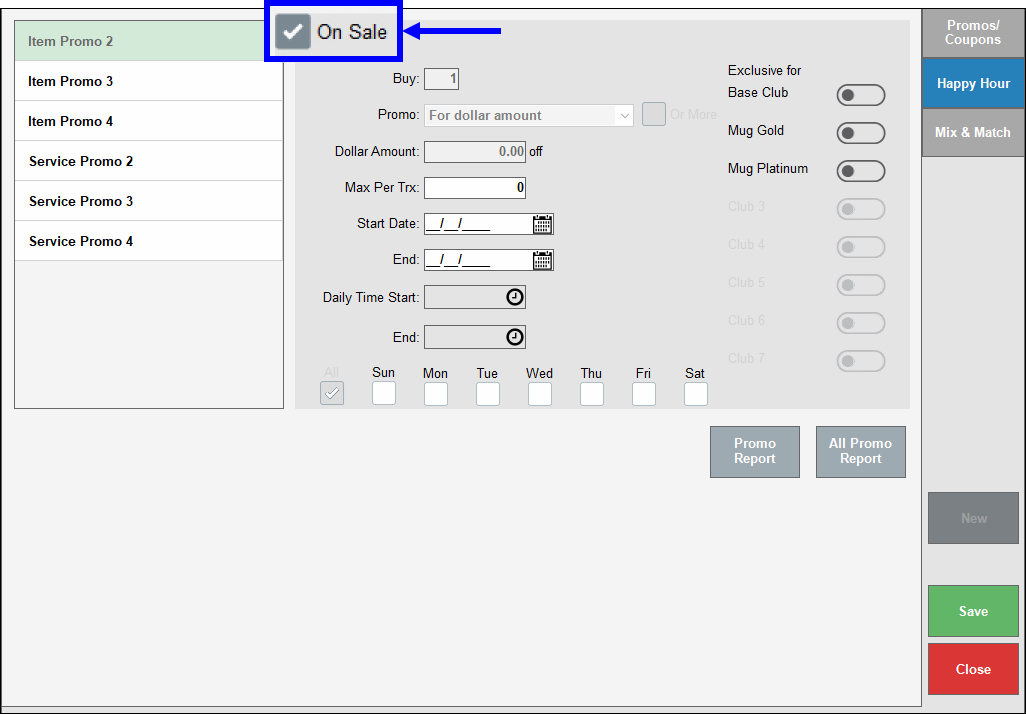
- Note: The Buy, Promo, and Dollar Amount fields display as inactive in the work area because these settings are configured under the Promos tab on the Items Details screen.
- Configure other promo settings as desired.
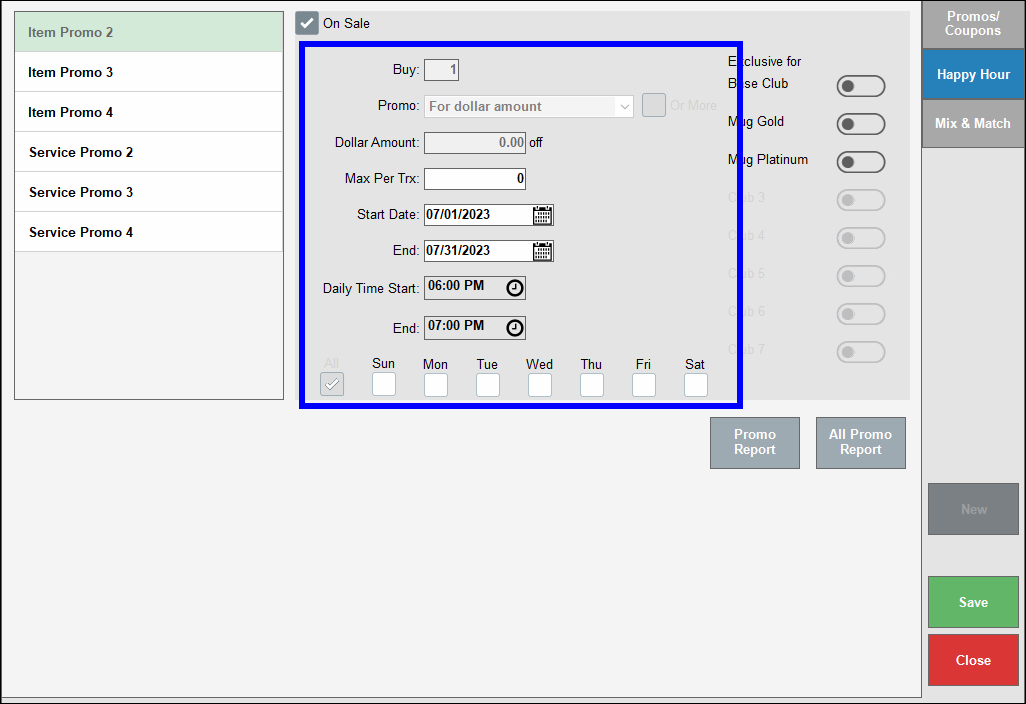
- Tap Save.
- Repeat Steps 1-8 to configure Promo 3 and Promo 4, as desired.
After creating a Promo Layer, merchants can apply the Promo Layer to other items by returning to the Promos tab on the Item Details screen.
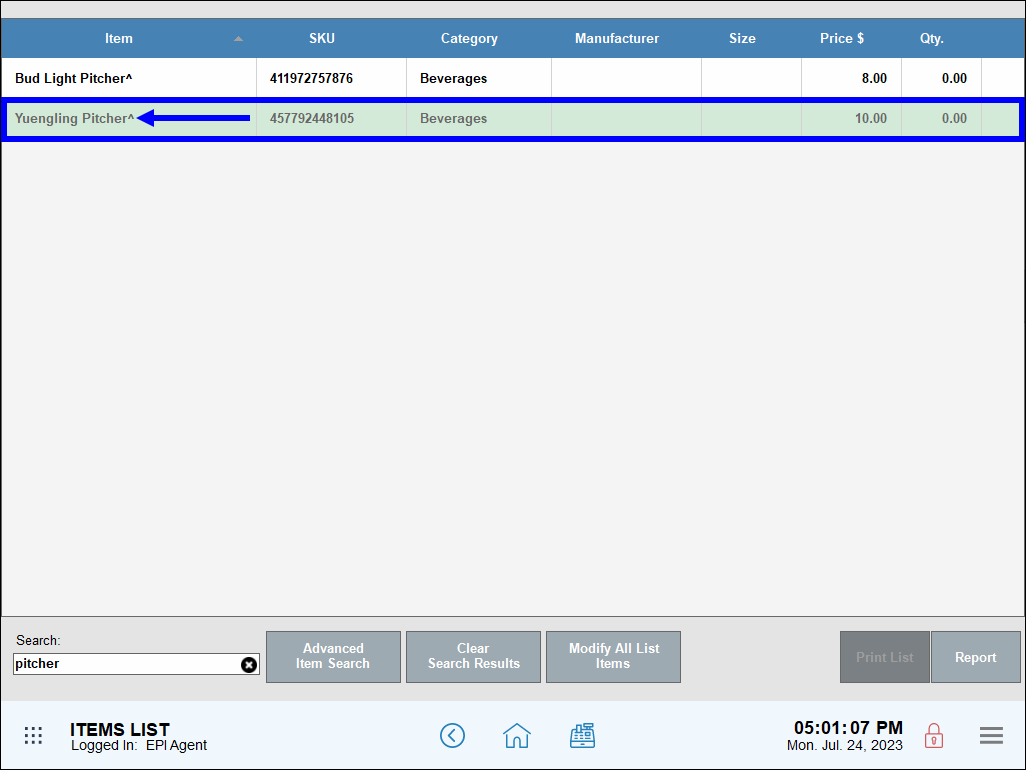
- From Home, navigate to Items > Item List.

- Select another item. The Item Details screen displays.
- Under the Promos tab, enable the selected item’s Promo 2 slider and enter the second item’s promo sale price in the For $ field.
- Tap Save.
- Repeat Steps 1-4 to apply additional promo layers.
How can we improve this information for you?
Registered internal users can comment. Merchants, have a suggestion? Tell us more.