Use a current Gmail address, or create a new one, to enable merchant email settings for message, report, and customer receipt emails in Exatouch.
Two-Step Verification (also known as Two-Factor Authorization/2FA), is required when creating a Gmail password for Exatouch. In addition to your username and password, you’ll need a Google verification code sent via text or voice message.
- Note: The 2-Step Verification instructions below use your phone number. If you choose to use another method, follow the onscreen instructions in your Gmail account.
- Open your Gmail account.
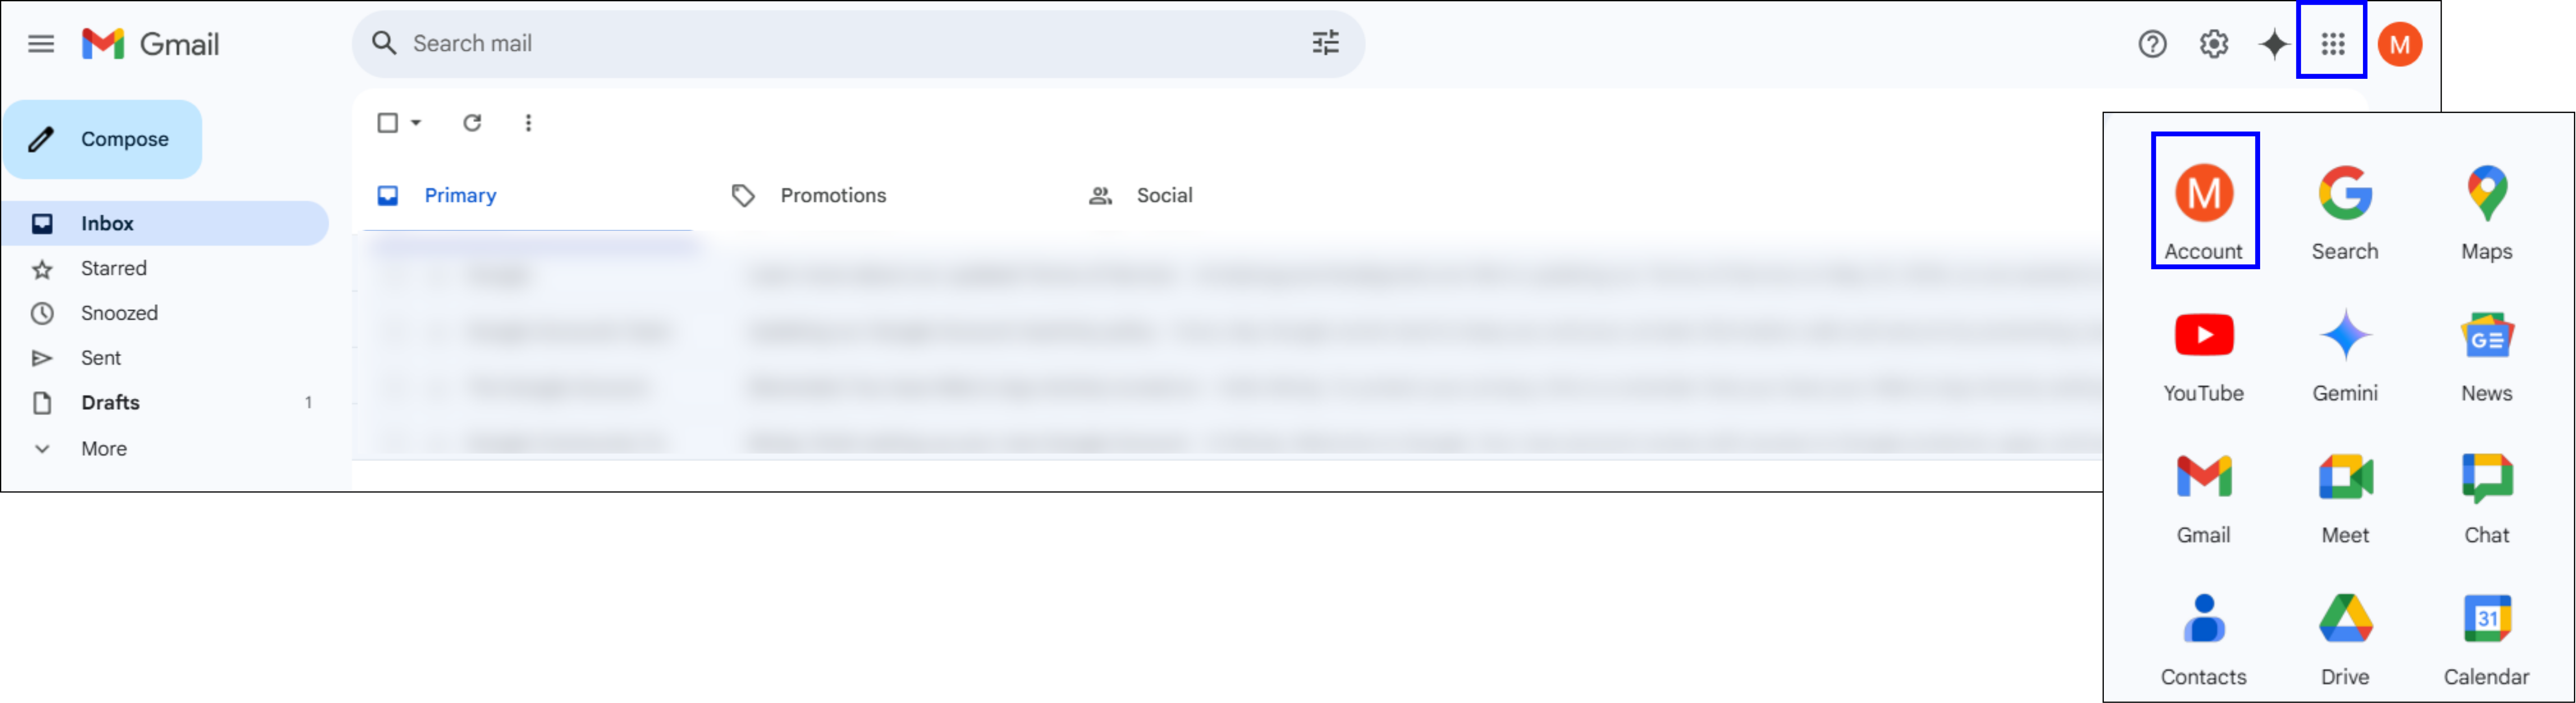
- Click the Menu waffle icon in the upper right corner (nine small squares), then Account.
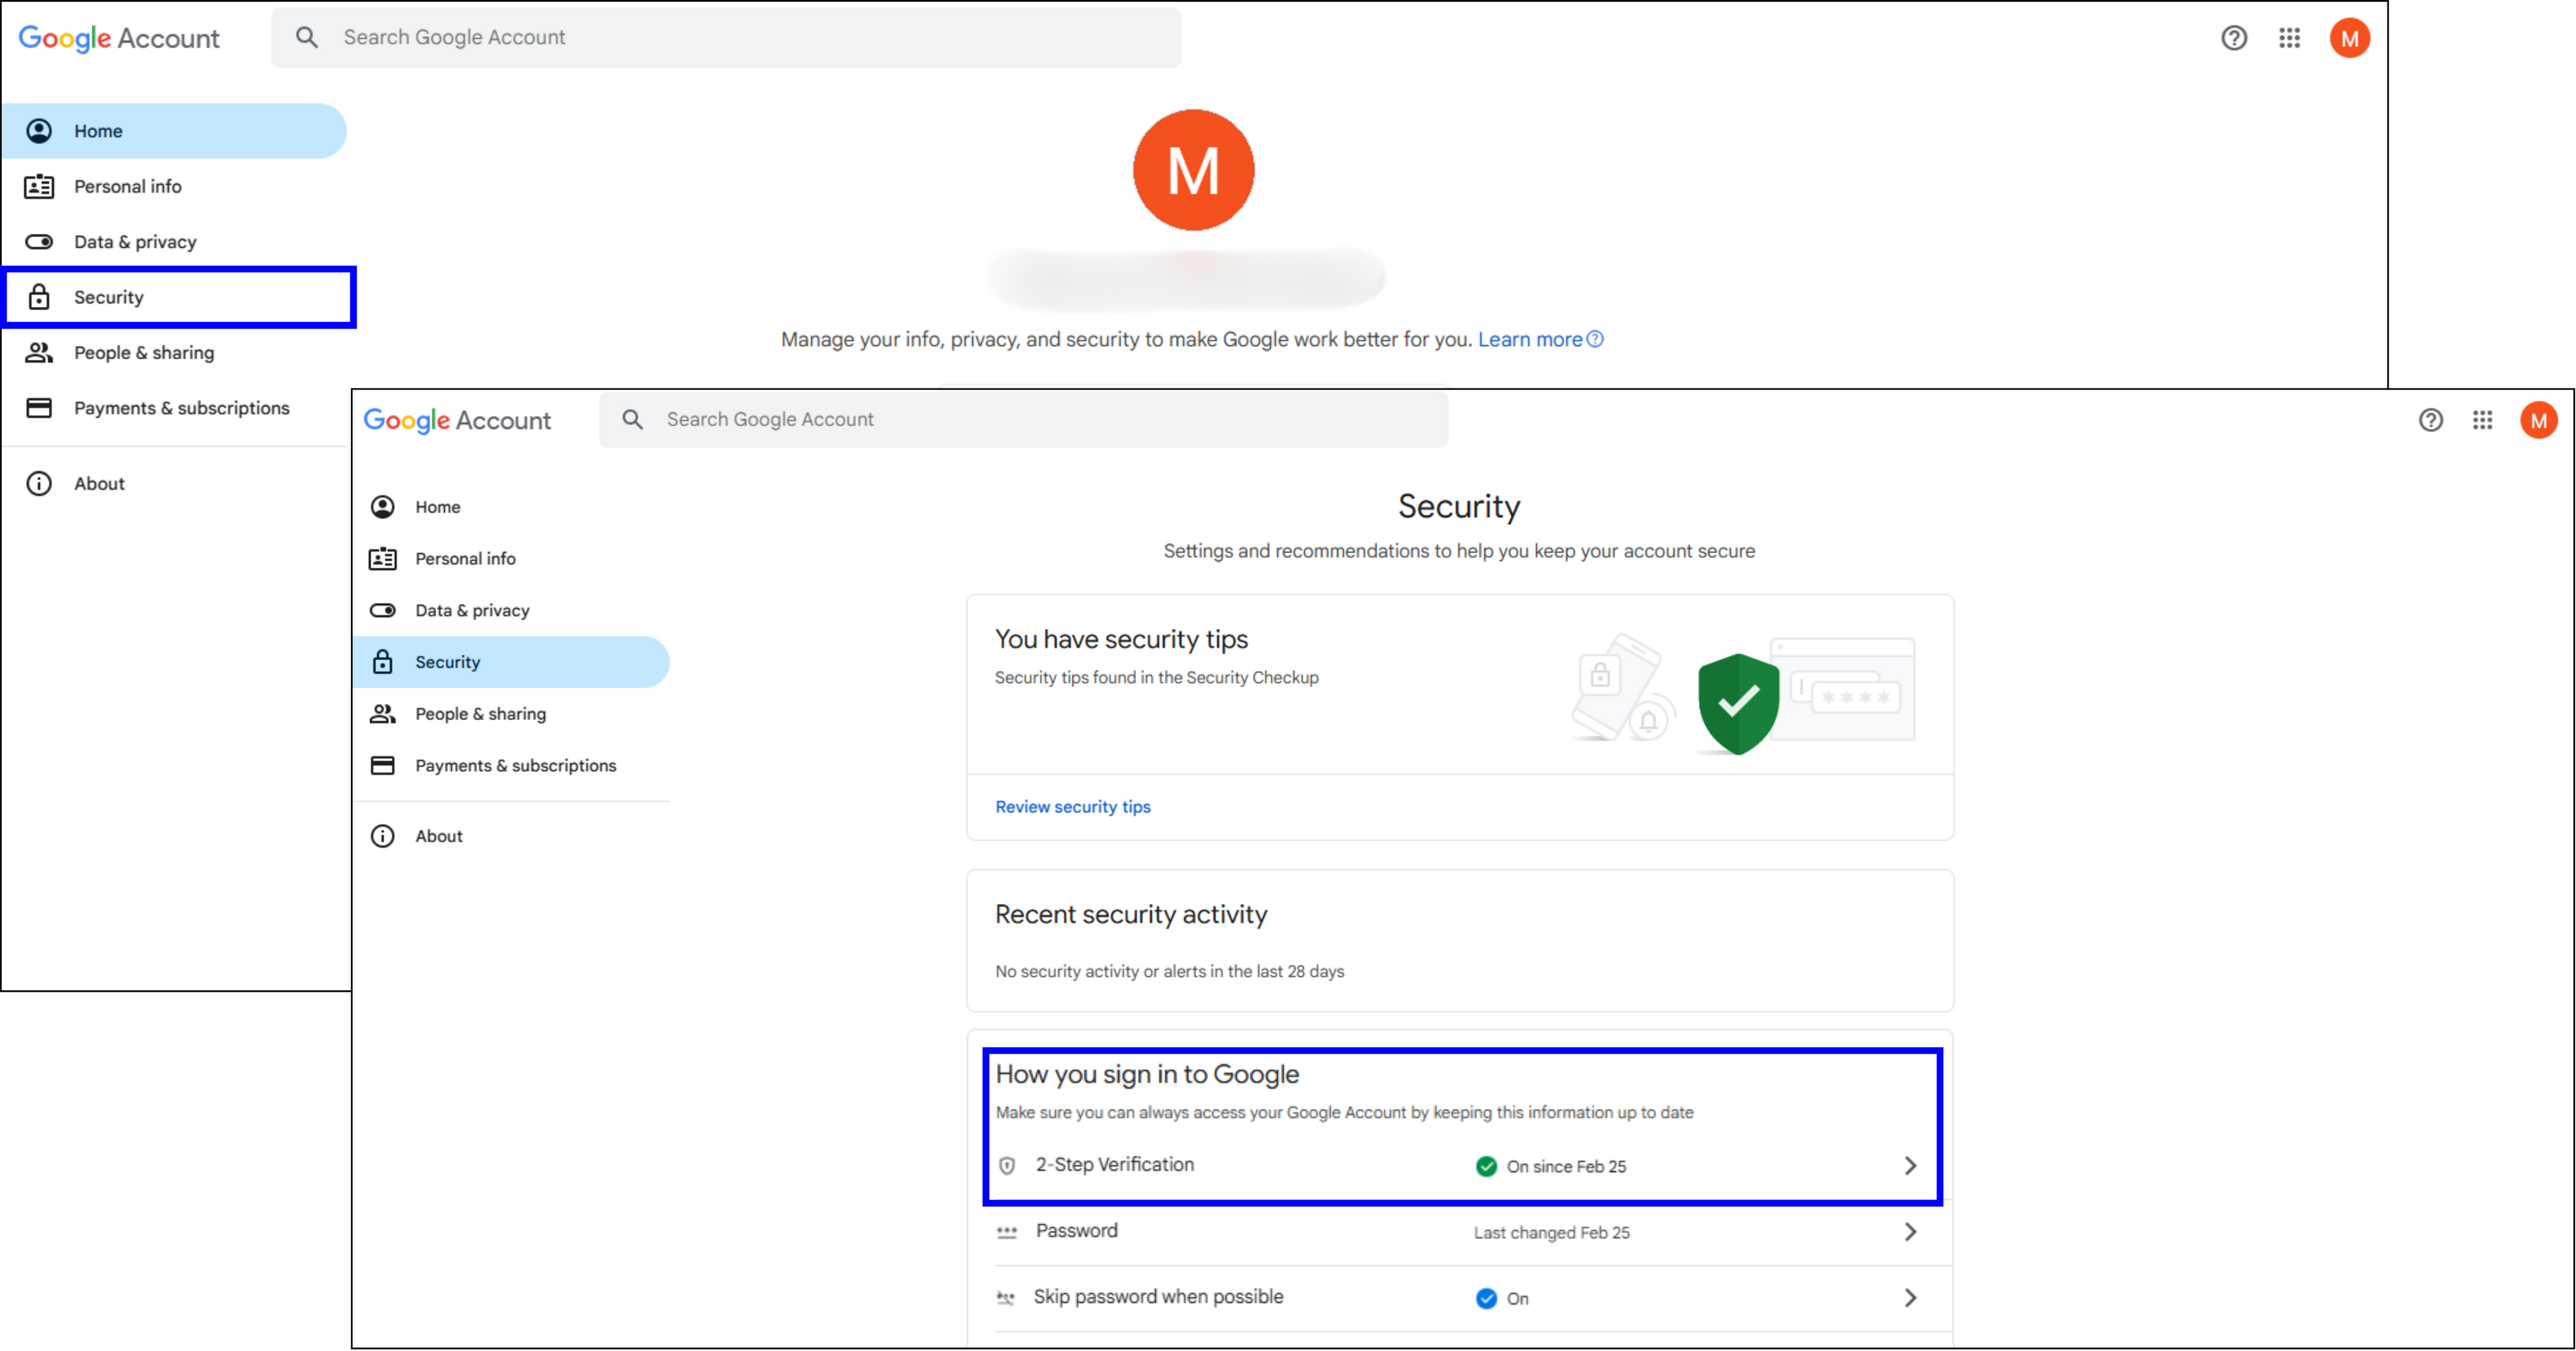
- Select Security in the left sidebar menu.
- Go to How you sign in to Google and turn 2-Step Verification on.
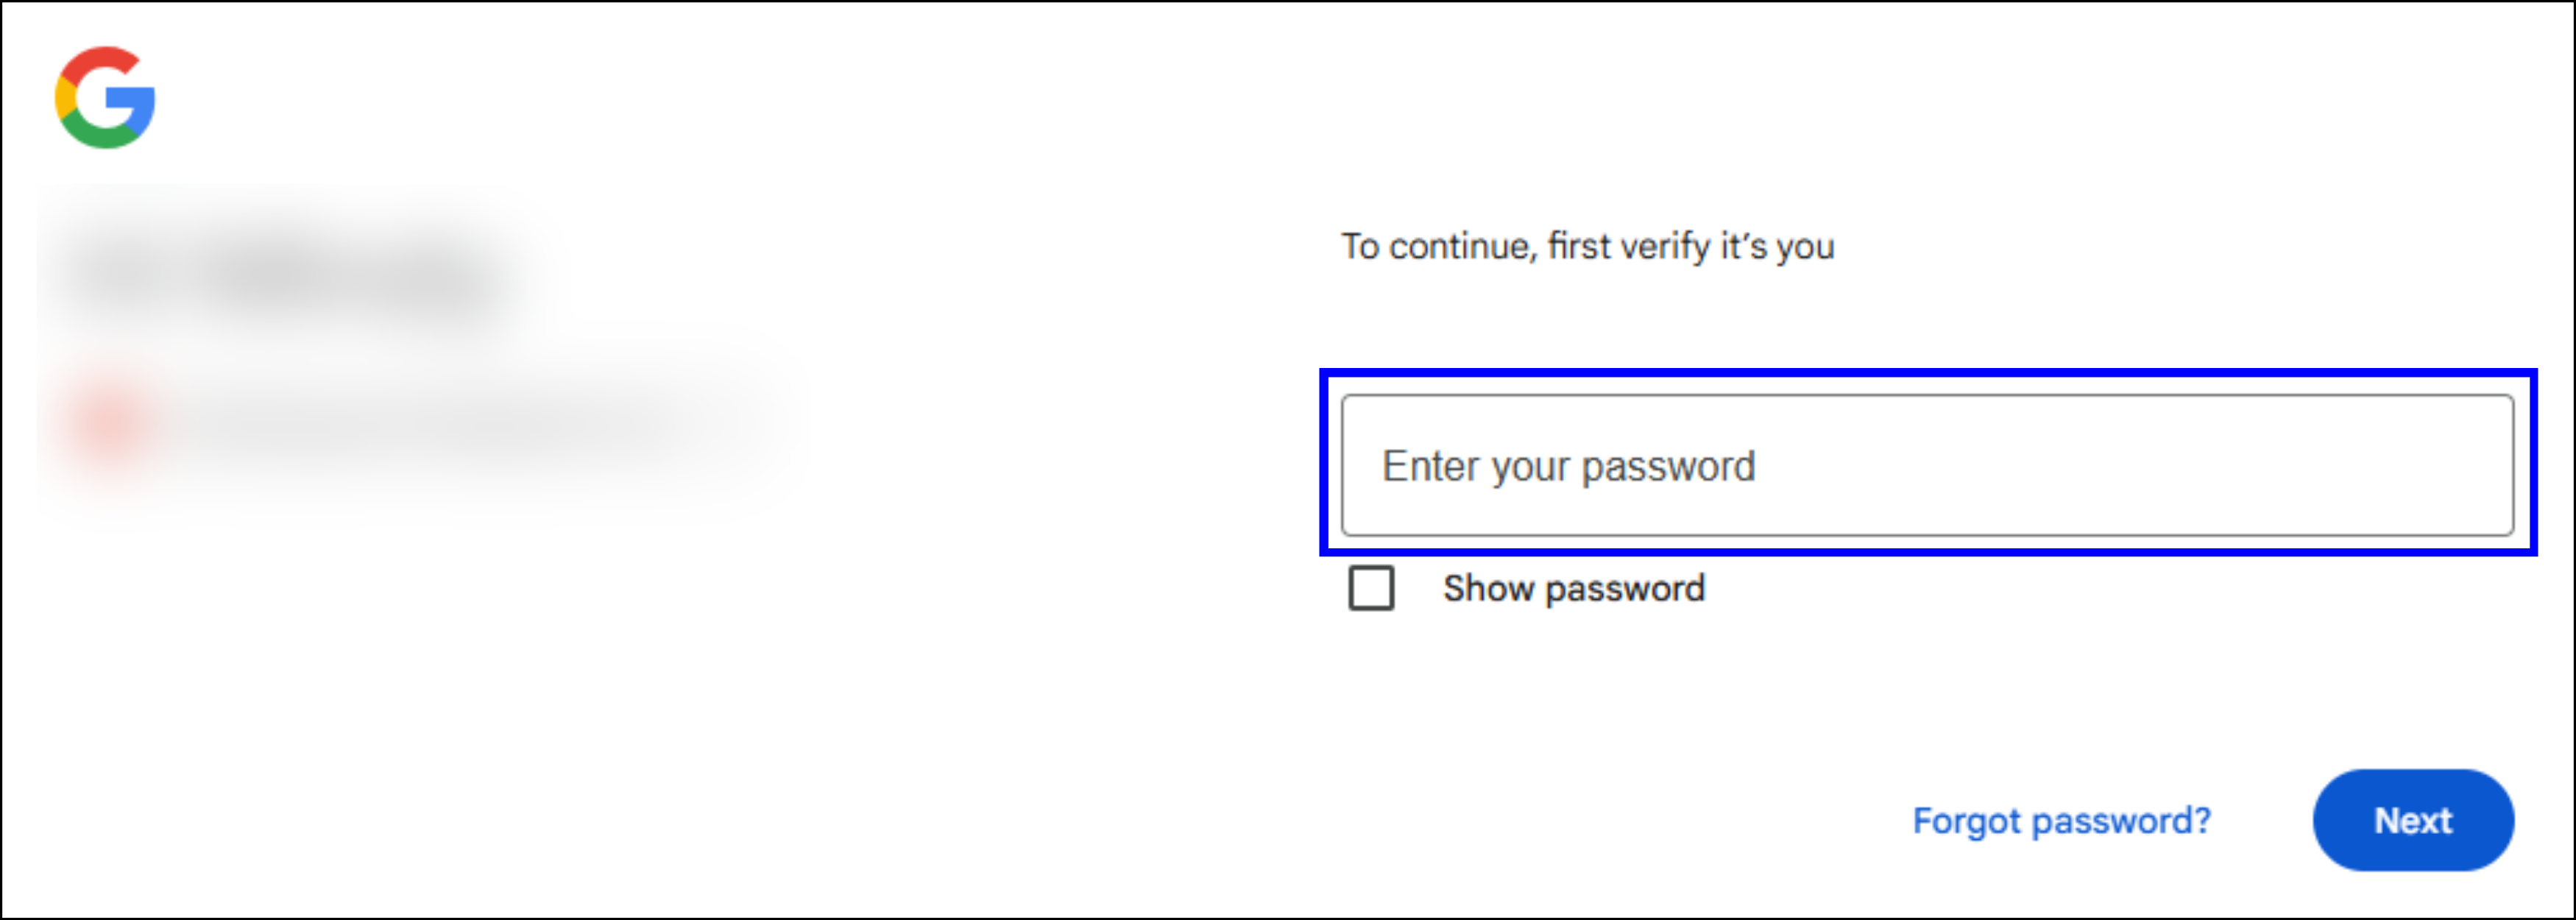
- Enter your Gmail password.
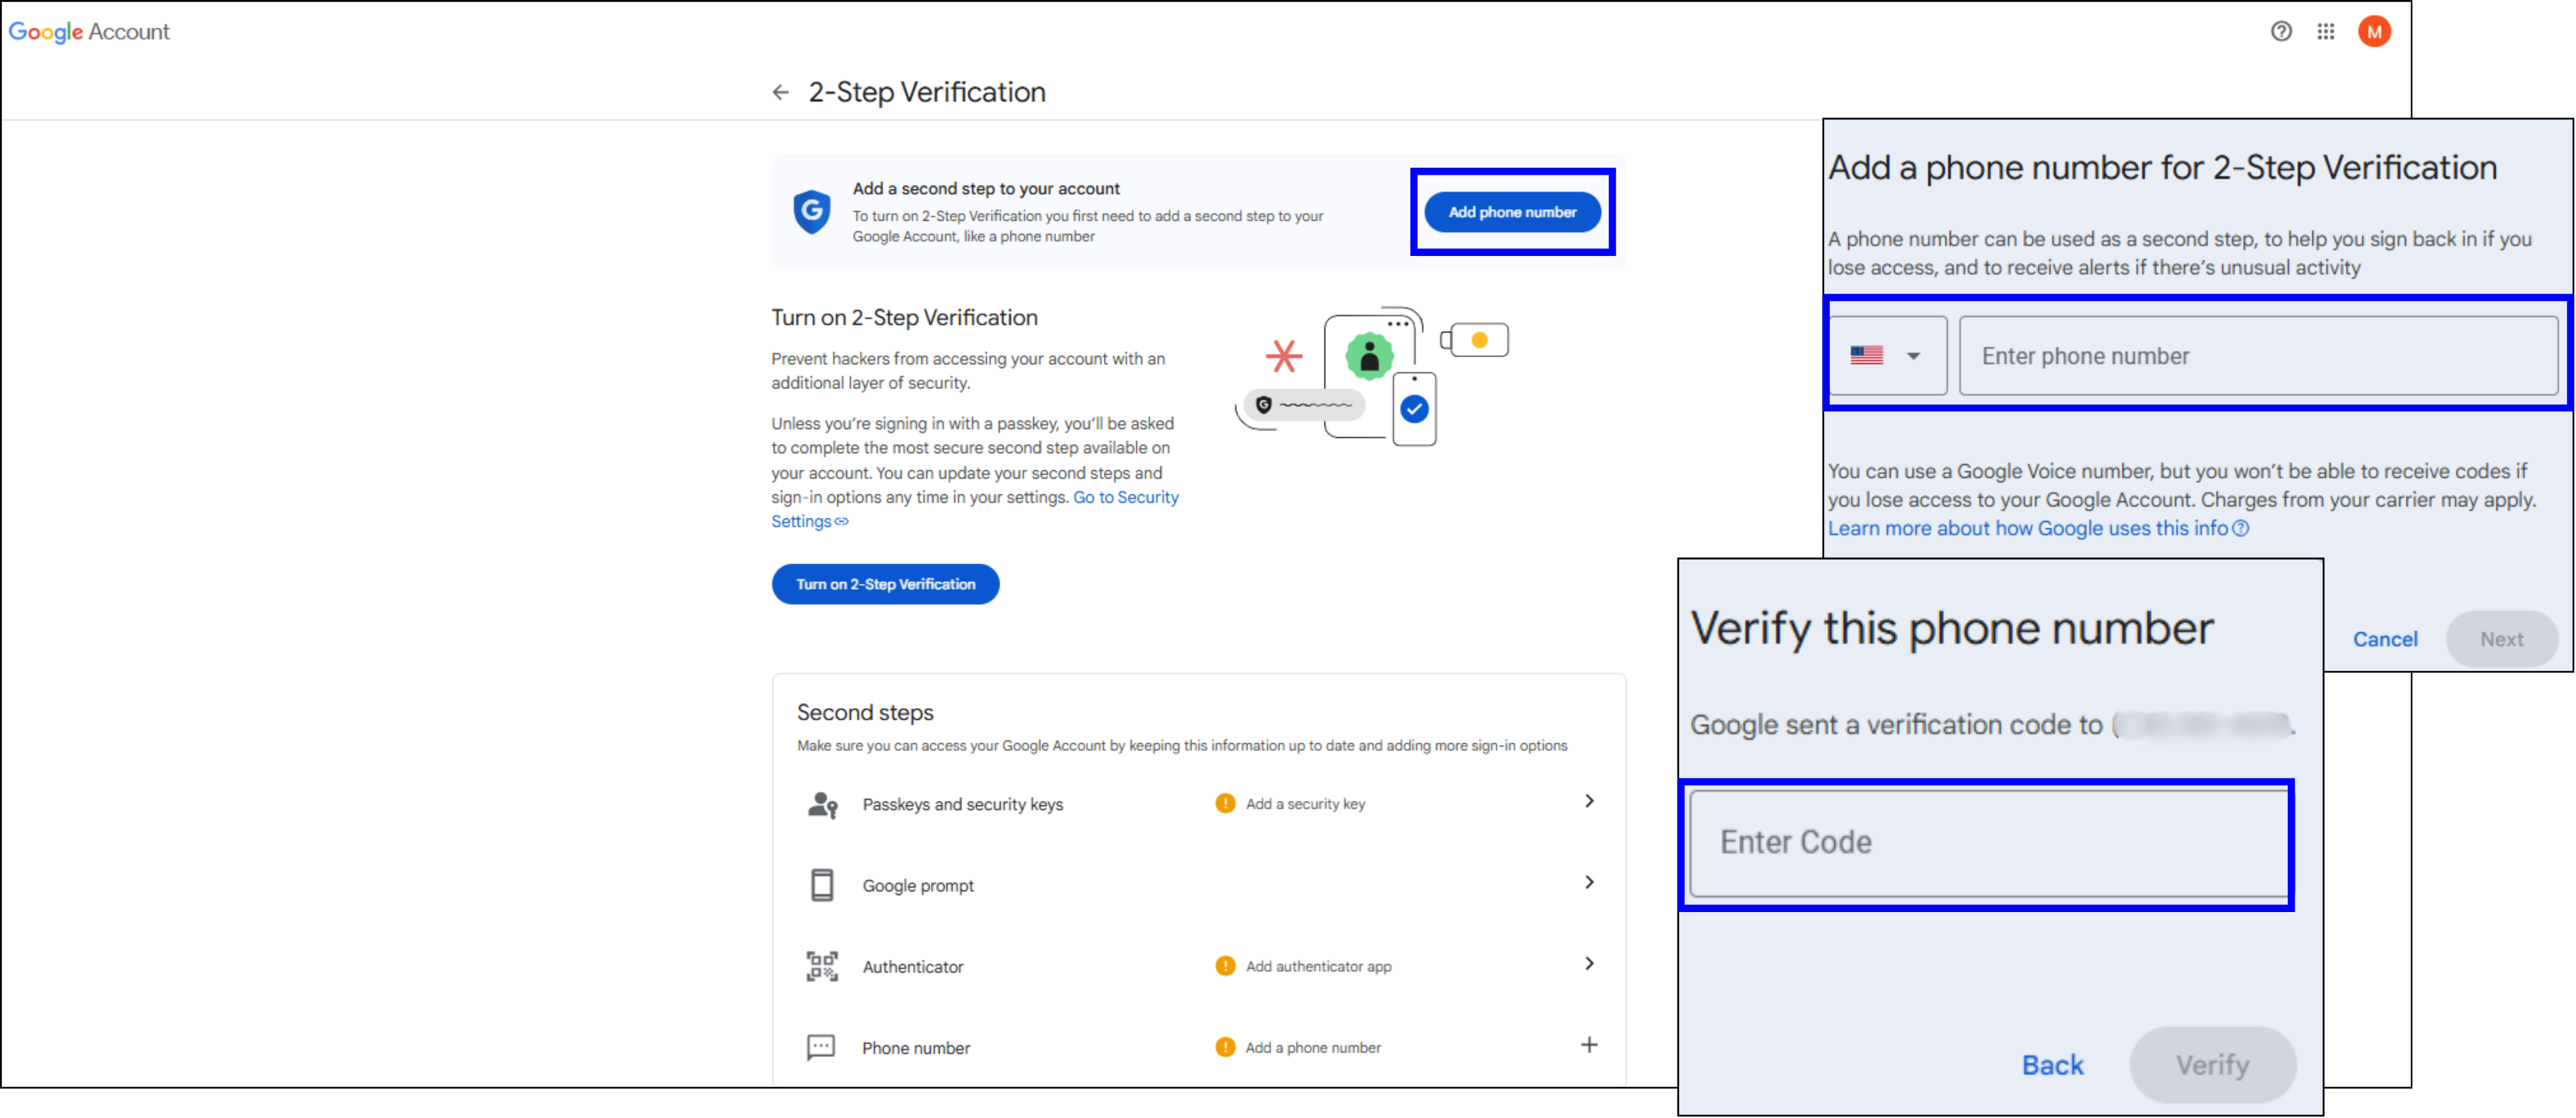
- Click Add phone number near the top of your screen.
- Enter the verification code sent by Google and click Verify.
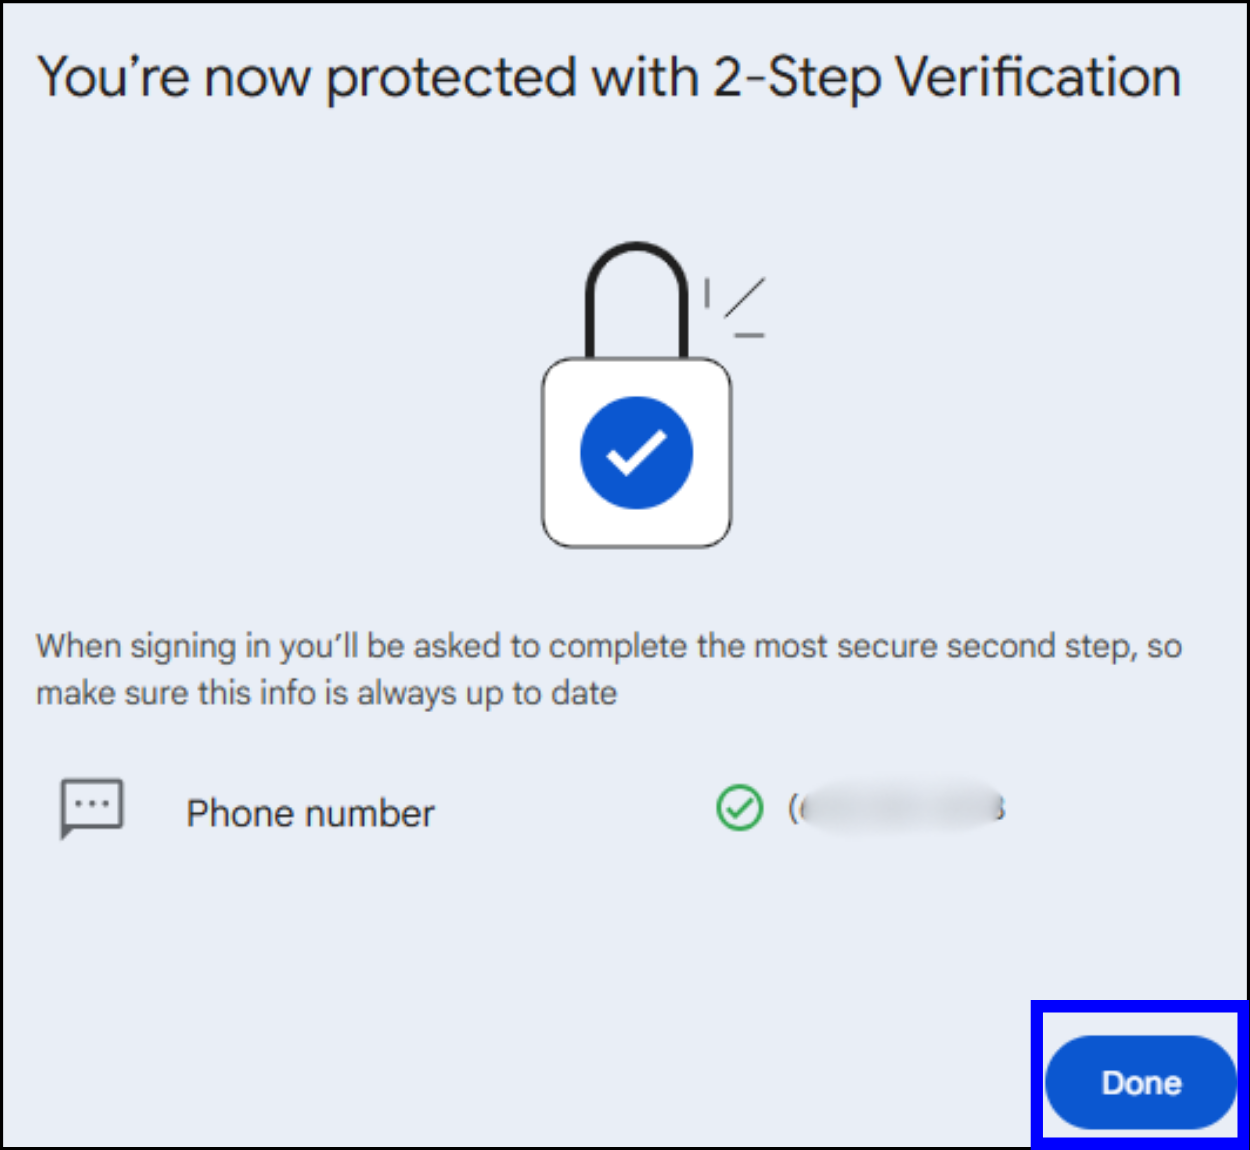
- An onscreen notification will confirm 2-Step Verification. Click Done.
- A confirmation email will be sent to your Gmail.
- Important: 2-Step Verification procedures are subject to change and may differ from the information above. Be sure to follow Google’s onscreen instructions.
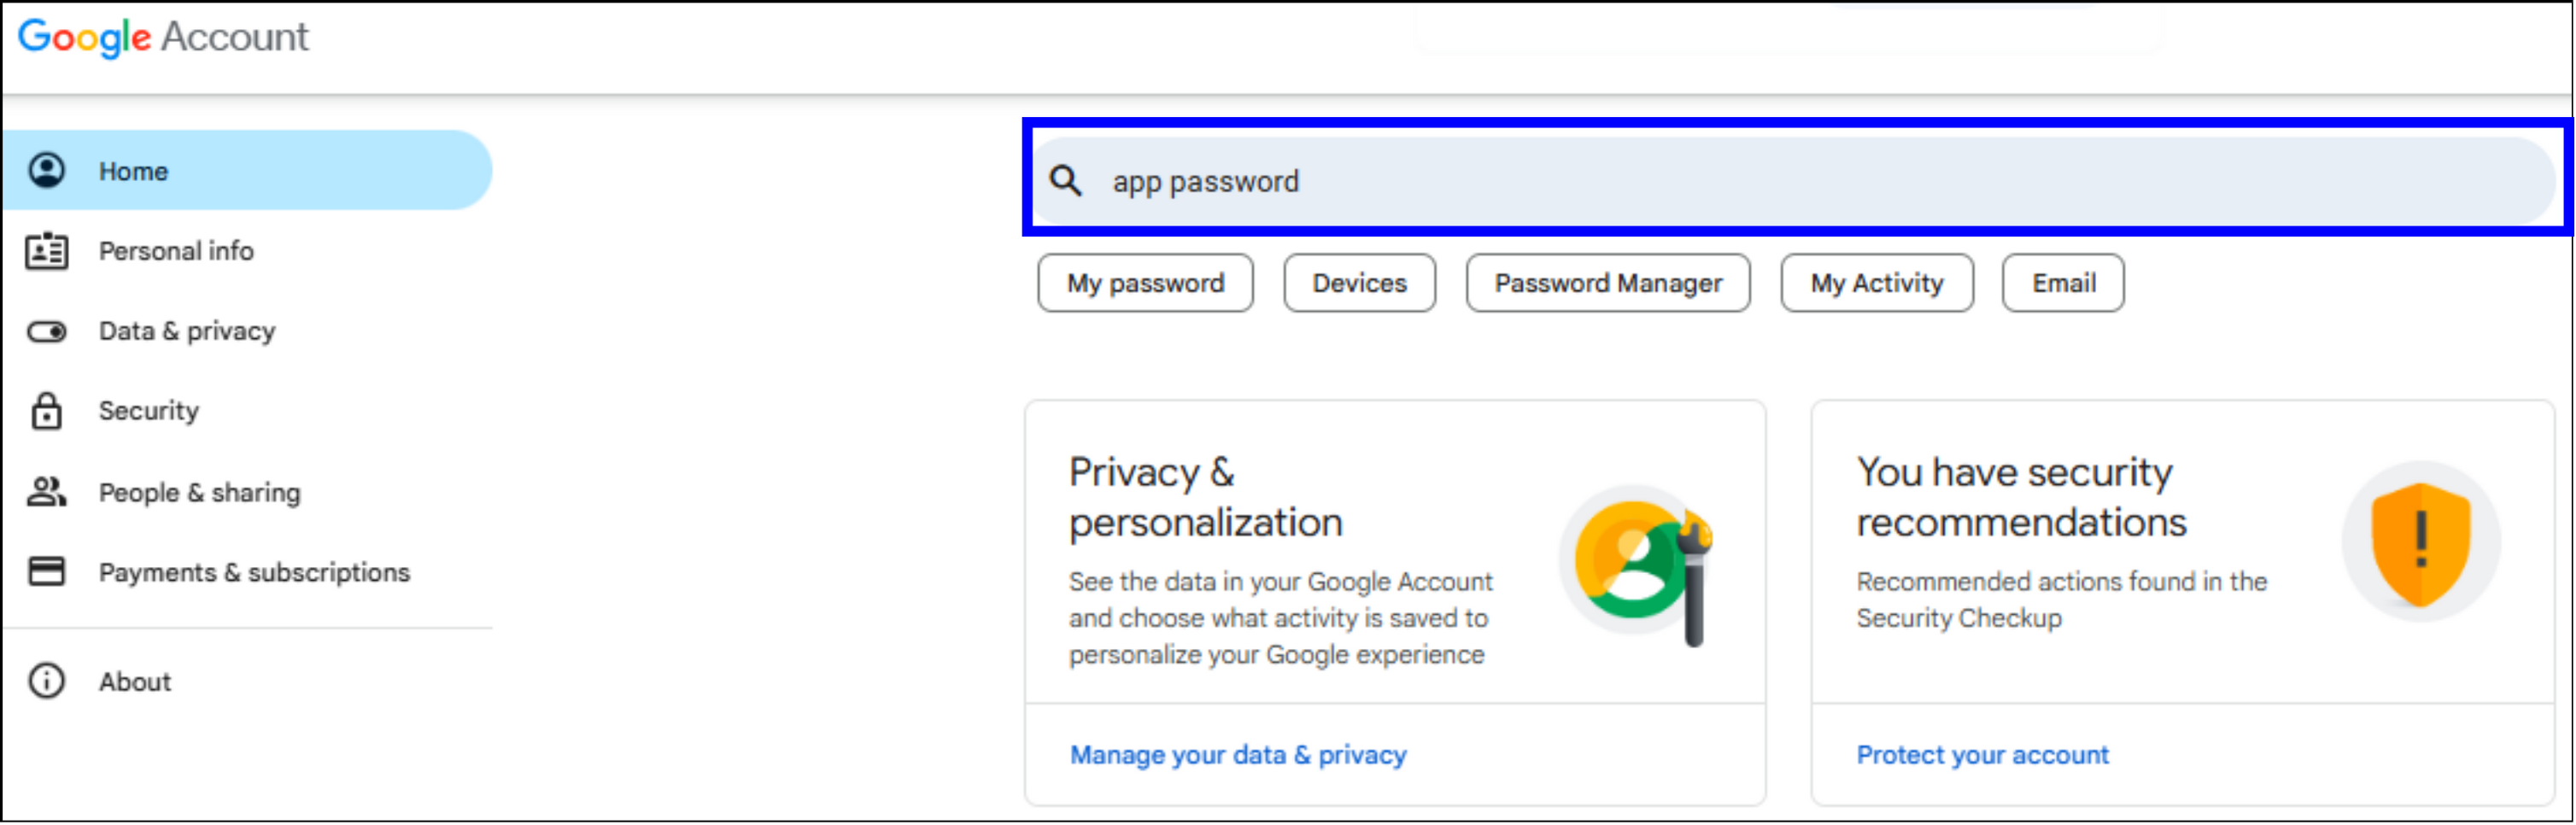
- Click the Menu icon in the upper right corner, then Account.
- Enter “app password” into the Search Bar.
- Select the App passwords (Security) option.
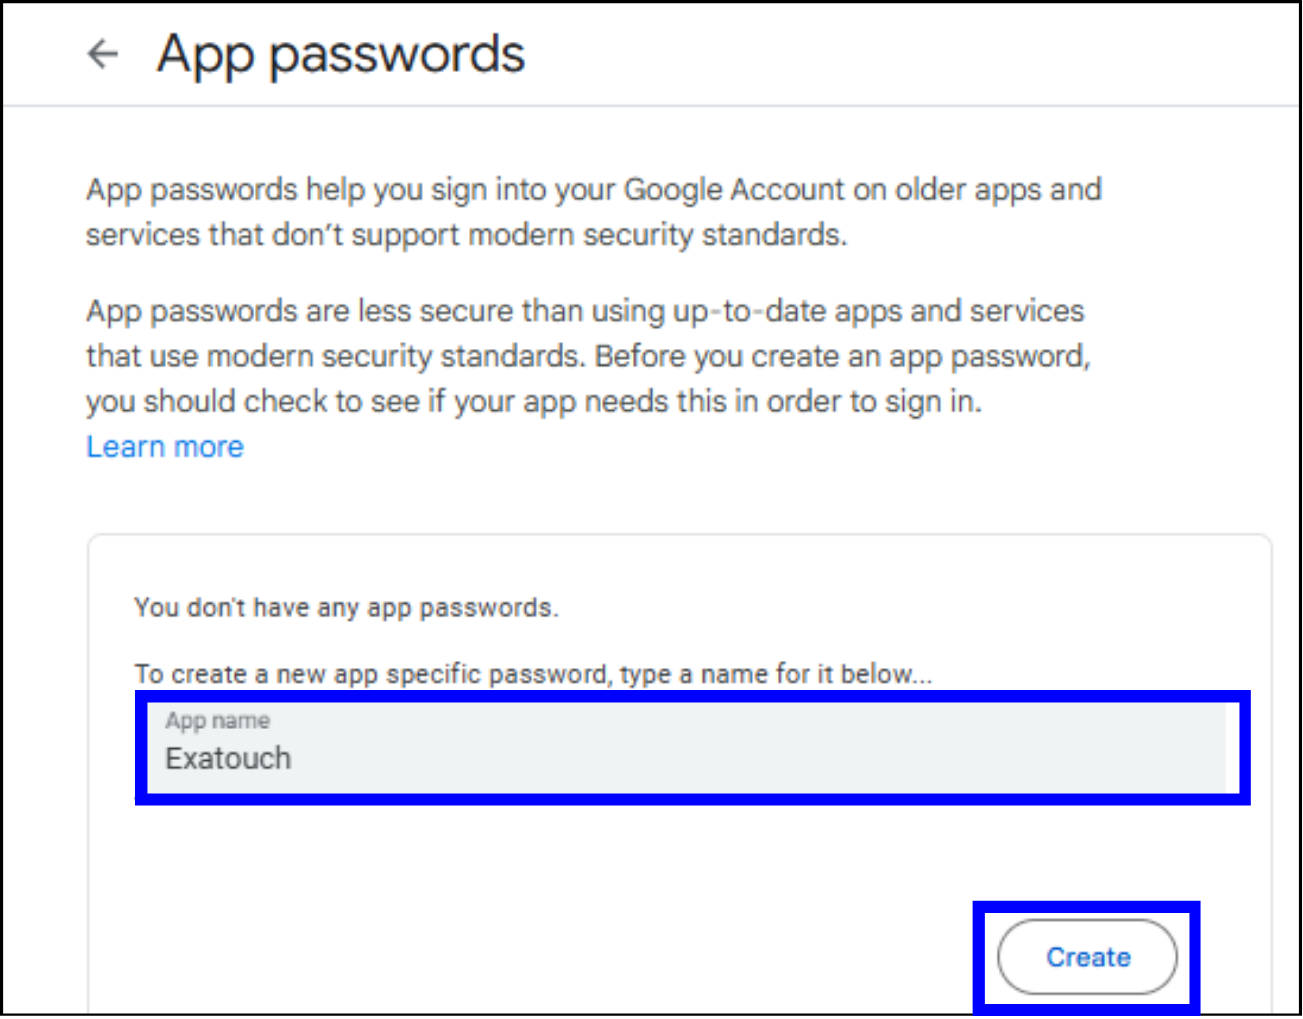
- Enter a name for the app password in the App name field. The example uses “Exatouch” as the name.
- Click Create.
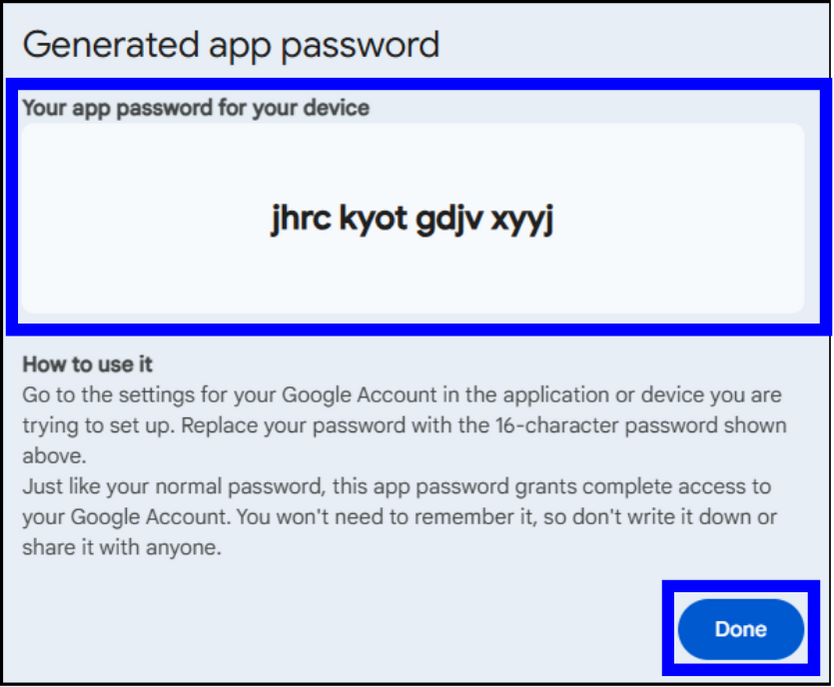
- Google will generate a 16-digit app password.
- Click Done.
- Enter this Google password when enabling Gmail settings in Exatouch.
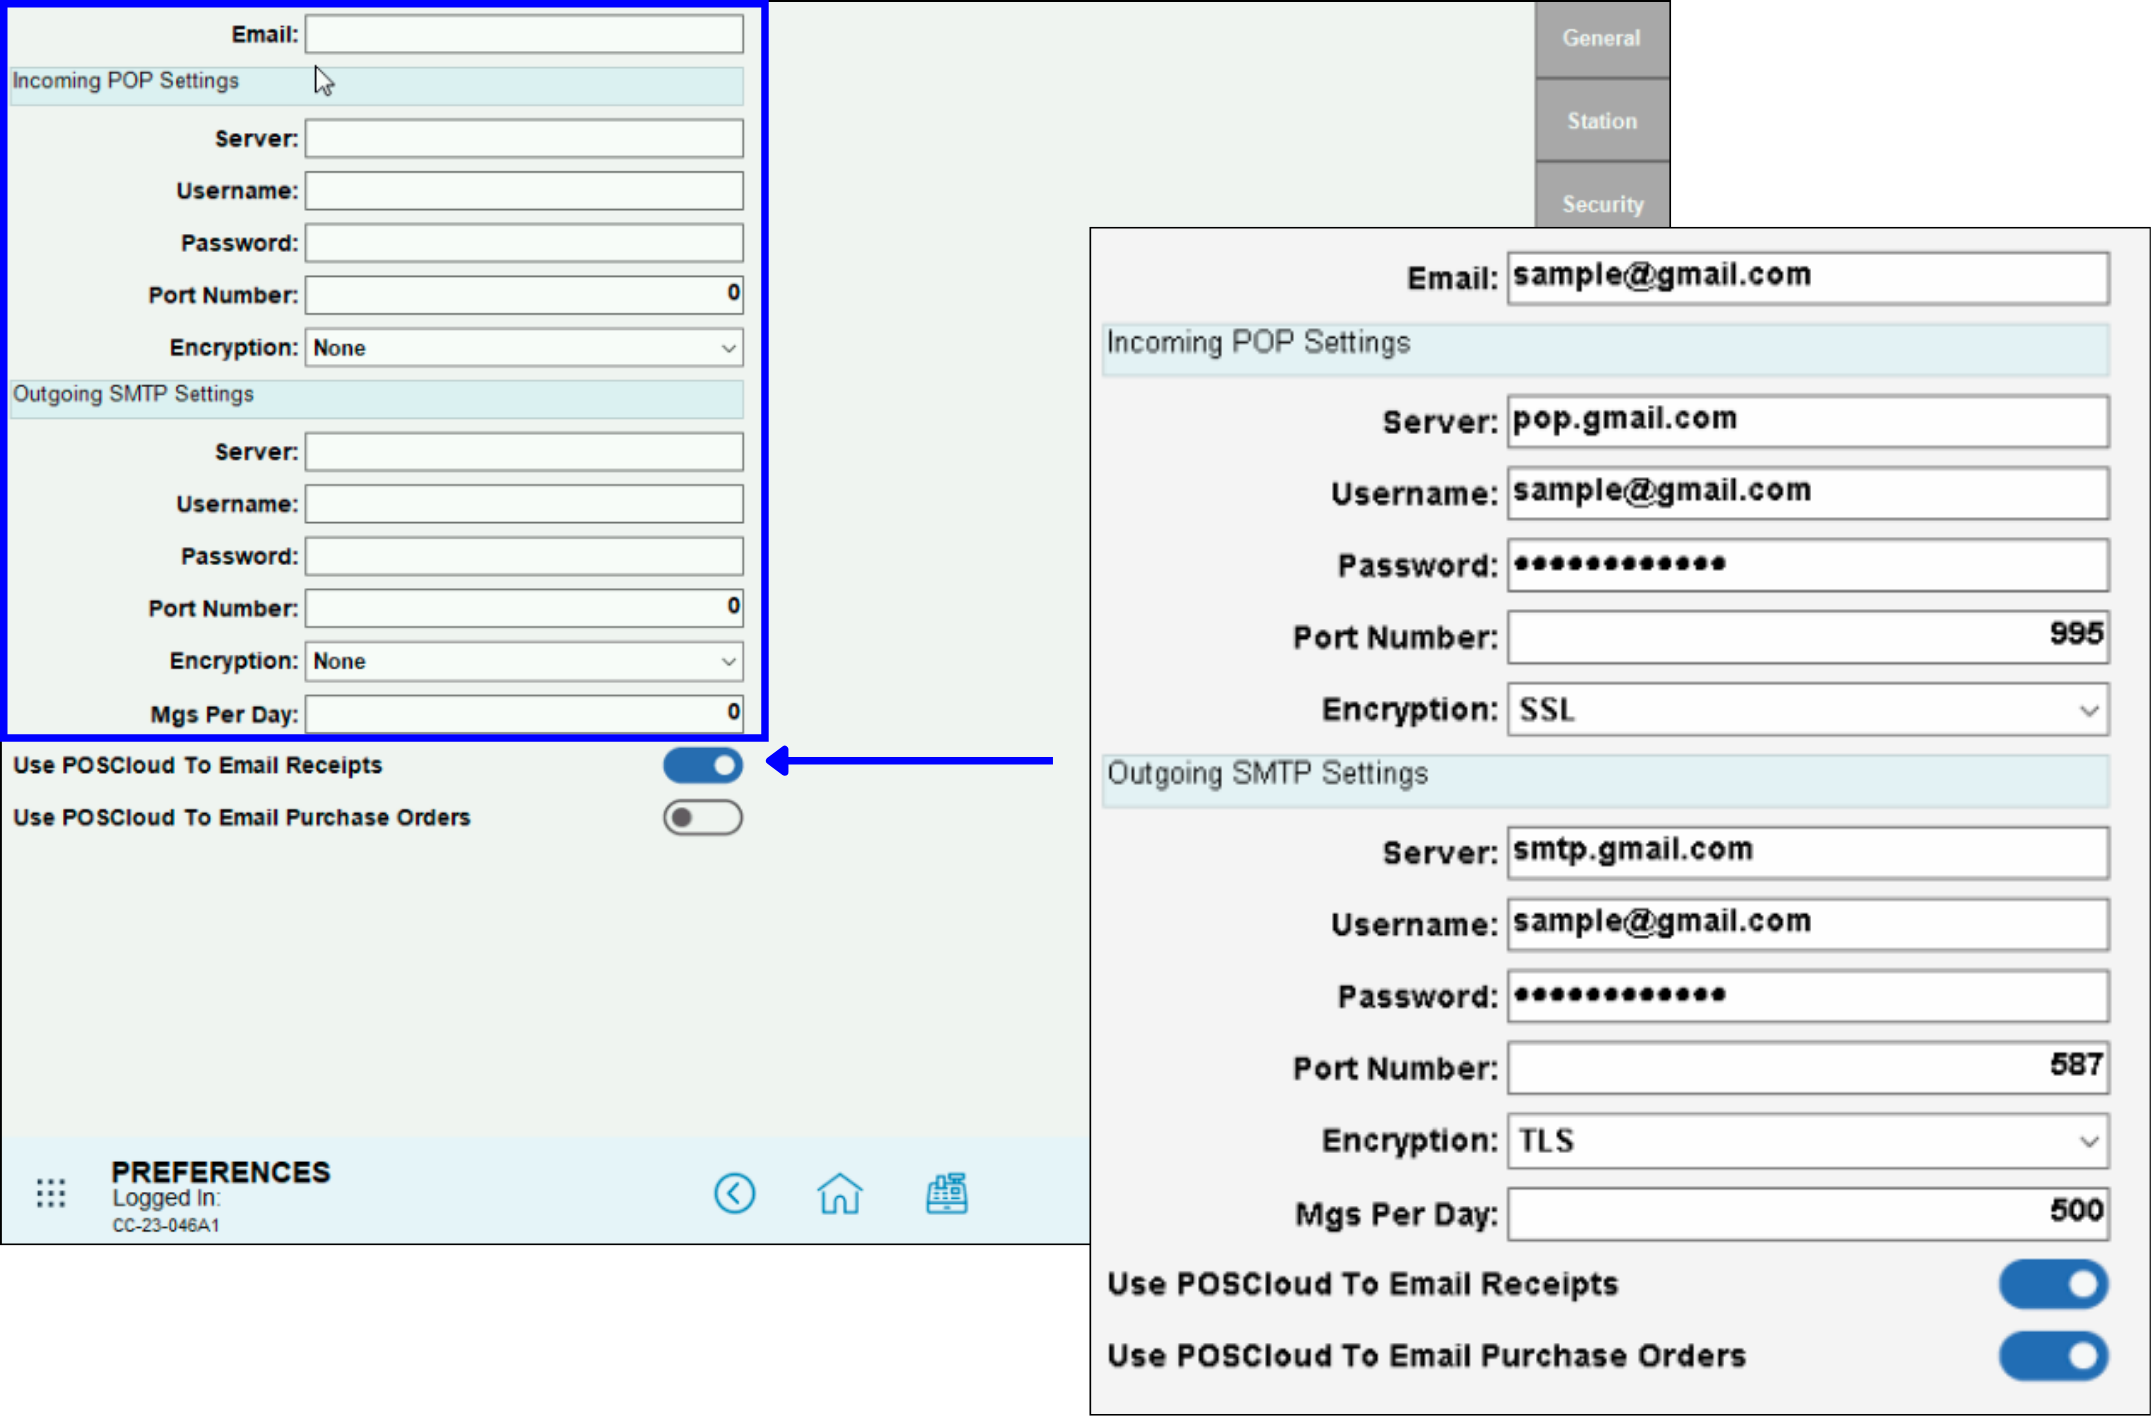
Follow these steps to set up your POP server for sending Gmail messages and as a backup for reports and customer receipts:
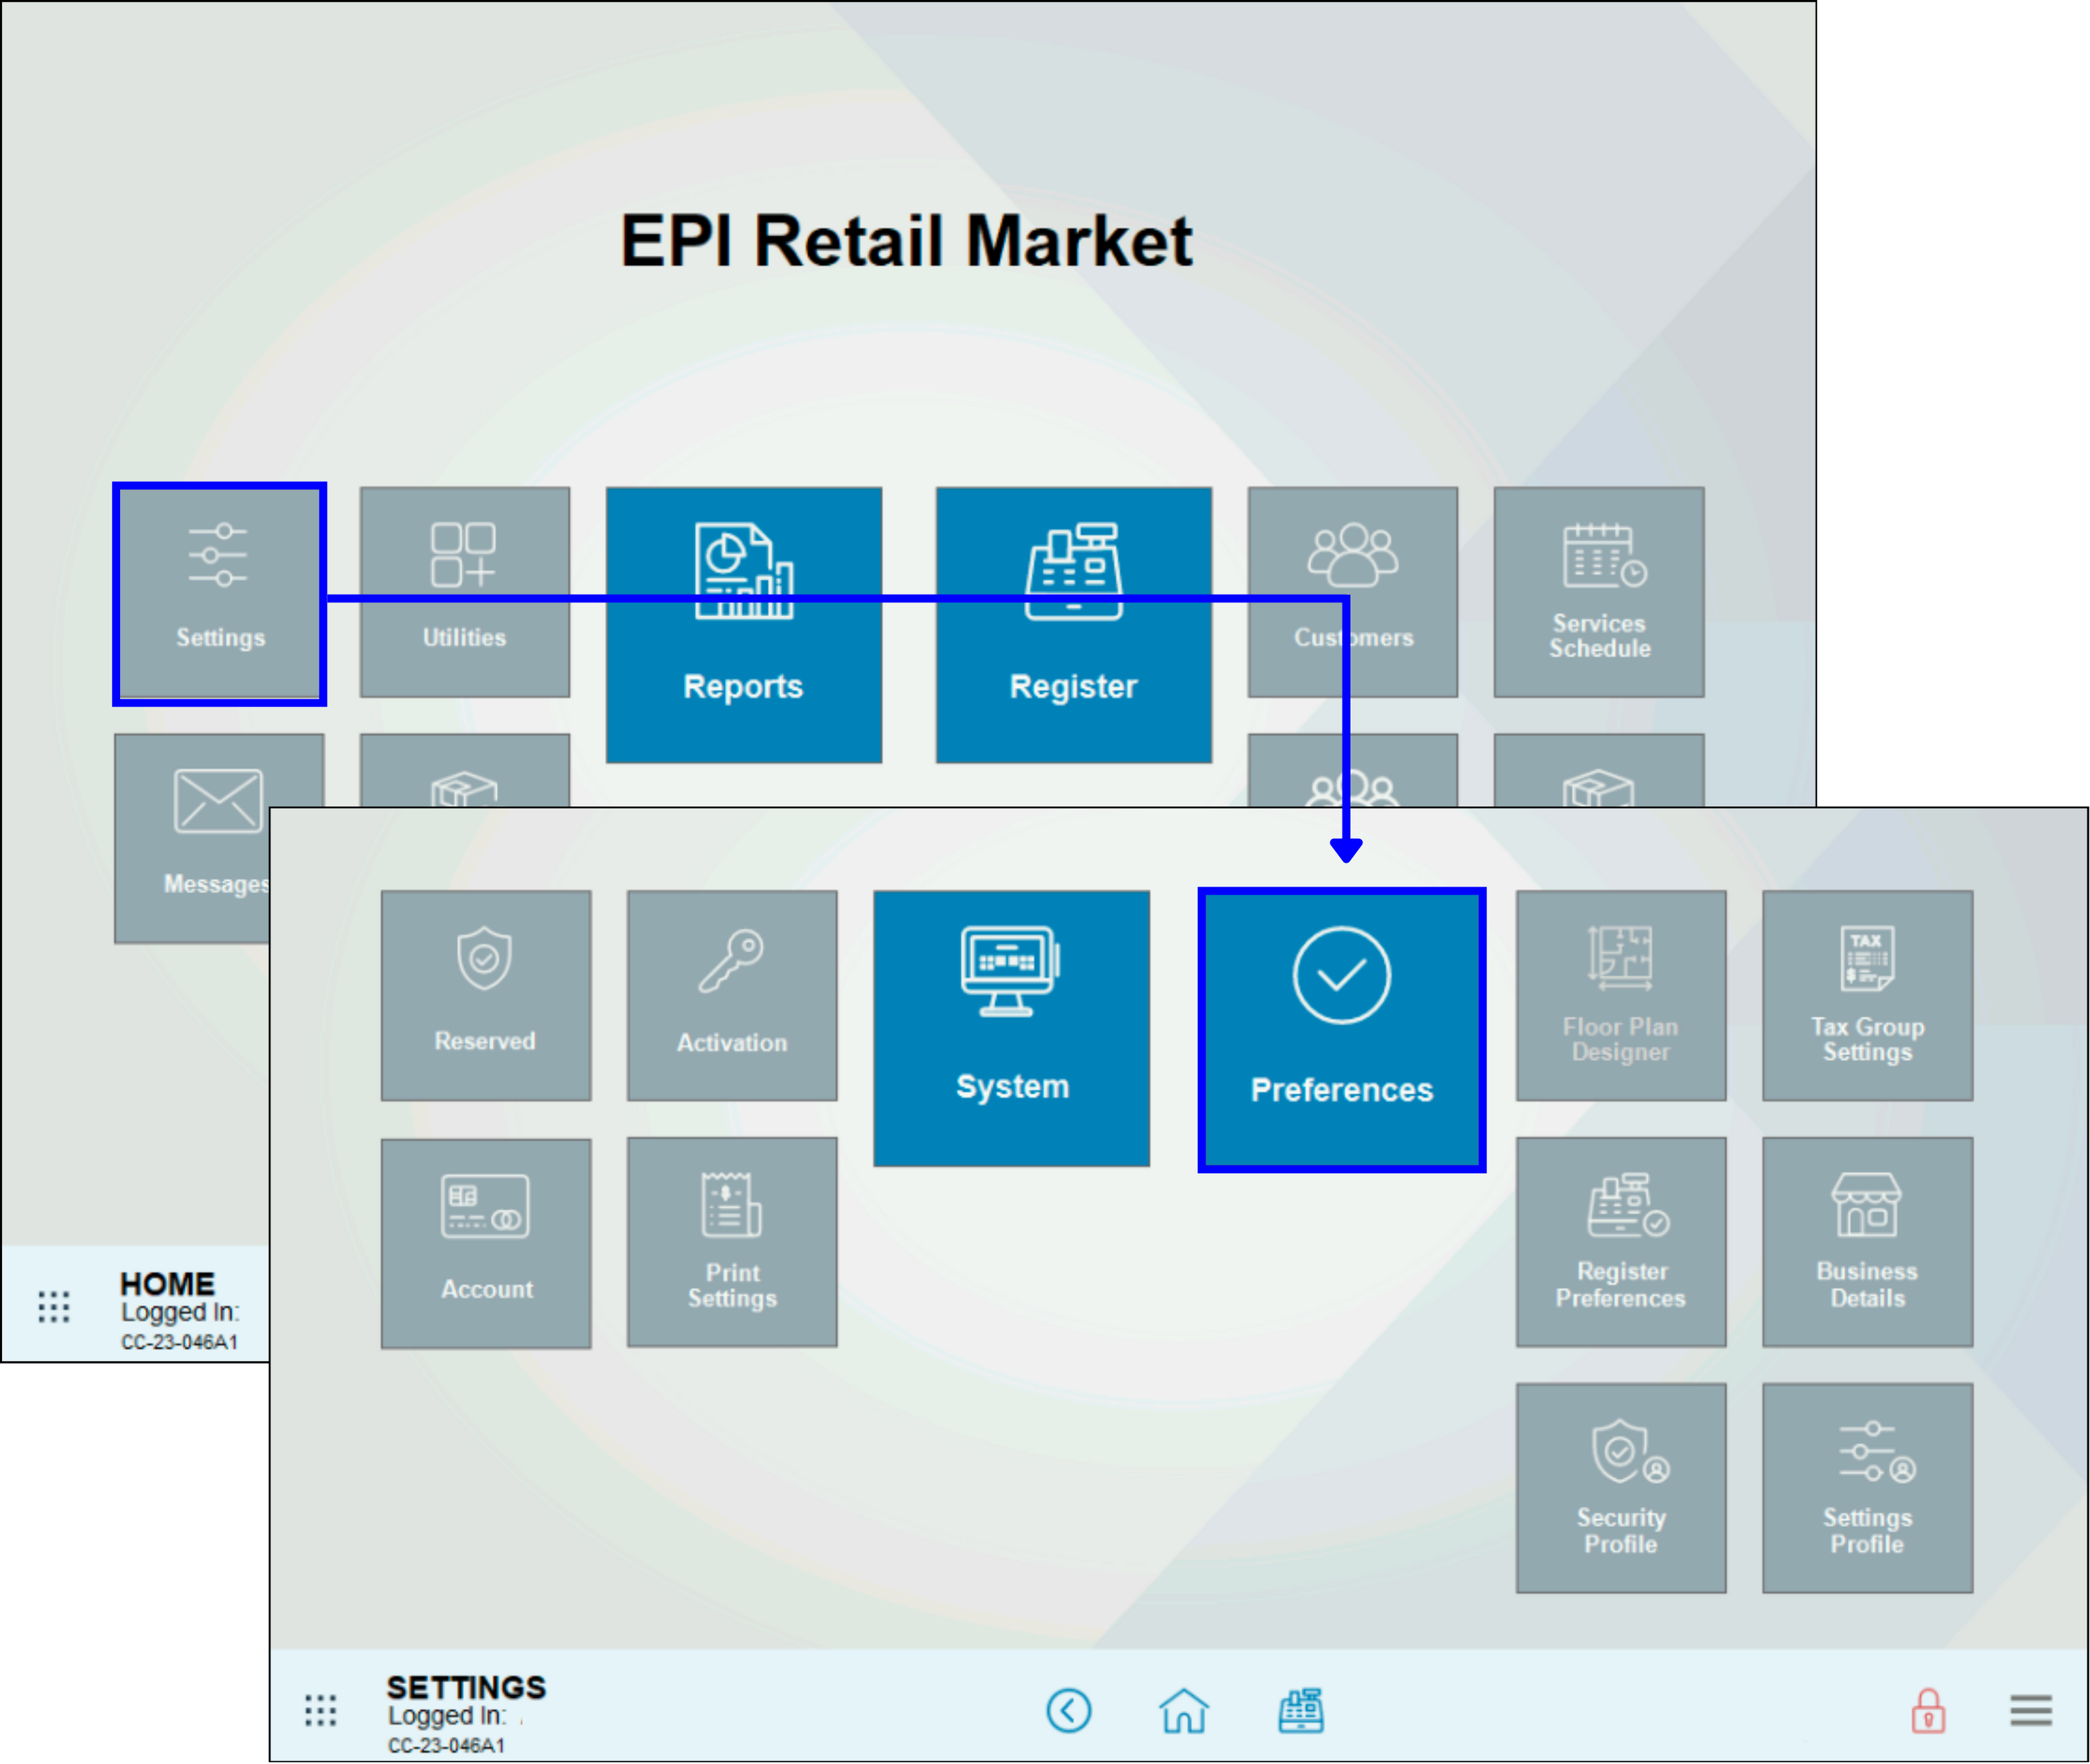
- From Home, navigate to Settings > Preferences.
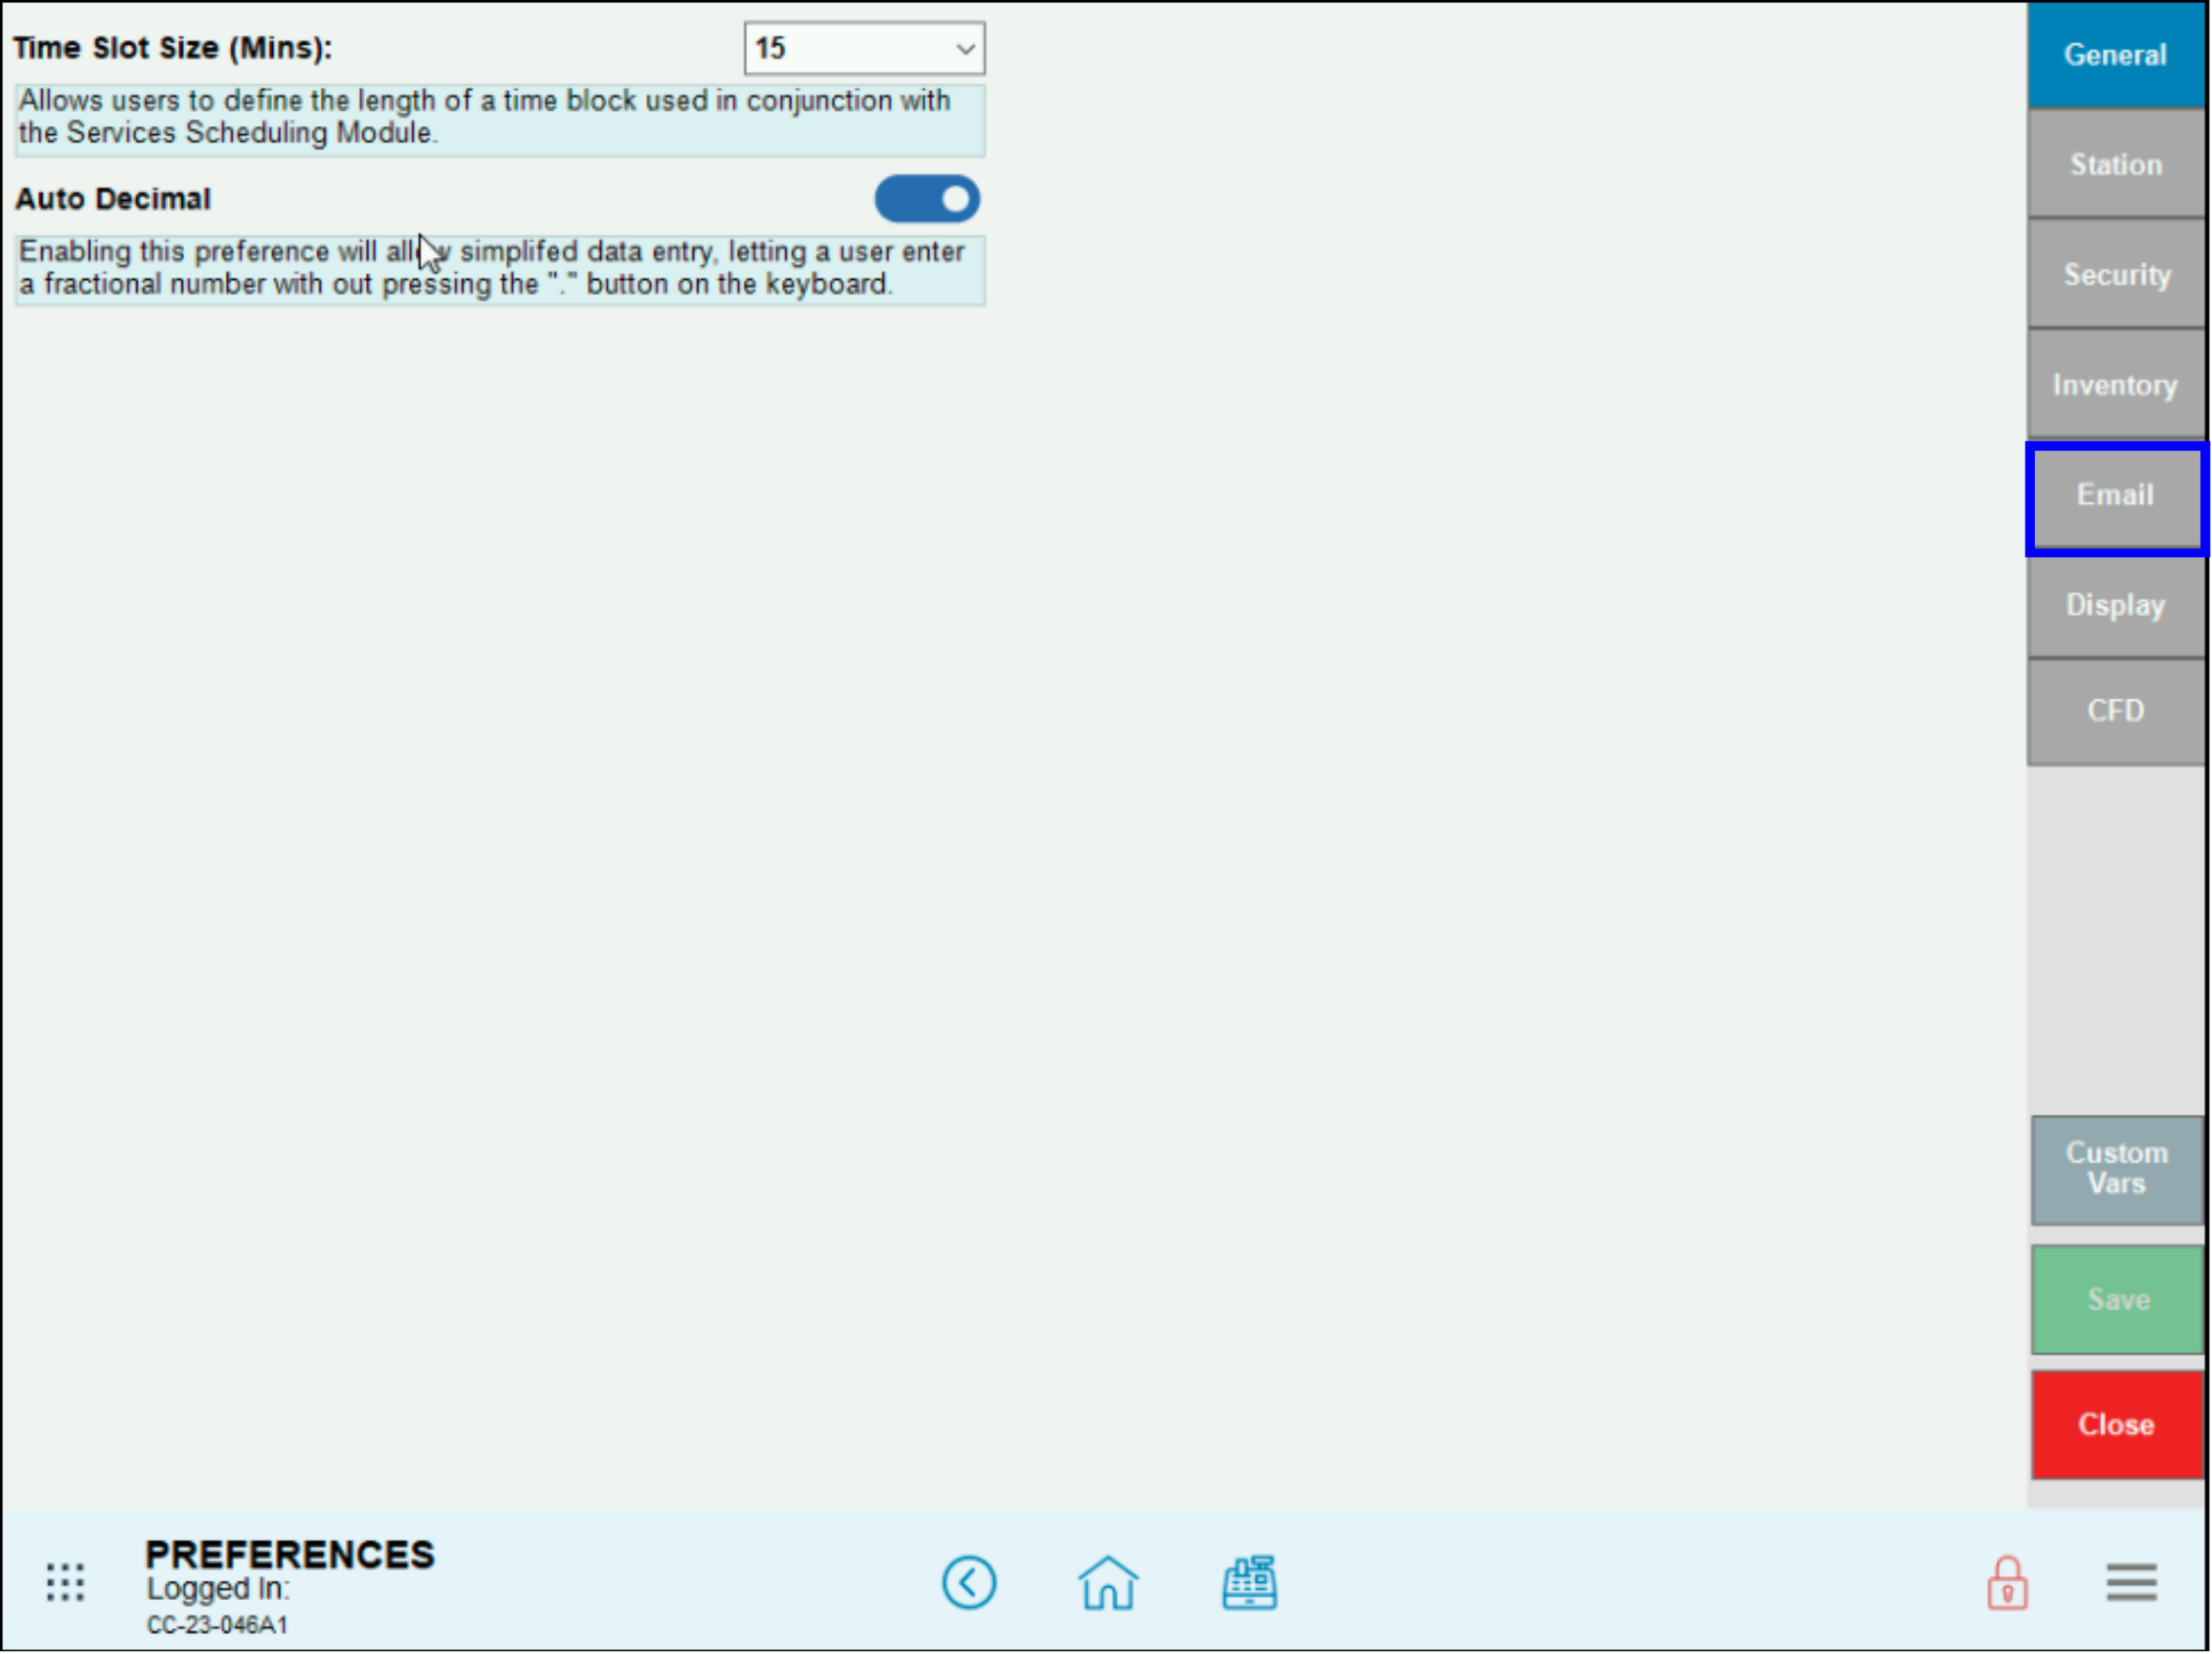
- Click the Email tab.
- In the Outgoing SMTP fields, enter Email and your Google Password. If you plan to use your Inbox, Incoming POP settings also need to be entered.
- Ensure Use POSCloud to Email Receipts slider is on.
- Important: These are the typical settings for Gmail. Contact your employer’s system administrator for help assigning the correct POP server address and other email settings. Exatouch is unable to assist with Email settings.
- Click Close.
- Note: For more information about sending and receiving messages, go to View Your Inbox.
How can we improve this information for you?
Registered internal users can comment. Merchants, have a suggestion? Tell us more.