Merchants can customize their Register by setting up Quick Menus, which allows easy access to specific items. This can be particularly helpful and efficient for best-selling items.
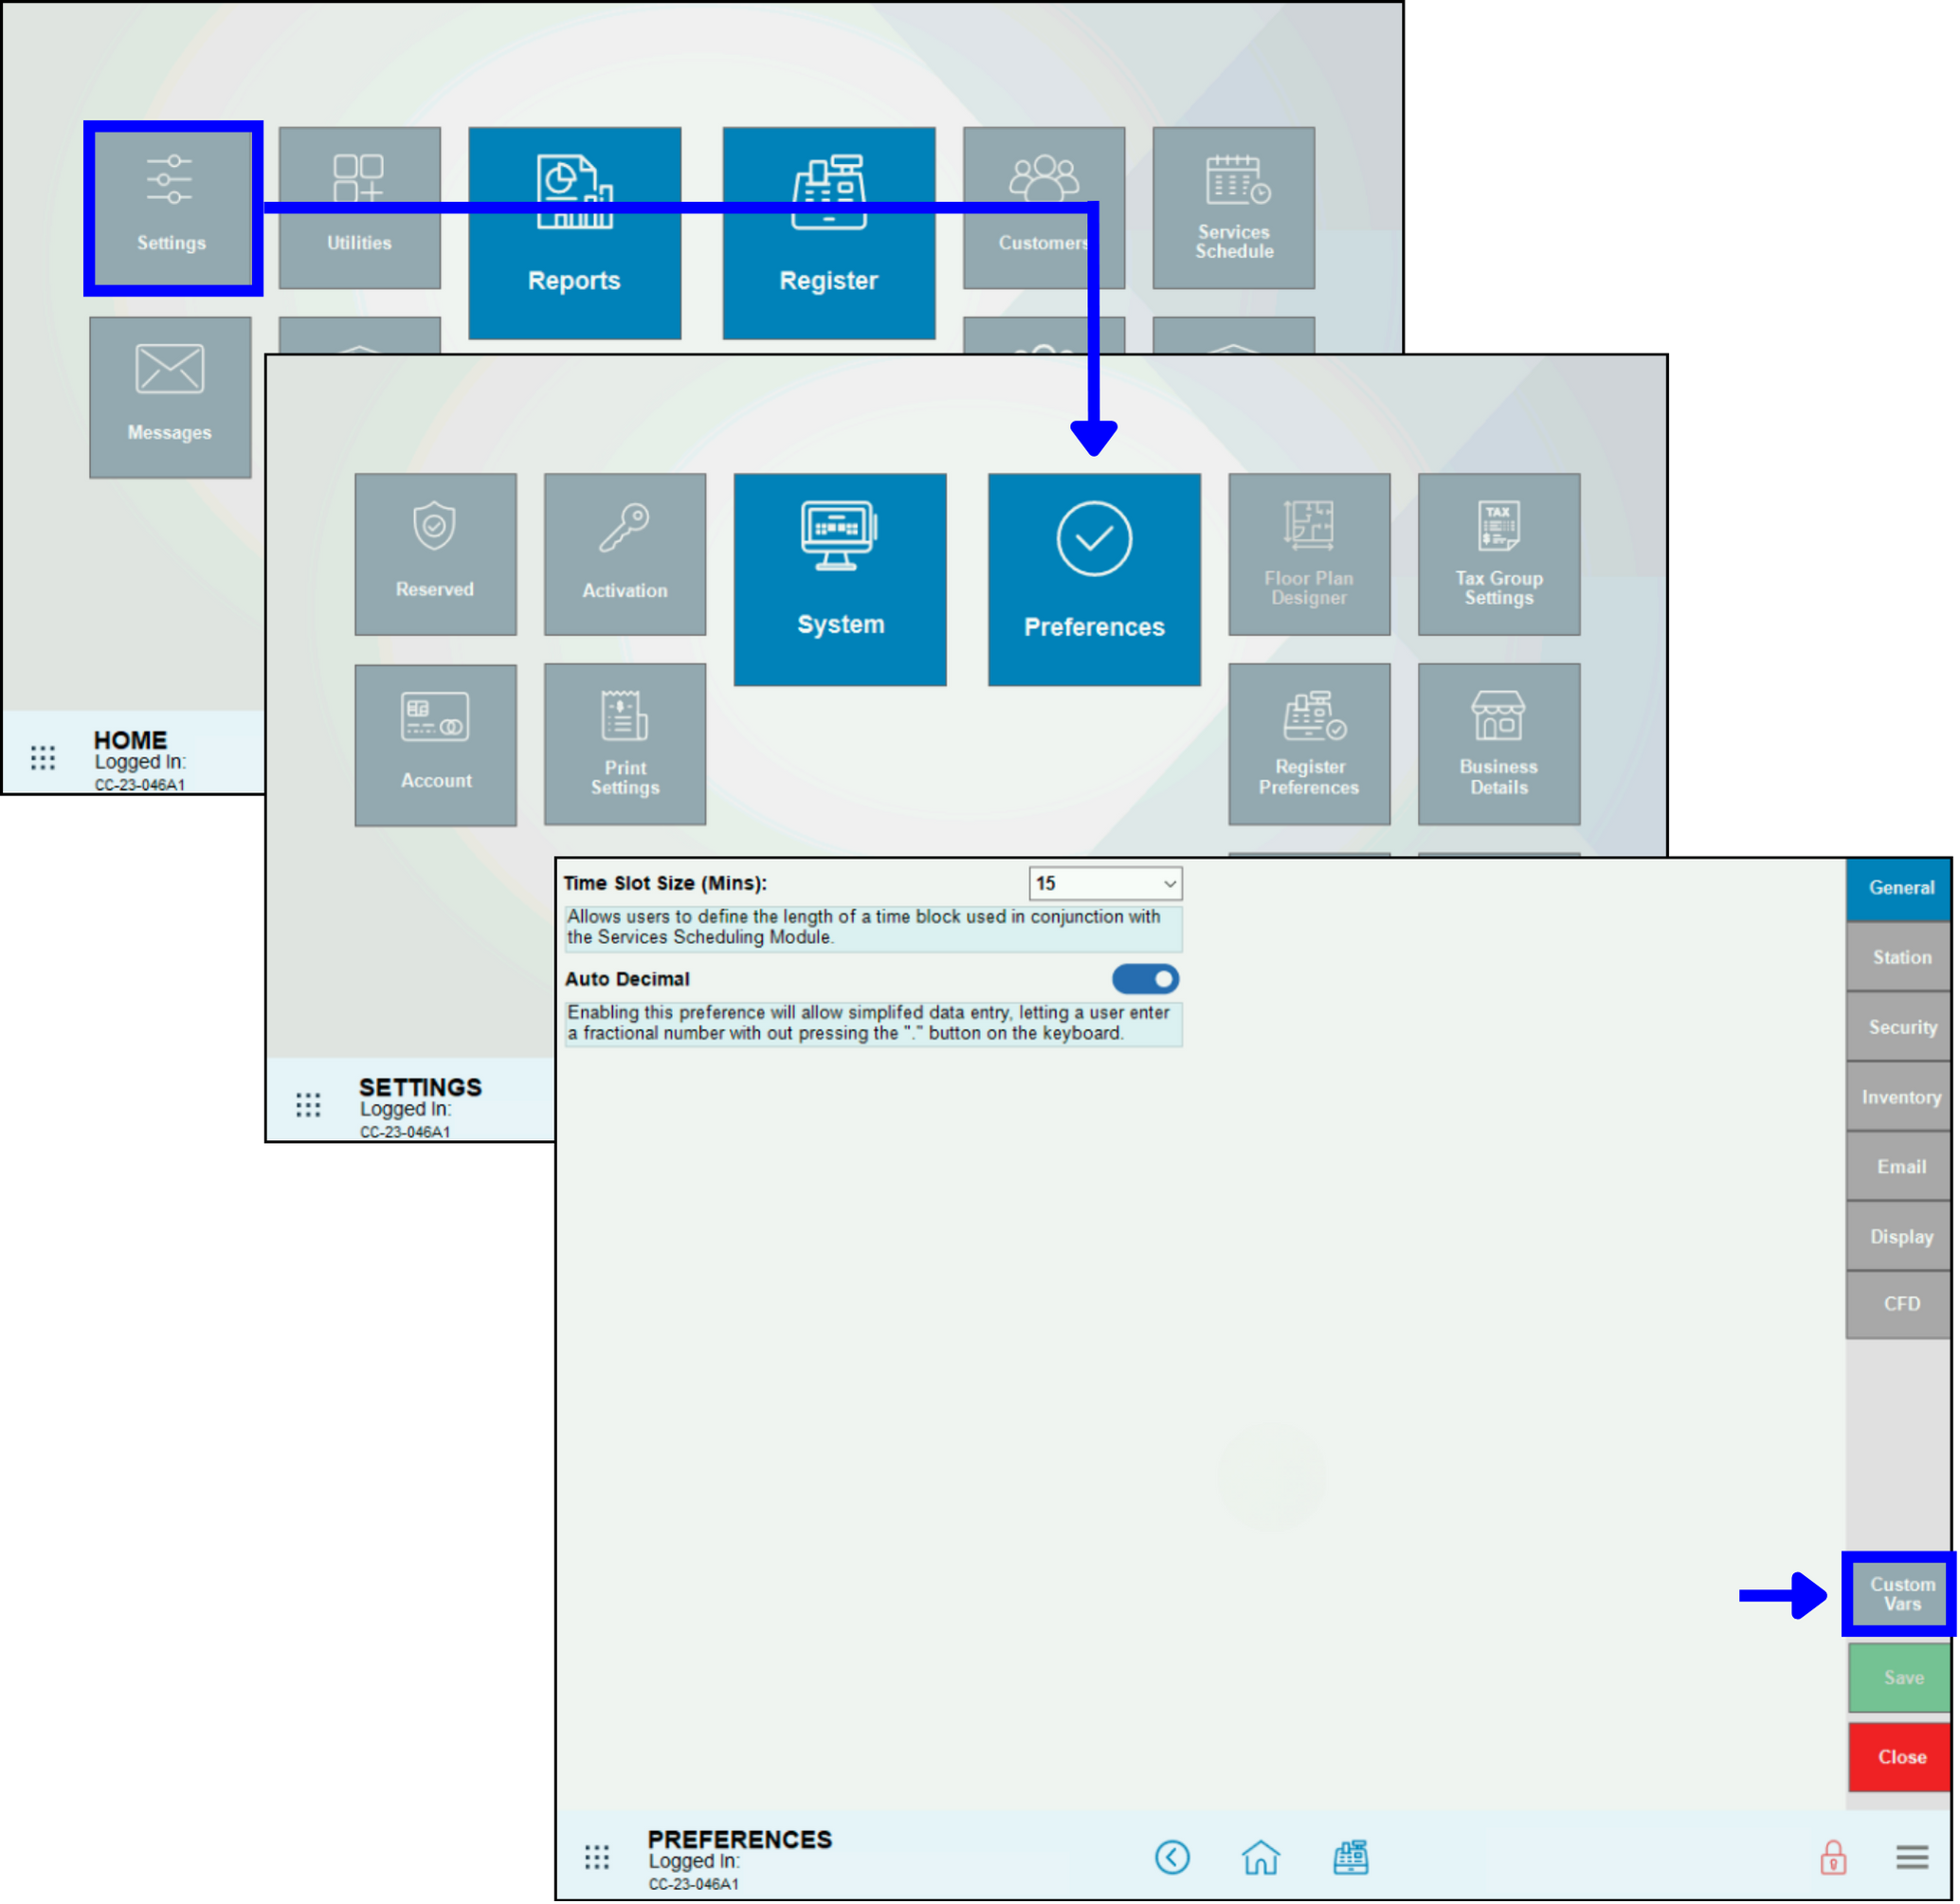
- From Home, navigate to Settings > Preferences > Custom Vars.
- Click Quick Menu in the Type column on the left.
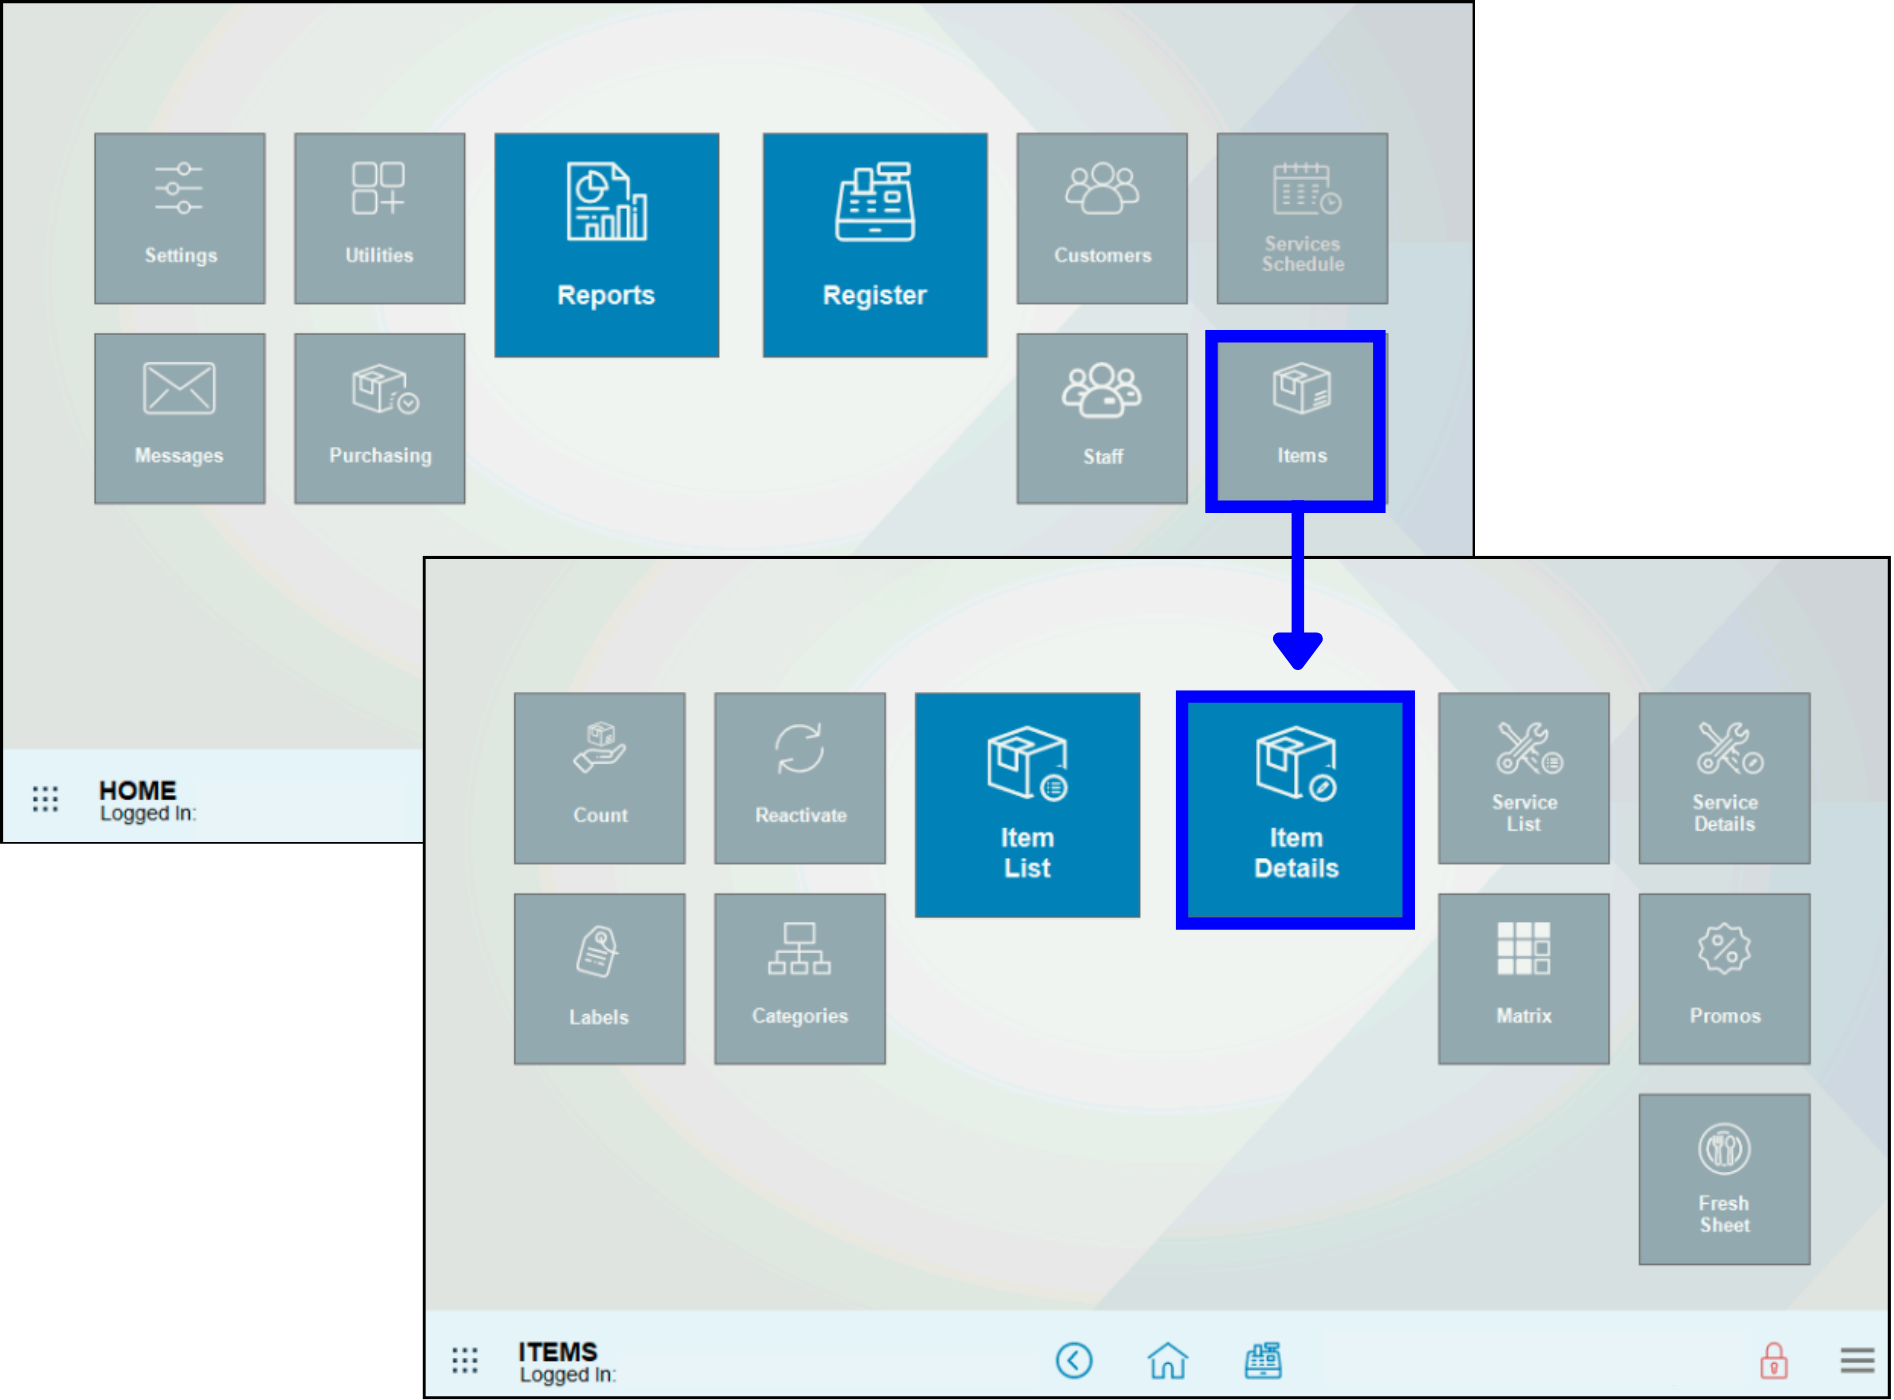
- Navigate to Home, then click Items > Item Details.
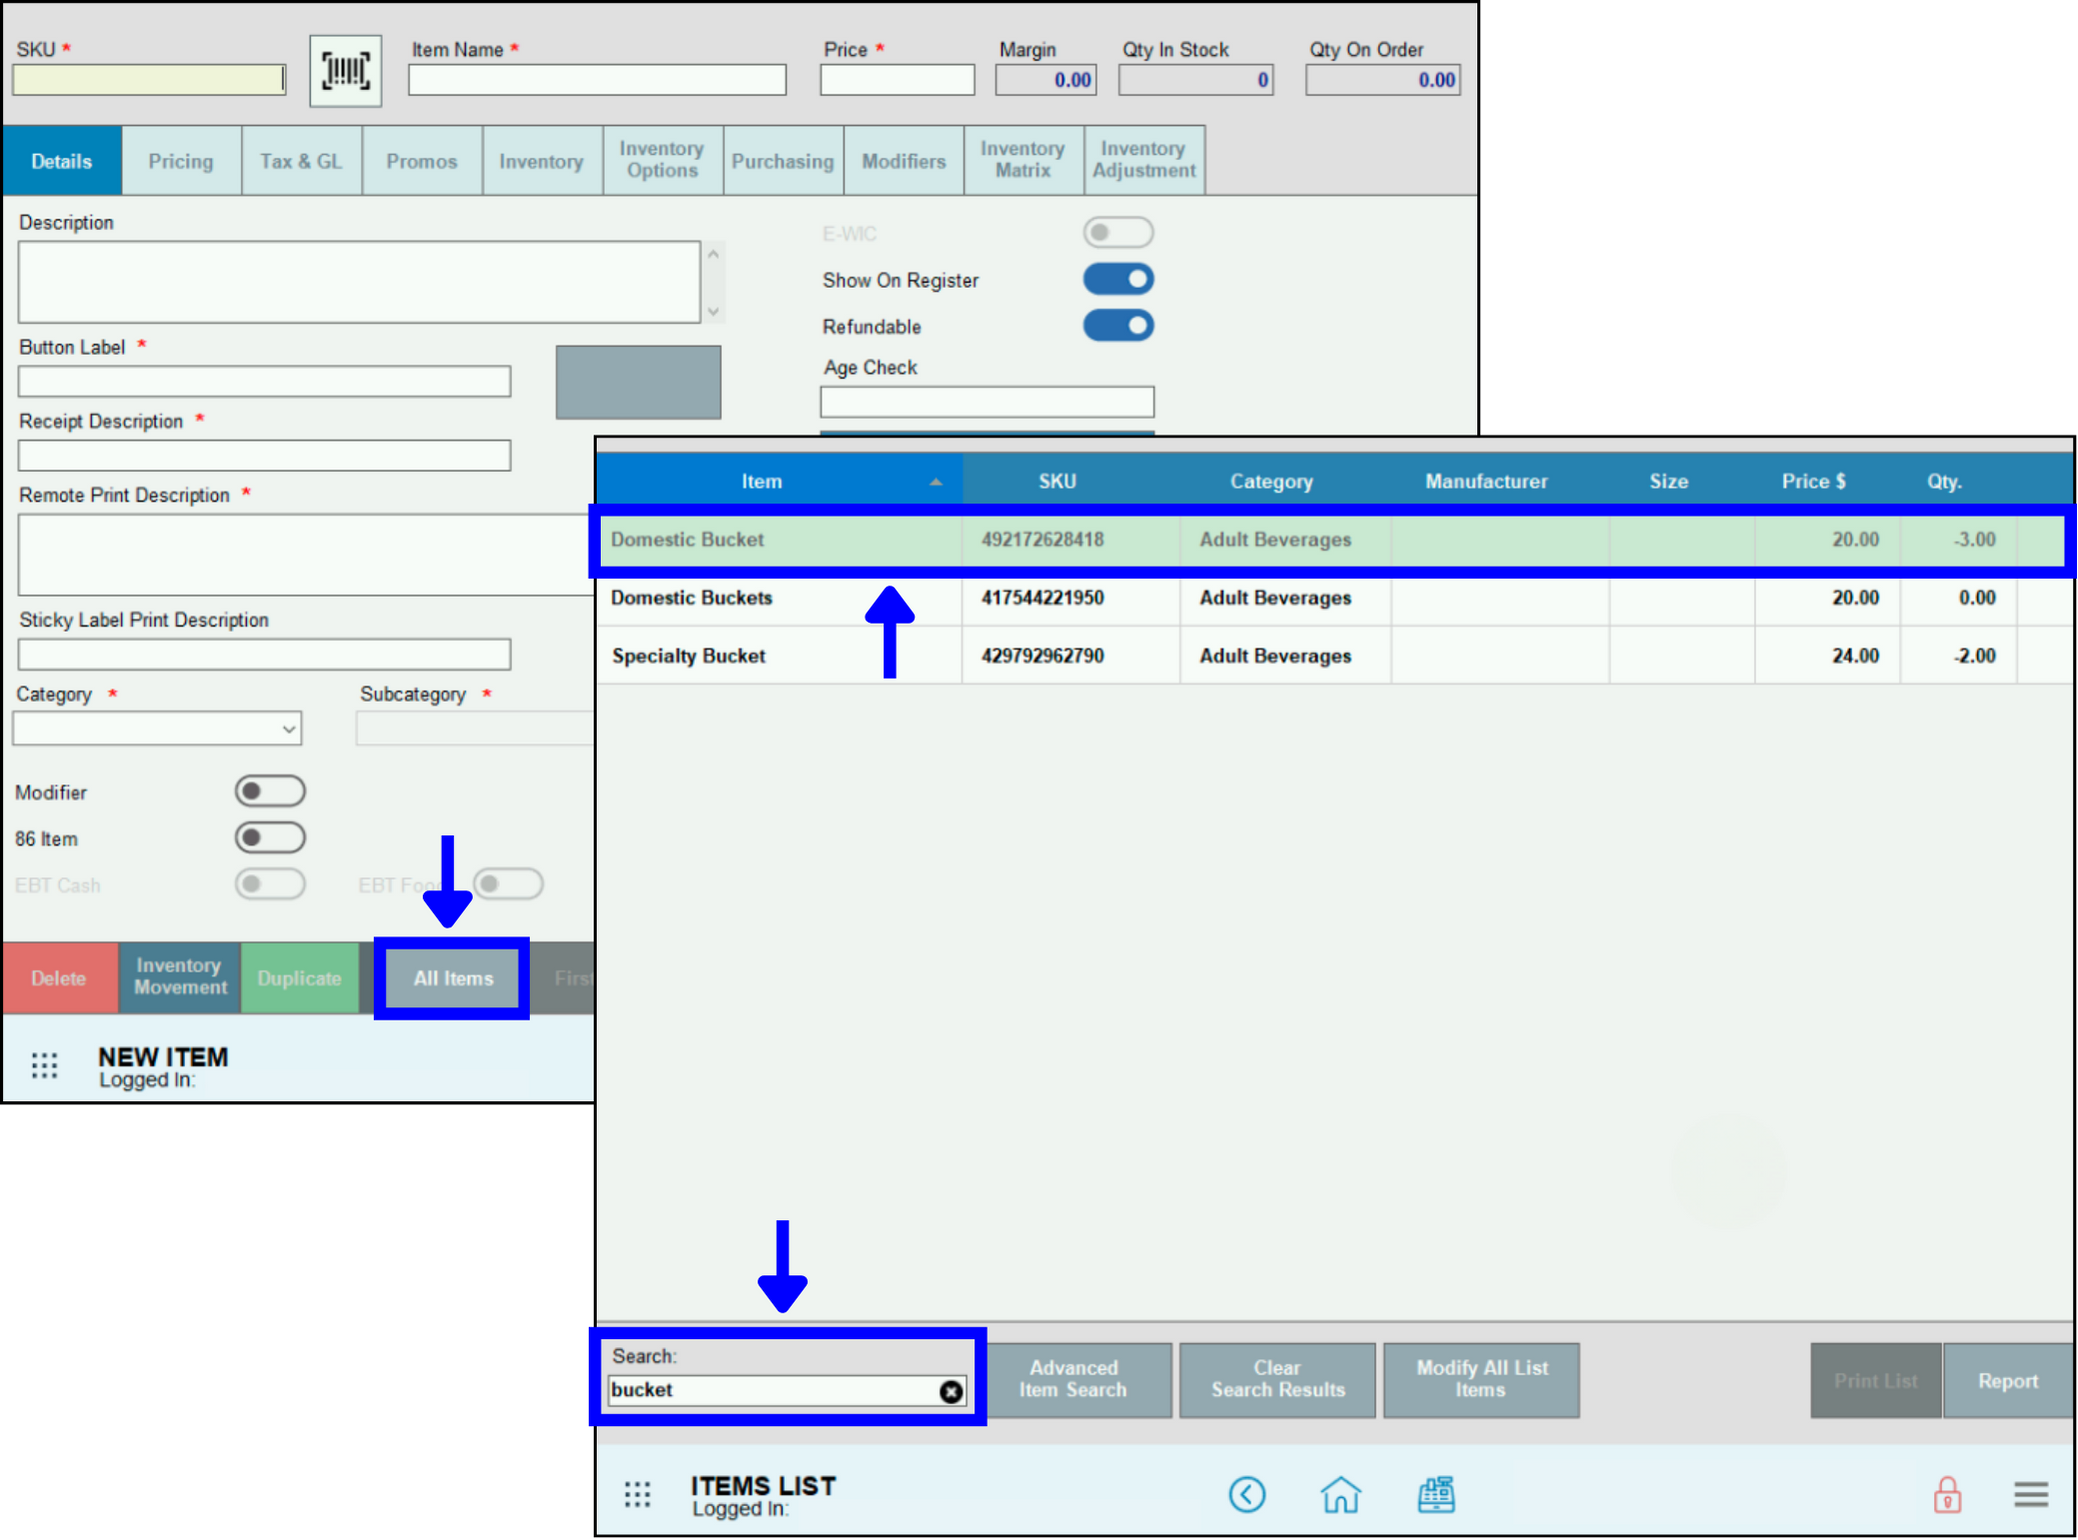
- To find a specific item to add to the Quick Menu, click All Items, then scroll or use the Search box. Click on the Item.
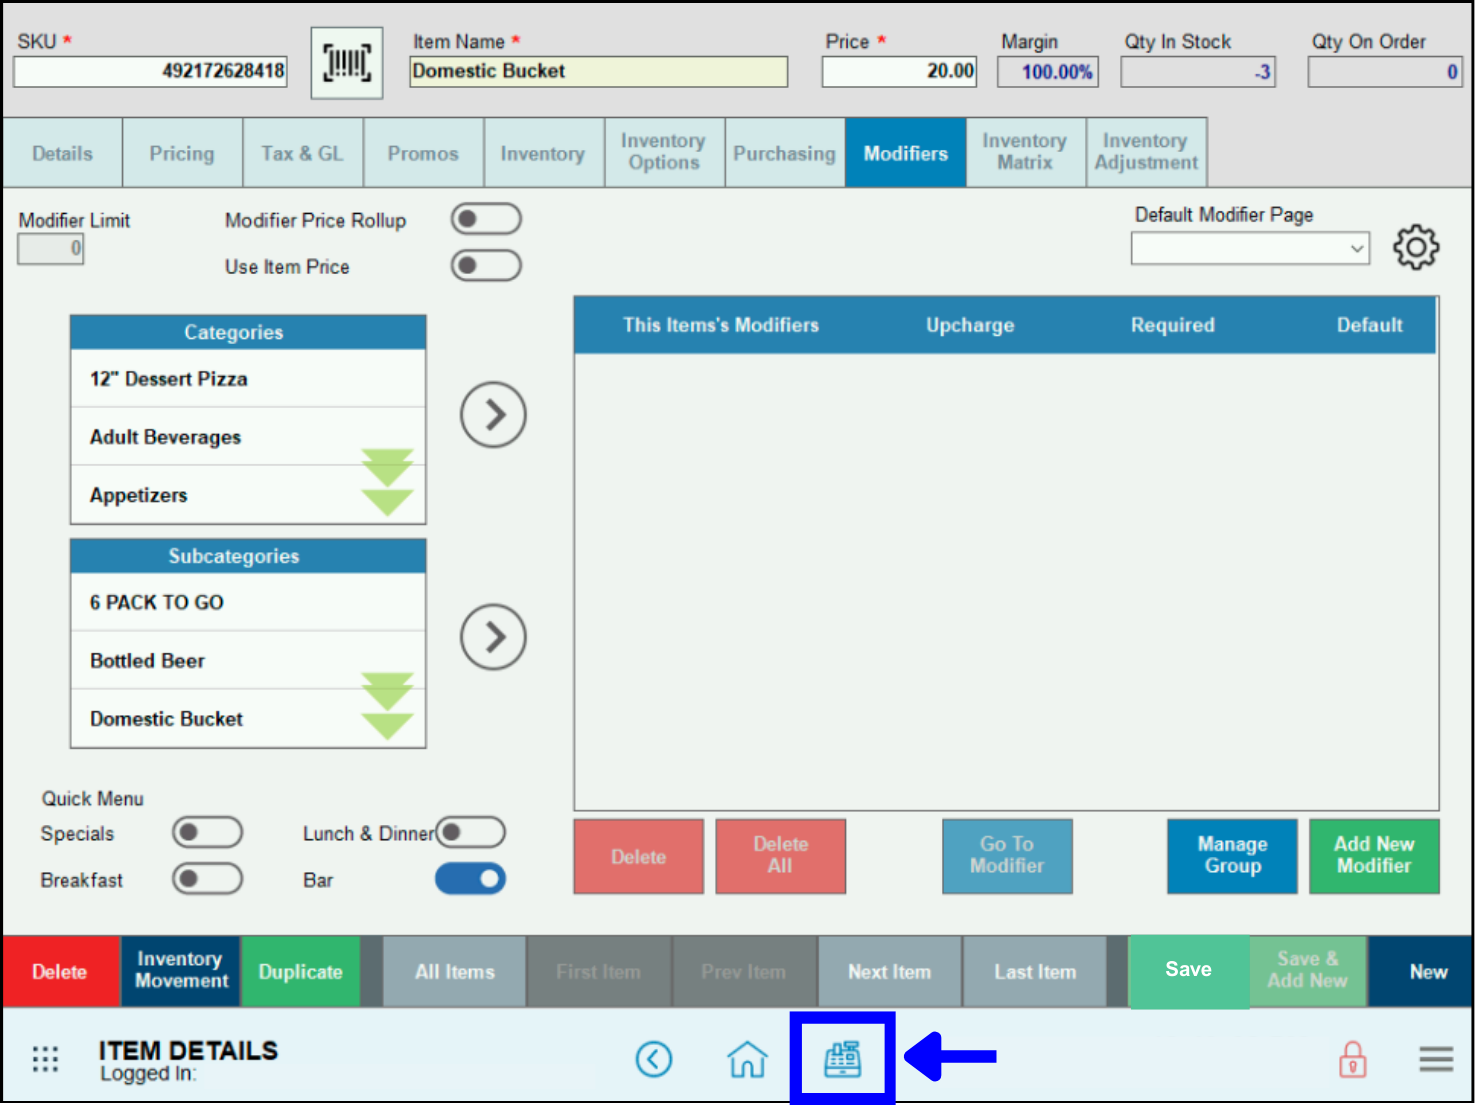
- In the example, Domestic Bucket will be added to the Bar Quick Menu.
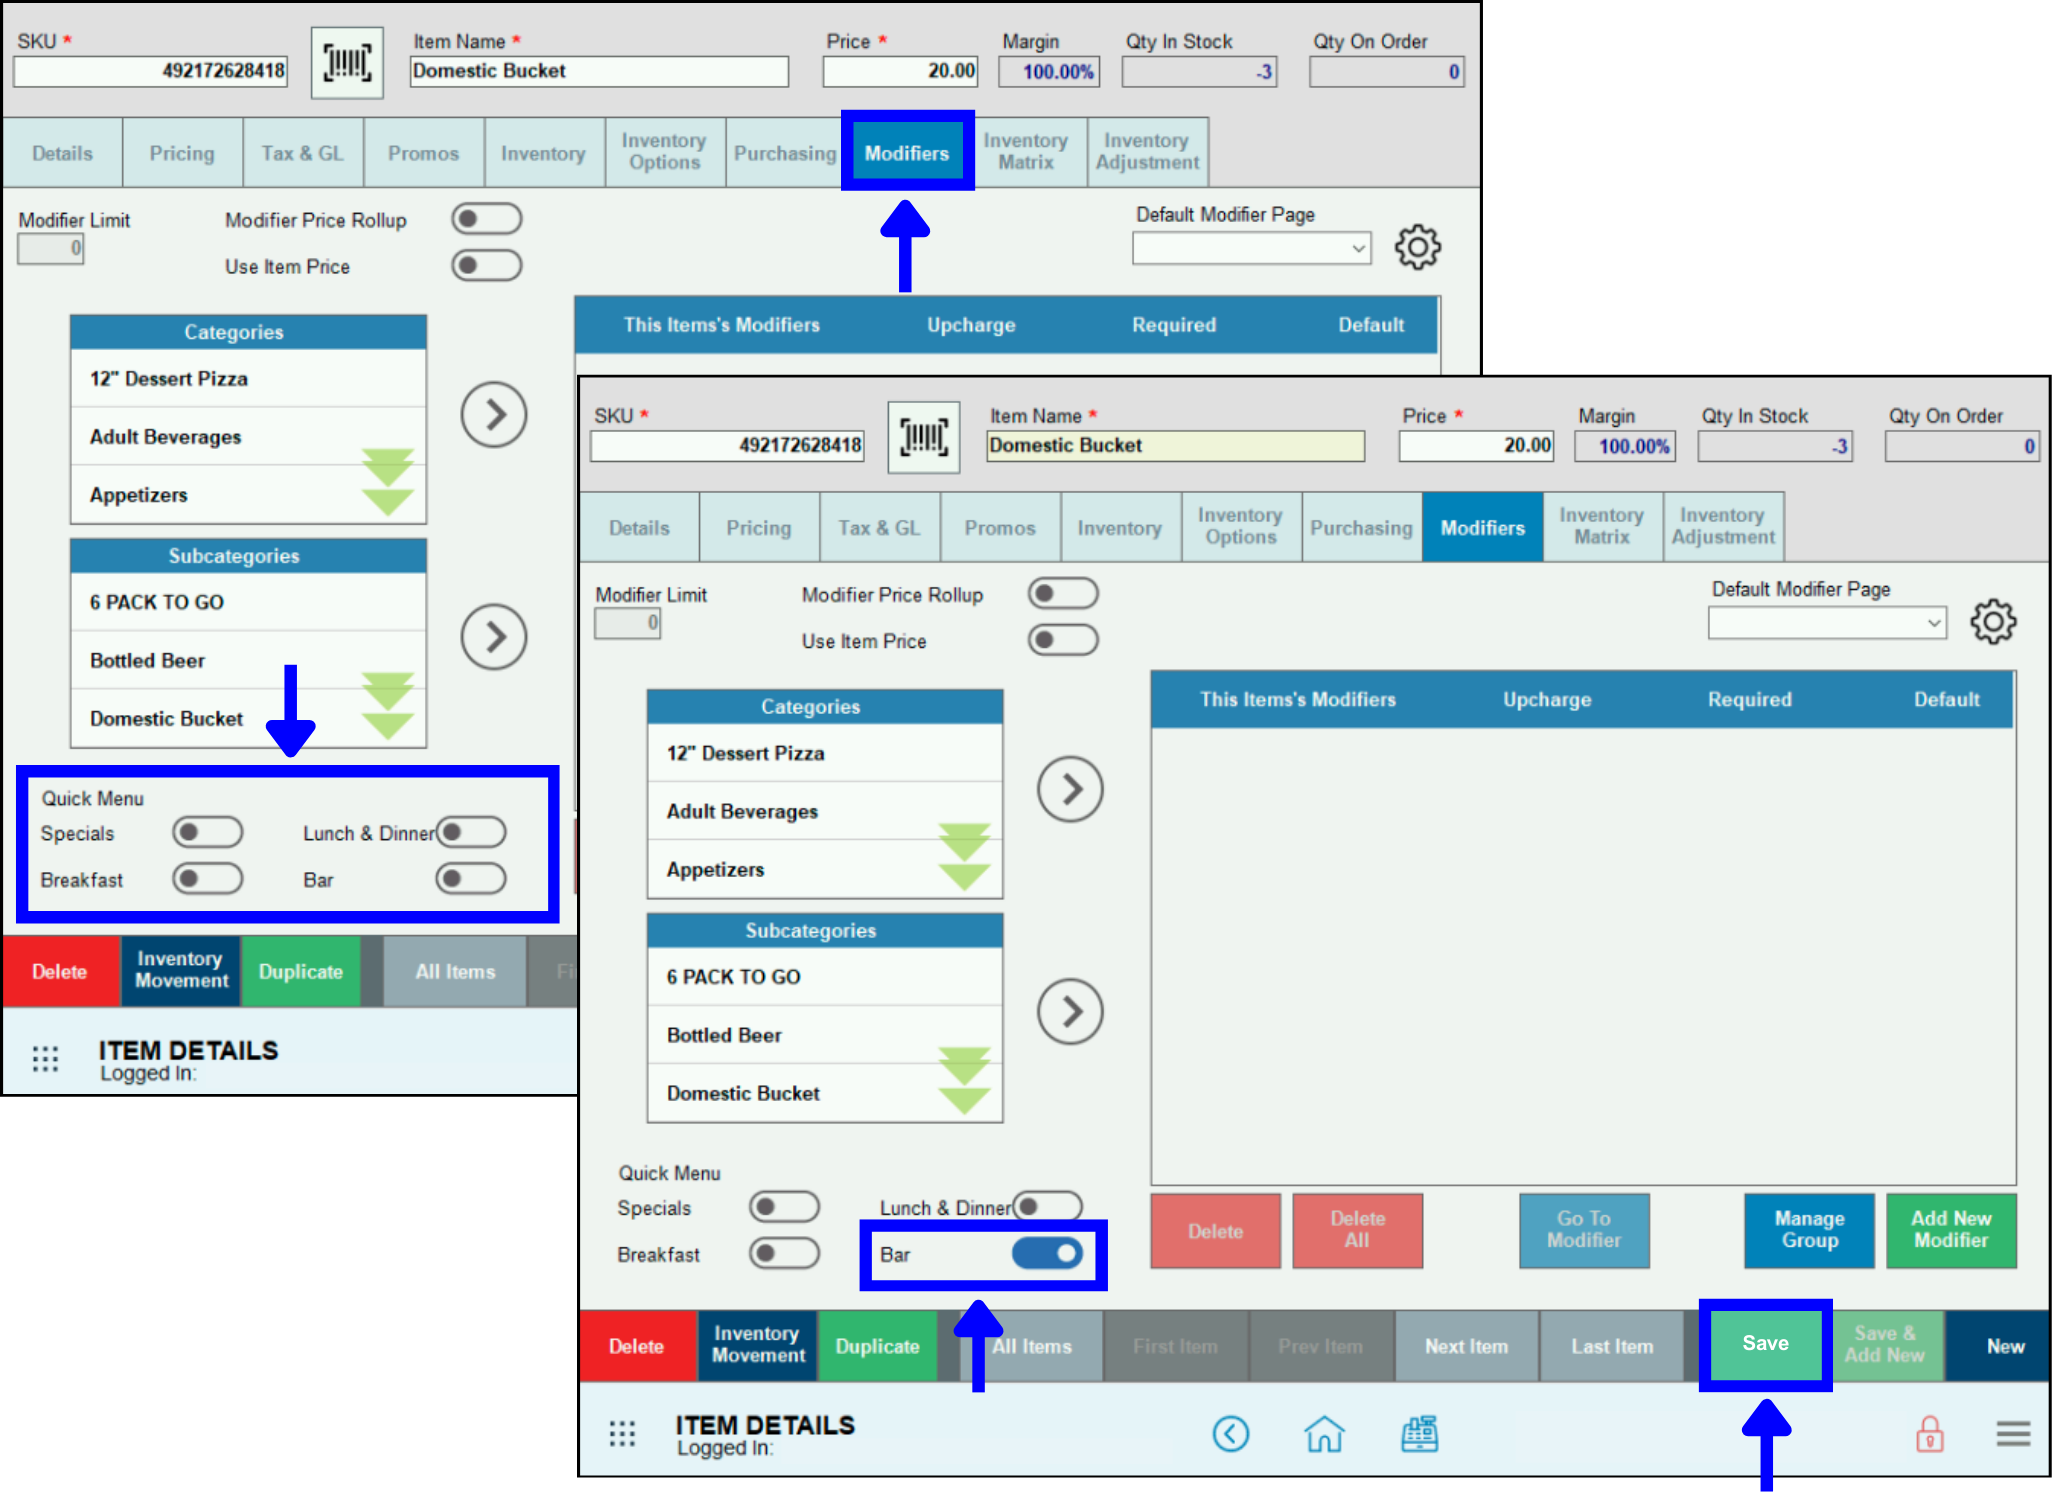
- Click the Modifiers tab. Under Quick Menu in the lower left corner, use the sliders to assign one or more Quick Menus.
- In the example, Domestic Bucket is added to Bar. Depending on a merchant’s needs, it could also be added to Lunch & Dinner.
- Click Save.
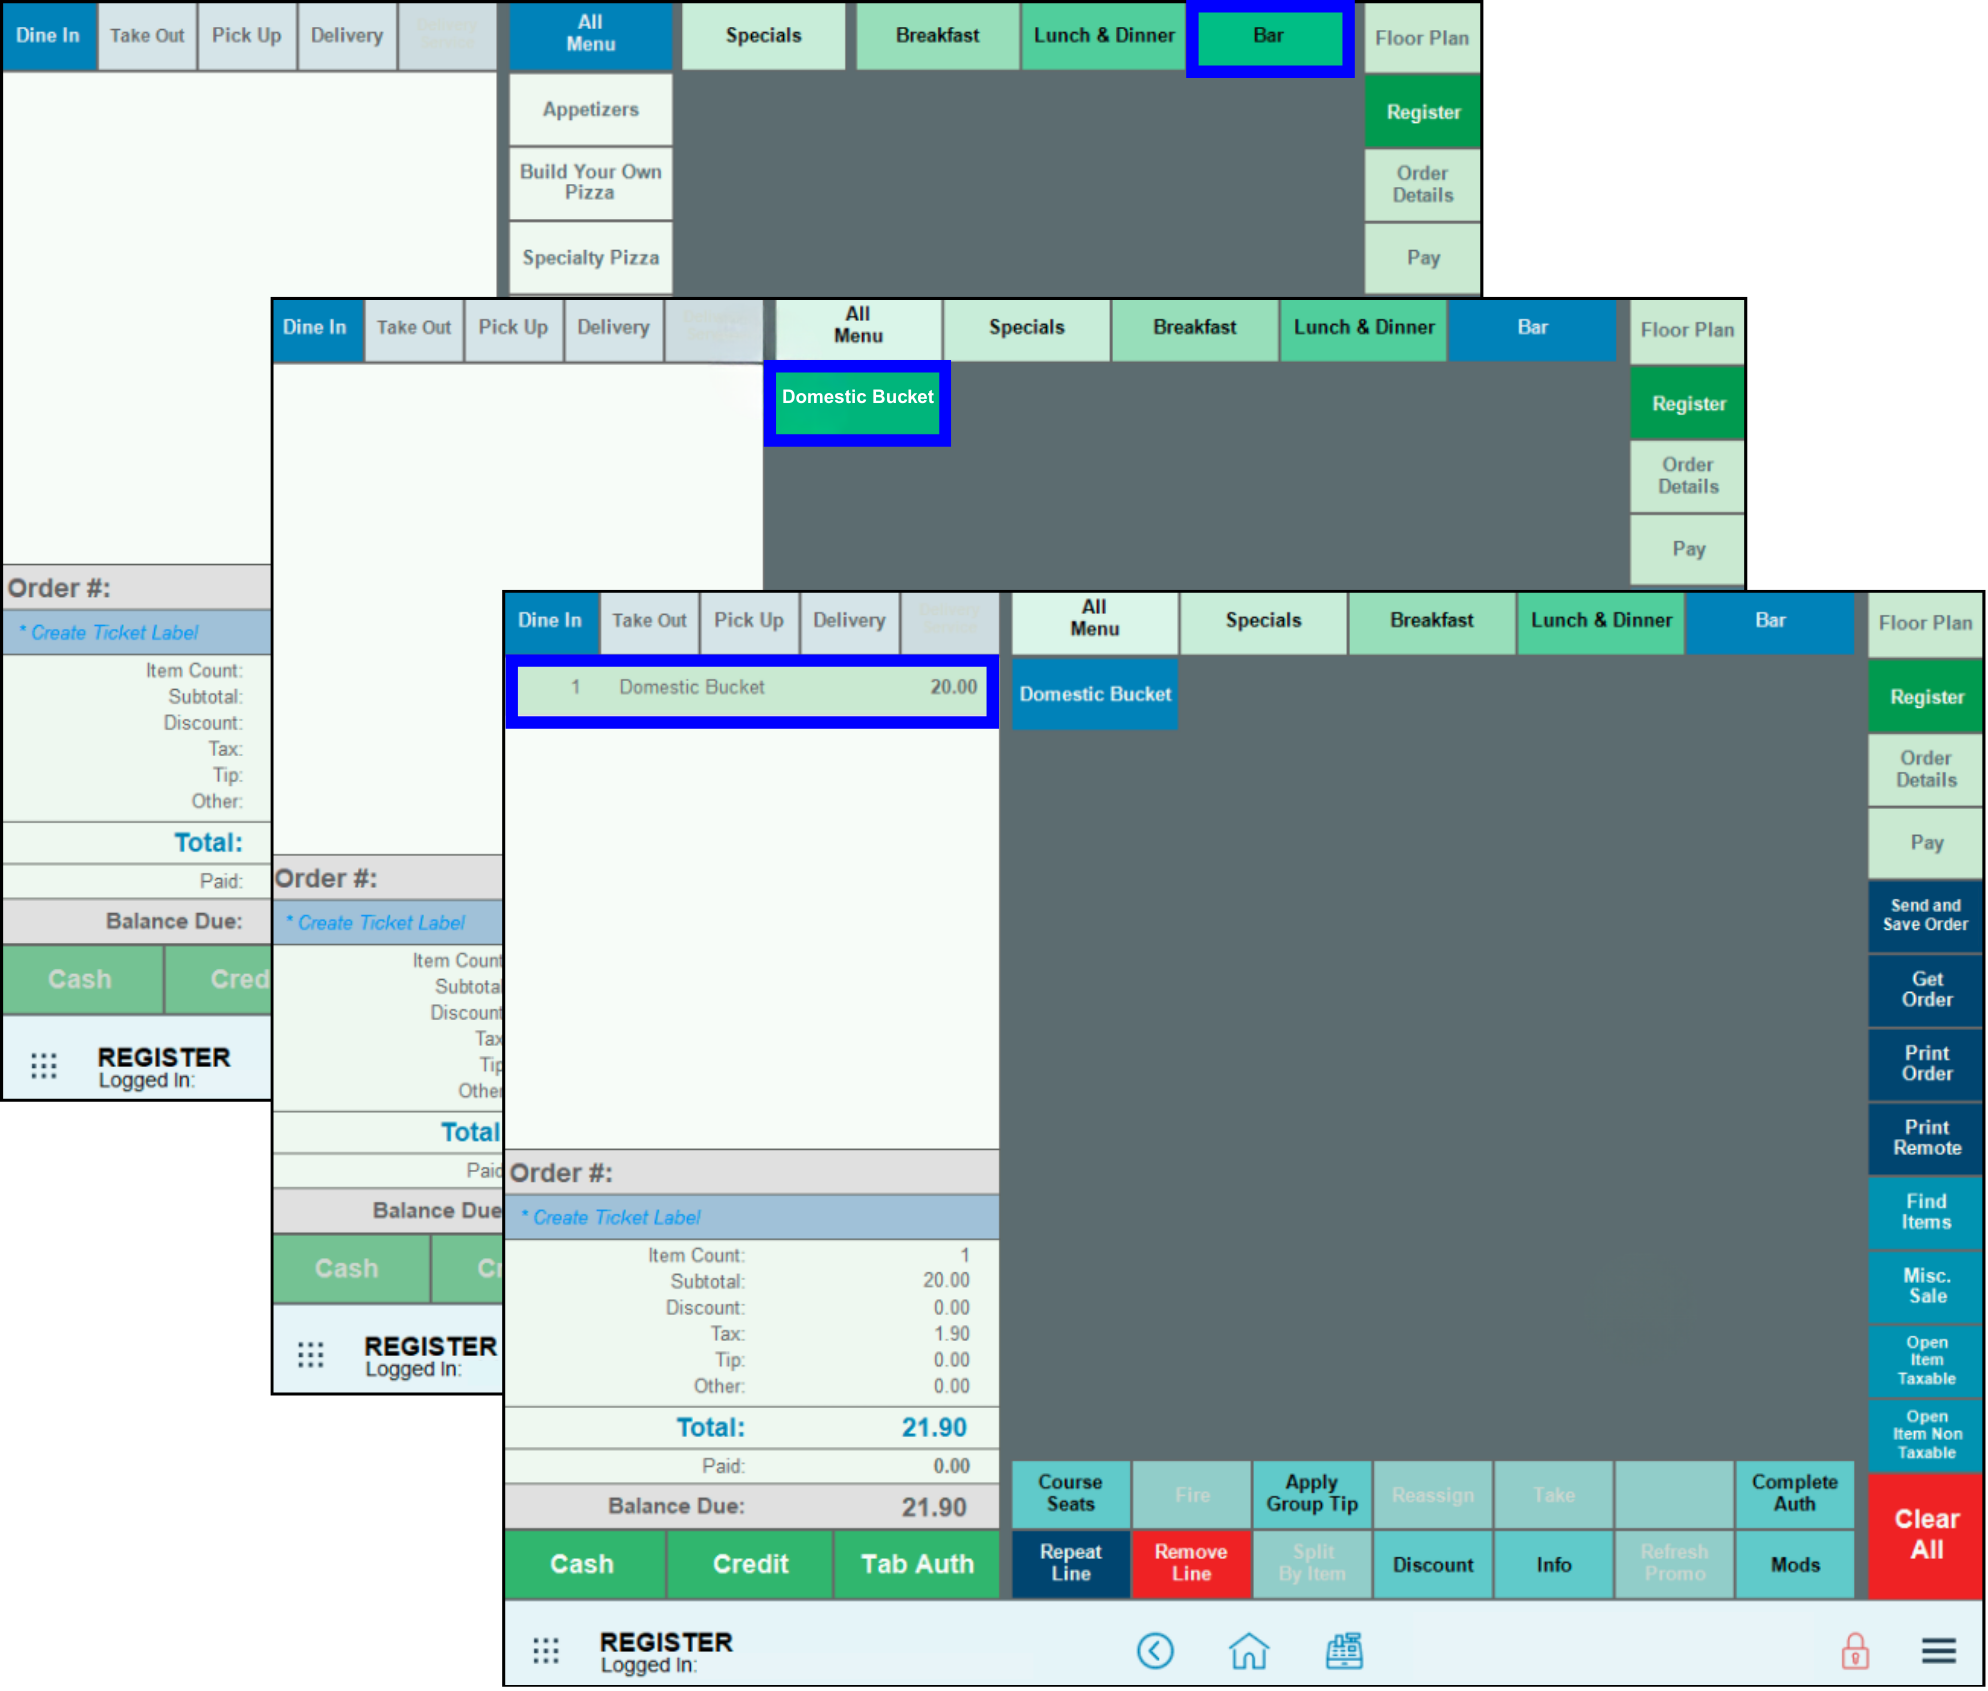
- Navigate to the Register.
- Click the Bar button at the top. The Domestic Bucket button displays. Click it, then finish the transaction as usual.

How can we improve this information for you?
Registered internal users can comment. Merchants, have a suggestion? Tell us more.