Organize your items and services using categories and subcategories to get the most out of Exatouch:
- Find items more easily in the Register app.
- Create category and subcategory level promotions.
- Review sales, inventory movement, and more in available reports.
- Print subcategory items to specialized printers, as needed.
- From Home, navigate to Items > Categories to open the Category work area.
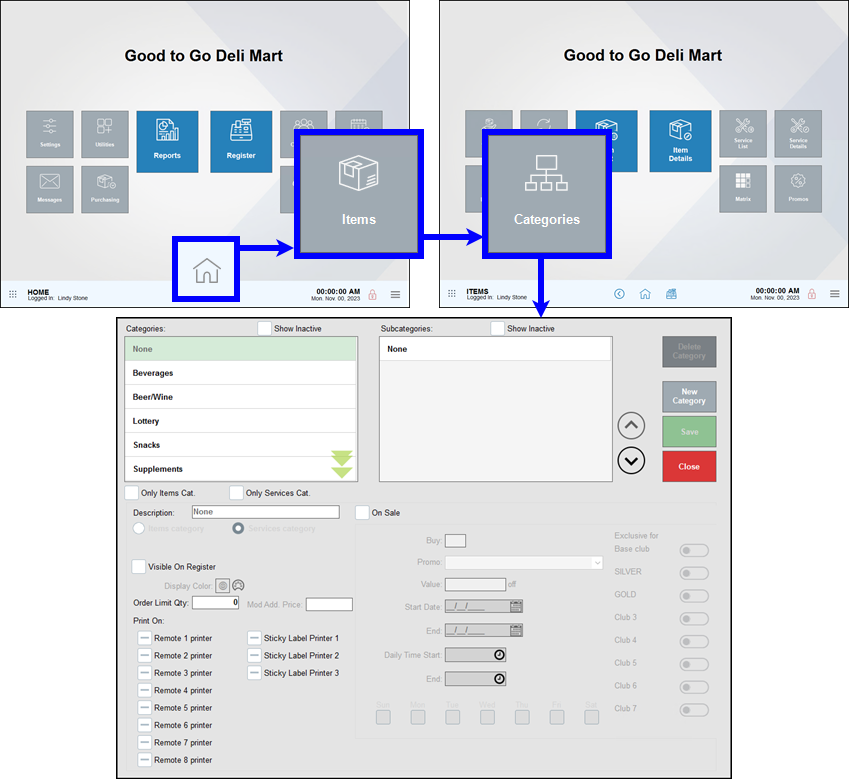
- Tap New Category to start a new category.
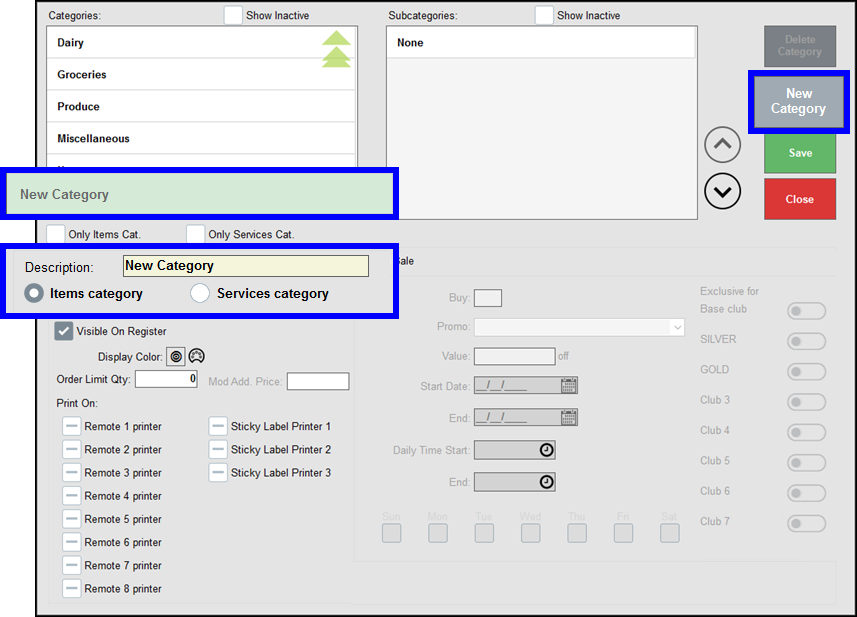
- Enter a Description, and select a category type: Items category or Services category.
- Define other settings as needed for this category. Tap Save to save your changes.

- Create subcategories for this category to accommodate different types of items. Repeat as needed to create categories for your items.
- From Home, navigate to Items > Categories to open the Category work area.
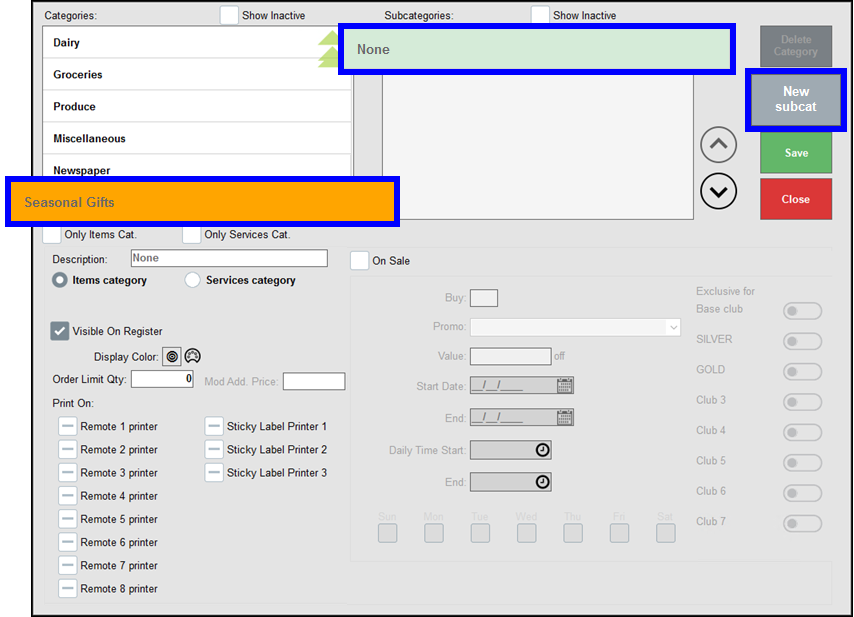
- Select a category, tap None in the Subcategories work area, then tap New Subcat to start a new subcategory.
- Enter a Description name. The subcategory type (item or service) is inherited from the parent category.
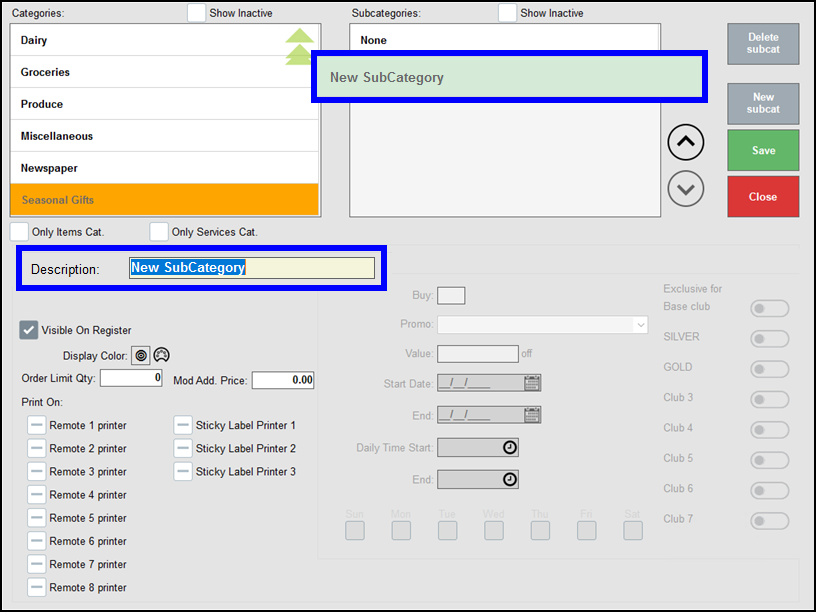
- Define other settings as needed for this subcategory. Some settings are inherited from the parent category.
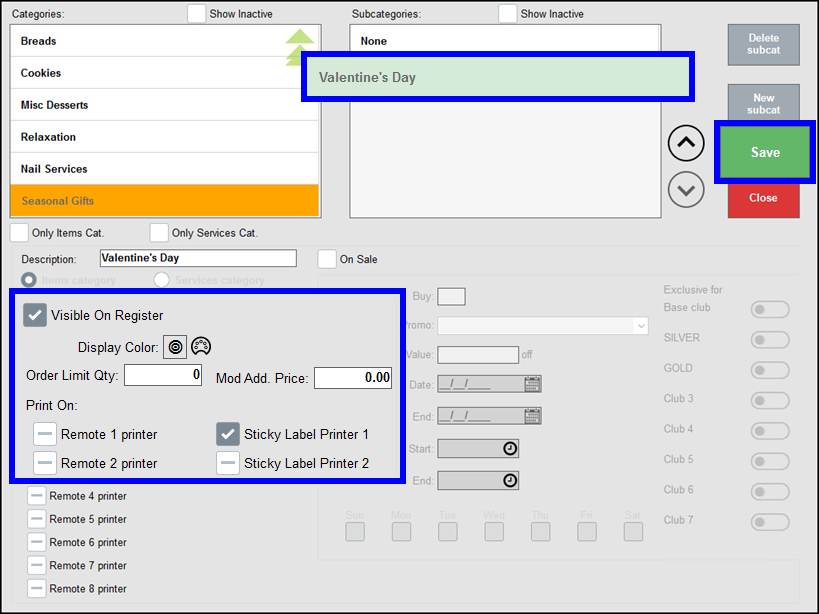
- Tap Save to save your changes.
Repeat as needed to create additional subcategories.
Several settings you apply to categories are inherited by the subcategories. Edit subcategories to have different settings from its parent category as needed.
Select a category or subcategory to adjust these options, then tap Save to commit your changes.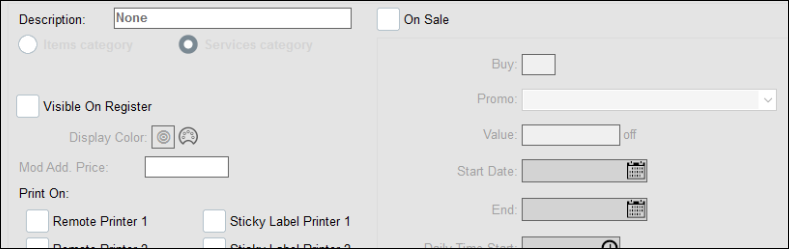
- Description – The name of the category or subcategory. Shows in the Register app (if enabled) and in applicable reports.
- Visible On Register – Enabled by default. Disable to hide this category or subcategory in the Register app.
- Display Color: – The color of the category and subcategory. The selected color shows in this work area and the Register app. Editable when Visible On Register is enabled.
- Order Limit Qty: – Set to restrict customer purchases to this quantity of items in this category or subcategory level.
- Mod Add Price: – The price to add items in this category or subcategory as modifiers.
- Print On: – Tap to enable or a printer or printers items in this category or subcategory should print to. (Remote Printer 1-8, Sticky Label Printer 1-3)
- On Sale – Enable to define a sale for items in this category or subcategory.
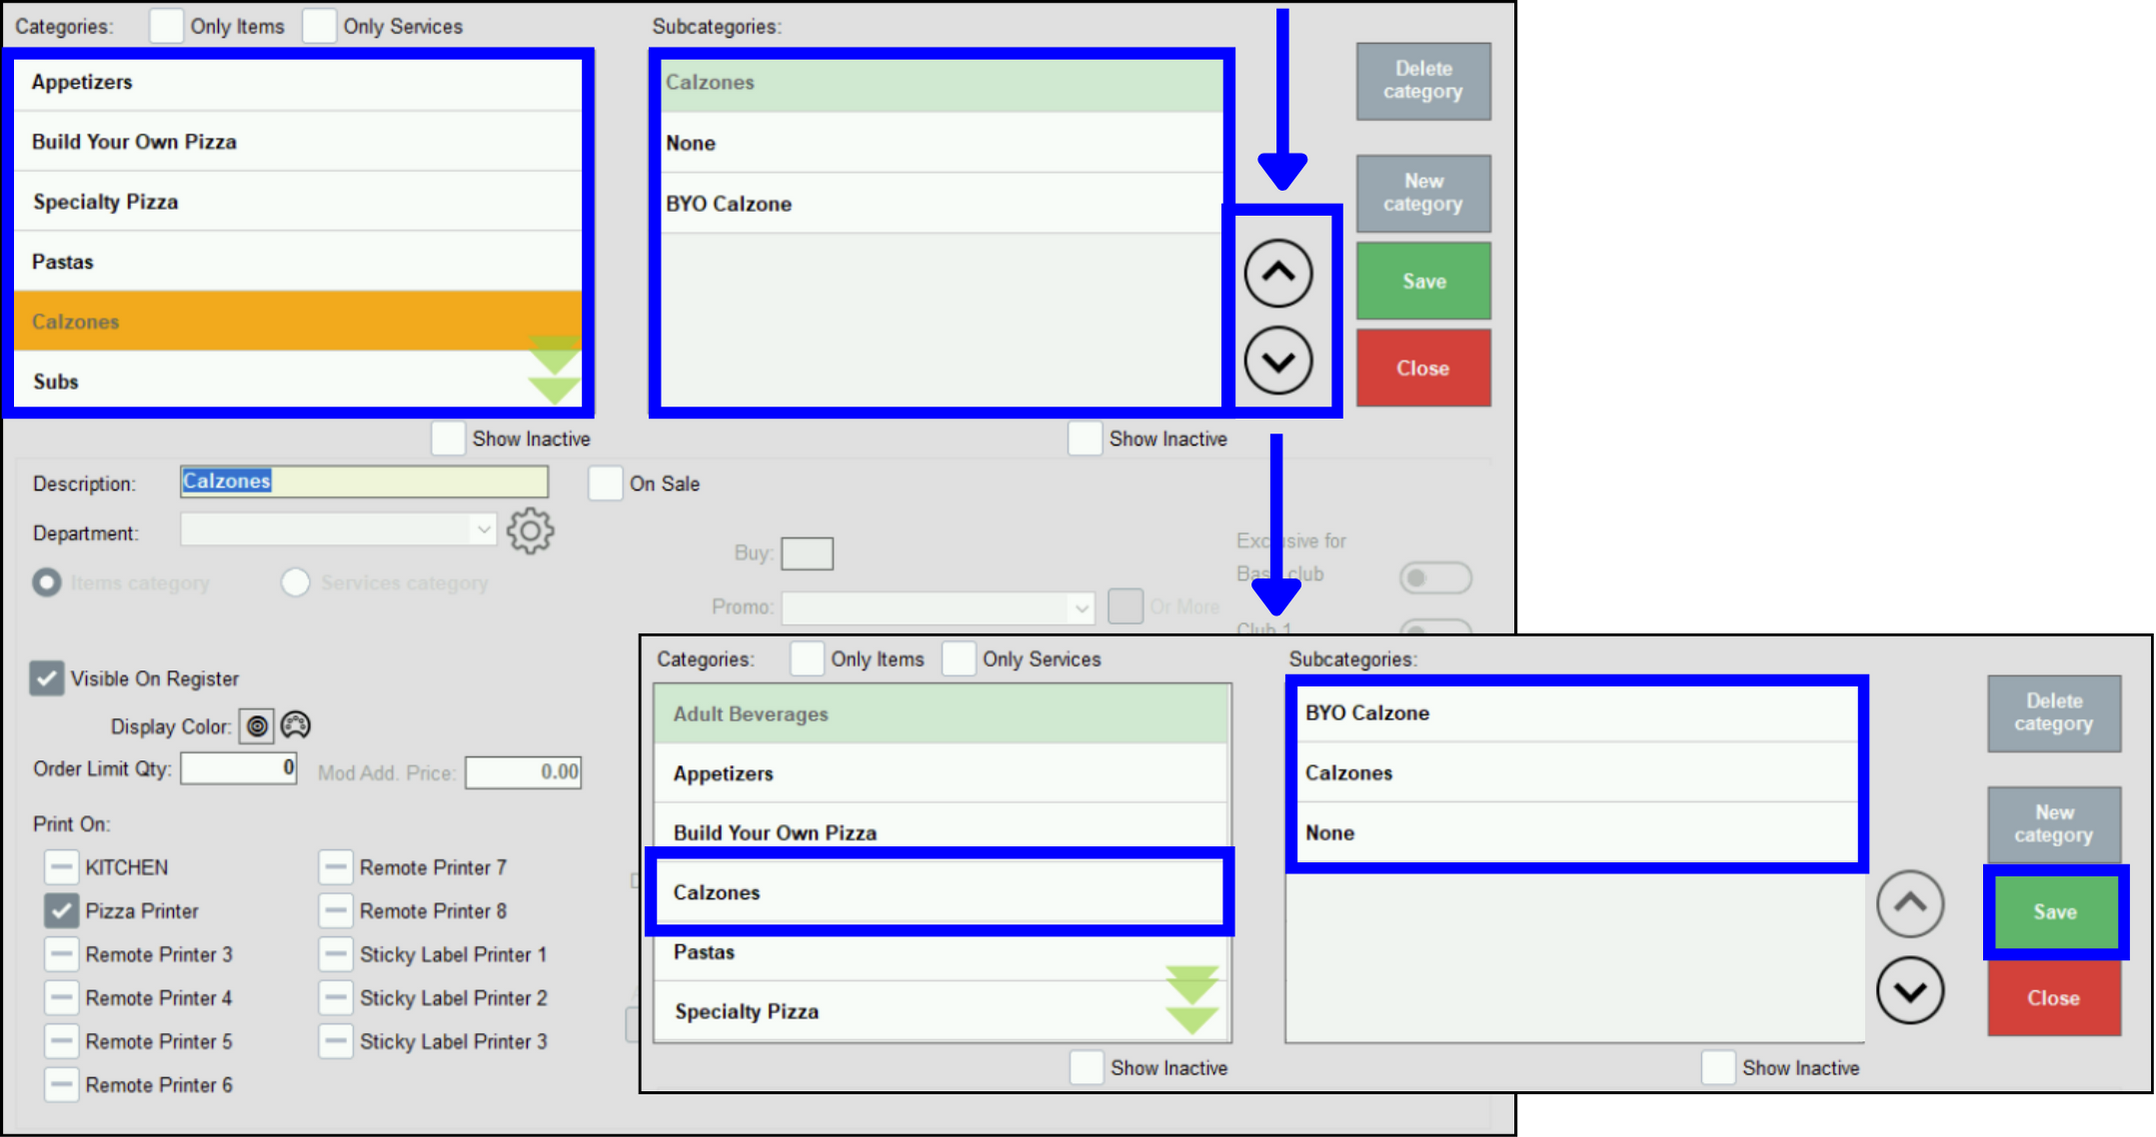
Use the up and down arrows in the Category work area to reorganize the Categories and Subcategories lists.
- To reorganize the Categories list, click on the item you wish to move. In this example, the category items will be put into alphabetical order.
- Tap the up or down arrows to the right of the Subcategories box until the category item is in the correct location. Each tap will move the item up or down one space.
- With the Category item still highlighted, move to the Subcategories list and repeat the process with subcategories items. In this example, the subcategories for Calzones have been placed in alphabetical order.
- Tap Save.
Categories and Subcategories are displayed in the Register app by default.
Disable Visible On Register for a category or subcategory to hide items that are modifiers to menu items, or do not need to appear in the Register app.
- Modifiers – items such as toppings or extras, with or without cost. When assigned to an item, modifiers are only shown when that item is selected in the Register app.
- Required adders – Items added to an order when an associated item is purchased.
- Free items – Gifts with purchase, such as a gift bag or accessory set.
- Charged Items – Bottle deposits, keg deposits, or other costs charged to a customer that is refundable when specific conditions are met.
By default, modifiers print to the same printer as their parent item. Change this by assigning a printer to specific modifier categories or subcategories.
- Example: You offer Salads as modifiers to several of your entrée categories. Assign the subcategory of Salad modifiers to print to your Salad Station printer.
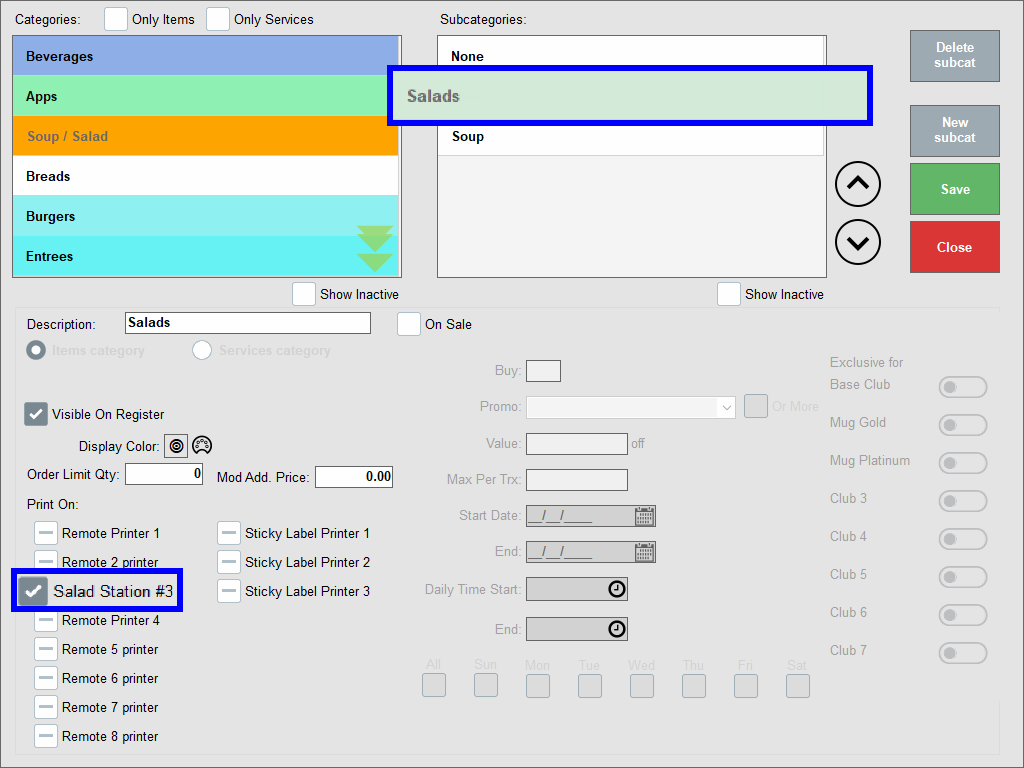
After you set up printers for your modifiers, parent items print to their assigned printers, while modifiers are routed to appropriate newly-assigned printers.
How can we improve this information for you?
Registered internal users can comment. Merchants, have a suggestion? Tell us more.