While Admins and Power Users typically have the highest level of security permissions in an Exatouch system, there are cases where a Regular User might need to perform a typical Admin or Power User action.
Exatouch supports the use of Admin PIN requests for this very reason! With Admin PIN requests, users can temporarily have access to certain activities and sections of the software, even if access is not permanently enabled in their security profile.
An Admin PIN will be sent to a manager when prompted and will only be active for 5 minutes. After that time period, a new PIN must be requested.
- Note: All Security Profile settings can be updated by an Admin or other user with the proper permissions. For more information, see Fine-Tune User Access Using Security Profiles.
Regular Users can only complete functions they are set up to perform in their Security Profile. However, these users can send an Admin PIN request to their manager to gain access to sections of the Exatouch software they cannot access such as Security Settings, or to complete functions that they are not usually allowed to complete such as price overrides.
When an unauthorized action is prompted by the user, a window will appear that allows the user to request the PIN by tapping Send PIN Request.

When you hit this button, a text message with the one-time PIN is sent to the manager, as long as the manager’s Staff Type settings are properly configured.
- Note: To confirm Staff Type settings and enable one-time PINs, see the respective sections below.
After the correct PIN is entered, the Manager access required window will automatically close and the user will be able to complete the newly-authorized
Confirm Staff Type Profile Settings
One-time PINs will only be sent to an Admin with the designated Manager staff type selected in their employee profile if the proper Security Preferences are enabled. To update the Staff Type settings, do the following:
- From Home, tap Staff and then Staff List.
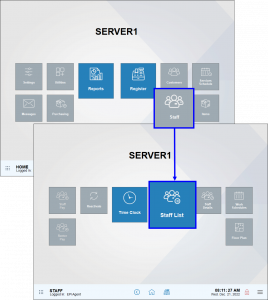
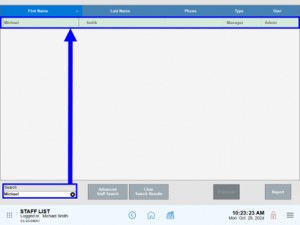
- Select an employee from the list. For more information on creating a new employee profile, see Add a New Employee.
- Make sure that the Admins who will receive the one-time PINs have the proper fields filled out in their employee profiles: Telephone, Mobile Carrier, and Staff Type: Manager.
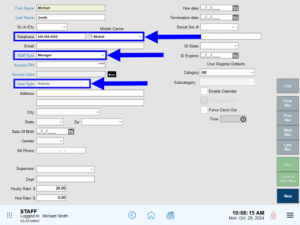
- Tap Save.
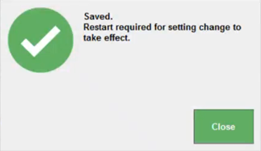
- Note: After making this change, you must restart the system for it to take effect. A window will appear to remind the user of this every time a change is saved.
- Note: After making this change, you must restart the system for it to take effect. A window will appear to remind the user of this every time a change is saved.
Enable One-Time Supervisor PINs
To enable one-time PINs, do the following:
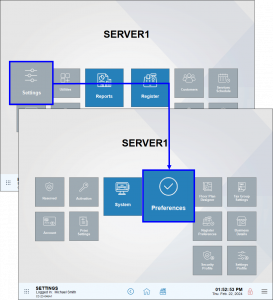
- From Home, tap Settings and then Preferences.
- In the Security tab, enable One-Time Supervisor PINs and then select Admin from the drop-down menu.
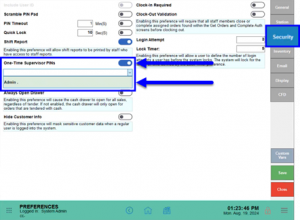
- Tap Save.
- Note: After making this change, you must restart the system for it to take effect. A window will appear to remind the user of this every time a change is saved.
- Note: After making this change, you must restart the system for it to take effect. A window will appear to remind the user of this every time a change is saved.
How can we improve this information for you?
Registered internal users can comment. Merchants, have a suggestion? Tell us more.