Exatouch easily generates the Scan Data reports required by Altria, automatically formatting the information according to Scan Data’s specifications. The information can be uploaded via FTP.
Perform the following to configure Scan Data integration with Exatouch. Contact your Scan Data representative with any additional questions.
- Navigate to Home > Settings > Account.

- Select the Altria Scan Data tab.
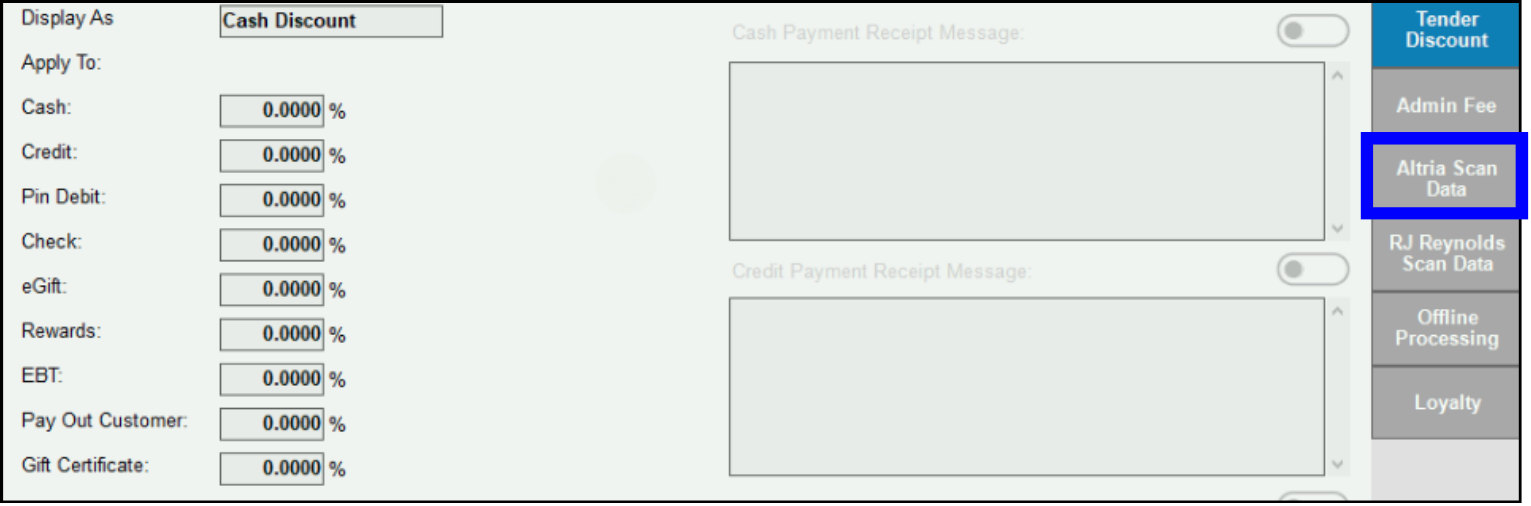
- Enter the following required information: Account Number, Store Number, Username, and Password.

- Note: These four fields must be completed correctly to run Altria Scan Data reports. Account information is available from the merchant’s Altria representative.
- Tap Save.
Item Requirements must be correctly configured for every Scan Data item in order for reports to process.
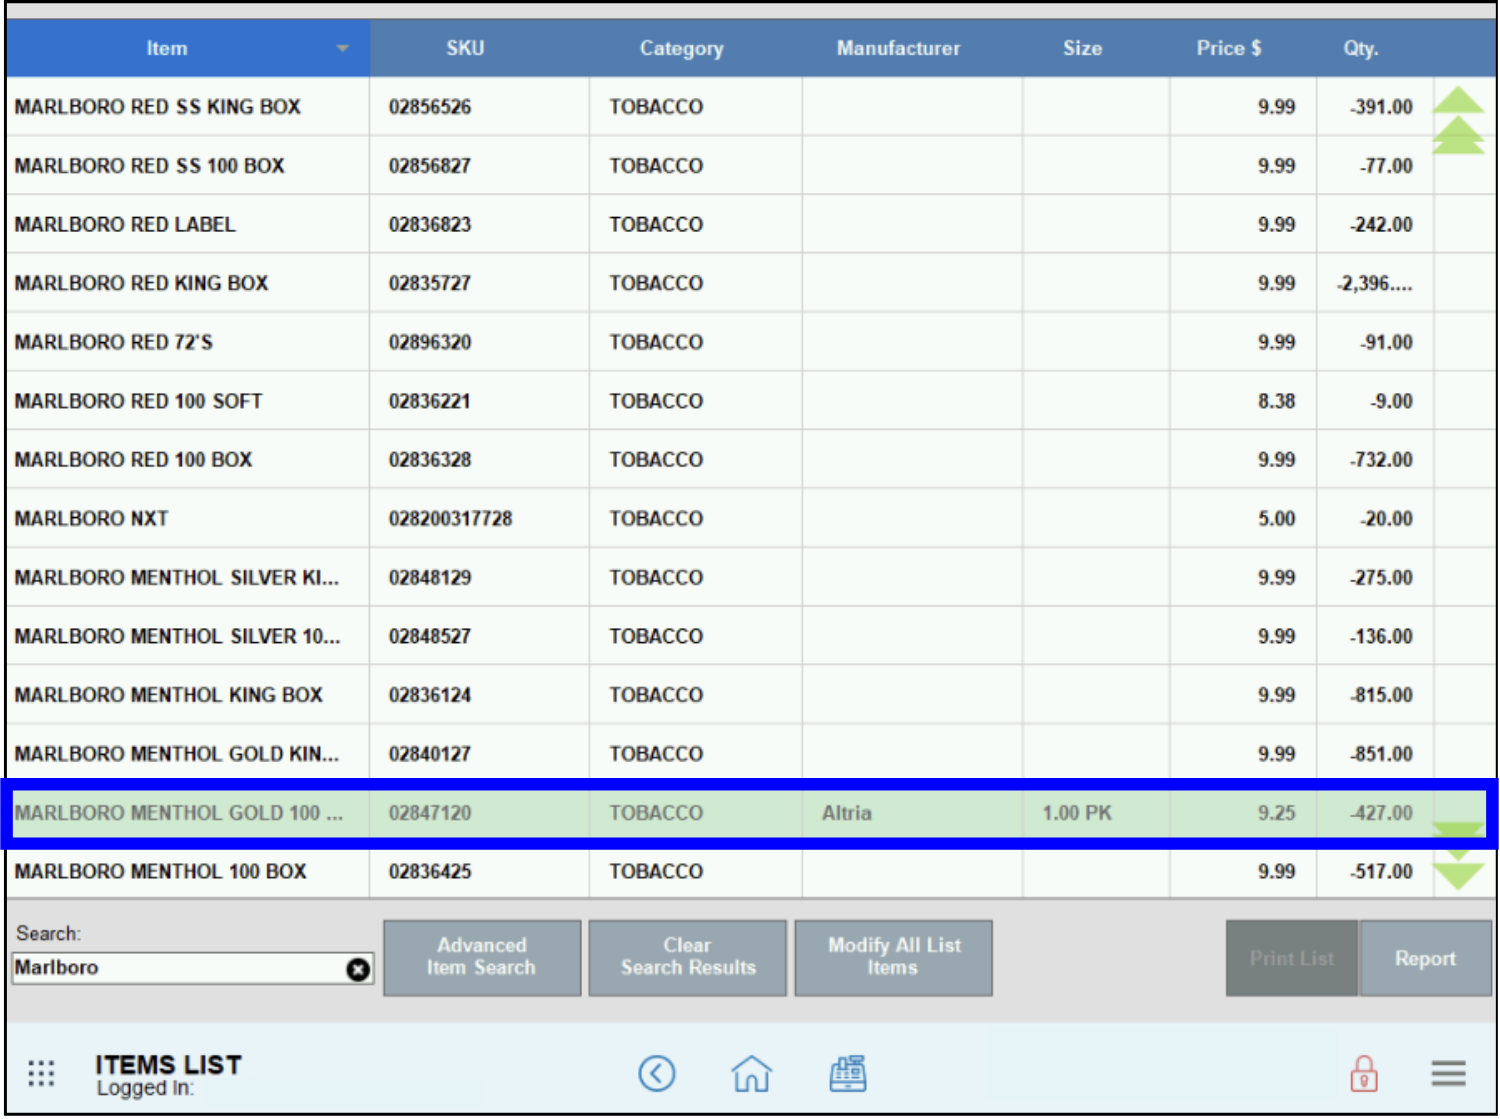
- Navigate to Home > Items > Item List.
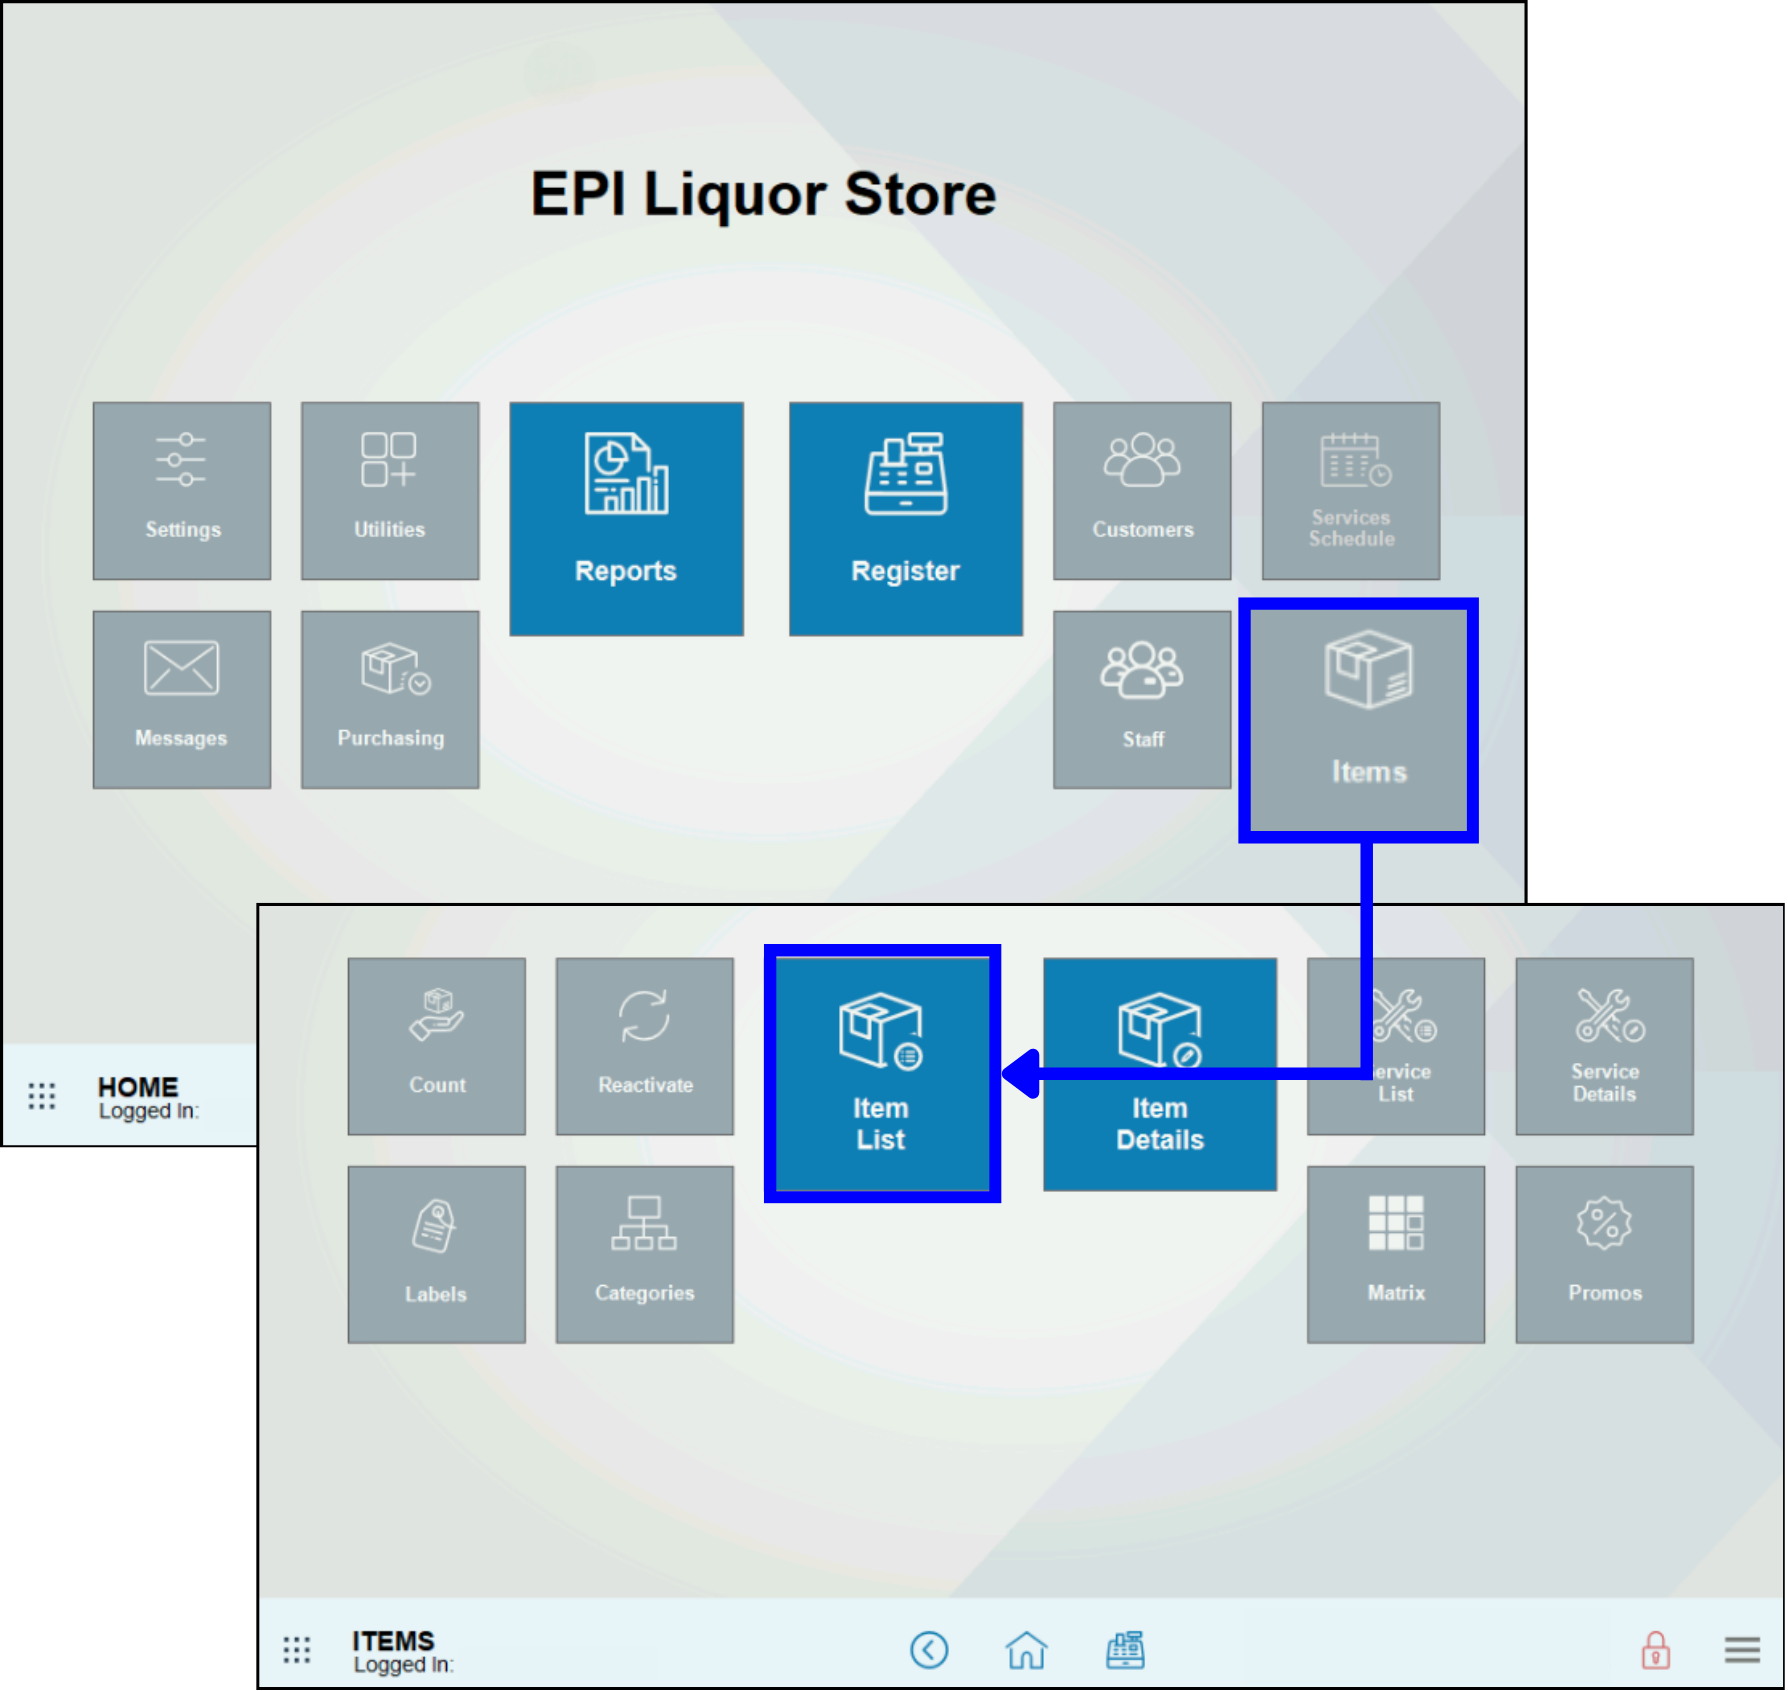
- Search for the desired item on the Items List page.
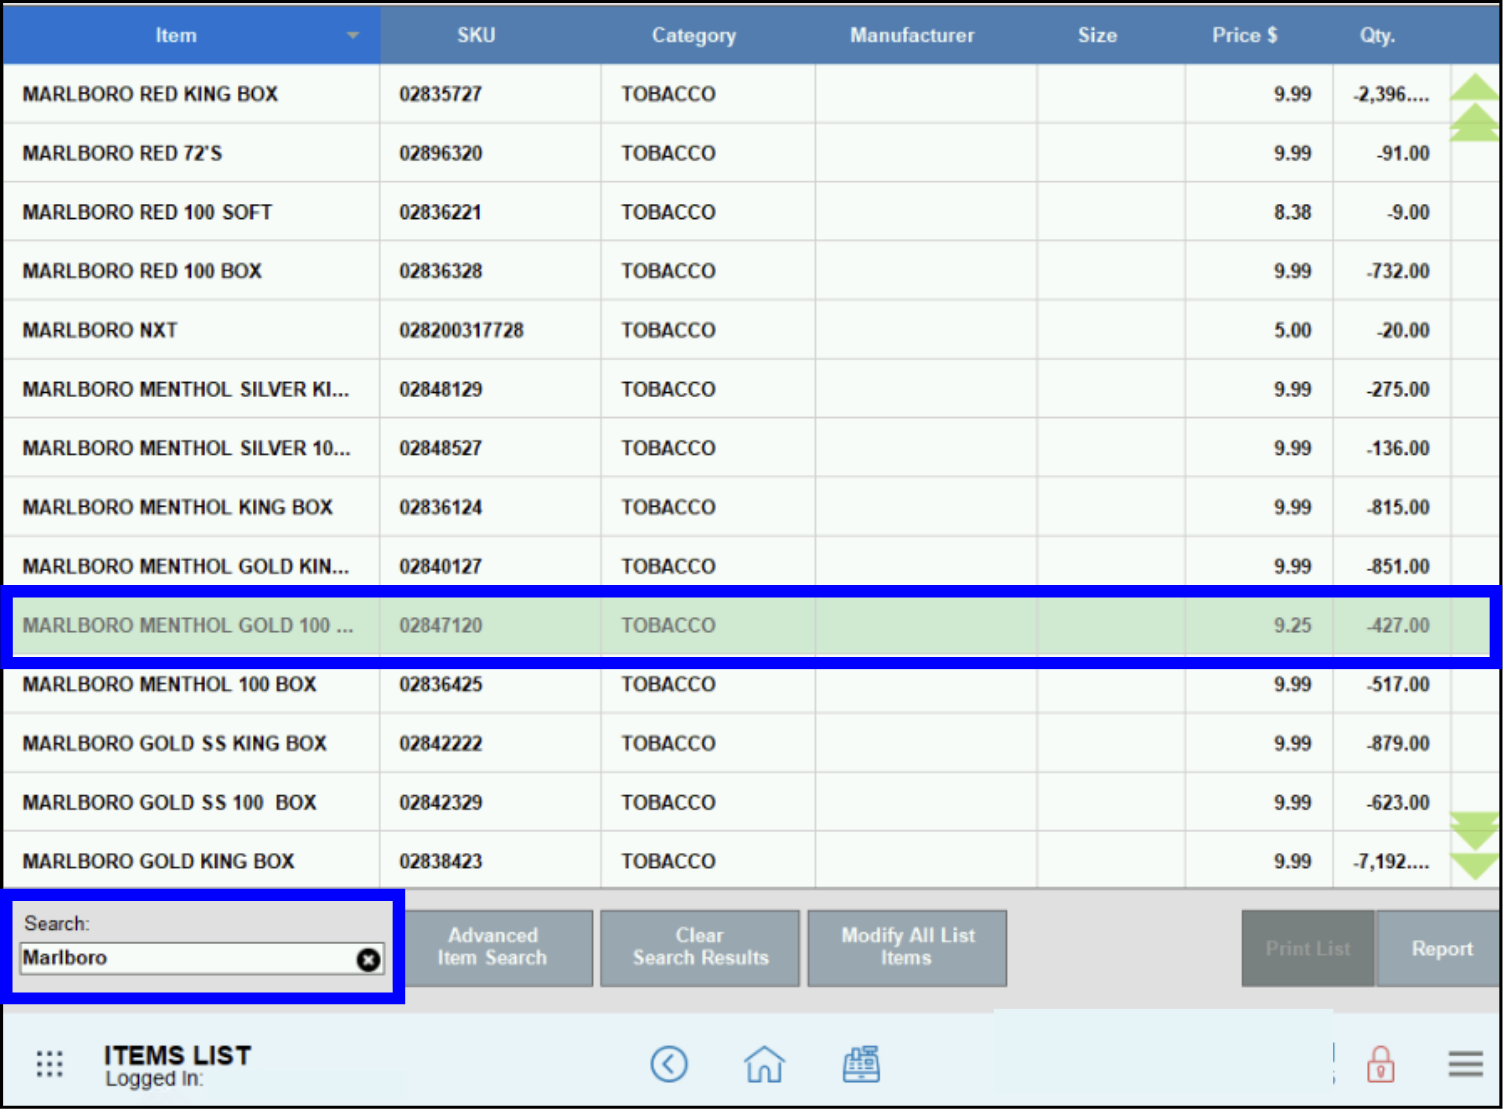
- Tip! Enter a keyword, such as “Marlboro” or “tobacco” in the Search field to narrow your search.
- Select the item. The Item Details screen displays.
- Select the Pricing tab, then enter pack data in the Pack Size section.
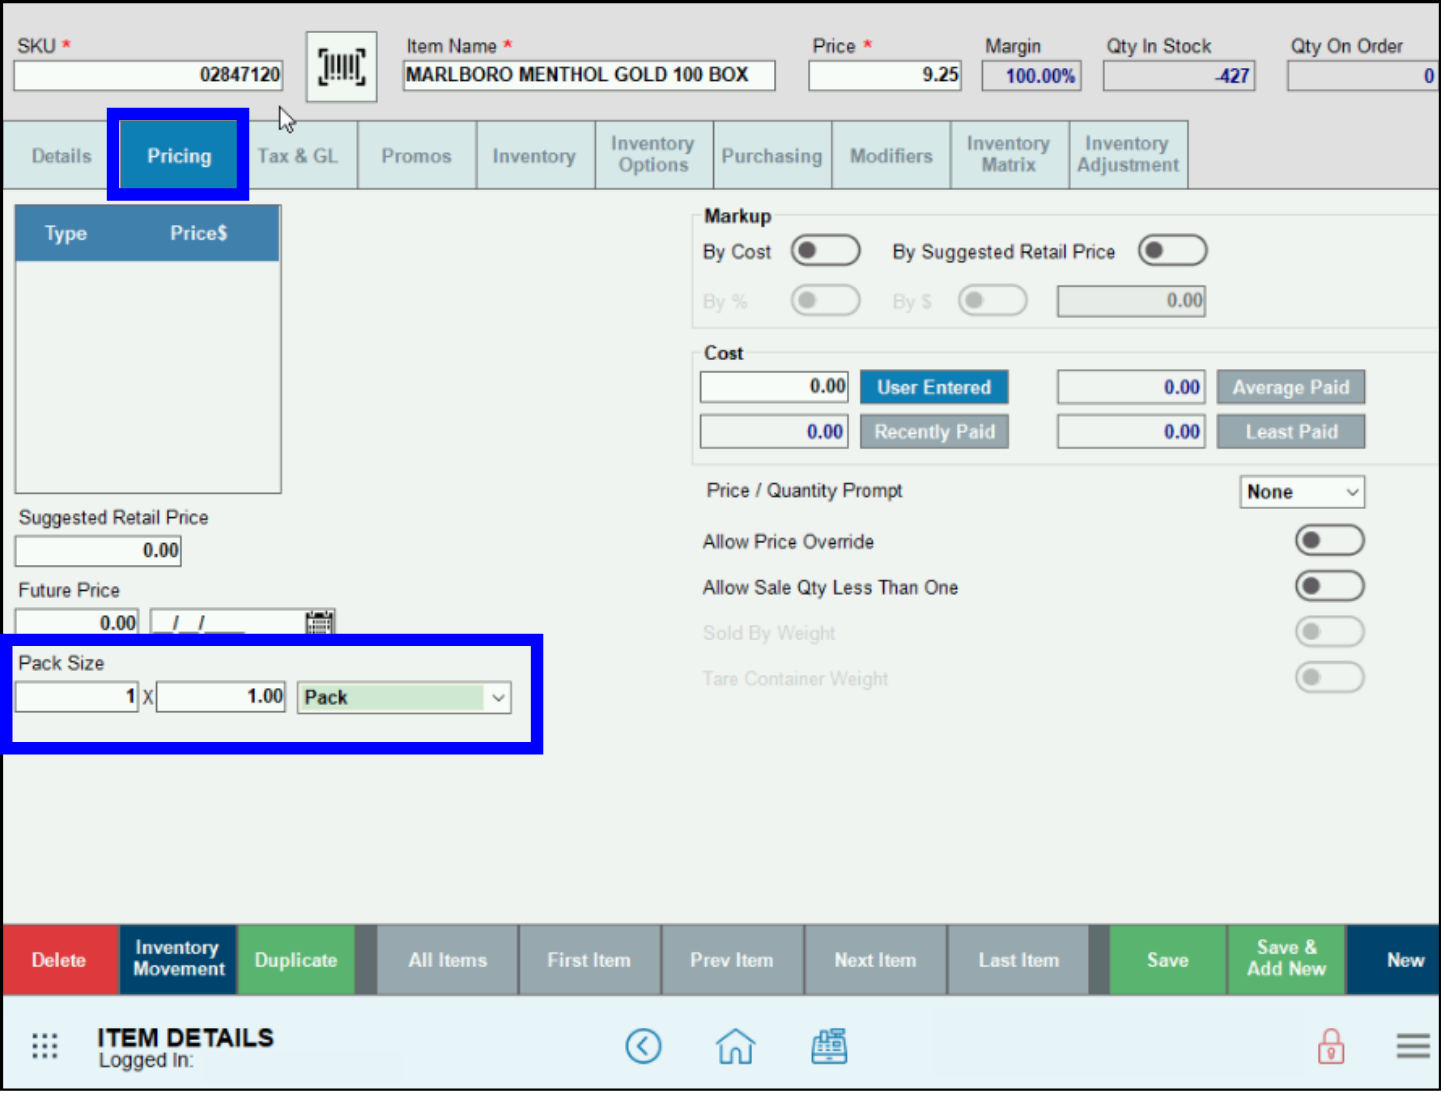
- Note: Altria provides the pack data entered into these fields. Contact your Scan Data representative with any questions.
- Under the Inventory tab, select the Manufacturer from the dropdown menu. Tap the gear icon to add a new line.
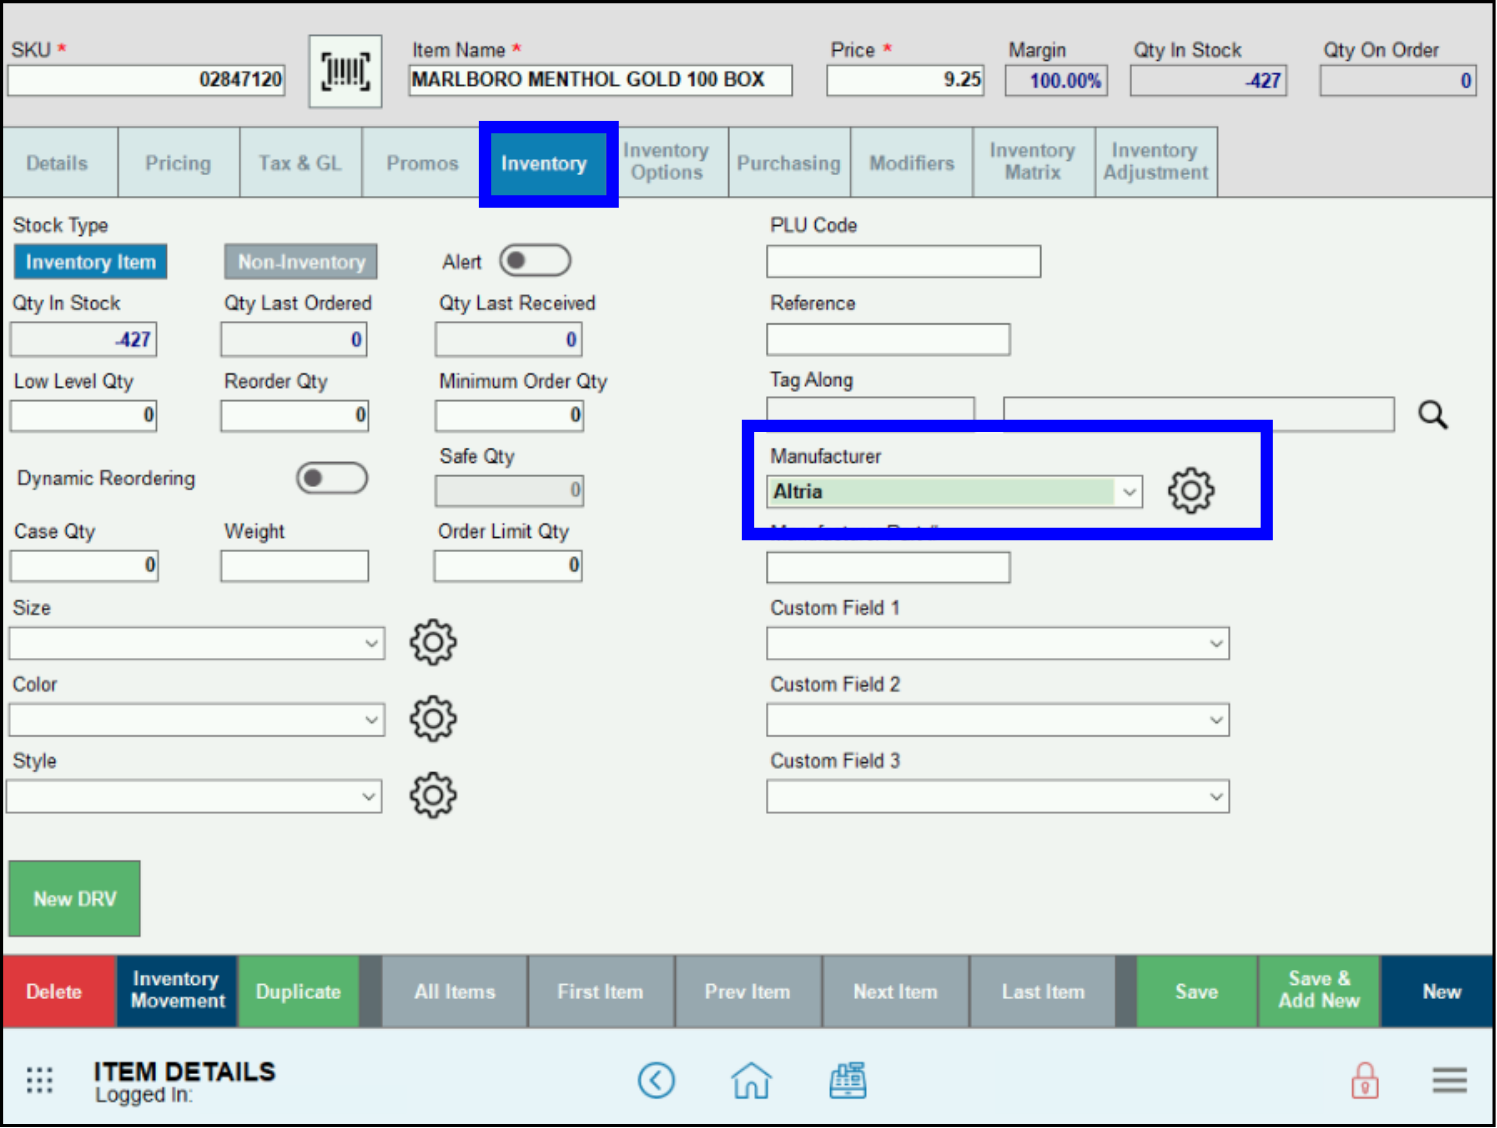
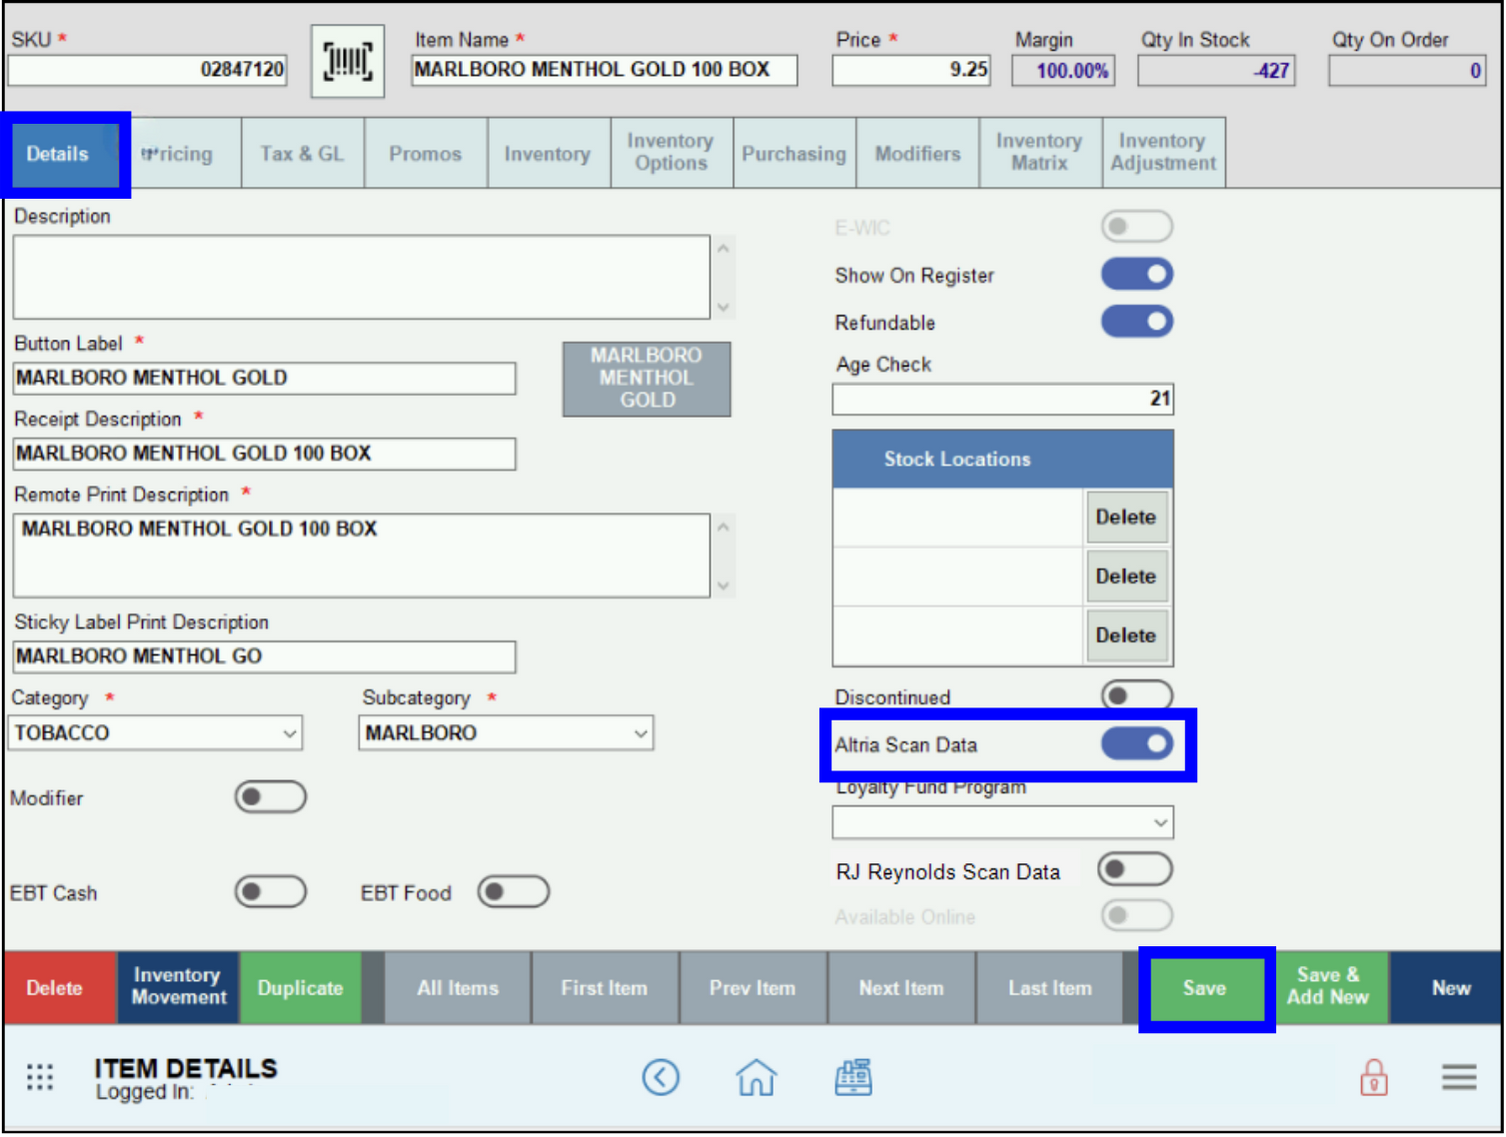
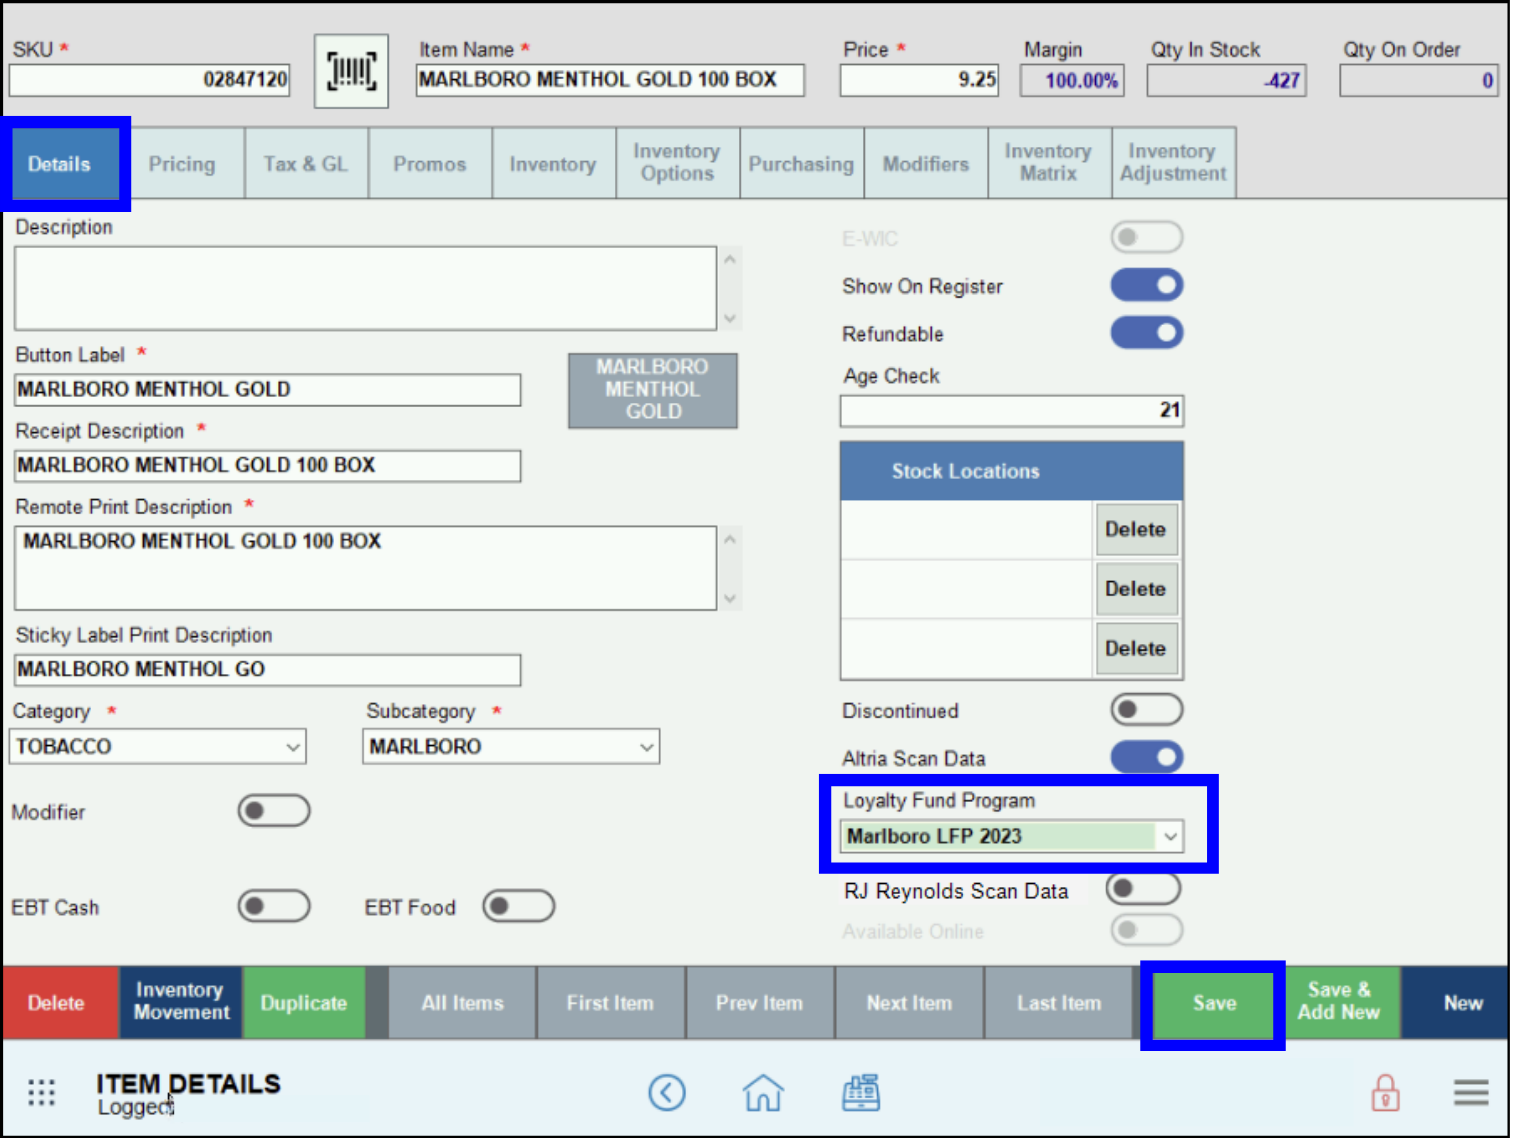
- Select the Details tab.
- Enable the Altria Scan Data slider.
- Tap Save.
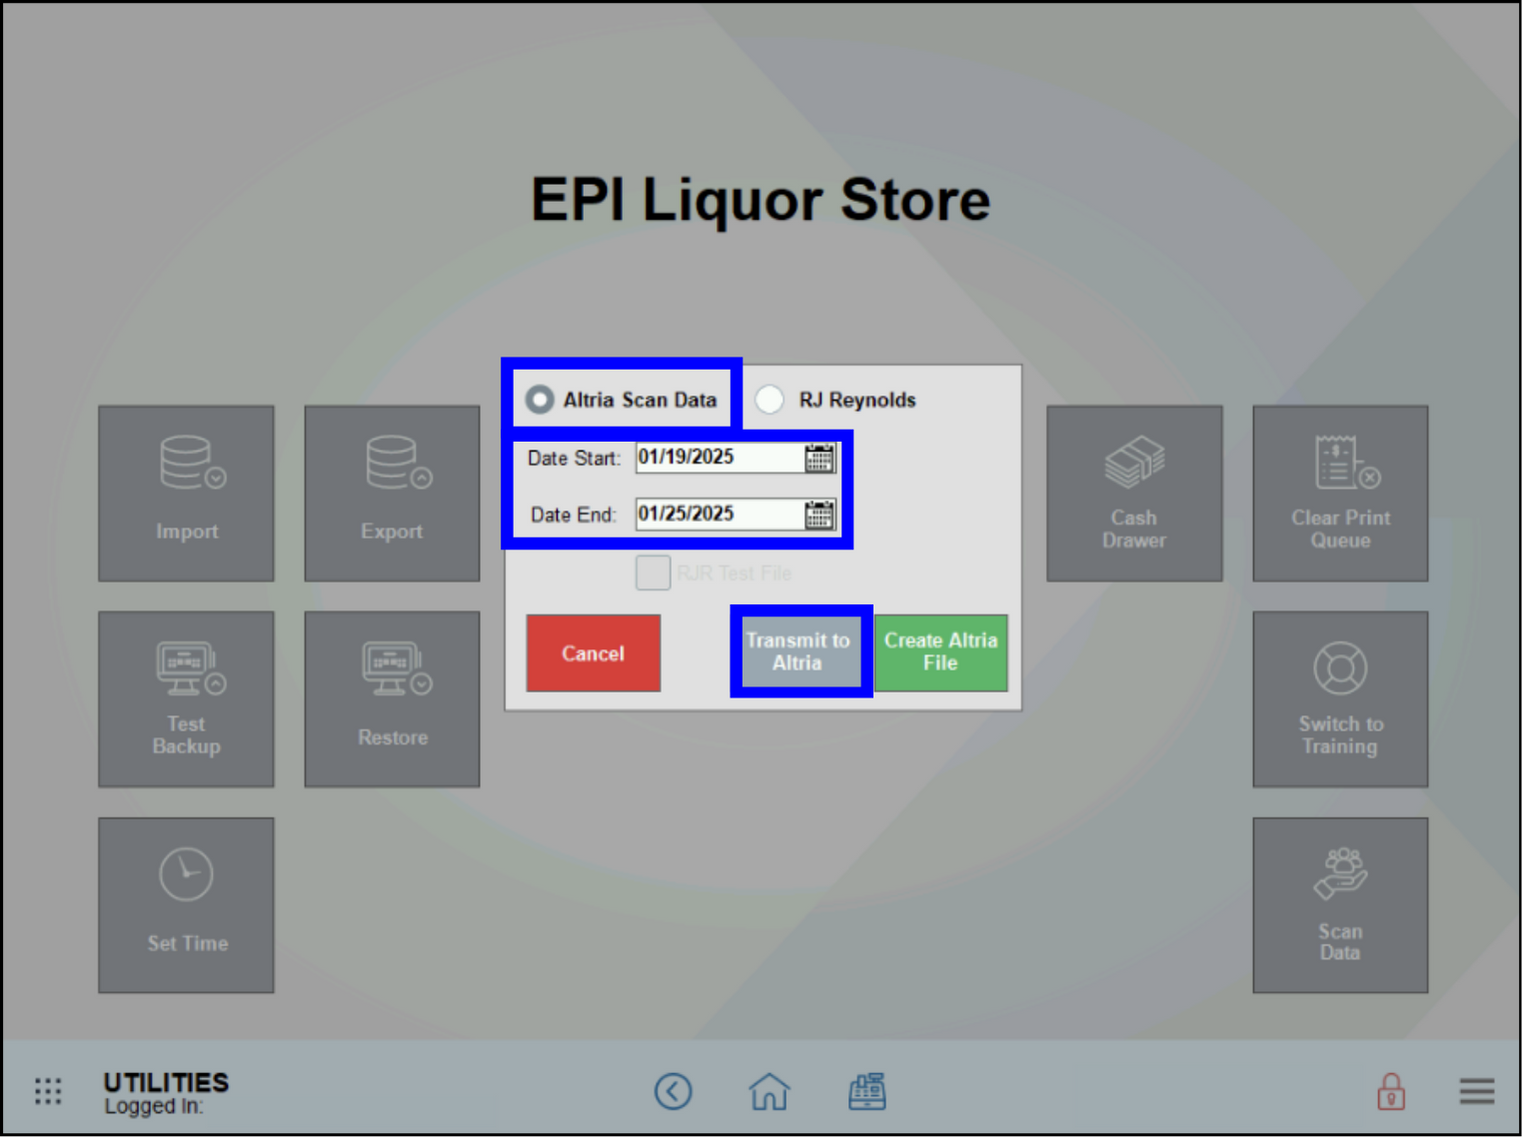
Before they can start discounting tobacco products, merchants must send a test file via FTP to ensure all requirements have been met. Merchants should conduct transactions for at least seven business days before sending a test file.
- Navigate to Home > Utilities > Scan Data.

- In the dialogue box, select Altria Scan Data.
- Enter a date range for the desired week.
- Tap Transmit to Altria to generate and transmit files to Altria via FTP server.
After receiving confirmation of a successful test file submission, merchants can offer discounts by one of two methods: Create a Loyalty Fund Program (LFP) or Create a Multi-Pack Discount. Procedures for each method follow below. At present, only Altria supports LFPs.
- Note: Altria LFP and Multi-Pack discounts cannot be stacked.
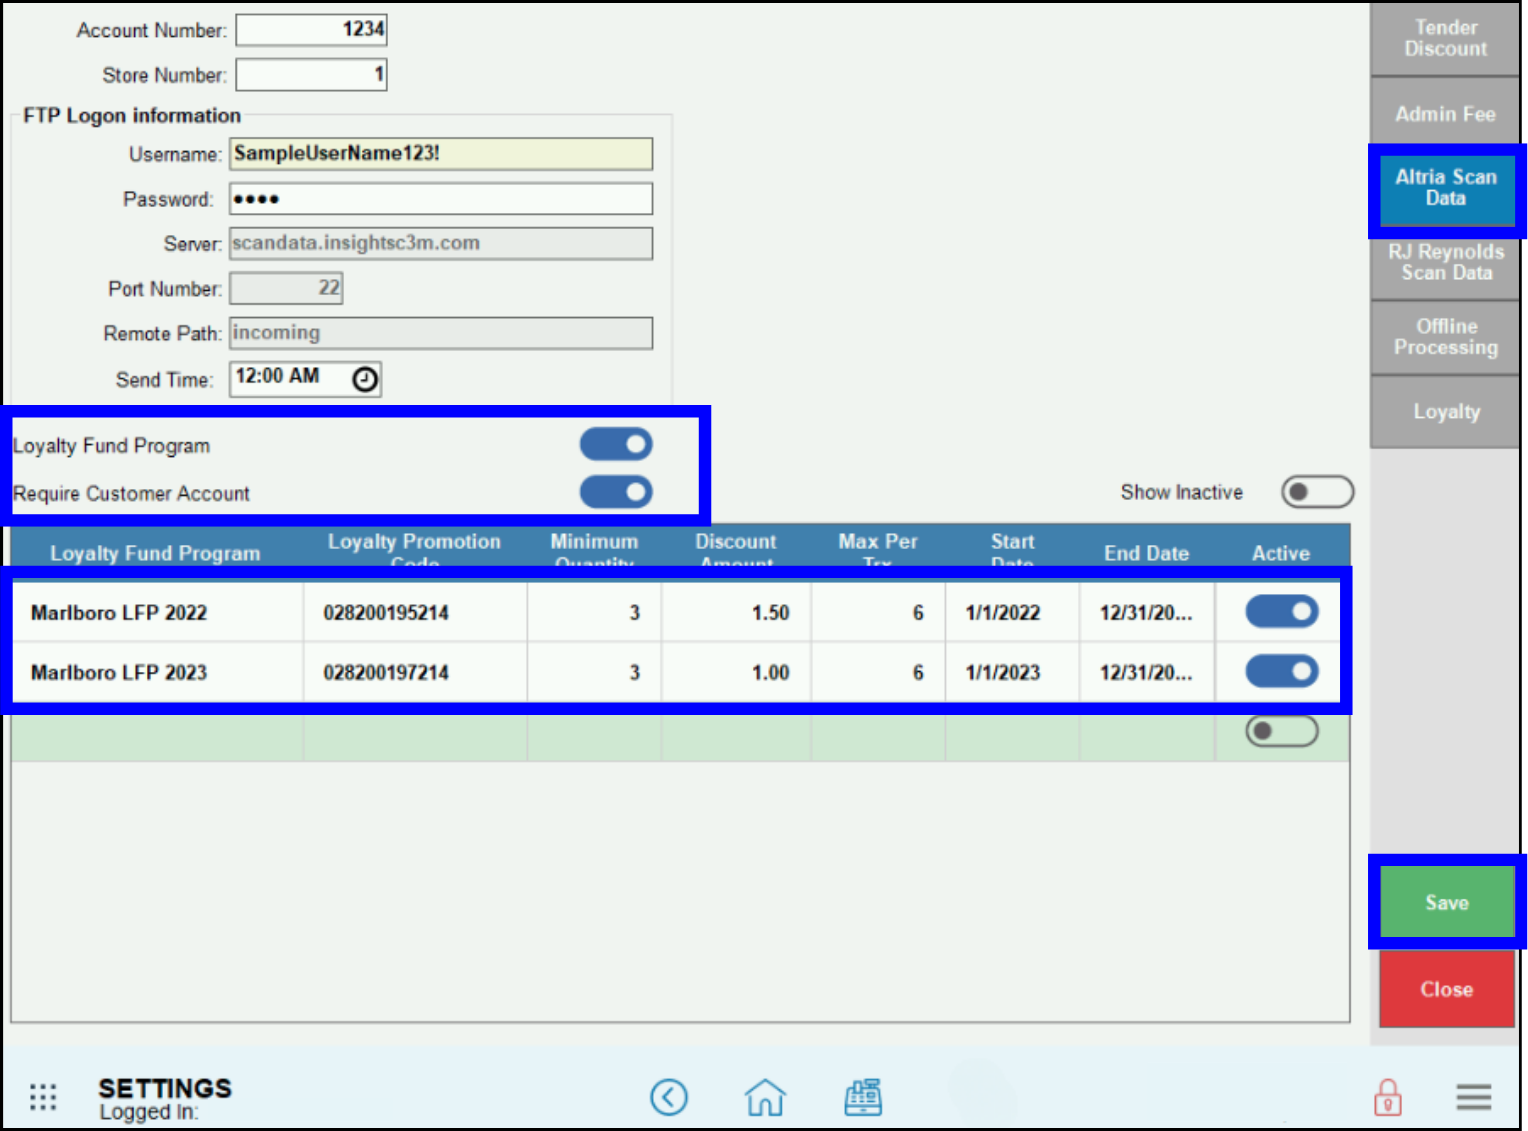
Create a Loyalty Fund Program (LFP)
- Navigate to Home > Settings > Account.
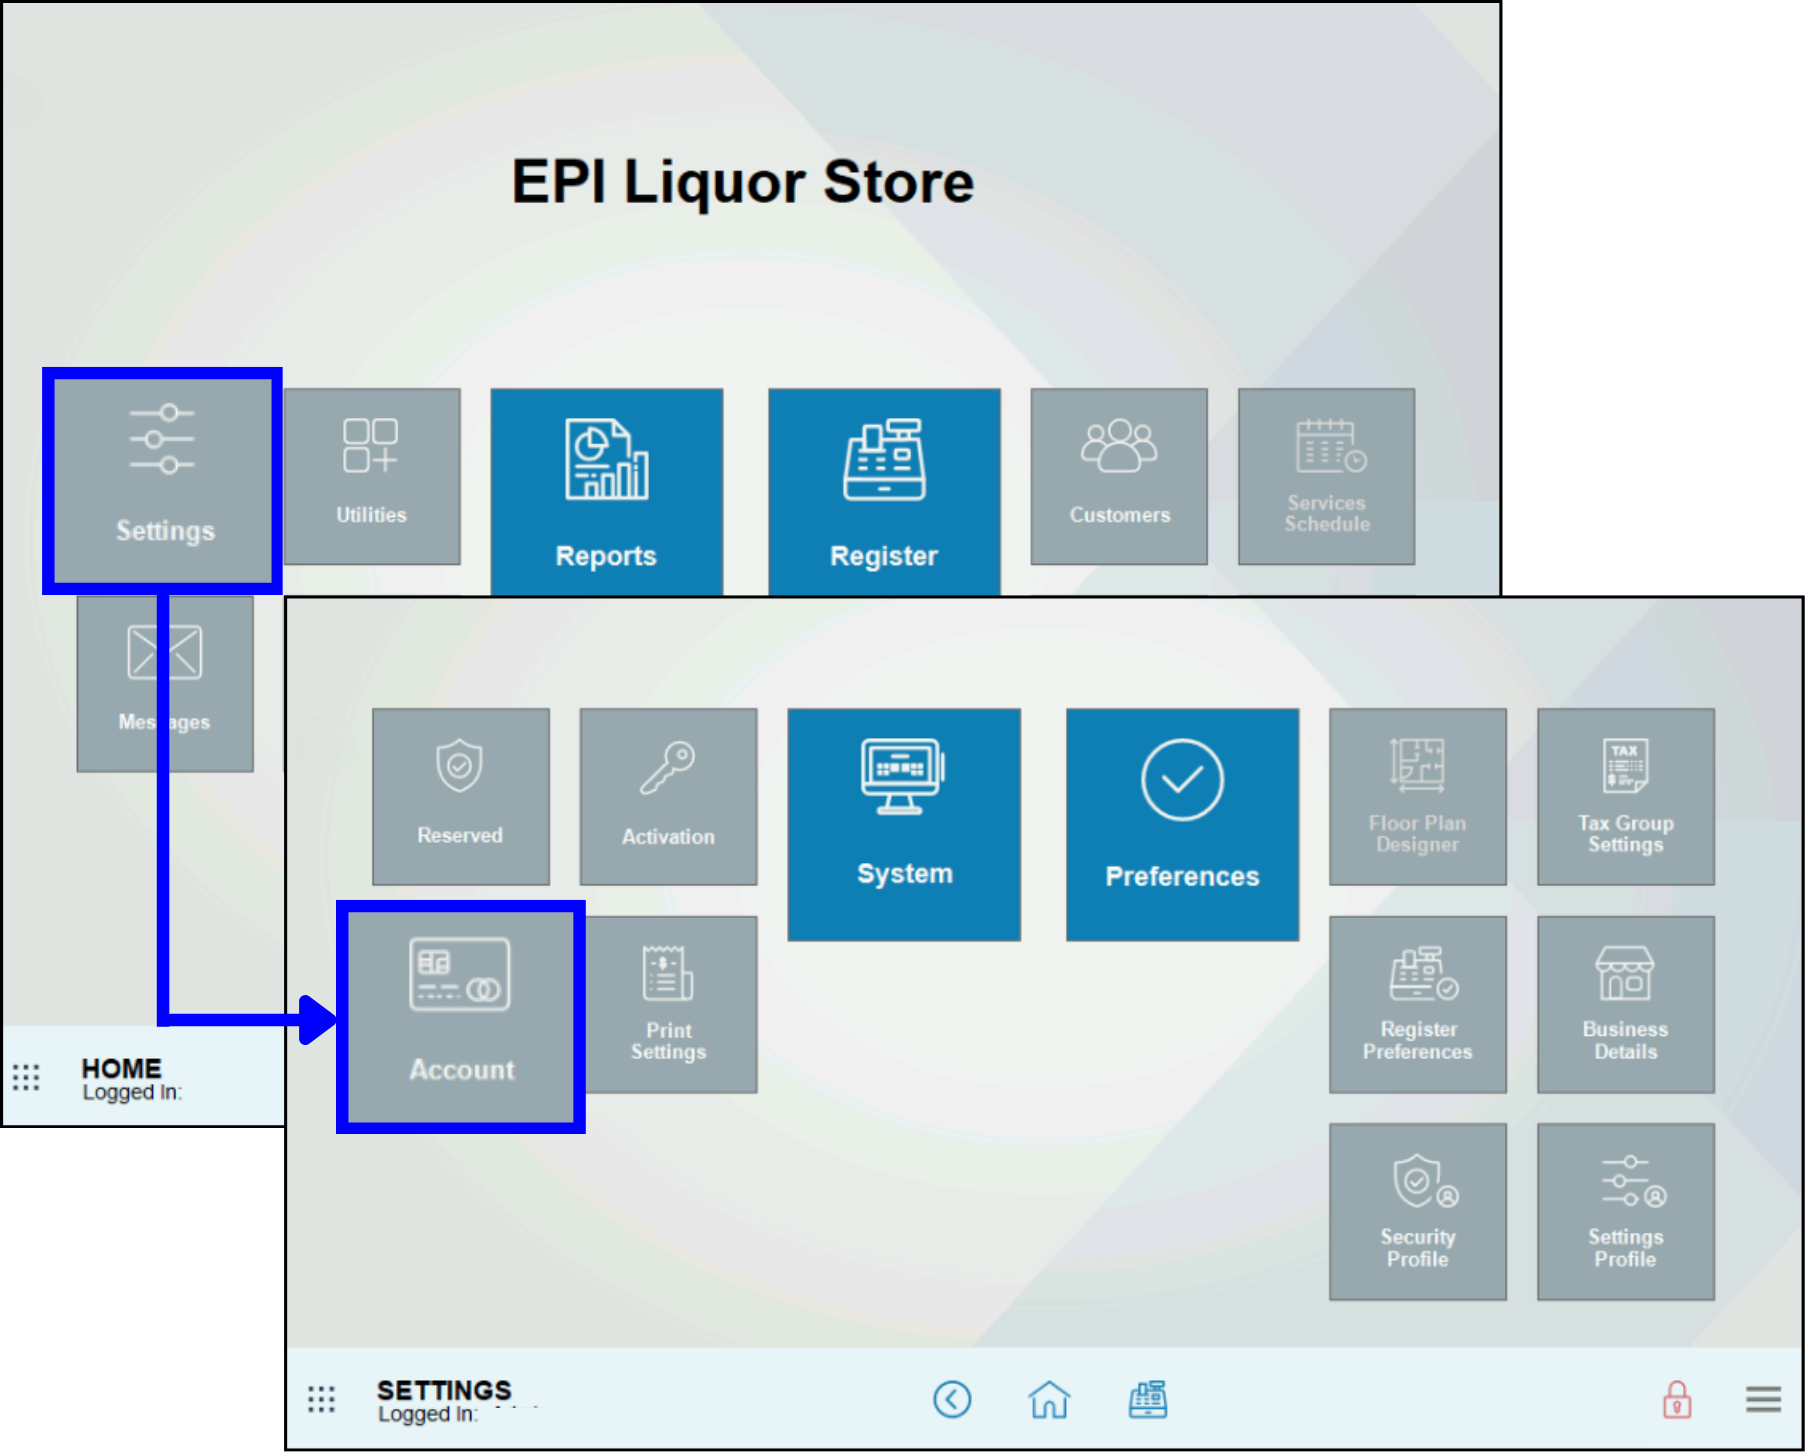
- Select the Altria Scan Data tab.
- In the Loyalty Fund Program section, enter data in the fields as provided by Altria.
- Activate the Require Customer Account slider to prompt users to add a customer. This optional setting requires customers to be added to the order before they receive the discount. If the customer declines to provide account information, no discount is given.
- Tap Save.
- Navigate to Home > Items > Items List.
- Select the item.
- Navigate to Home > Items > Item Details.
- In the Details tab, select the desired LFP from the Loyalty Fund Program dropdown. For example, a merchant may have an LFP for Marlboro products during a calendar year called “Marlboro LFP 2023.”
- Tap Save.
Create a Multi-Pack Discount
Multi-pack discounts allow merchants to offer discounts when customers buy a certain quantity of an item. For example, when a customer buys two packs of cigarettes, the merchant may offer a third pack for half price.
- Note: Altria Multi-Pack and LFP discounts cannot be stacked.
Multi-pack discounts are configured on the Item Promos page. Promos can also be configured at the Item or Category level.
- Navigate to Home > Items > Promos.

- Select the Mix & Match tab.
- Tap New.
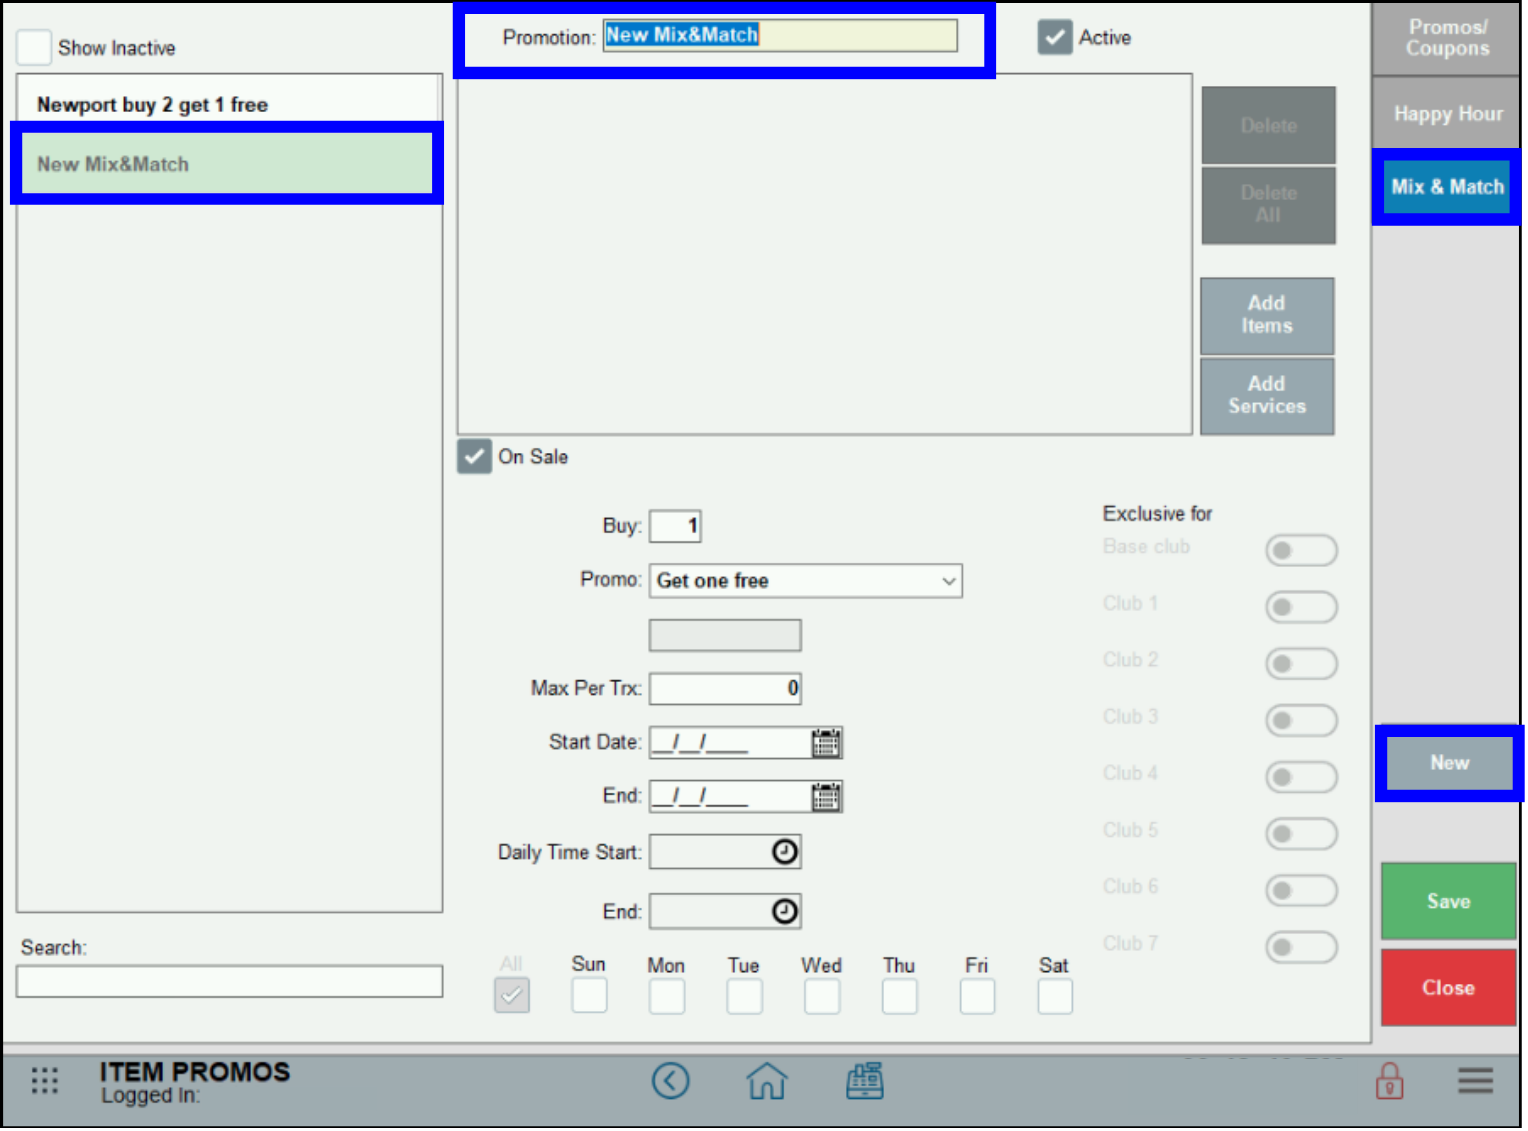
- Enter a promo name in the Promotion field.
- Verify the On Sale checkbox is selected.
- Configure the following, as desired:
- Buy: Enter the quantity a customer must purchase to qualify for the promo.
- Promo: Select the promotion type from the dropdown menu.
- Percentage: This field displays when selecting a percentage-based Promo. Enter the discount percentage.
- Dollar Amount: This field displays when selecting a dollar amount-based Promo. Enter the dollar amount discount.
- Max Per Trx: Enter the maximum amount of the item a customer can buy per transaction (i.e., a merchant may limit quantities sold to prevent the item from selling out too quickly).
- Start Date: Select a date for when the promotion begins.
- End: Select a date for when the promotion ends.
- Daily Time Start: Select the time the promotion starts.
- End: Select the time the promotion ends.
- Tap Save.
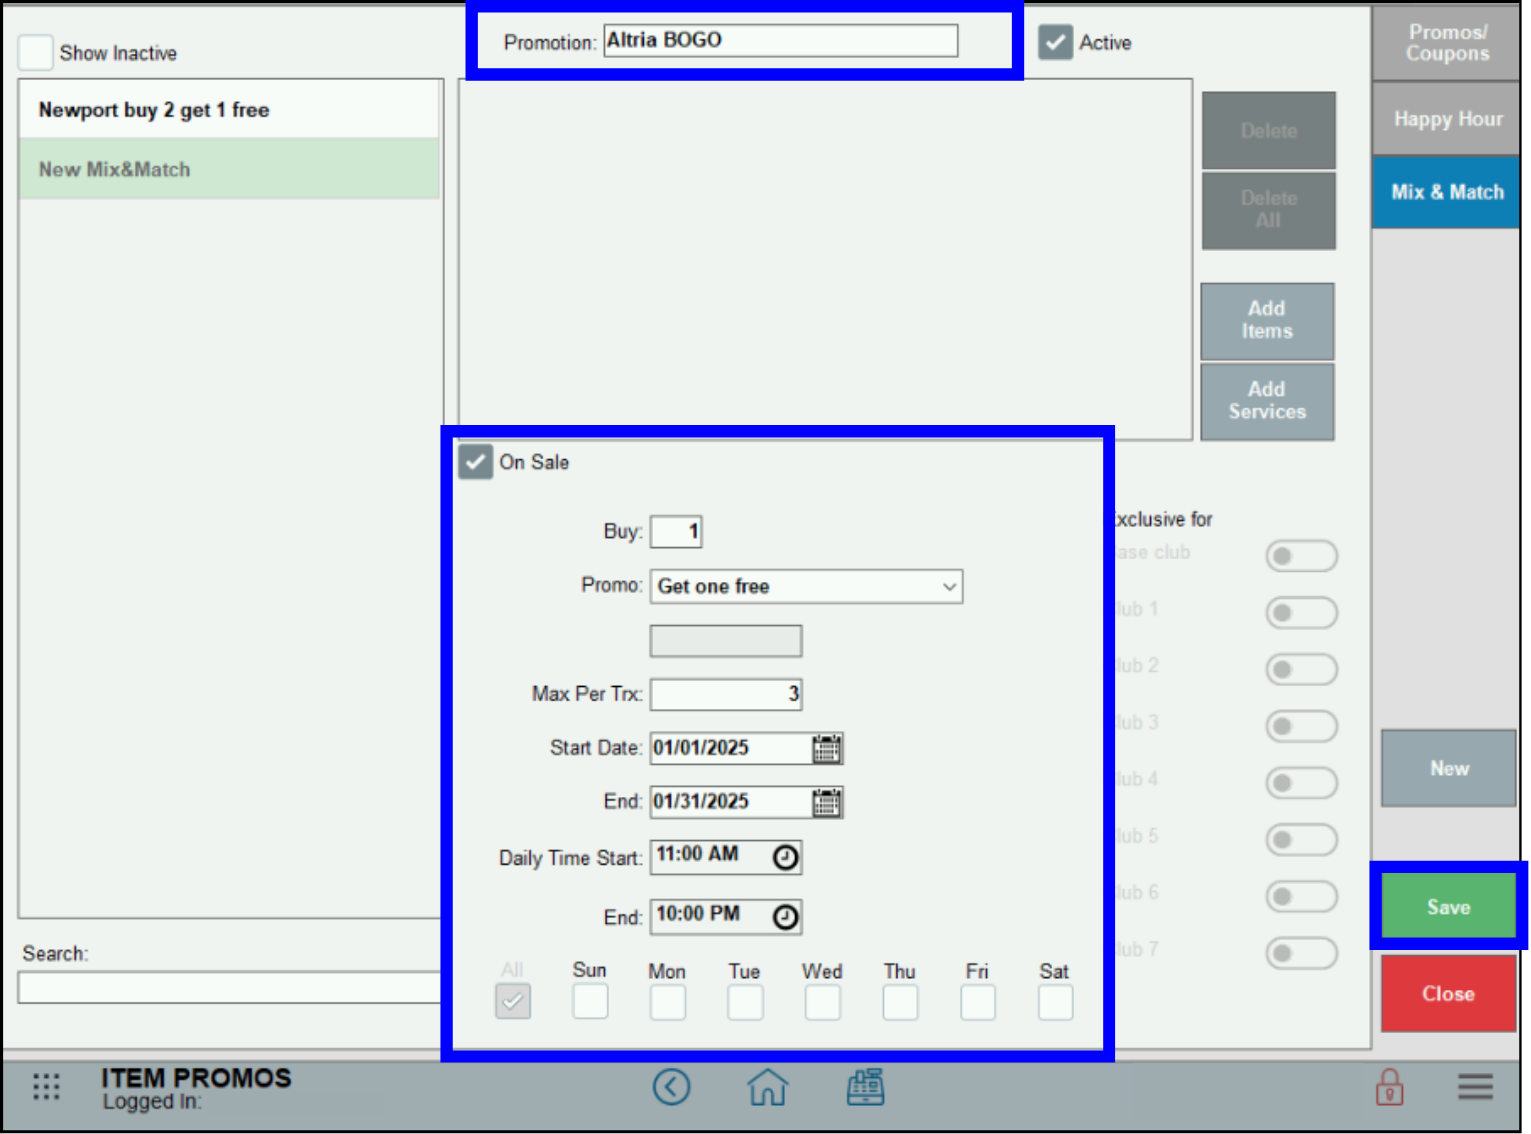
- Tip! Choose specific dates for when the discount is applied by selecting the appropriate checkbox. For example, select Tue and Thu to offer the discount on Tuesdays and Thursdays only. The default is All dates.
How can we improve this information for you?
Registered internal users can comment. Merchants, have a suggestion? Tell us more.